Thinking about jumping into digital art? You might be surprised at how easy and affordable it is to get started. Honestly, it all comes down to just two things: a good drawing tablet and the right software. You can actually build a fantastic setup for creating art without breaking the bank.
2. Your First Steps into the World of Digital Art
One of the biggest myths I hear is that you need a ton of expensive, pro-level gear right out of the gate. That couldn't be further from the truth. The best tools for any beginner are the ones that don't get in your way. You want something that's easy to pick up so you can focus on what really matters: building your skills, not fighting with your tech.
At the heart of any digital artist's setup is a graphics tablet. This isn't like an iPad or a Samsung tablet; it's a dedicated piece of hardware that translates the strokes and pressure from a special pen (a stylus) into lines on your computer screen. For most people starting out, a simple screenless tablet is the perfect choice. You draw on the pad and watch the magic happen on your monitor. They're incredibly affordable and get the job done beautifully.
Essential Digital Art Tools for Beginners
Here's a quick look at the essential hardware and software you'll need, with a focus on budget-friendly options that are perfect for getting started.
| Tool Category | Budget-Friendly Option | Key Feature for Beginners |
|---|---|---|
| Drawing Tablet | Huion or entry-level Wacom | Pressure sensitivity, which lets you vary line thickness just like with a real pen or brush. |
| Software | Krita (Free) | A powerful, professional-grade program with a massive brush library and an intuitive interface. |
As you can see, you don't need to spend a fortune. A solid tablet and free, high-quality software are all you need to start making incredible art.
Finding Your First Tools
When you’re picking out that first tablet, brands like Wacom and Huion are your best bet. They both make some excellent entry-level models. The main feature you want to look for is pressure sensitivity. This is what allows you to press harder for a thick, bold line or lighter for a delicate, thin one, just like you would with traditional pencils or brushes. You don't need a tablet with thousands of pressure levels to start—most beginner models have more than enough sensitivity to create dynamic, expressive art.
On the software side of things, many beginners find their footing with powerful, free, open-source programs. Krita is a fantastic example. It's a professional-level painting program that costs absolutely nothing, and artists love it for its massive library of brushes and easy-to-learn interface. Going this route lets you put your money where it counts—into a good tablet—while you learn the software.
Your initial focus should be on practice and consistency, not on acquiring the most expensive gear. A simple, reliable tablet and free software are more than enough to produce stunning digital art.
The growing accessibility of these tools is a huge reason the industry is booming. The digital artwork market is projected to skyrocket from around US$5.8 billion in 2025 to a massive US$17.72 billion by 2032. This growth is fueled by communities like DeviantArt and ArtStation, where artists at every skill level can share their work. In fact, digital paintings now make up over 25% of the art market. If you're curious, you can read more about the digital artwork market's impressive growth and trends.
The infographic below breaks down how most beginners get started, showing just how manageable the learning curve can be.
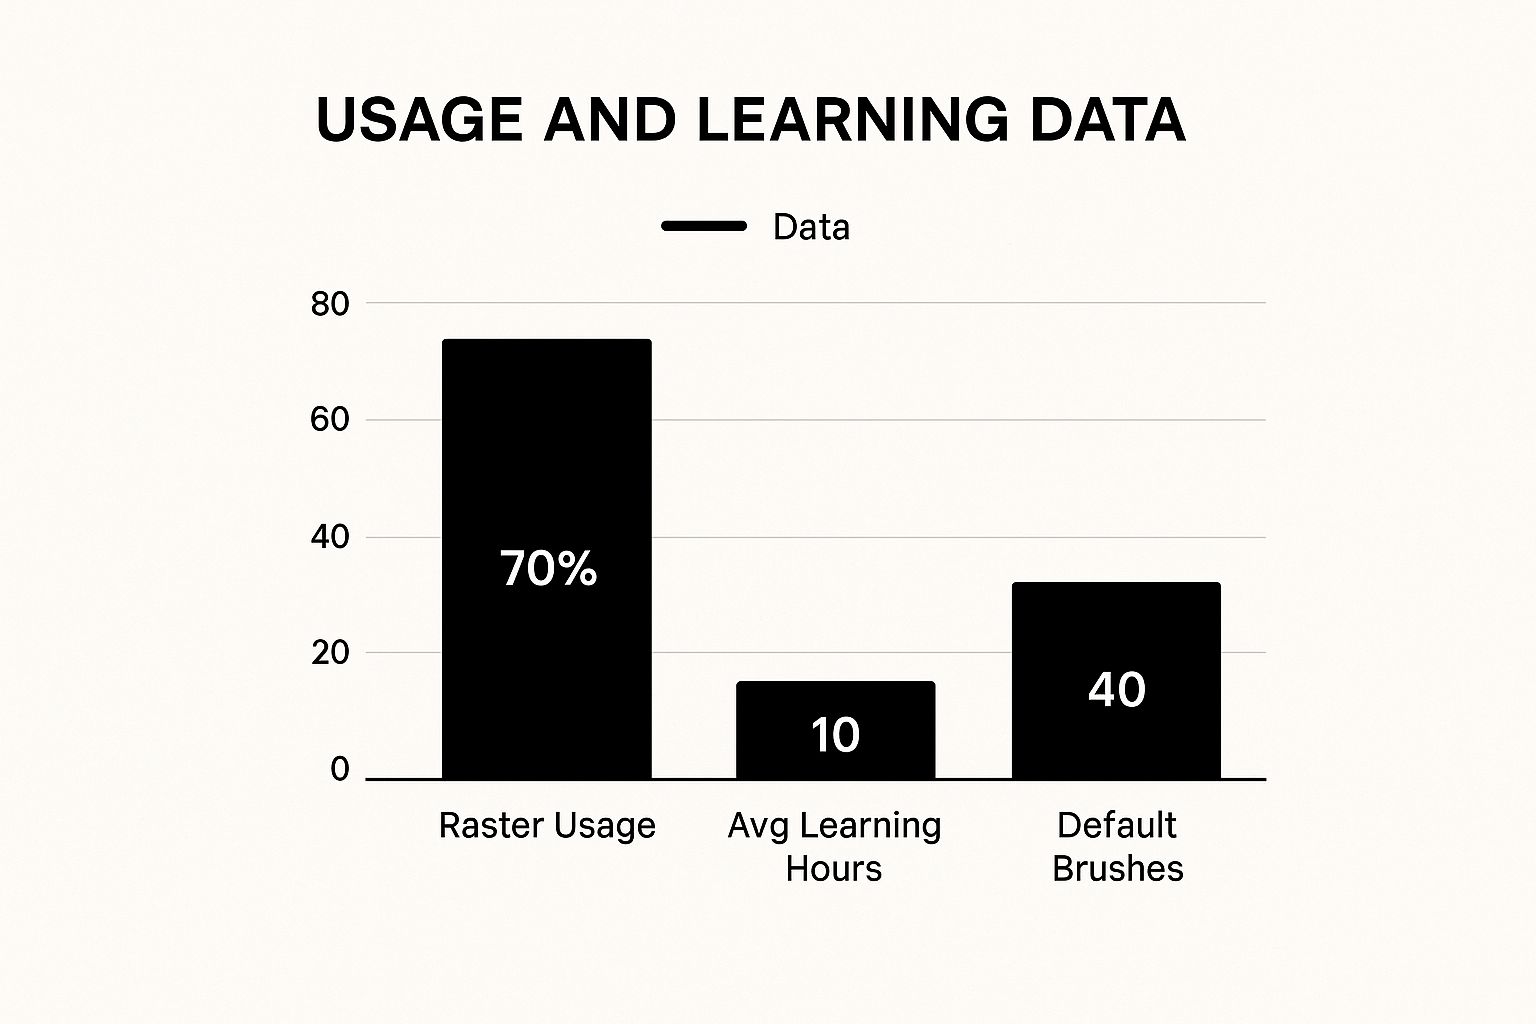
As you can see, most beginners jump in with raster-based software (like Krita or Photoshop). They can typically get the hang of the basics in about 10 hours of practice, often just by experimenting with the 40+ default brushes that come included with the software.
Choosing Your Creative Toolkit
Alright, let's talk about getting your first digital art setup. Forget the vague recommendations for a minute—it’s time to get specific about what these tools actually feel like to use. The hardware and software you pick will be your creative partners, so it’s a choice that matters.
The most common starting point is a screenless graphics tablet. You’ll see two names pop up constantly: the Wacom Intuos and the Huion Inspiroy. Both are fantastic for beginners, but they offer slightly different experiences.
- Wacom Intuos: I've always found Wacom tablets to have a more textured, almost "papery" feel. The pen doesn't need a battery, so it's super lightweight, which is a lifesaver during long drawing sessions.
- Huion Inspiroy: This one's known for its slicker, smoother surface. If you want a fluid, gliding motion, almost like using a marker on a whiteboard, you might prefer this feel.
Ultimately, it comes down to personal taste. There’s no right or wrong answer here. Think about whether you prefer the subtle drag of a pencil or the effortless glide of a pen. That’s the kind of decision you’re making.
A Hands-On Look at Free Software
Once you’ve got your tablet, you need a canvas. The good news? You don't have to spend a dime to get your hands on a seriously powerful program. Let’s fire up Krita, which is easily one of the best free options out there for anyone new to digital art.
When you first open Krita, don't get overwhelmed. You only need to focus on a few key areas to get started:
- The Canvas: This is the big, blank space in the middle. Your digital playground.
- The Brush Presets Docker: Look to the right. This is your treasure chest of brushes—pencils, inks, paints, you name it. Just click one and start making marks.
- The Layers Docker: Also on the right, this is your secret weapon. Think of layers like a stack of clear plastic sheets. You can sketch on one, ink on the next, and color on a third, all without messing up the others.
- The Color Selector: Tucked in a corner, you'll find a color wheel or triangle. This is where you can pick any hue you can imagine.
The real magic of digital art isn’t the fancy tools; it’s the freedom to experiment without fear. Hate that last brush stroke? Just hit
Ctrl+Z. Want to try a wild color palette? Do it on a new layer. This ability to undo and iterate is what makes learning so much faster than with traditional media.
The low cost of entry has completely changed the game for aspiring artists. A recent survey found that over 70% of new digital artists started within the last three years, and nearly half of them did it using free or budget-friendly software. The digital art market is booming, projected to jump from USD 7.24 billion in 2025 to over USD 30.69 billion by 2035, according to a market analysis from Roots Analysis. This trend isn't slowing down.
Even as you master traditional digital painting, AI tools are becoming a valuable part of the workflow for generating ideas and assets. If you're curious about the big names in that space, our guide comparing Stable Diffusion vs. Midjourney is a great place to start.
Your First Drawing: A Guided Tutorial
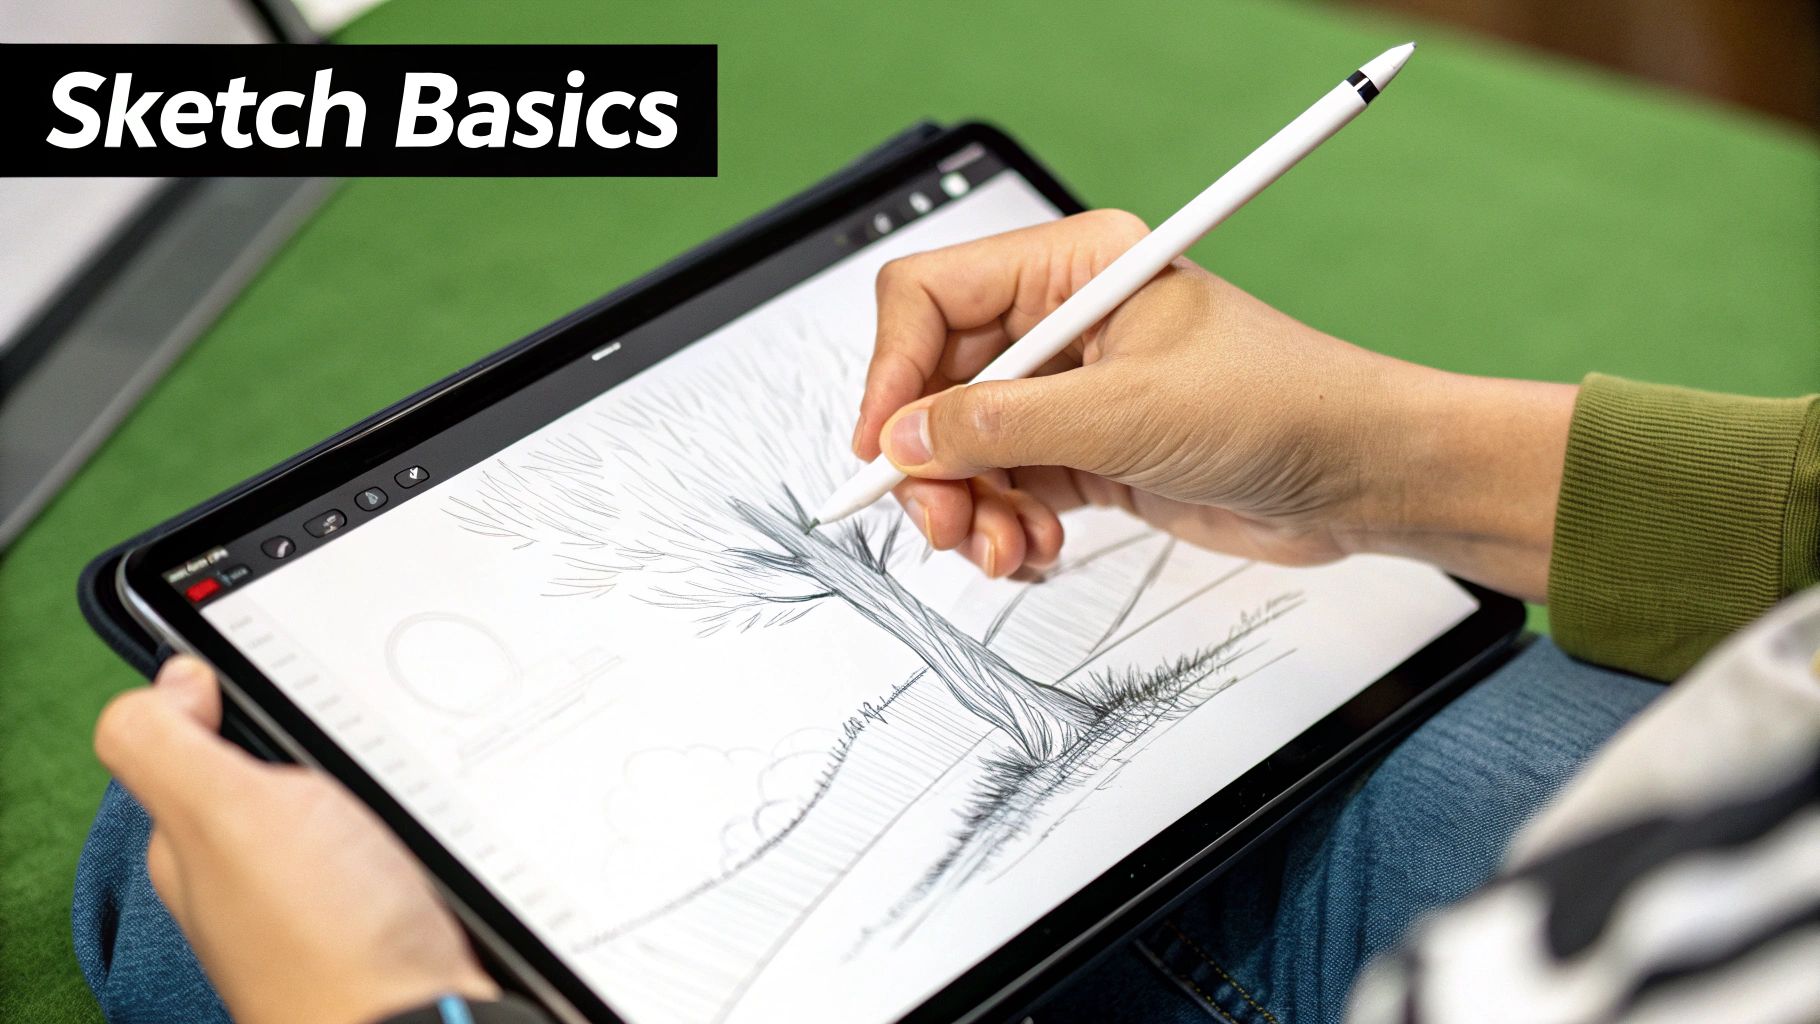
Alright, enough theory. The absolute best way to get your feet wet in digital art is to just start drawing. So let's do exactly that. We're going to create a simple, stylized potted plant together from scratch.
Why a plant? Because it’s built from the fundamental shapes and techniques you'll use in pretty much every piece of art you make from here on out.
The goal here isn't to create a masterpiece. It's about getting comfortable with the workflow and building some confidence. We'll walk through setting up your canvas, sketching the idea, cleaning it up with line art, and finally adding some color and basic shading.
Setting Up Your Digital Canvas
First things first, fire up your software of choice (we'll use Krita for this example). Before you can do anything, you need a canvas. Find the File > New option to pop open the new document settings. You'll see fields for width, height, and resolution.
For a simple practice piece, a square canvas is perfect. Let’s go with 2000 x 2000 pixels. For resolution, 300 DPI (dots per inch) is the gold standard if you ever think you might want to print your work. If it's just for the web, 150 DPI is totally fine.
Click 'Create,' and a fresh blank page will appear.
Now, find your Layers Docker. If you don't see it, poke around in the "View" or "Window" menu. You should see a single layer, probably named "Background" or "Layer 1." This is where the magic begins.
The Sketching Phase
Time to get our idea down. Don't stress about making it pretty—this is just the rough draft.
- Select Your Brush: In the Brush Presets docker, find a brush that feels like a pencil. The Pencil-3 Large 4B or Sketch_Scribble brushes in Krita are great starting points.
- Choose a Color: Click on the color selector and pick a light blue or gray. This makes it easier to draw your final lines over it later.
- Draw Basic Shapes: On your first layer, loosely draw a cylinder or trapezoid for the pot. Add a few simple curves for stems and some heart-like shapes for the leaves. Don't worry about perfection; just get the general form down.
If you build one habit, make it this: always work in layers. Your sketch layer is like the faint pencil lines you'd erase on paper. But here, you just hide it when you're done. It's a safety net that gives you the freedom to experiment without fear.
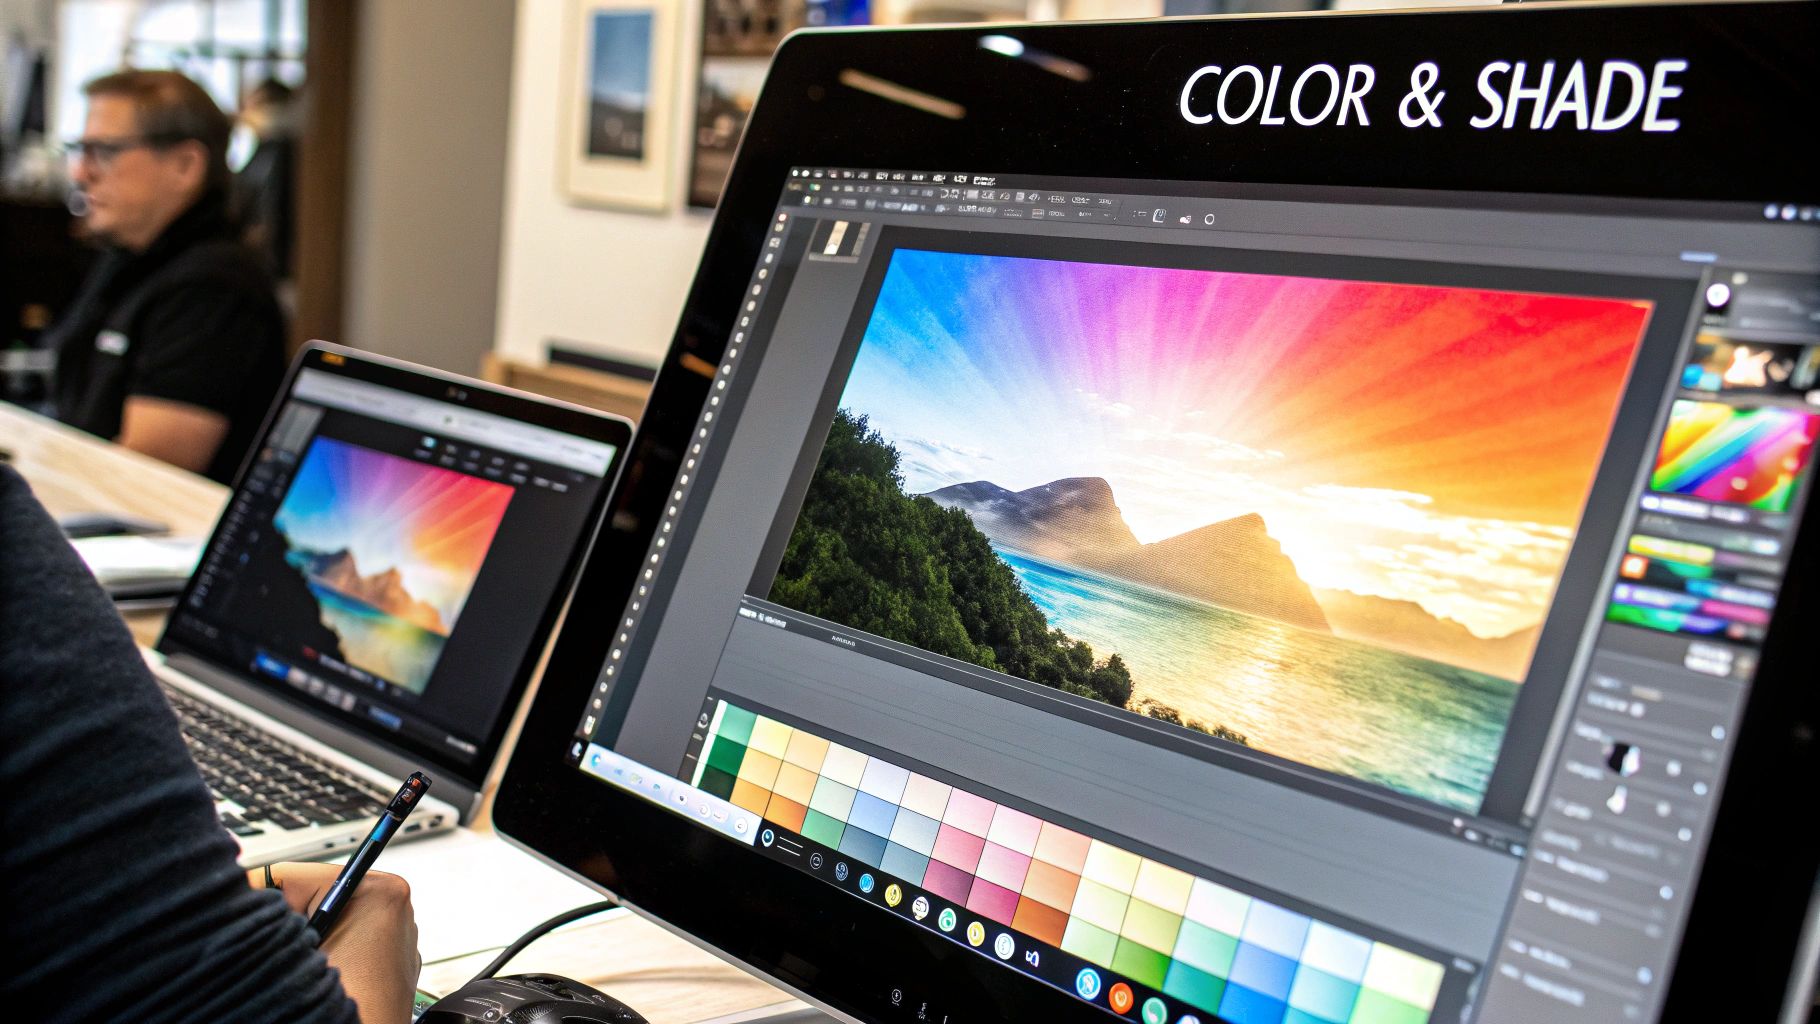
Here’s a look at the Krita interface. See the brush presets and layer dockers on the right? Everything you need is right there, giving you a huge, clean space to work.
The whole layout is designed to keep your most-used tools handy so you can stay in the flow.
Refining with Line Art
Got your rough sketch? Awesome. Now it's time to create those clean, final lines. This is where you'll really feel the power of layers.
- Lower Sketch Opacity: In the Layers docker, find the opacity slider for your sketch layer. Drag it down to about 20-30%. Your sketch will fade, becoming a perfect guide.
- Create a New Layer: Click the
+icon in the Layers docker to add a new layer on top. Double-click its name and rename it "Line Art" to stay organized. - Select an Inking Brush: Go back to your Brush Presets and choose a smooth, solid brush. The Ink-3 G-Pen or Ink-4 Fineliner are excellent choices. Select black or a dark brown from the color selector.
- Trace Your Sketch: With your "Line Art" layer selected, carefully draw over your faded sketch lines. Use your tablet's pressure sensitivity to vary your line weight. Press harder for thicker lines and lighter for thinner ones. Use
Ctrl+Zto undo any wobbly lines until you're happy. - Hide the Sketch Layer: Once you’re done, click the small eye icon next to your sketch layer to hide it. Now you have crisp, clean line art ready for color. This non-destructive process is a cornerstone of digital art for beginners and pros alike.
Using Color and Light to Add Life
Alright, you’ve got your clean line art ready to go. Now for the fun part—this is where you really bring your work to life. Color and light are the magic ingredients that transform a flat sketch into something with depth, dimension, and genuine emotion.
Don't get bogged down in dense, academic color theory. For a beginner, a practical approach using the tools already in your software is way more effective. Pretty much every art program has a color wheel, and honestly, that’s all you need to start building fantastic palettes.
Building a Simple Color Palette
The quickest way to get started is by leaning on a complementary or analogous color scheme. Sounds technical, but I promise it's dead simple.
- Complementary Colors: Think opposites on the color wheel, like blue and orange or red and green. They create high contrast, making your artwork really pop. A great trick is to pick one for your main color and use its opposite for small, high-impact details.
- Analogous Colors: These are buddies that sit right next to each other on the wheel—think blue, blue-green, and green. This approach is almost foolproof for creating a harmonious, serene mood that just feels right.
Let's go back to our potted plant example. An analogous scheme using green, yellow-green, and yellow for the leaves will instantly feel natural. For the pot, you could grab a complementary color like a muted purple or a terracotta orange to create a solid, pleasing visual anchor.
Color does so much more than fill in the lines; it dictates the entire mood of your piece. Bright, saturated colors feel energetic, while muted, desaturated tones can evoke nostalgia or sadness. Play around and see how a new palette can completely change the story your image tells.
A Quick Tutorial on Light and Shadow
Now, let's give that plant some real form. The key is to pick a single light source and stay consistent.
Imagine a lamp is positioned to the top right of your plant. This is your single point of truth. All the highlights will appear on surfaces facing the top right, and all the shadows will be cast on the bottom-left areas.
Here's a super-fast way to achieve this using layer blending modes:
- Add Base Colors: Create a new layer below your "Line Art" layer and name it "Colors". Use a solid brush or the Fill tool to color in the pot and leaves with your chosen flat colors.
- Create a "Shadows" Layer: Add a new layer above your "Colors" layer (but still below "Line Art"). Name it "Shadows." Change this layer's blending mode from "Normal" to Multiply using the dropdown menu in the Layers docker.
- Paint the Shadows: Select a soft, airbrush-style brush. Choose a neutral, desaturated color like a light gray or muted blue. Gently paint on the "Shadows" layer where shadows would fall—underneath the leaves, on the left side of the pot, and inside the rim. The "Multiply" mode will automatically create natural-looking shadows.
- Create a "Highlights" Layer: Add one more layer above "Shadows" and name it "Highlights." Change its blending mode to Overlay or Screen.
- Add the Highlights: With a soft brush, pick a light, warm color like pale yellow. Paint highlights on the "Highlights" layer where the light would hit directly—the top-right edges of the leaves and the pot. "Overlay" will create a nice, vibrant glow.
This layer-based approach is a massive shortcut that adds incredible depth with very little effort. It’s a core technique for digital art for beginners because it’s non-destructive and incredibly effective. As you get more comfortable, you can even explore advanced techniques like using AI image style transfer to apply different lighting aesthetics to your finished work.
Building Your Workflow and Sharing Your Art
Making great art consistently isn't just about talent; it's about building smart habits. A personal workflow sounds formal, but it's really just your own smooth process for getting things done. Think of it as your secret weapon for staying organized and improving with every piece you create.
It all starts with something simple: how you organize your projects. A messy hard drive can be just as crippling as a creative block. Get into the habit of making a new folder for every major art piece. Inside, you can toss your main art file, all your reference images, and the final exported versions. Trust me, it makes finding things later a breeze.
The Power of Naming Your Layers
Here’s a habit you should start right now: logical layer naming. There's nothing worse than opening a project you haven't touched in a week and having to click through 20 layers named "Layer 1," "Layer 2," etc., just to find the one you need.
Think of your layers panel as the table of contents for your artwork. Keeping it organized means you can jump to any part of your process instantly, whether you need to adjust a color, tweak a shadow, or fix a line.
A good starting point for your layer structure might look something like this:
- Shading & Highlights: For all your lighting and shadow effects.
- Colors: The flat, base colors of your piece.
- Line Art: Your clean, final lines.
- Sketch: The initial rough drawing at the bottom of the stack.
This one simple act will save you countless headaches. It’s a small thing that makes a huge difference in your speed and sanity.
Sharing Your Art with the World
Creating the art is only half the fun. Sharing your work is how you connect with other artists, find an audience, and see your skills grow. Platforms like Instagram and ArtStation are fantastic places for digital art for beginners to get feedback and find inspiration.
When you're ready to show off your work, save a high-quality version for your portfolio (a PNG is great for this) and a smaller, web-friendly version (like a JPG) for social media. For a little extra pop before you post, you can explore our guide on AI image enhancement to make your colors pop.
Don't just post the image and run! To really connect with people, you need to explore different types of social media content. Write a caption that tells a little story about your piece. What inspired you? What new technique did you try? Using relevant hashtags like #digitalart, #artstation, and #procreateart helps the right people find you.
The digital art world is bigger than ever. The market was valued at a staggering USD 12.04 billion in 2023 and is expected to hit USD 39.40 billion by 2032. A recent report from Zion Market Research found that over 40% of digital artists earning under $10,000 a year only started selling their work in the last 18 months. That shows a huge wave of newcomers are successfully turning their passion into a side hustle or career. Sharing your work is the first step to becoming part of it.
Common Questions from New Digital Artists
As you start your journey into digital art, you'll probably run into the same questions and hurdles that trip up most beginners. Getting clear, practical answers from the get-go is the best way to build your confidence and, most importantly, keep you motivated and drawing.
Let's tackle some of the most frequent questions I hear. We'll cover everything from gear and must-have skills to finding your own creative voice.
- Do I really need a super expensive tablet?
- What's the one skill I should focus on first?
- How do I even begin to find my own art style?
- Is digital art actually easier than traditional art?
Do I Need an Expensive Tablet to Start?
Worried you have to drop a ton of cash on hardware? Don't be. You can get a fantastic entry-level tablet like a Wacom Intuos or Huion Inspiroy for under $70.
These tablets have the one feature that truly matters: pressure sensitivity. That's what gives you control over line weight, just like with a real pencil. It’s more than enough to start mastering your hand-eye coordination. Forget the top-tier gear for now; just focus on learning your software and sketching every day.
What's the Most Important Skill to Learn First?
If there's one technical skill that will give you the biggest shortcut to getting good, it's mastering layers. Hands down. Layers let you keep your sketch, line art, colors, and shading all separate, which makes editing a breeze.
Working this way is called "non-destructive editing," and it's a game-changer. It means you can go wild experimenting on one layer without any fear of messing up the rest of your work. Mistakes become part of the process, not frustrating roadblocks.
A few quick tips to get started with layers:
- Name your layers! Seriously, get in the habit of naming them something logical (like Sketch, Line Art, Base Colors). It saves a ton of time and confusion later.
- Group related layers. For more complex pieces, grouping layers together (like for a character's face or clothing) keeps your workspace tidy.
- Play with blending modes. Simple modes like Multiply and Overlay are fantastic for adding shadows and highlights with just a few clicks.
Of course, technical skills are only part of the battle. It's common for new artists to hit a wall. If that happens, it's worth learning how to overcome creative block and reignite your creativity.
How Can I Discover My Unique Art Style?
This is the big one, and the answer is simple but not easy: your style finds you through practice and a whole lot of exploration. Nobody starts with a unique style.
Start by studying artists you really admire. Don't copy their work wholesale, but try to imitate small things—the way they draw eyes, use color, or structure a composition. Over time, you’ll find that all these little influences start to blend together into something that is uniquely yours.
Your art style is a fingerprint of your experiences and choices. Embrace experimentation as the path to discovery.
Is Digital Art Easier Than Traditional Art?
Not really, no. It’s just different. Digital art gives you amazing tools like the undo button and layers, which can feel like a safety net. But it comes with its own steep learning curve—mastering software, fiddling with brush settings, and calibrating pressure curves takes time and patience.
Ultimately, both mediums rely on the exact same fundamentals: a solid understanding of things like composition, anatomy, color theory, and light. Think of digital tools as a powerful extension of your artistic skills, not a replacement for them.
What If My Software or Tablet Starts Acting Up?
Few things are more frustrating than your tools glitching out when you're in the zone. If your software starts lagging or your brushes get weird, the first thing to try is the classic "turn it off and on again." A simple restart of the art program or a full reboot of your tablet often clears things right up.
If that doesn't work, here are a few other things to check:
- Make sure your tablet drivers are up to date. Always get them from the official Wacom or Huion website.
- Dig into your software's preferences and adjust the pen pressure settings.
- Close any other programs running in the background to free up computer resources.
A quick check can save you a lot of headaches.
With these common questions answered, you can push forward with a bit more clarity. Every little insight helps turn that initial uncertainty into confident action, fueling your growth as a digital artist.
Ready to elevate your digital creations? Try AI Photo HQ https://aiphotohq.com and access powerful AI-driven image tools to boost your workflow. Sign up free today.

