Feeling stuck in a creative rut? It happens to every photographer. The world is full of visual potential, but it's easy to fall into familiar patterns and capture the same types of shots. This guide is your definitive resource for shattering those creative blocks. We will introduce ten powerful and truly unique photography ideas, complete with practical, step-by-step instructions to help you master them. You will move beyond generic tips and dive into the specific techniques professionals use to create breathtaking, memorable images.
We'll cover everything from the ethereal glow of light painting and the mind-bending illusions of forced perspective to the intricate details of macro photography. Each concept is broken down into an actionable tutorial. Furthermore, we'll explore how cutting-edge tools like AI Photo HQ can simplify traditionally complex processes, enhance your existing work, or even generate entirely new avenues for artistic expression. This isn't just a list; it's a launchpad for your next great project. Get ready to transform your portfolio and see the world through a new, more dynamic lens. This collection of creative prompts will equip you with fresh perspectives and the skills to execute them flawlessly.
1. Light Painting Photography
Light painting is a captivating technique that turns a dark scene into a dynamic canvas. It involves using a handheld light source, like a flashlight or a specialized light wand, to draw or "paint" trails of light into an image during a long camera exposure. This unique photography idea allows you to create luminous, ethereal patterns, text, or even highlight subjects in a way that feels both magical and technically impressive. The camera captures the movement of your light source over time, resulting in glowing streaks against a dark background.
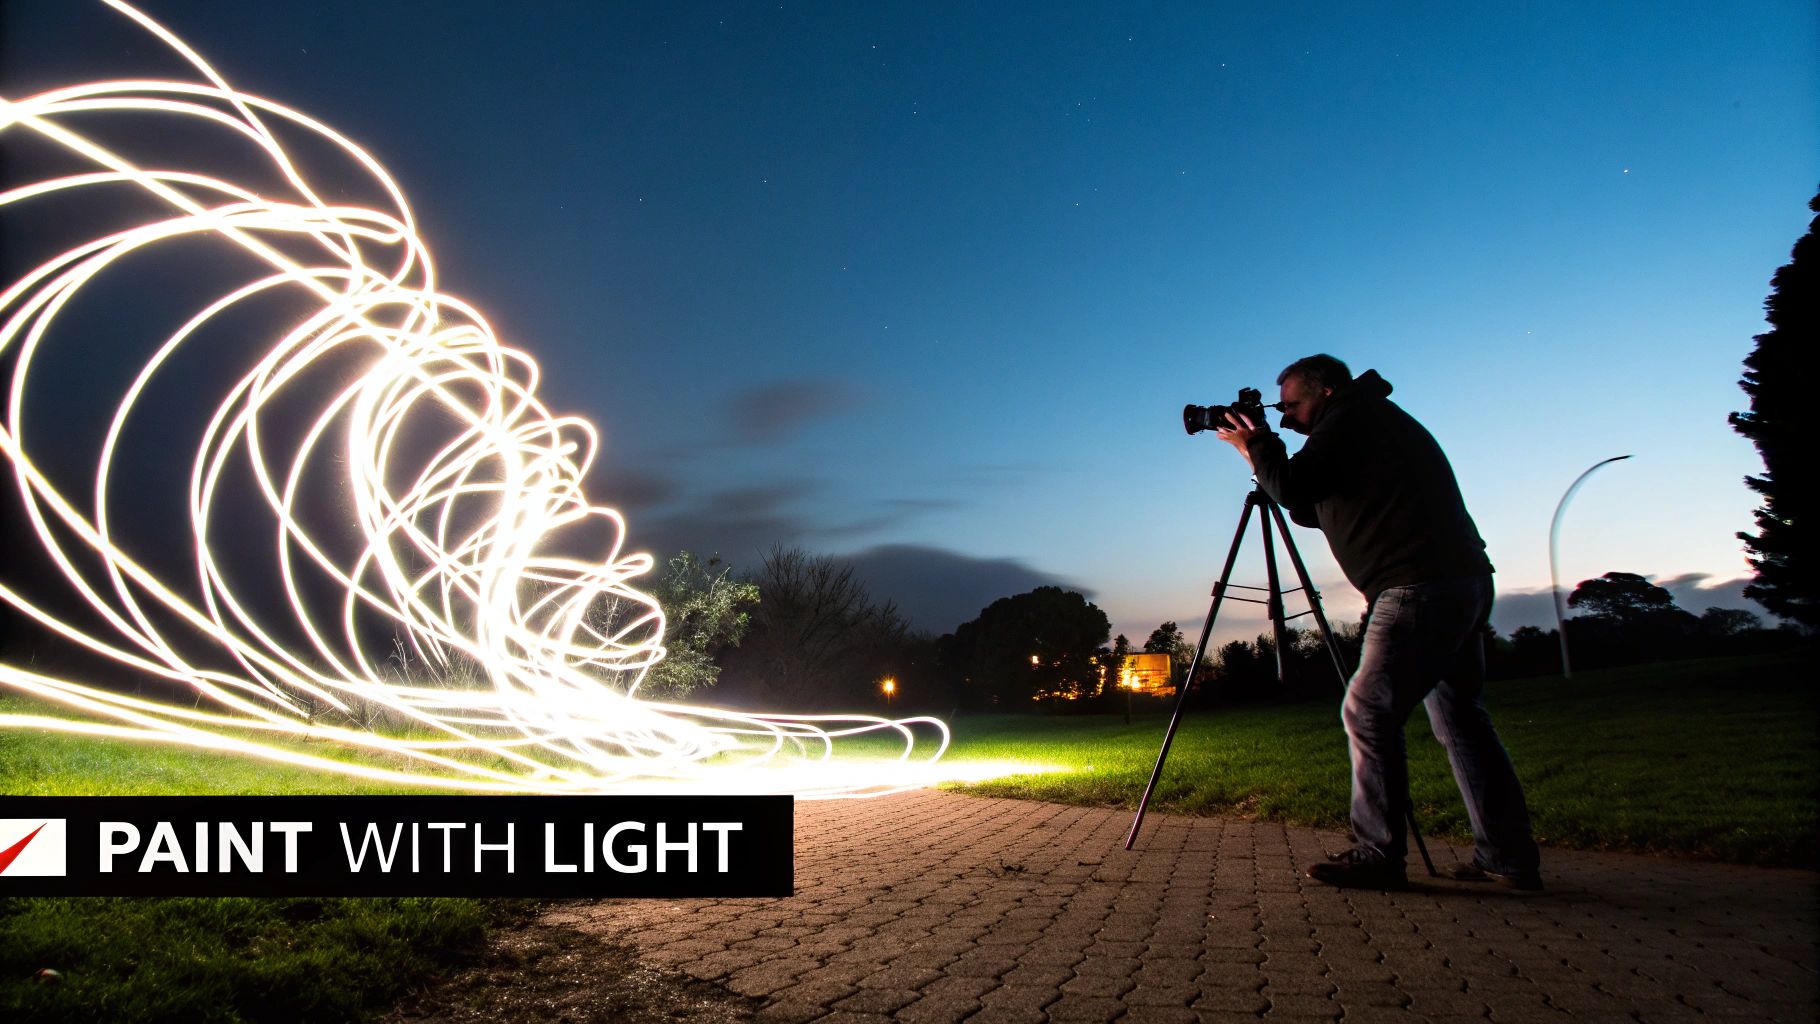
This method, explored by artists like Man Ray and popularized in modern times by pioneers such as Denis Smith, transforms simple locations into otherworldly landscapes. It's perfect for creating standout content, from surreal portraits to abstract art and even striking commercial imagery for brands.
How to Get Started with Light Painting
Achieving a great light painting shot is a methodical process. Follow these steps for a successful first attempt.
- Set Up Your Gear: Find a completely dark location. Mount your camera on a sturdy tripod—stability is non-negotiable. Attach a remote shutter release or set your camera's 2-second self-timer to prevent any camera shake when you begin the exposure.
- Dial in Your Camera Settings: Switch your camera to Manual (M) or Bulb (B) mode. Start with these settings: Shutter Speed: 15 seconds. Aperture: f/8. ISO: 100. This combination will capture the light trails clearly without introducing excess noise or ambient light.
- Focus Your Shot: In the dark, it's hard to autofocus. Place your light source where your subject or drawing will be, shine it on the spot, and use your camera's autofocus to lock in. Once focused, switch your lens to Manual Focus (MF) to prevent it from changing.
- Perform the "Painting": Wear dark clothing to avoid appearing in the photo. Press the shutter button. During the 15-second exposure, walk into the frame and "draw" your design with your flashlight, pointing it towards the camera. For writing, remember to write backwards as if in a mirror. When the shutter closes, review your shot and adjust your drawing speed or camera settings as needed.
Experiment with different tools like colored gels over your flashlight, LED strips, or even steel wool for dramatic sparks (with extreme caution and safety gear). The key is to practice your movements before you start shooting to get the shapes just right.
2. Forced Perspective Photography
Forced perspective is a classic optical illusion technique that plays with our sense of scale and depth. By strategically positioning your subjects at different distances from the camera, you can make objects appear larger, smaller, closer, or farther away than they really are. This unique photography idea transforms ordinary scenes into surreal and often humorous images, from a tourist appearing to "hold up" the Leaning Tower of Pisa to someone "pinching" the sun.
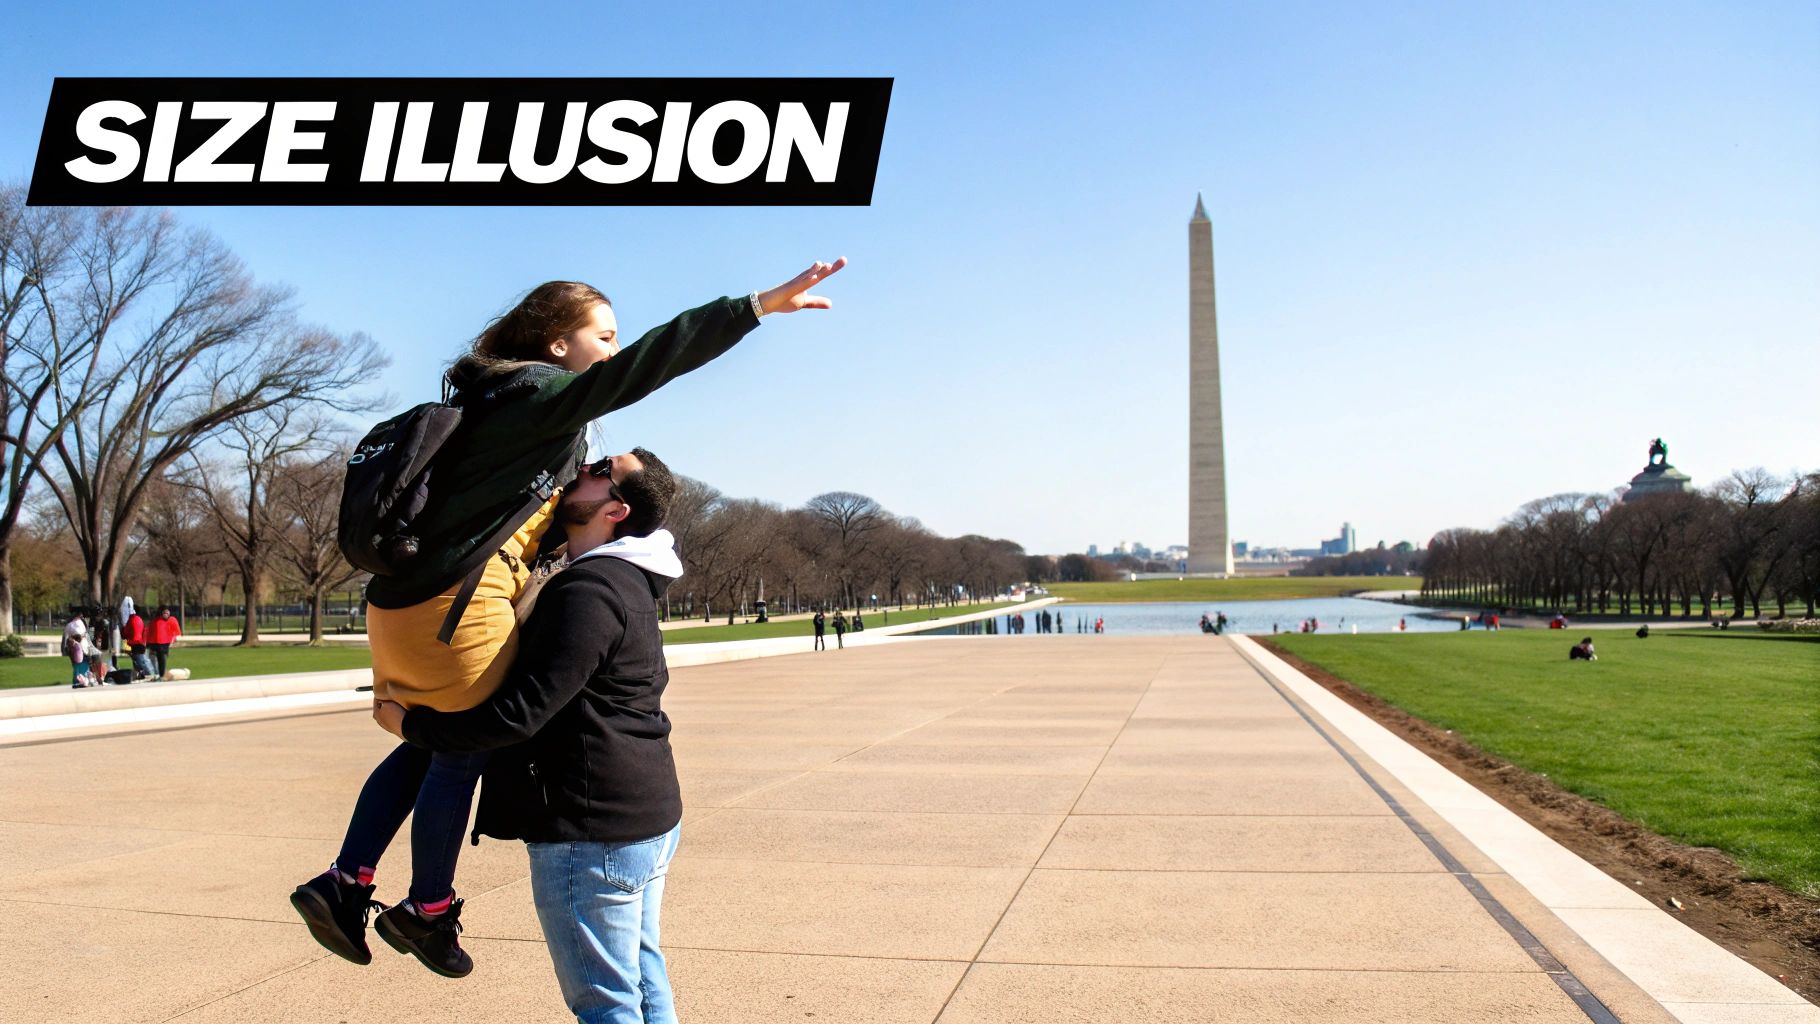
This technique has been popularized by artists like Michael Hughes with his "Souvenirs" project and Instagram creators like Rich McCor (paperboyo). It’s an accessible yet powerful way to create engaging and shareable content that makes viewers do a double-take. Its playful nature is perfect for travel blogs, social media posts, and creative brand campaigns. For more insights on this method, you can learn more about Forced Perspective Photography.
How to Get Started with Forced Perspective
Creating a convincing forced perspective illusion is all about careful alignment and the right camera settings. Follow this step-by-step tutorial.
- Plan Your Concept and Position Subjects: Decide on your illusion (e.g., a person holding the sun). Place your primary subject (the person) very close to the camera. Position the secondary object (the sun, a building, etc.) far in the background. The core trick is the massive distance between them.
- Select a Small Aperture: Go into Aperture Priority (A/Av) or Manual (M) mode. Set your aperture to a high f-stop number, like f/11 or f/16. This creates a large depth of field, which keeps both your close subject and your distant object in sharp focus. This is crucial for making the illusion believable.
- Align with Precision Using Live View: Switch to your camera's Live View mode. Get low to the ground to enhance the sense of scale. From this viewpoint, direct your subject to move their hands or body until they perfectly align with the distant object. For example, tell them "move your hand left an inch" until their fingers appear to be "pinching" the sun on your screen.
- Take the Shot and Review: Snap the picture and immediately check the alignment on your screen. Often, tiny adjustments are needed to perfect the interaction. Having an assistant to direct the subject while you manage the camera can make this process much faster.
3. Underwater Photography
Underwater photography is a unique photography idea that opens up an entirely new realm of visual storytelling. This practice involves taking pictures while submerged, whether snorkeling, diving, or in a controlled setting like a swimming pool. It transforms familiar subjects and introduces otherworldly elements like weightlessness, unique light refraction, and vibrant marine life, resulting in captivating and often ethereal imagery. The water itself becomes a dynamic element, adding mood, texture, and a sense of mystery to every shot.
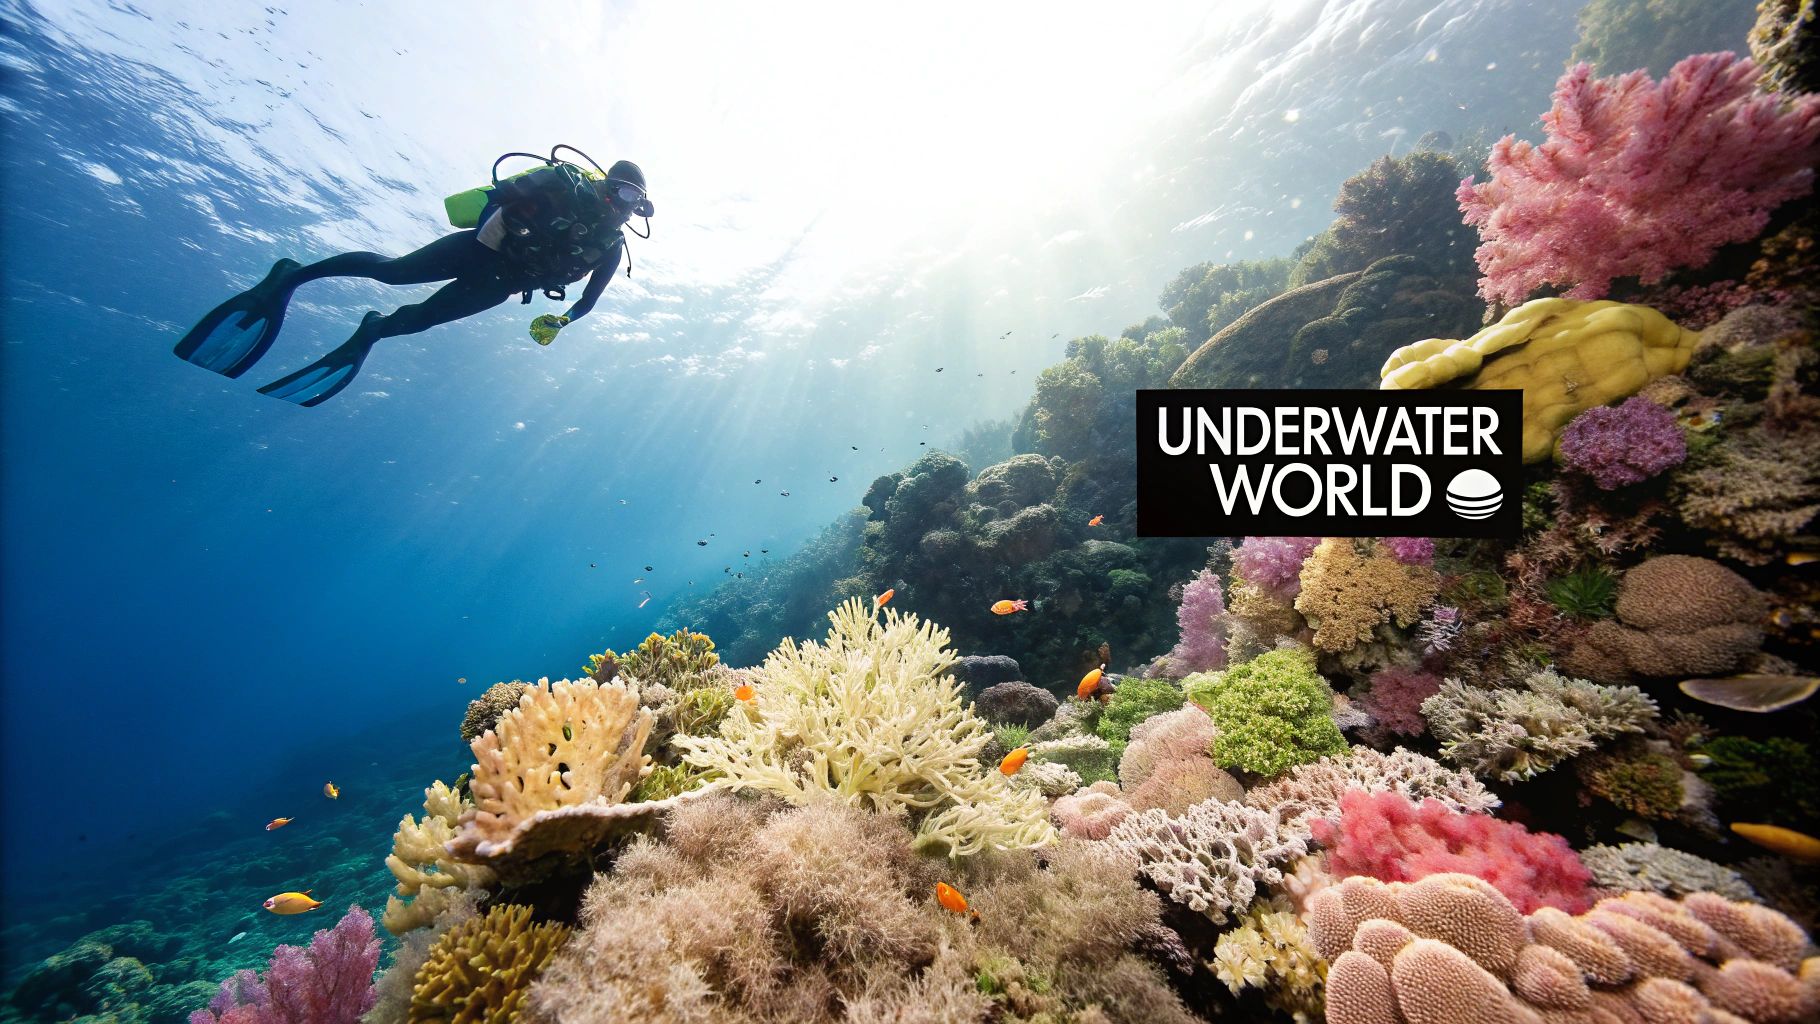
Pioneered by explorers like Jacques Cousteau and perfected by artists such as David Doubilet, this technique is incredibly versatile. It’s used for everything from breathtaking nature documentaries and fashion shoots with floating fabrics to memorable wedding portraits. Specific marine life encounters also offer incredible opportunities, such as those captured in detailed collections of Manta Ray Dive Kona Pictures. This approach is perfect for creating truly distinct and unforgettable photos.
How to Get Started with Underwater Photography
Capturing stunning images below the surface requires specialized gear and techniques. Here’s a practical guide.
- Prepare Your Gear: You'll need a waterproof camera or, for better quality, a dedicated underwater housing for your DSLR or mirrorless camera. Before every use, check the O-ring seal for debris and ensure it's securely closed. An external strobe (flash) is highly recommended, as water filters out red light quickly, making photos look blue and dull.
- Dial in Your Settings: Use a wide-angle lens to get as close to your subject as possible, which reduces the amount of water between you and them for a clearer shot. Set your camera to shoot in RAW format—this is critical for color correcting in post-production. A fast shutter speed (start at 1/125s) is needed to freeze the motion of fish and floating particles.
- Execute the Shot: Master your buoyancy so you can remain stable without disturbing the environment. Get extremely close to your subject (ideally within one meter). Aim your strobe to light the subject without causing "backscatter"—the effect of the flash illuminating particles in the water. To do this, position your strobe on an arm away from the lens, pointing slightly inward at the subject.
- Post-Processing: In software like Lightroom, adjust the White Balance to bring back natural colors. Use the Dehaze tool to add clarity and boost the contrast and saturation to make the vibrant underwater colors pop.
4. Drone/Aerial Photography
Drone photography elevates your perspective, offering a unique bird's-eye view that reveals patterns and compositions impossible to see from the ground. This technique uses unmanned aerial vehicles (drones) to capture stunning images from above, turning familiar landscapes, cityscapes, and events into abstract art. It’s a powerful method for adding a dramatic and high-production-value feel to your portfolio, whether you're shooting for travel, real estate, or creative projects.
This unique photography idea has been popularized by artists like Tommy Clarke and Dimitar Karanikolov, who use the elevated viewpoint to find hidden geometric patterns in nature and urban environments. It’s an invaluable tool for showcasing property layouts, capturing the full scale of a wedding ceremony, or simply creating breathtaking art that stands out.
How to Get Started with Drone Photography
Safely capturing professional-level aerial shots requires a methodical approach.
- Pre-flight Checklist (Legal & Safety): Before you even leave the house, use an app like B4UFLY or AirMap to check for flight restrictions at your chosen location. Ensure your drone registration is current and your batteries are fully charged.
- Scout Your Location: Use Google Earth's 3D view to scout potential shots from home. Look for leading lines, symmetry, and interesting textures (e.g., patterns in farm fields, intersecting roads). Plan your shots for the golden hour (just after sunrise or before sunset) when long shadows define textures and the light is soft.
- On-site Setup and Settings: Find a safe, open spot to launch. Let the drone hover for a moment to ensure it has a stable GPS lock. In your camera settings, use a low ISO (100) for maximum quality. Use the auto-exposure bracketing (AEB) feature, which takes 3-5 photos at different exposures. This guarantees you'll get a perfectly exposed shot, especially in high-contrast scenes.
- Compose and Capture: Fly your drone to the desired altitude and position. Experiment with different camera angles: a direct top-down view (90 degrees) creates abstract patterns, while a 45-degree angle provides a more traditional landscape perspective. Use the grid overlay on your screen to apply the rule of thirds for balanced compositions.
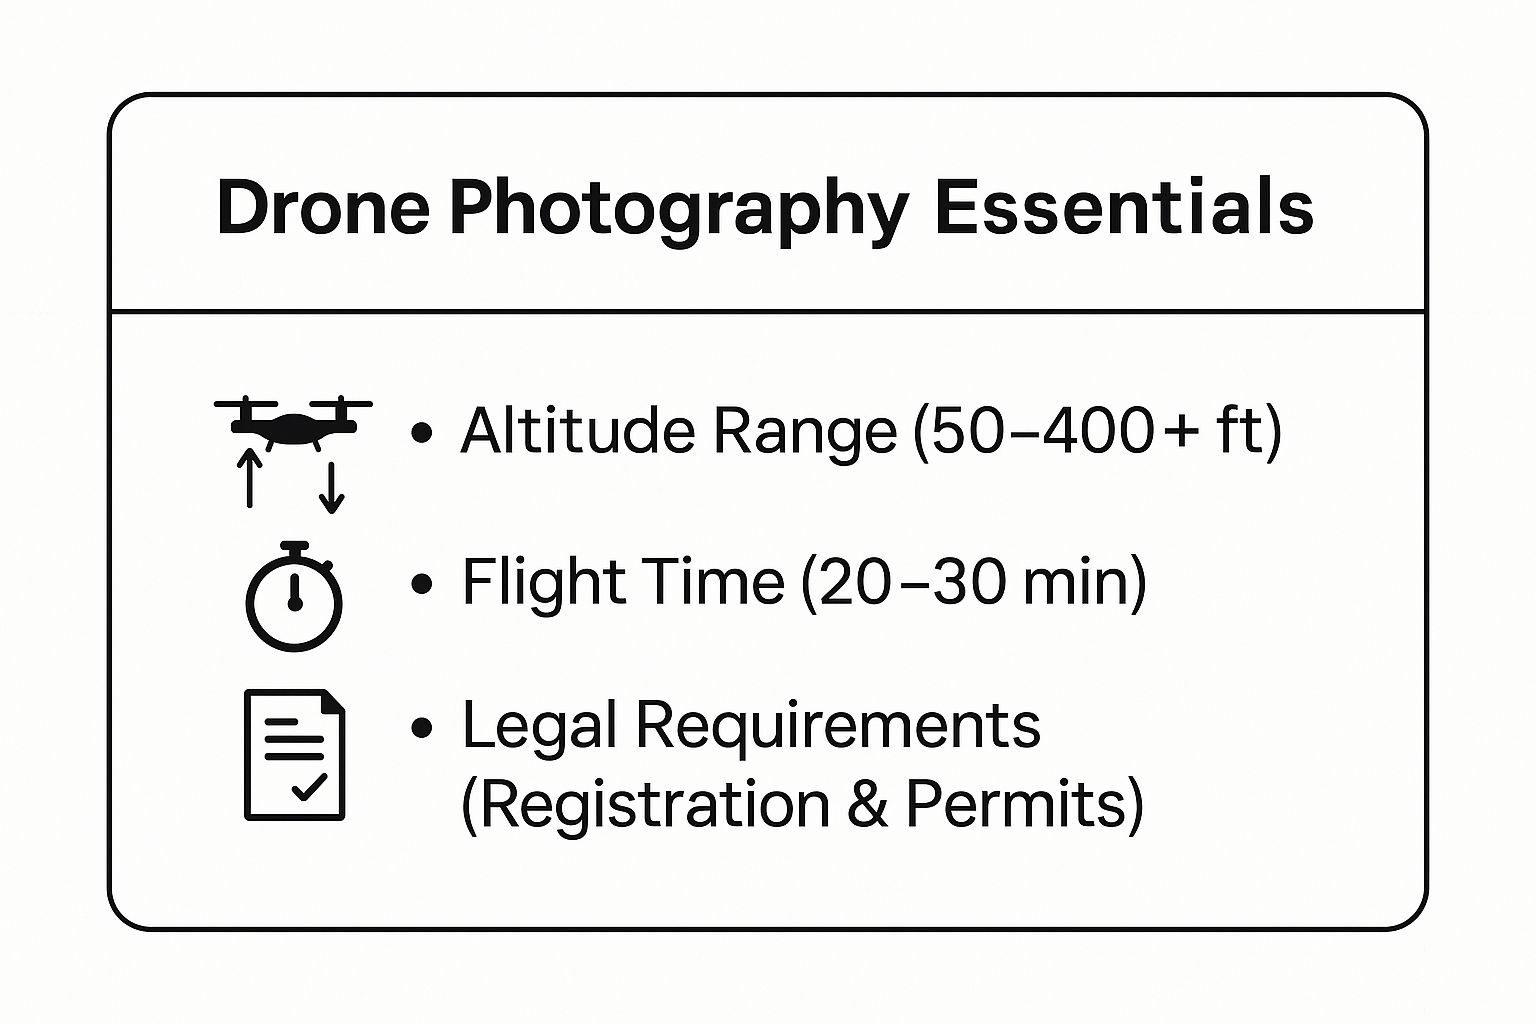
These essentials highlight that drone photography is a time-sensitive activity governed by specific flight altitudes and legal frameworks. Practice flying in open, safe areas to build confidence before tackling more complex and dynamic scenes.
5. High-Speed/Freeze Motion Photography
High-speed photography is a stunning technique that freezes moments invisible to the naked eye. It involves capturing incredibly fast-moving subjects, like a bursting water balloon or a shattering object, with absolute clarity. This unique photography idea reveals the intricate, hidden beauty within a split second, transforming a chaotic event into a detailed, static work of art. The magic lies in using an extremely fast shutter speed or a short-duration flash to stop the motion completely.
Pioneered by figures like Harold Edgerton, whose iconic image of a bullet piercing an apple redefined the limits of a camera, this method is now used by artists like Martin Klimas to create dramatic "sculptures" from destruction. It's a powerful tool for creating scientifically precise images, compelling advertisements, and breathtaking fine art that captures the impossible.
How to Get Started with High-Speed Photography
Freezing a fleeting moment requires precise timing. Here is a step-by-step tutorial using an external flash.
- Prepare Your Environment: Work in a completely dark room. Set your camera on a tripod and frame your scene. For a water splash, place a glass of water where it will be hit by a falling object.
- Manual Focus and Settings: Use a flashlight to illuminate the spot where the action will happen. Manually focus on this spot, then switch your lens to manual focus (MF). Set your camera to Manual (M) mode with these settings: Shutter speed: 1 second. Aperture: f/11. ISO: 100. The long shutter speed is just to ensure you capture the flash; the flash itself will freeze the motion.
- Set Up Your Flash: Place an off-camera flash (speedlight) to the side, aimed at your subject. Set the flash power to its lowest setting, like 1/128 or 1/64 power. The lower the power, the shorter the flash duration, and the better it will be at freezing motion.
- Execute the Shot: In total darkness, press the shutter button. During the 1-second exposure, create the action (e.g., drop a strawberry into the glass of water). Manually trigger the flash at the exact moment of impact. This takes practice! For consistency, use a sound trigger that fires the flash automatically when it detects the "splash" sound. Review and repeat until your timing is perfect.
6. Infrared Photography
Infrared photography is a truly unique photography idea that reveals a world invisible to the human eye. This technique captures light in the infrared spectrum (roughly 700-1200 nanometers), transforming ordinary scenes into surreal, dreamlike images. Foliage and grass reflect infrared light strongly, making them appear a brilliant white or ethereal pink, while blue skies turn dark and dramatic. This creates a high-contrast, otherworldly aesthetic that immediately stands out.
This method, pioneered for artistic purposes by figures like Robert Wood and used powerfully by contemporary artists such as Richard Mosse, offers a completely fresh perspective on familiar subjects. It's perfect for creating stunning landscapes, unique portraits with glowing skin tones, and striking architectural shots where structural details are accentuated against a dark sky.
How to Get Started with Infrared Photography
There are two main ways to shoot infrared: with a filter or a converted camera. Here's a tutorial for the filter method.
- Acquire Your Gear: Purchase an infrared filter, such as a Hoya R72, that screws onto your lens. You will also need a sturdy tripod, as this method requires very long exposures.
- Compose and Focus: Mount your camera on the tripod and compose your shot before attaching the filter, as it will be too dark to see through. Use autofocus to lock onto your subject, then switch your lens to Manual Focus (MF) so it doesn't change. Now, carefully screw the IR filter onto the lens.
- Set Your Camera: Switch to Manual (M) mode. Set your ISO to 100 and Aperture to f/8. Your shutter speed will be very long—start with a 30-second exposure and adjust based on a test shot. It's best to shoot on a bright, sunny day for the most dramatic effect. Shoot in RAW format.
- Post-Process the Image: Open the RAW file in editing software. The image will look very red. The key step is to use the Channel Mixer. In Photoshop, go to Image > Adjustments > Channel Mixer. Select the Red Output Channel and set Red to 0% and Blue to 100%. Then, select the Blue Output Channel and set Red to 100% and Blue to 0%. This "channel swap" creates the classic blue-sky, white-foliage look. Adjust white balance and contrast to finish.
7. Double/Multiple Exposure Photography
Double or multiple exposure is a surreal technique that merges two or more images into a single, layered composition. This unique photography idea allows you to blend subjects, textures, and scenes, creating dreamlike visuals that tell complex stories. The method involves superimposing one photograph over another, either directly in-camera or later in post-processing, resulting in a single frame where different realities coexist.
Popularized by conceptual artists like Duane Michals and re-energized by modern photographers like Brandon Kidwell, double exposure turns ordinary portraits into profound art by overlaying them with landscapes or abstract textures. It's an excellent way to create emotionally resonant and thought-provoking images that stop viewers in their tracks.
How to Get Started with Double Exposure
You can create this effect in-camera or in post-processing. Here is a step-by-step tutorial using Photoshop.
- Shoot Your Base Image (The Silhouette): Photograph your subject against a very bright, plain background (like an overcast sky or a white wall). Expose for the subject so that the background is completely blown out to white. This high-contrast silhouette is your foundation. The dark parts of the silhouette are where the second image will appear.
- Shoot Your Texture Image (The Fill): Your second photo should be a visually interesting texture or scene. Good examples include a dense forest canopy, a cityscape, flowers, or waves. This image will "fill" the dark areas of your base image.
- Combine in Photoshop: Open your base silhouette image in Photoshop. Place your texture image on a new layer on top of it.
- Blend the Layers: With the texture layer selected, change its Blending Mode from "Normal" to "Screen". Instantly, the texture image will appear only within the dark parts of your silhouette below. You can then move, resize, or rotate the texture layer to get the perfect composition. Use a layer mask to clean up any areas where the blend isn't perfect.
8. Tilt-Shift Photography
Tilt-shift photography is a creative technique that manipulates depth of field to make real-world scenes look like charming miniature models. This unique photography idea is achieved by using a specialized tilt-shift lens or post-processing software to blur the top and bottom of an image, leaving only a narrow strip of sharp focus. The effect plays with our perception, tricking the brain into seeing a life-sized cityscape or landscape as a tiny, detailed diorama.
This method was popularized by artists like Ben Thomas with his miniature city series and Vincent Laforet's stunning aerial cityscapes, which transformed sprawling metropolises into intricate toy sets. It’s an excellent way to breathe new life into architectural, landscape, or street photography, offering a whimsical and compelling perspective that grabs viewers' attention on social media and in creative portfolios.
How to Get Started with Tilt-Shift Photography
While a dedicated lens is expensive, you can create a convincing miniature effect in post-processing. Here's how.
- Shoot from a High Angle: The most critical step is your vantage point. Photograph your scene from above, looking down. Good locations include bridges, rooftops, or hills overlooking a town or busy street. This high-angle perspective is key to the diorama illusion.
- Choose a Busy Scene: The effect works best on scenes with lots of detail and moving parts, like cars, people, boats, or trains. The more it looks like a model train set, the better.
- Apply the Blur in Post-Processing: Open your photo in an editor like Photoshop. Go to Filter > Blur Gallery > Tilt-Shift. A tool with solid and dashed lines will appear.
- Refine the Effect: Position the solid lines to enclose the part of the image you want to keep in sharp focus (e.g., a single street). Drag the dashed lines to control the feathering or gradient of the blur. Increase the "Blur" slider until the surrounding areas look convincingly out of focus. To complete the miniature look, boost the color Saturation and Contrast slightly, as model toys are often brightly colored.
9. Macro/Extreme Close-up Photography
Macro photography is a fascinating technique that opens up a hidden world by capturing subjects at extremely close distances. This unique photography idea focuses on revealing intricate details invisible to the naked eye, transforming tiny subjects like insects, flower petals, or water droplets into dramatic, larger-than-life landscapes. By using specialized lenses or techniques, you can achieve a 1:1 magnification ratio or greater, where the subject appears life-sized or larger on the camera's sensor.
This method, brilliantly executed by artists like Thomas Shahan with his stunning spider portraits and Levon Biss with his "Microsculpture" series, turns the mundane into the extraordinary. It's a powerful tool for nature photographers, product advertisers, and artists who want to create visually arresting images that demand a closer look, highlighting texture, pattern, and complexity in a way other styles cannot.
How to Get Started with Macro Photography
Achieving sharp, detailed macro shots requires precision. Follow this step-by-step workflow for great results.
- Get Your Gear and Stabilize: You'll need a dedicated macro lens or more affordable extension tubes. Mount your camera on a sturdy tripod. At this level of magnification, even the vibration from pressing the shutter can cause blur, so use a 2-second timer or a remote shutter release.
- Control Your Lighting: Natural light can work, but for consistent results, use an off-camera flash or a dedicated macro ring light. Diffuse the light with a small softbox or even a piece of paper to soften shadows and reveal delicate textures.
- Set Your Focus Manually: Turn off autofocus. Set your aperture to a narrow setting like f/11 to maximize the shallow depth of field. Use your camera's Live View and magnify it 10x on the screen. Instead of turning the focus ring, physically move the entire camera slightly forward and backward on the tripod until the most critical part of your subject (like an insect's eye) is perfectly sharp.
- Try Focus Stacking (Advanced): For ultimate sharpness, take multiple photos, slightly adjusting the focus point from the front to the back of your subject with each shot. Later, use software like Photoshop or Helicon Focus to merge these images into one fully-focused final photograph.
10. Street Photography with Intentional Camera Movement (ICM)
Street Photography with Intentional Camera Movement (ICM) is a creative technique that transforms bustling urban scenes into abstract, painterly works of art. Instead of freezing a moment, you deliberately move the camera during a longer exposure to blur motion, creating streaks of color and light. This unique photography idea turns ordinary cityscapes, with their people and traffic, into fluid, impressionistic compositions that evoke a sense of energy and dynamism.
This method, embraced by fine art photographers like Chris Friel and Doug Chinnery, adds a layer of abstraction to street photography. It's an excellent way to capture the feeling of a place rather than a literal depiction, making it perfect for creating evocative fine art prints or compelling visual narratives about urban life that stand out from traditional street shots.
How to Get Started with ICM Street Photography
Mastering ICM requires experimentation. Here’s a simple process to create your own abstract street scenes.
- Find the Right Scene and Time: Look for locations with strong lines and colors, like a street with neon signs at night or a row of colorful buildings during the day. The technique works best when there is a mix of static elements (buildings) and moving ones (people, cars).
- Adjust Your Camera Settings: Set your camera to Shutter Priority (S or Tv) mode. Start with a shutter speed of 1/8th of a second. Set your ISO to its lowest value (e.g., 100). If it's too bright outside to use a slow shutter speed, you'll need a Neutral Density (ND) filter to reduce the light entering the lens.
- Practice Different Movements: The way you move the camera creates the effect.
- Vertical Pan: For buildings, move the camera smoothly straight up or down as you press the shutter.
- Horizontal Pan: For moving cars or a crowd, move the camera smoothly side-to-side.
- Rotation: For an abstract swirl, twist the camera during the exposure.
- Shoot in Bursts and Review: Use your camera's continuous shooting (burst) mode. Start your movement, then press and hold the shutter button to capture a sequence of frames. This increases your chance of getting one shot where the speed, movement, and composition are perfect. Review your shots often and adjust your shutter speed or movement to refine the effect.
Unique Photography Ideas Comparison Table
| Photography Type | Implementation Complexity 🔄 | Resource Requirements ⚡ | Expected Outcomes ⭐📊 | Ideal Use Cases 💡 | Key Advantages ⭐💡 |
|---|---|---|---|---|---|
| Light Painting Photography | Medium - requires practice, tripod, remote 🔄 | Low - basic DSLR/mirrorless, light sources | Highly creative, artistic light trails ⭐📊 | Artistic shoots, dark environments, experimental | Inexpensive gear, endless creative possibilities ⭐ |
| Forced Perspective Photography | High - precise positioning, planning 🔄 | Low - camera and subjects/props | Surreal scale illusions, viral content ⭐📊 | Travel, landmarks, social media content | Minimal equipment, builds spatial/compositional skills ⭐ |
| Underwater Photography | High - specialized skills and gear 🔄 | High - waterproof housing, strobes, diving gear | Dramatic, otherworldly aquatic imagery ⭐📊 | Marine life, underwater fashion, commercial | Unique subjects, high artistic and commercial value ⭐ |
| Drone/Aerial Photography | Medium-High - legal knowledge, flying skill 🔄 | Medium - drone, batteries | Unique bird’s-eye views, abstract compositions ⭐📊 | Real estate, landscapes, events | Affordable aerial access, cinematic motion shots ⚡ |
| High-Speed/Freeze Motion Photography | High - specialized triggers and timing 🔄 | High - high-speed flash, triggers | Reveals microsecond details, scientific/artistic ⭐📊 | Scientific demonstration, creative advertising | Fascinating captured moments, strong commercial appeal ⭐ |
| Infrared Photography | Medium - camera conversion, long exposures 🔄 | Medium - IR camera/filter, tripod | Surreal false-color, reveals unseen details ⭐📊 | Landscape, fine art, architectural | Unique aesthetic, penetrates haze better than visible light ⭐ |
| Double/Multiple Exposure Photography | Medium-High - planning, blending techniques 🔄 | Low-Medium - any camera with multiple exposure | Layered, dreamlike composites ⭐📊 | Conceptual art, storytelling | Highly creative, works in-camera or digitally ⭐ |
| Tilt-Shift Photography | Medium - specialized lens or post-process 🔄 | Medium - tilt-shift lens or software | Miniature effect, selective focus ⭐📊 | Urban scenes, architecture, busy environments | Eye-catching look, can use post-processing ⭐ |
| Macro/Extreme Close-up Photography | High - critical focus and lighting 🔄 | Medium-High - macro lens, lighting, focus stacking | Detailed, larger-than-life subject images ⭐📊 | Nature, scientific imaging, art | Reveals hidden details, artistic and commercial value ⭐ |
| Street Photography with ICM | Medium - controlled camera movement 🔄 | Low - standard camera | Abstract, impressionistic urban scenes ⭐📊 | Creative street, urban night, emotional imagery | Unique artistic results, no expensive gear needed ⭐ |
Your Next Shot: Integrating AI into Your Creative Workflow
The journey through these unique photography ideas, from the ethereal glow of light painting to the dynamic blur of intentional camera movement, reveals a fundamental truth about modern creativity: the most compelling images often emerge at the intersection of technique and technology. Mastering forced perspective or capturing the perfect high-speed splash requires practice, patience, and a clear vision. But what happens when you introduce a powerful new partner into your creative process?
This is where the true potential unfolds. Instead of viewing AI as a replacement for skill, consider it a powerful conceptual sandbox and an efficiency engine. It’s a tool to augment your creativity, not automate it. The concepts we've explored, from infrared and double exposure to tilt-shift and macro, are no longer confined to specific gear or complex post-processing. They are starting points for endless exploration.
From Inspiration to Execution: A Practical Workflow
The gap between a brilliant idea and a finished photograph can be daunting. AI tools like AI Photo HQ serve as a bridge, helping you visualize and refine your concepts before you ever pick up your camera.
Here’s a practical, step-by-step approach to integrate AI into your next project:
- Concept Generation: Start with one of the unique photography ideas from this article, like "underwater photography." Use AI Photo HQ to generate concept images. You could prompt it with:
ethereal underwater portrait of a woman in a flowing red dress, surrounded by glowing jellyfish, hyperrealistic, dramatic lighting. This gives you a visual storyboard to guide your actual shoot. - Refine and Iterate: Perhaps the initial AI generation sparks a new idea. You can quickly iterate. Maybe you change the prompt to
surreal underwater scene, a vintage gramophone on the seabed releases musical notes as bubbles, fish swimming through them, photorealistic. This rapid experimentation helps solidify your vision without the cost or time of a real-world setup. - Augment Existing Work: Once you have your shots, AI can still play a role. You can enhance details, blend elements from different takes, or even stylize your final images. Beyond generating new images, AI can also be used to creatively transform existing photographs. For example, you can use AI tools to effectively turn your photos into cartoons with AI for a unique social media post or a fun artistic project.
The Future of Your Photography
Embracing these unique photography ideas is about more than just adding new techniques to your portfolio; it’s about rewiring how you approach the creative process. By combining your hands-on skills with the limitless ideation power of AI, you can move faster, think bigger, and execute with greater confidence. Whether you are a professional photographer planning a high-concept shoot or a hobbyist looking for your next creative spark, this hybrid approach is your new competitive edge. The next masterpiece isn't just waiting to be captured; it's waiting to be imagined, refined, and then brought to life.
Ready to turn your most ambitious concepts into stunning visuals? Explore the limitless creative potential of AI Photo HQ and start generating unique photography ideas today. Visit AI Photo HQ to see how our advanced AI can help you storyboard, conceptualize, and create your next incredible image in seconds.

