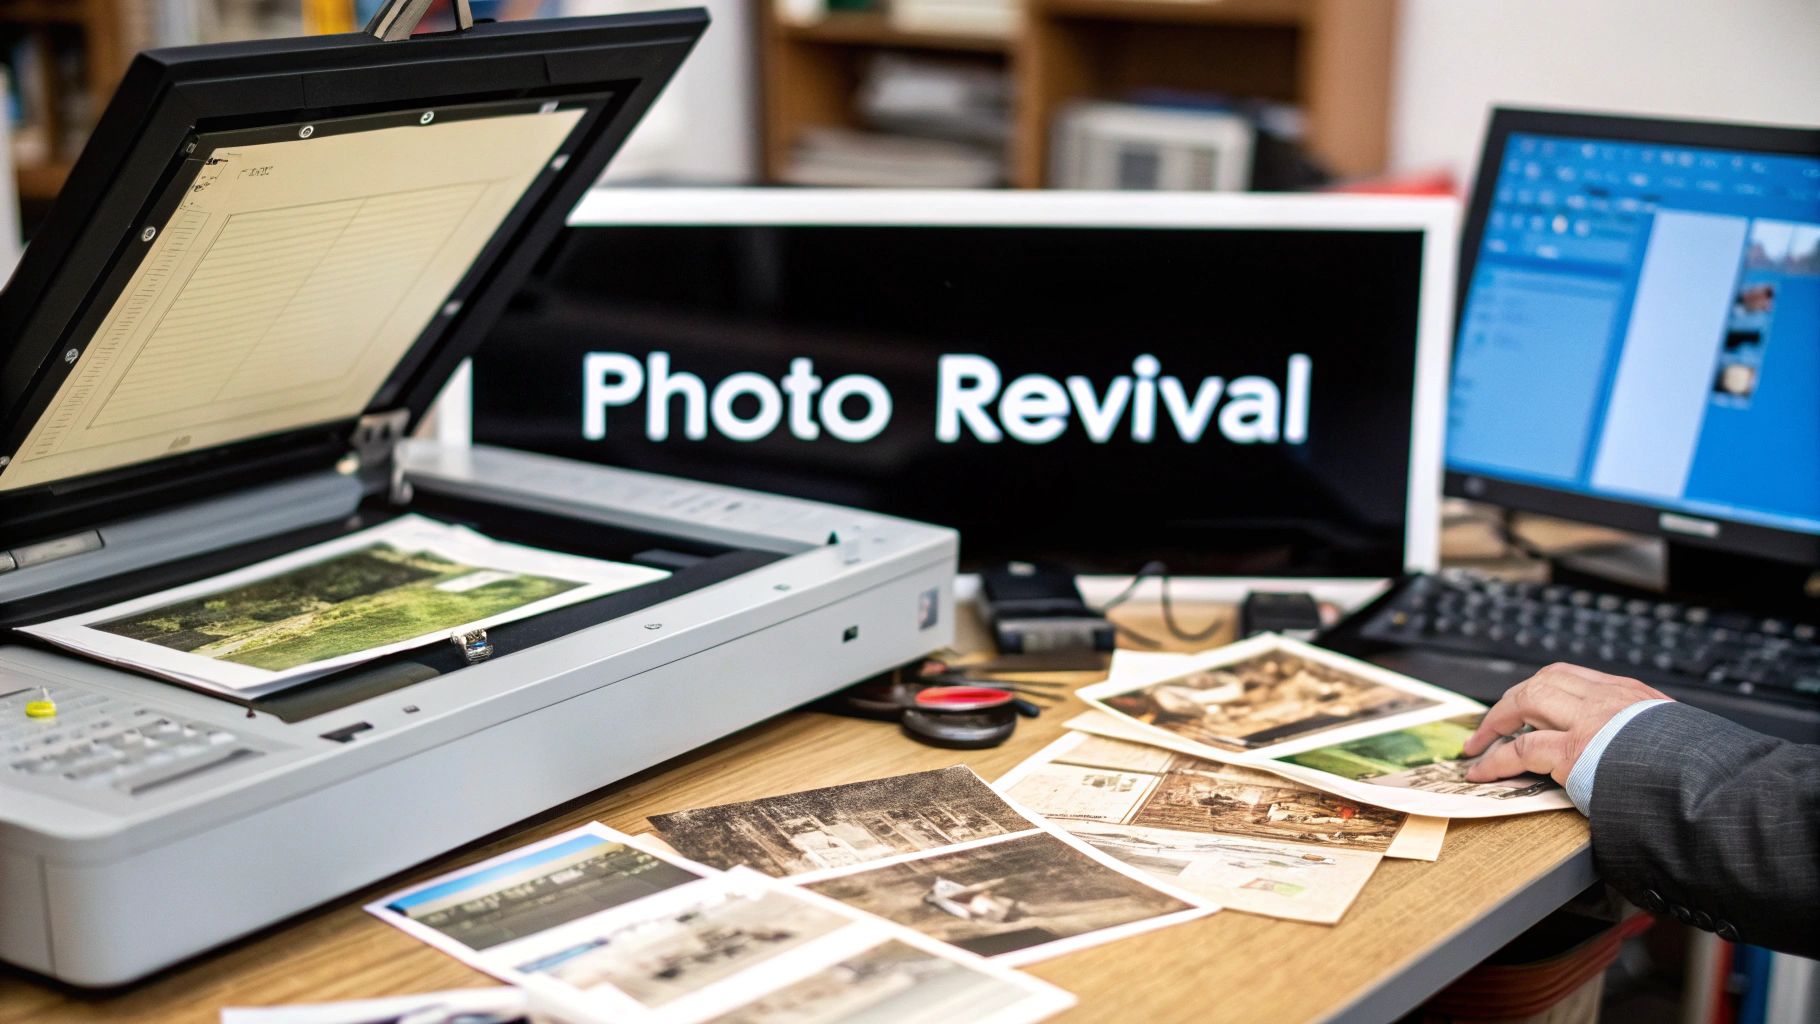
Bringing an old, faded photograph back to life is a special kind of magic. It's about taking a physical print—maybe one that’s been tucked away in a shoebox for decades—and using today’s tools to repair the damage from scratches, fading, and time itself. What used to be a painstaking, manual process can now be done in minutes, turning a fragile memory into a sharp, vibrant digital keepsake. This guide will show you exactly how to do it.
Why We Bother Restoring Old Photos
Let's be honest, old photographs are more than just paper and ink. They're tangible links to our past. They hold the faces of family we never met, capture moments that define our heritage, and tell stories that words can't.
But these heirlooms are incredibly fragile. Time, sunlight, and even just the air around them can cause fading, weird color shifts, and physical damage. Slowly but surely, the details of our history can get erased.
That powerful urge to save these memories is what connects us to our roots and ensures the next generation knows where they came from. It's no surprise, then, that there's a huge interest in photo restoration. The global market for these services was valued at around USD 420 million in 2023 and is only expected to climb. If you're curious, you can discover more insights about the photograph restoration market and see just how fast it's growing.
A Modern Take on an Old Craft
Not too long ago, fixing up old photos meant shelling out for expensive software and having the patience and skill of a professional graphic artist. Today, things are completely different. Powerful AI-driven tools have made the entire process incredibly straightforward.
I'm going to walk you through a practical, step-by-step journey to bring a damaged photo back to its former glory.
We'll cover everything you need to know:
- Digitizing Your Photos: The first step is always creating a high-quality digital copy. This scan is the foundation for all the restoration work to come.
- Letting AI Do the Heavy Lifting: We'll use modern tools to automatically fix common problems like scratches, tears, and washed-out colors with incredible speed.
- Refining the Final Image: After the AI works its magic, you'll learn how to make small manual tweaks to the brightness, contrast, and color to add that perfect, realistic touch.
- Preserving Your Work for Good: Finally, I'll show you how to properly save and archive your newly restored images so they truly last forever.
By the time you're done with this guide, you won’t just have a fixed-up photo. You'll have a vibrant, shareable piece of your history, ready to be enjoyed by family and friends for years to come.
The Crucial First Step: Your Digital Foundation
https://www.youtube.com/embed/zBSWkDKk-3c
Before we can even think about firing up any fancy AI software, we need to get our hands on a high-quality digital copy of the original photograph. Honestly, the quality of your scan is the single biggest factor that will make or break your entire restoration project.
Think of it like this: a poor scan gives the AI very little information to work with, limiting its ability to fix anything. It's like trying to build a house on a shaky foundation—the whole thing is compromised from the start.
Here's a quick step-by-step guide to preparing and scanning your photo:
- Clean Your Equipment: Take a soft, lint-free microfiber cloth and gently wipe the surface of the physical photograph to remove any loose dust or fingerprints.
- Wipe the Scanner Glass: Do the same for the glass on your scanner. Even a tiny speck of dust on the scanner bed can look like a giant, ugly blemish in your final high-resolution image.
- Place the Photo: Lay the photo flat on the scanner bed, ensuring it is straight.
- Open Your Scanning Software: On your computer, open the software that controls your scanner.
- Choose Your Settings: Before you hit "scan," you need to select the correct settings. This is the most important part of the process.
Choosing Your Scanning Resolution
The most important setting you'll deal with is DPI, which stands for dots per inch. This number basically tells you how much detail your scan is going to capture. The higher the DPI, the more data you get—and for restoring old photos, more data is exactly what we want.
Here are the DPI settings I stick to in my own workflow:
- Standard 4x6 or 5x7 Prints: I always start with a minimum of 600 DPI. This resolution grabs enough detail for most restoration tasks and gives you the flexibility to make decent-sized reprints later.
- Small Photos (Wallet-sized or smaller): For these tiny prints, you need to crank it up to 1200 DPI or even higher. This essentially enlarges the photo digitally, giving you a much larger pixel canvas to work with for those intricate repairs.
- Negatives or Slides: These are a different beast altogether because they're packed with an incredible amount of information. You'll need a dedicated film scanner set anywhere from 2400 to 4800 DPI to pull out all that hidden detail.
A key piece of advice I always give: you can always scale a high-resolution image down, but you can never authentically add detail back into a low-resolution scan. When in doubt, always go for a higher DPI. It's better to have too much detail than not enough.
Recommended Scanning Resolutions for Old Photos
To make it even easier, here’s a quick reference table I put together. It breaks down the best DPI settings based on the size of your original photo and what you plan to do with the final, restored image.
| Original Photo Type | Recommended DPI | Best For |
|---|---|---|
| Standard Prints (4x6, 5x7) | 600 DPI | General restoration, sharing online, and reprinting up to 8x10. |
| Small Prints (< 3x5) | 1200 DPI | Capturing fine details from tiny photos for significant enlargement. |
| Large Prints (> 8x10) | 300-400 DPI | Archiving large-format photos where the original is already big. |
| 35mm Negatives/Slides | 2400-4800 DPI | Professional-quality archival and large-format printing. |
This table should help you choose the right setting every time, ensuring you start your project with the best possible digital file.
Selecting the Right Scanning Method
You've got a few ways to get that print into your computer, and each has its own set of pros and cons.
By far, the best tool for the job is a flatbed scanner. Most all-in-one printers have one, and they provide the even lighting and flat surface you need for a sharp, distortion-free scan. If you're serious about this, a dedicated photo scanner will give you even better color depth and dynamic range.
This image lays out a simple workflow for what comes next, once you have your scan ready.
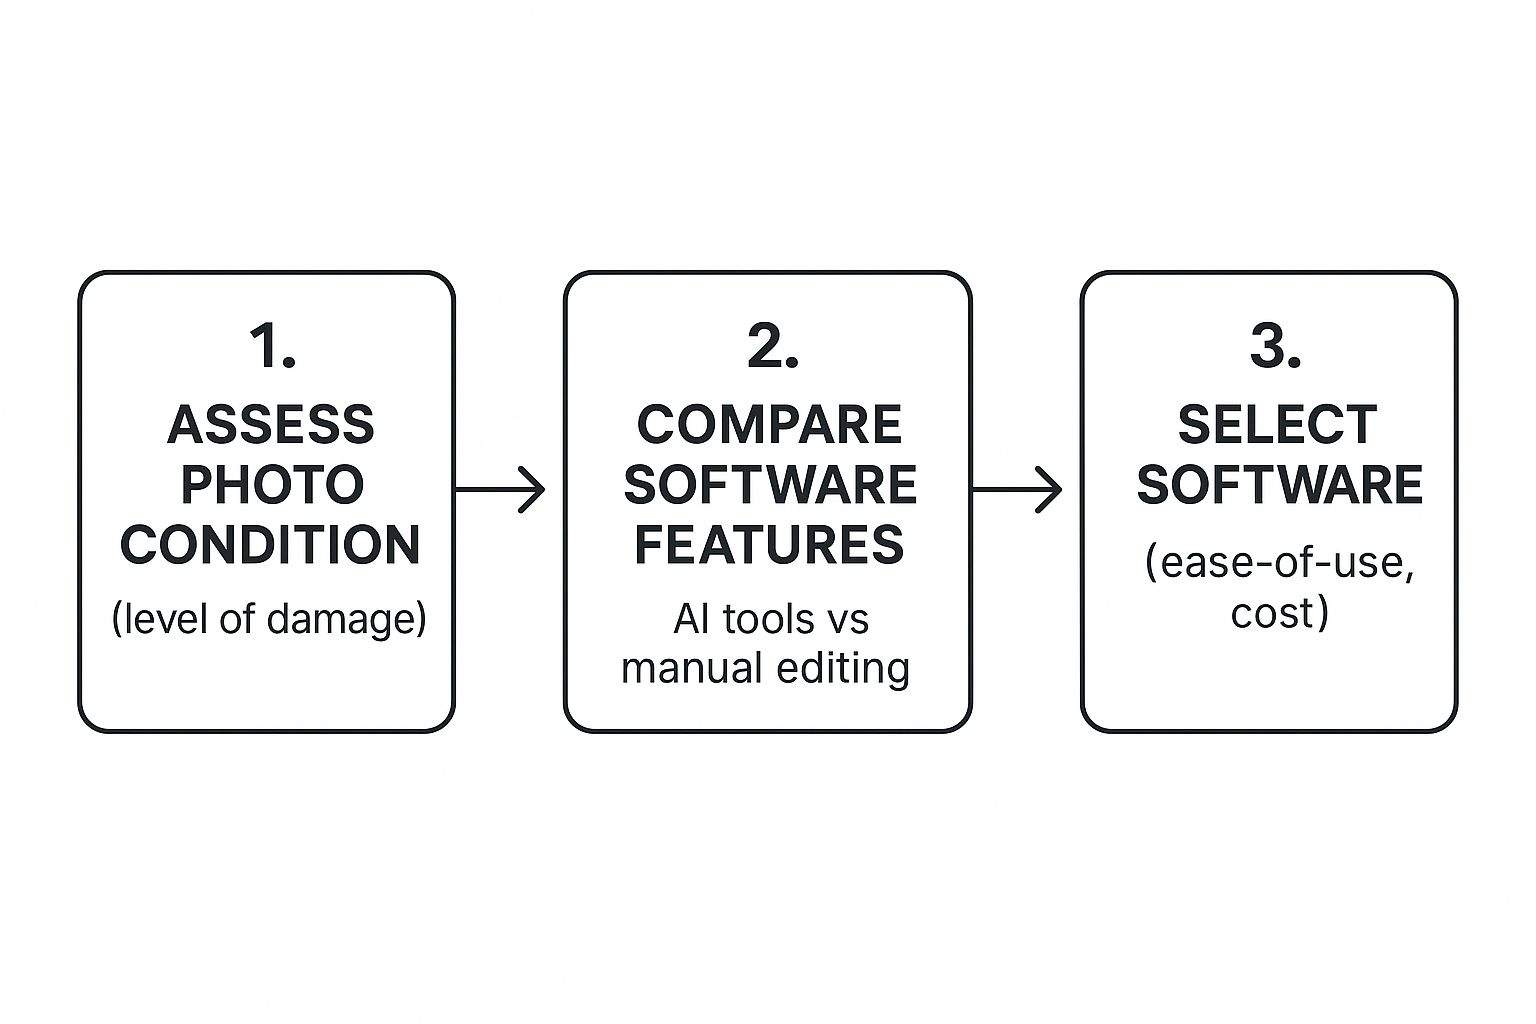
As you can see, assessing the photo’s damage helps you decide whether AI tools or more manual methods are the right fit.
What about just using your phone? While it’s tempting, using a smartphone app is really a last resort. It's incredibly difficult to get perfectly even lighting and avoid the glare, shadows, and perspective distortion (keystoning) that can ruin an image.
If you absolutely have to use your phone, find a spot with bright, indirect natural light. Lay the photo on a perfectly flat surface and use a dedicated scanning app like PhotoScan by Google to help correct for some of that distortion.
No matter which method you choose, always save your scan as a TIFF or PNG file if you can. These are "lossless" formats, meaning they preserve every single pixel of data. A JPEG, on the other hand, compresses the file by throwing away information you can never get back.
Letting AI Do the Heavy Lifting for Photo Restoration
Now that you have a top-notch scan, we get to the fun part. This is where modern AI tools work their magic, handling complex repairs in seconds—a job that used to take me hours of painstaking, pixel-by-pixel work.
The whole field has changed dramatically. Photo restoration used to be an entirely analog craft. Then, around 1990, the digital age began to shift things. For decades, experts (myself included) relied on early versions of tools like Photoshop to fix images manually. It was incredible for its time, but incredibly time-consuming. If you're curious about the old ways, rememorie.com has a great article on the history of photo restoration that shows just how far we've come.
Today, AI-powered features take on the most tedious tasks automatically, putting professional-grade results within anyone's reach.
A Step-by-Step Tutorial with Photoshop's Neural Filters
Let's walk through a real-world example using a tool many photographers and hobbyists already have: Adobe Photoshop. We'll use its AI-driven Neural Filters to restore a faded, scratched family photo from the 1960s.

Step 1: Open Your Image and Create a Duplicate Layer
First, open your high-resolution TIFF or PNG file in Photoshop. To make sure you don't accidentally mess up your original scan, always work on a separate layer. In the Layers panel (usually on the bottom right), right-click your "Background" layer and select "Duplicate Layer." Give it a name like "AI Restoration" and click OK. All your edits will now happen on this new layer, preserving the original.
Step 2: Access the Neural Filters
With your new layer selected, navigate to the main menu at the top of the screen and click Filter > Neural Filters. This will open a dedicated workspace panel on the right with a list of available AI tools.
Step 3: Apply the Photo Restoration Filter
In the Neural Filters panel, find the Photo Restoration filter and toggle the switch to turn it on. The AI will immediately begin analyzing the image. In a few moments, you'll see a dramatic reduction in scratches, fading, and general noise.
Step 4: Adjust the Filter's Intensity
The Photo Restoration filter has two main sliders you can use to fine-tune the result:
- Photo Enhancement: This adjusts the overall clarity and detail.
- Scratch Reduction: If the initial pass didn't remove all the damage, you can increase this slider for a more aggressive repair.
Adjust these sliders until you're happy with the balance. Be careful not to push them too high, as it can sometimes create an unnatural, "plastic" look.
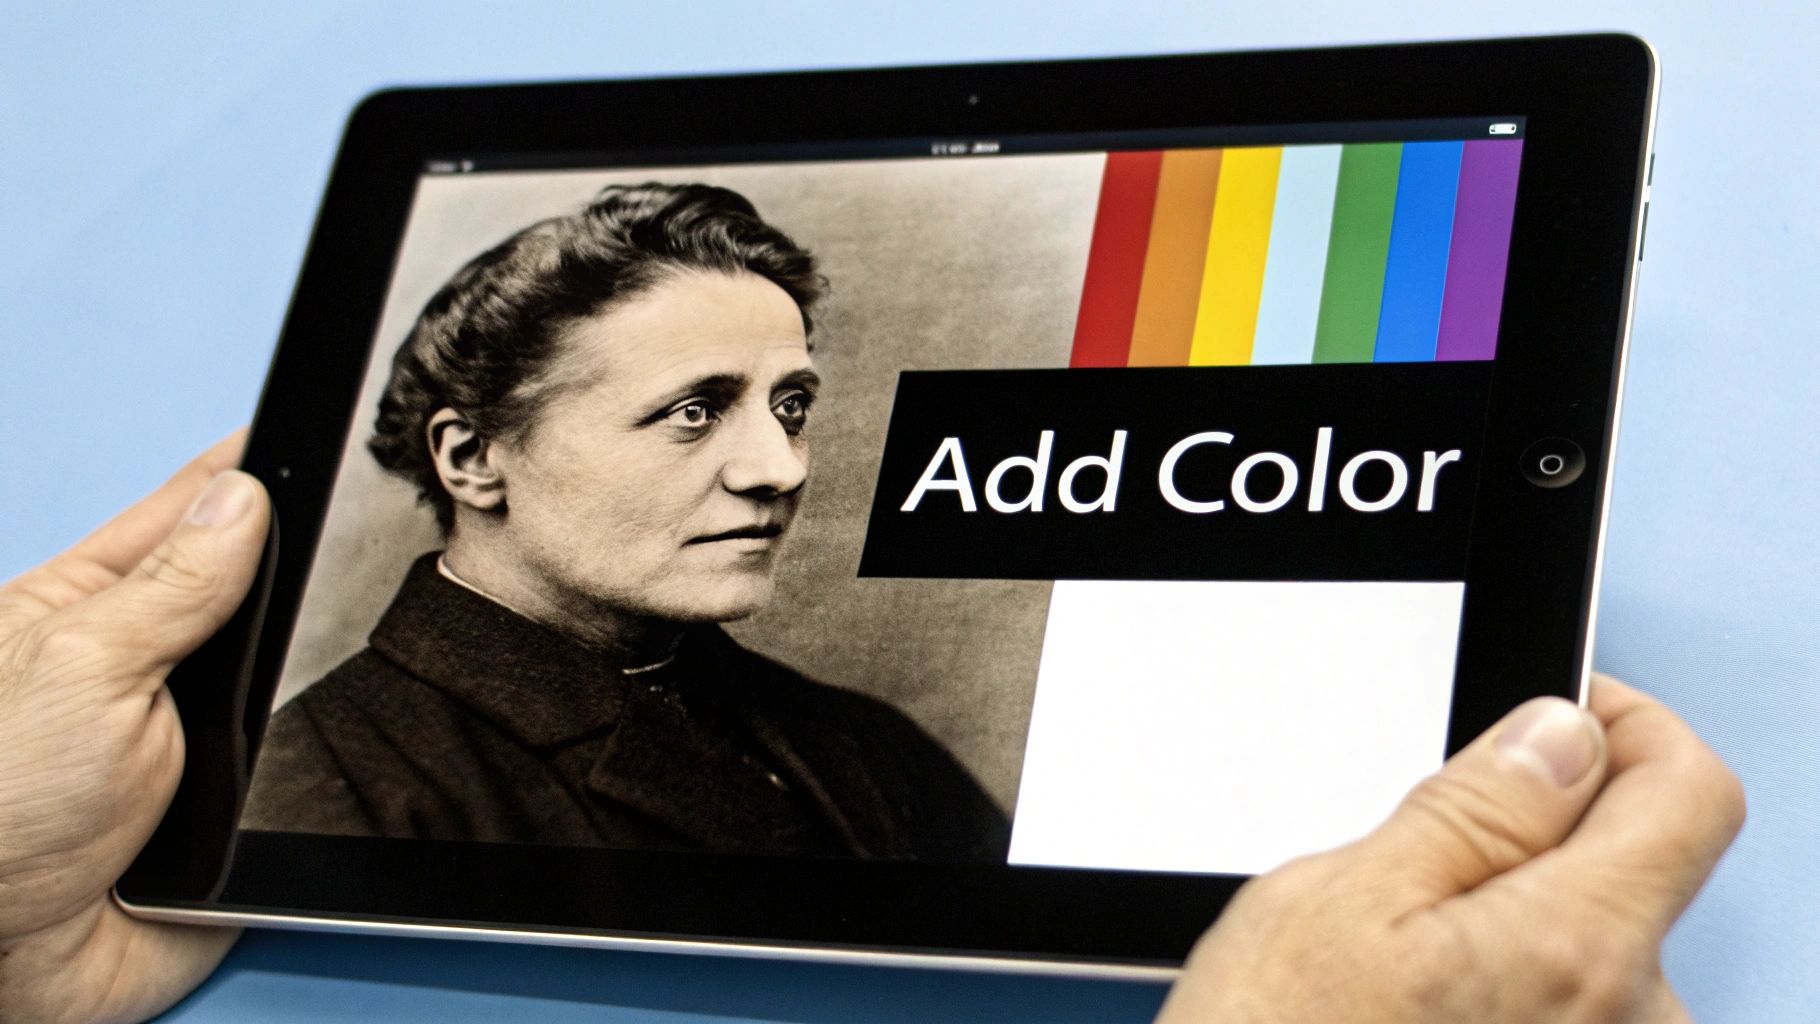
Step 5: (Optional) Colorize a Black and White Photo
If your original photo is black and white, find the Colorize filter in the Neural Filters panel and toggle it on. The AI will analyze the scene and apply realistic colors. It's surprisingly effective at identifying things like skin tones, skies, and foliage.
Step 6: Output Your Result
At the bottom of the Neural Filters panel, find the "Output" dropdown menu and make sure it's set to "Output to New Layer." This is crucial. It saves the restored version on its own separate layer, giving you a clean before-and-after and making it easy to perform manual touch-ups. Click OK to apply the changes and return to the main Photoshop workspace.
You now have a beautifully repaired base image, all set for the final, human-led fine-tuning.
Refining the Details with Manual Adjustments
AI restoration tools do an amazing job, but they can't replicate a human's artistic judgment. This is where you come in. Your eye for detail is what turns a technically good restoration into a truly breathtaking one. The goal is to perform small, subtle tweaks to correct any AI missteps and restore a natural feel to the image.
Here's a step-by-step guide to the final polishing stage, which you can do in Photoshop, GIMP, or most other photo editors.
Step 1: Fine-Tune Brightness and Contrast
The AI can sometimes leave an image looking a bit flat. Let's bring back the depth.
- Add an Adjustment Layer: In Photoshop, go to
Layer > New Adjustment Layer > Brightness/Contrast. Using an adjustment layer means you can edit these settings later without permanently changing the image. - Increase Contrast: Slowly move the Contrast slider to the right. Watch the shadows get deeper and the highlights brighter. You're looking for a "pop" without losing detail in the darkest or brightest areas.
- Adjust Brightness: Nudge the Brightness slider slightly to lift the overall tone of the photo, making it feel less heavy.
Pro Tip: Pay special attention to the eyes in a portrait. If they look dull, a slight contrast increase can instantly bring them back to life. The eyes are the soul of the photo, and getting them right makes all the difference.
Step 2: Correct Unnatural AI Colorization
Sometimes AI-generated colors can feel artificial. Here’s how to fix common issues.
- Add a Color Balance Layer: Go to
Layer > New Adjustment Layer > Color Balance. - Fix Skin Tones: If skin looks too red or "sunburnt," select "Midtones" from the dropdown and move the top slider slightly away from Red and toward Cyan.
- Tone Down Scenery: If grass looks neon green or the sky is an electric blue, you can add a
Hue/Saturationadjustment layer. Select "Greens" or "Blues" from the channel dropdown and slightly decrease the Saturation slider. - Neutralize Old Tints: If a faint yellow or sepia tone remains, use a
Photo Filteradjustment layer, select a "Cooling Filter," and adjust the density to cancel out the warmth.
For a deeper dive, our comprehensive guide on old photo restoration has more advanced strategies for getting the perfect color balance.
Step 3: Remove Lingering Blemishes
Even the best AI can miss a few spots. Let's clean them up manually.
- Create a New Blank Layer: Create a new, empty layer on top of your AI restoration layer. This is where you'll do your spot healing.
- Select the Spot Healing Brush: Choose the Spot Healing Brush Tool from the toolbar. In the options bar at the top, make sure "Sample All Layers" is checked.
- Zoom In and Clean Up: Zoom in on your image to at least 100%. Click on any remaining dust specks, tiny scratches, or blemishes. The tool will automatically sample the surrounding area to paint over the imperfection.
This final, meticulous pass is what separates a quick fix from a professional-grade restoration.
Saving and Sharing Your Restored Masterpiece
You've put in the hard work, and now you’re holding a beautifully restored piece of family history. The final, crucial part of the process is making sure that digital masterpiece is saved correctly and shared in a way that does it justice.
Here's how to properly archive and prepare your files:
- Save Your Master File: This is your digital negative. Go to
File > Save Asand choose the TIFF format. Make sure the "Layers" option is checked. This saves your full project with all the adjustment layers intact, so you can come back and make changes later. This is your archival copy. - Export for Sharing: The TIFF file is too large for email or social media. Go to
File > Export > Export As.... Choose the JPEG format. Set the Quality to 80-90%. This will create a much smaller file that still looks great online. - Organize Your Files: Create a dedicated folder for your photo restorations. Use a consistent naming system that gives you context at a glance. I recommend:
Year_Event-Description_Family-Name.tiff. For example:1965_Smith-Family-Reunion_Johnson.tiff(your master file)1965_Smith-Family-Reunion_Johnson.jpg(your sharing file)
Creating a Digital Photo Archive
With a system like this, your photos become instantly searchable. Next up: backups. You absolutely need to store your master TIFF files in at least two different places. An external hard drive is a great start, but pair it with a cloud service like Dropbox or Google Photos. For a deeper dive into long-term storage, check out our complete guide on https://aiphotohq.com/blog/2025/08/how-to-preserve-old-photos.
Don't let a single hard drive failure erase your family's history. Cloud backup is an inexpensive and automatic way to safeguard these irreplaceable digital heirlooms against accidental loss.
Now for the fun part—sharing these revived memories! You could create a digital slideshow for the next family gathering, design a high-quality photobook as a truly personal gift, or post the image on social media with the story behind it.
When you're posting online, you'll want the images to load quickly without looking pixelated. It’s worth looking into some basic image optimisation techniques to make sure your photos look their best on any device.
Sharing these moments does more than just bring joy to your family; it can also highlight a valuable skill. Believe it or not, photo restoration is a thriving business. Top professionals in this field can generate annual revenues between $50,000 and $200,000, which just goes to show how much people value their history. By sharing your work, you’re not just preserving a memory—you’re continuing a story that began decades ago.
Have Questions About Enhancing Old Photos?
Even with a solid plan, you're bound to run into a few questions once you start digging into your old photo collection. Let's walk through some of the most common ones that pop up.
Can I Really Fix Extremely Damaged Photos?
Yes, but it's crucial to have realistic expectations. Today's AI tools are remarkably good at piecing together photos with small to moderate damage. Got a picture with a web of fine cracks or a small tear through a tree in the background? The AI can often rebuild that area almost perfectly by looking at the pixels around it.
But what about a photo with a huge chunk missing—say, a corner was completely torn off, taking part of someone's face with it? In that case, the AI is essentially making an educated guess. It creates a plausible reconstruction, but it's not truly restoring what was lost. For that level of severe damage, you're still better off finding a professional human restorer.
Key Takeaway: AI is a wizard at fixing widespread issues like scratches and fading. For large, missing sections, it’s not restoring the original—it’s generating a brand new piece of the image to fill the gap.
What’s the Best Free Tool for Enhancing Old Photos?
There isn’t one single "best" free tool, but you can build a fantastic, no-cost workflow by combining a couple of great options. Many of the dedicated AI restoration websites give you a few free enhancements to start. This is the perfect way to test them out and handle the heavy lifting like scratch removal and colorization.
Once you’ve done that initial AI pass, you can jump into a powerful free editor like GIMP for the manual touch-ups. Think of GIMP as a free, open-source alternative to Photoshop. It has everything you need—like the spot healing brush and color balance controls—to add those critical finishing touches without spending a dime.
Is AI Colorization Historically Accurate?
Not always, and this is a really important thing to understand. The AI algorithms are trained on massive datasets of modern color photos, so they make very smart, logical guesses. They've learned that skies are blue and grass is green.
What the AI doesn't know is the exact shade of your grandmother’s favorite dress from 1952 or the specific paint color of that vintage car. The results are often stunning and believable, but you should see them as an artistic interpretation, not a perfect historical document. If a color feels just a bit off, you can always open the image in an editor and adjust the hues yourself to get a more authentic feel.
Ready to bring your old memories back to life with stunning clarity? AI Photo HQ offers professional-grade photo restoration powered by cutting-edge AI. Fix scratches, colorize black and white photos, and sharpen faded details in seconds. Start your free trial today at https://aiphotohq.com.

