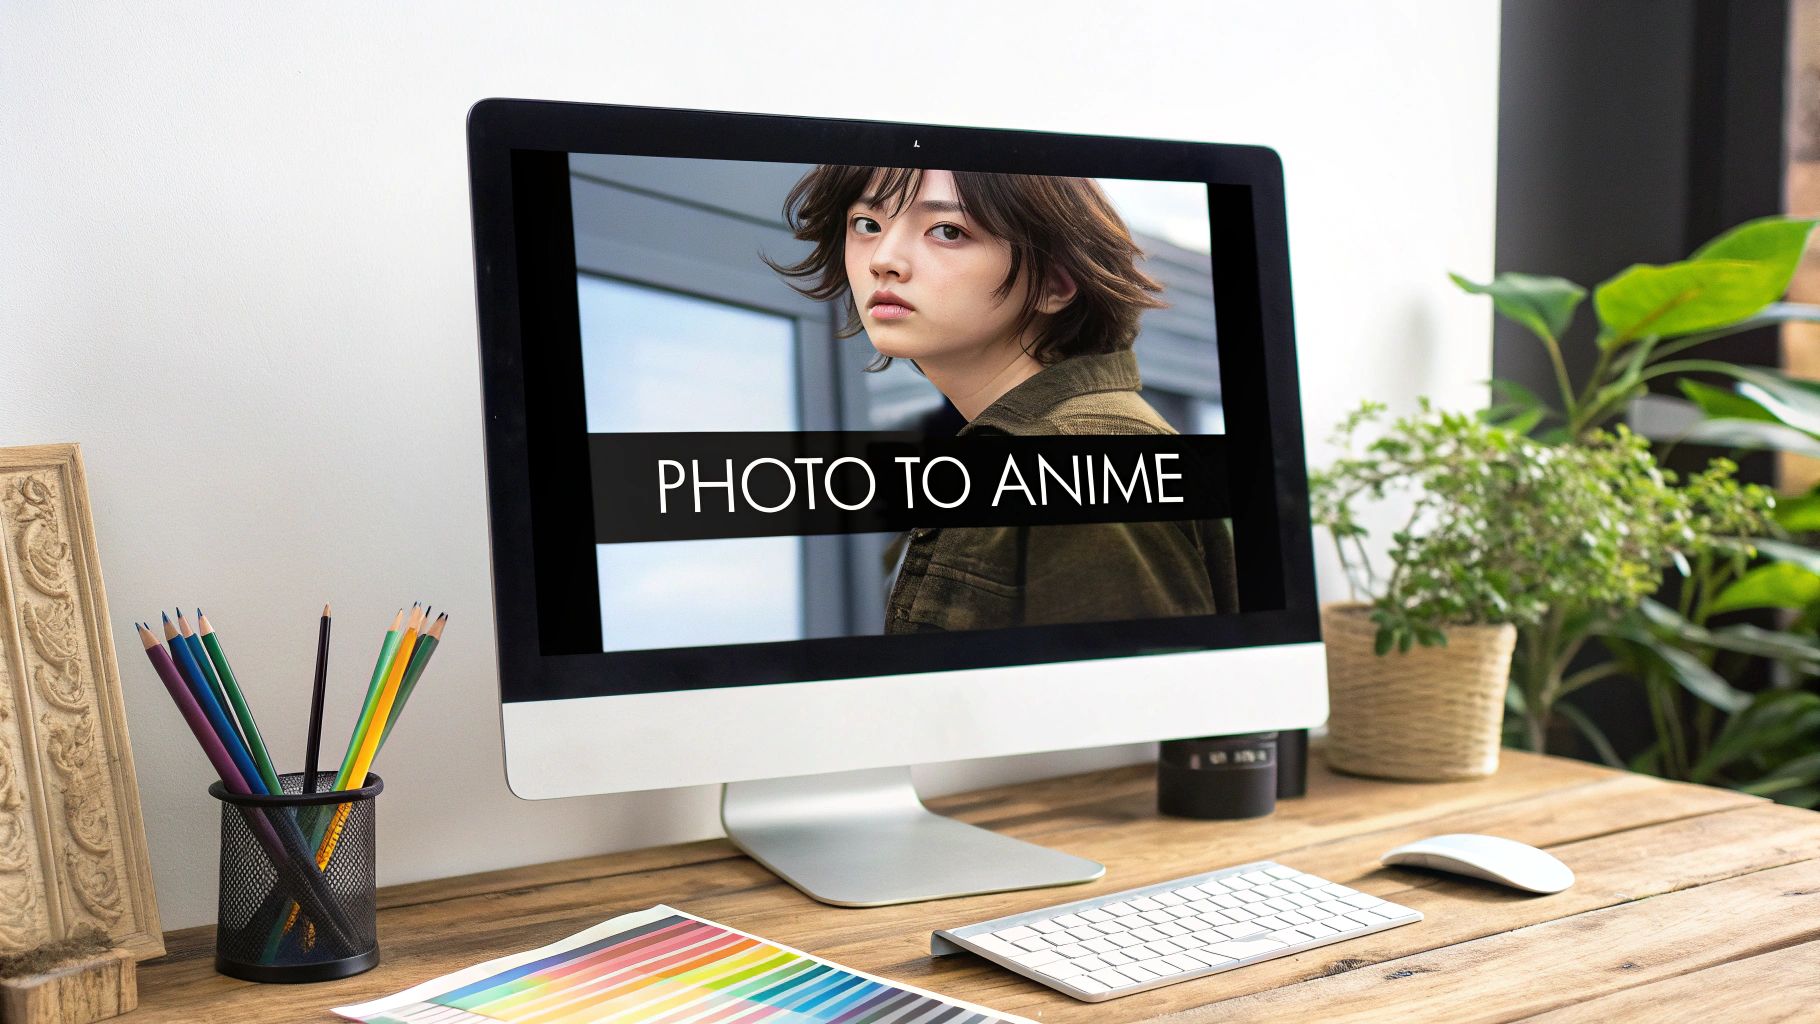
Ever wanted to give your photos a unique, artistic spin? Thanks to modern AI, you can make a photo into anime with just a few clicks—no drawing skills needed. It's as simple as uploading a picture, picking an anime style you love, and letting the AI work its magic.
How to Turn a Photo Into Anime Instantly
Transforming a personal photo into a piece of anime art is a ridiculously fun way to get creative. It's a great way to create standout social media profile pictures, custom phone wallpapers, or even a one-of-a-kind gift for a friend. The best part? The whole process is surprisingly straightforward.
This trend has absolutely exploded lately. AI-generated anime avatars are everywhere on platforms like Instagram and TikTok, becoming a kind of digital identity for many. This really took off with the rise of simple web tools that give you an instant transformation without downloading any software or even signing up.
Popular Anime Style Conversions
Different AI tools come loaded with a variety of art styles, and each one creates a totally distinct look. Knowing what's available helps you nail the perfect aesthetic for your photo.
For instance, just look at how one AI can take a simple portrait and remix it into several different styles.
The image above really shows off the AI's versatility. You can see the same source photo reimagined into multiple anime aesthetics, making it obvious how quickly you can jump from a realistic image to a stylized drawing.
To help you get a feel for the options, here's a quick look at some of the most common styles and what they're good for.
Popular Anime Style Conversions at a Glance
This table breaks down some popular anime styles you can apply to your photos and the typical look they create. It’s a handy reference for picking the right vibe before you start.
| Anime Style | Key Characteristics | Best For |
|---|---|---|
| Shonen | Bold lines, dynamic action poses, vibrant colors | Action shots or energetic portraits |
| Shojo | Soft features, large expressive eyes, pastel color palettes | Romantic or dreamy-looking portraits |
| Chibi | Cute, oversized heads, simplified and playful look | Fun, humorous avatars and social media posts |
| Ghibli-esque | Painterly backgrounds, nostalgic and whimsical feel | Scenic photos or creating a storybook vibe |
As you can see, the style you choose completely changes the final mood of the image. Experimenting is half the fun!
Getting started is a breeze, and if you're ready to dive in, you can find a complete walkthrough in our guide to make your photo into an anime masterpiece.
Choosing and Preparing the Perfect Photo
The secret to getting a jaw-dropping anime conversion? It all starts with the photo you feed the AI. A clean, clear blueprint will always produce a better result. A well-lit portrait with a simple background almost always beats a busy, dimly lit shot when you want to make a photo into anime.

This side-by-side shot says it all. The AI has a much easier time interpreting the distinct features and lighting in a good source photo, which leads directly to a cleaner and more faithful anime transformation.
Elements of a Great Source Photo
Before you even think about uploading, take a second to consider what the AI needs to "see." We're not aiming for a Pulitzer-winning photograph here, just clear data for the AI to work with. A high-resolution image is a great starting point, but other factors are just as crucial for getting a truly fantastic result.
A portrait where your face is front and center, well-lit, and unobstructed is ideal. This lets the AI lock onto your expression and features. A cluttered background can confuse the algorithm, causing it to merge you with distracting elements. Your goal is to make the subject the undeniable star of the show.
Key Takeaway: The best photos for this kind of AI work share three traits: a sharp focus on the subject, good and even lighting, and a simple, uncluttered background. Nailing these three things will dramatically improve your final image.
Quick Edits for Better Results: A Practical Tutorial
You don't need to be a Photoshop pro to prep your image. The editing tools built into your phone are more than enough. Here’s a quick step-by-step guide to get your photo AI-ready:
- Step 1: Crop for Focus. Open your photo in your phone's gallery app. Tap "Edit," then select the "Crop" tool. Drag the corners to cut out all the background noise and put your subject front and center. For a portrait, crop it so the head and shoulders fill most of the frame.
- Step 2: Boost Brightness. In the same "Edit" menu, find the "Brightness" or "Exposure" slider. Is the photo a little dark? A slight bump in brightness (e.g., +10) helps the AI pick out shadows and highlights more accurately.
- Step 3: Adjust Contrast. Find the "Contrast" slider. A little extra contrast can make the edges of your subject pop. This is a huge help for the AI when it’s trying to generate clean line art. A small increase (e.g., +5 or +10) is often enough.
- Step 4: Save Your Edited Photo. Hit "Save" and you're ready to upload!
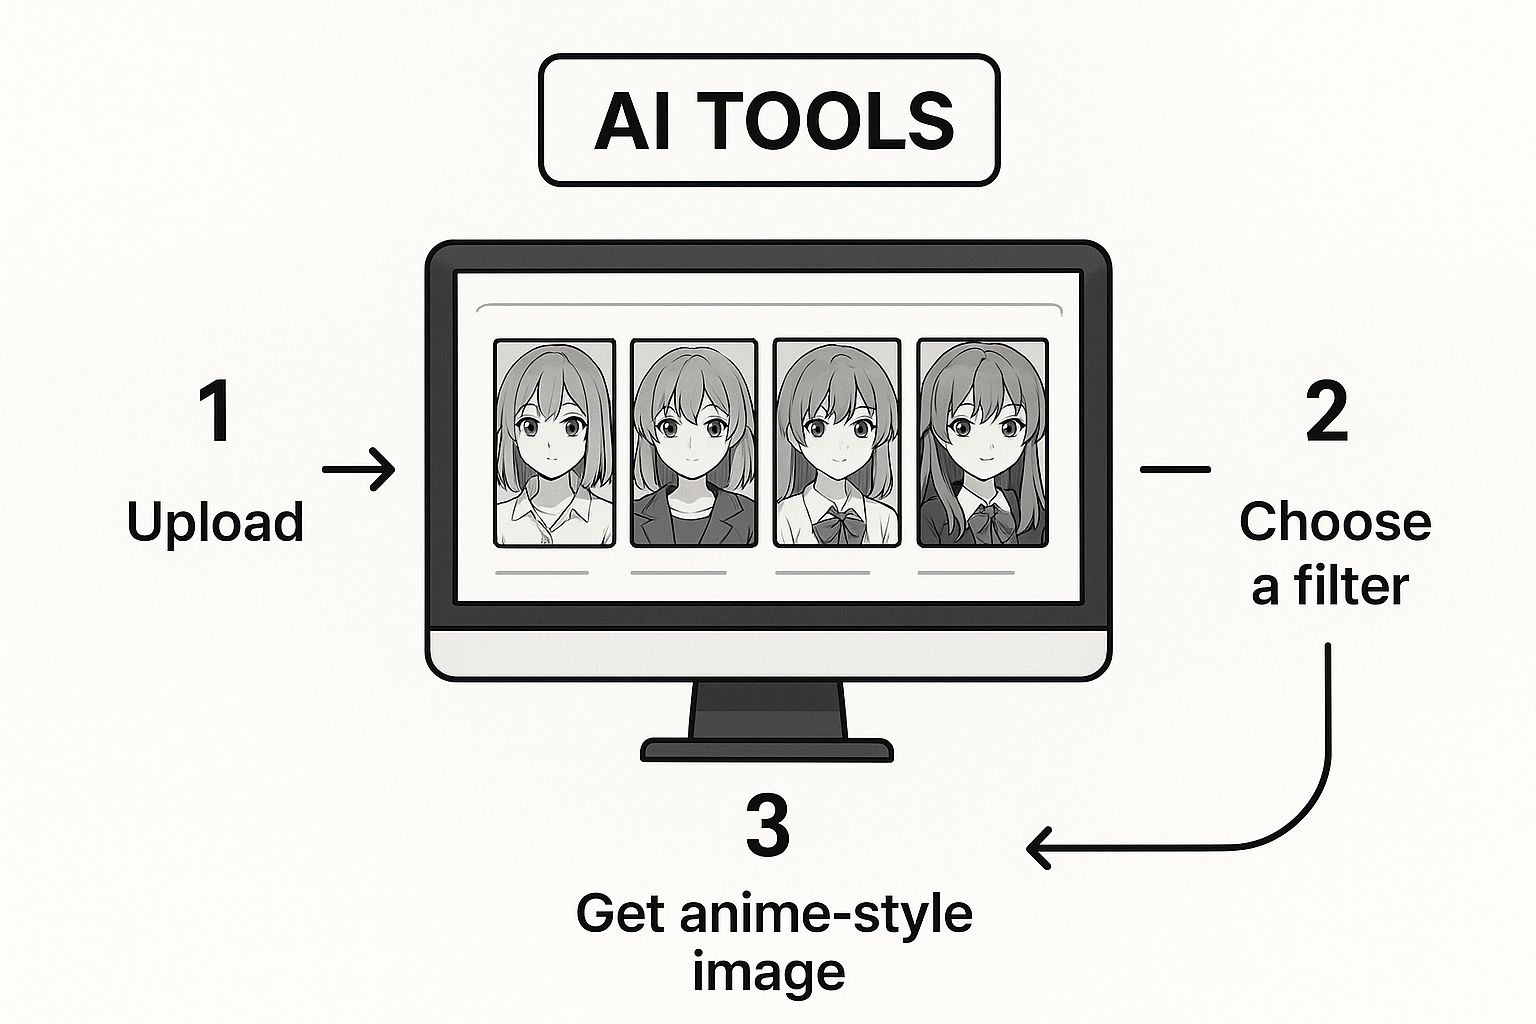
Diving Into the AI Anime Generator: A Step-by-Step Walkthrough
Alright, you've got your photo prepped and ready to go. Now for the exciting part—actually turning it into anime. I'll walk you through the entire process, showing you what to expect when using a tool like AI Photo HQ to make photo into anime.
Step 1: Upload Your Image. Go to the AI anime generator's website. You’ll see a large "Upload Image" button or a drag-and-drop area. Select the prepared photo from your device.
Step 2: Choose Your Anime Aesthetic. Once uploaded, you'll be presented with a gallery of different style presets. Think of it as a menu of artistic vibes. Are you chasing that classic 90s cel-shaded look, or is a modern, slick webtoon style more your speed? Click on the style that best matches your vision.
Seeing the options laid out like this is a huge help. You can get a feel for what works best with your photo before committing to a generation.
Step 3: Generate and Review. After picking a style, click the "Generate" or "Convert" button. The AI will process your request and show you the first version. For many, this initial result is impressive enough. But if you want to refine it, move on to the next step.
Fine-Tuning Your AI Anime Masterpiece
This is where you get to put your own creative stamp on the image. Most AI anime tools give you a handful of simple sliders that can have a massive impact on the final piece.
Pro Tip: I always recommend starting with the default settings to see what the AI cooks up first. Then, adjust one slider at a time. It’s the best way to learn what each parameter does without getting lost in the options.
Here's a practical guide to the most common settings:
- Style Strength: This slider controls the intensity. How to use it: Drag it to a low setting (e.g., 25%) to keep more photographic detail. Drag it to a high setting (e.g., 75% or more) for a very stylized, illustrated look.
- Creativity Level: This tells the AI how much to experiment. How to use it: A lower setting sticks closely to your photo's composition. Pushing this higher can lead to more imaginative—and sometimes wonderfully unexpected—results. Try a small increase first to see how it changes your image.
Some advanced generators also let you use text prompts. For a deep dive into that, our Stable Diffusion prompt guide is the perfect resource.
And if you're looking to explore other AI tools and applications beyond just photo editing, the AI Tools Blog is a great place to find more insights. Once you’re happy with your creation, all that's left is to hit that export button.
Mastering Different Anime Art Styles
Getting past the default presets is where the real fun begins. This is where you direct your creative vision. The trick is learning how to guide the AI to not just make a photo into anime, but to nail a specific mood. Think about the difference between the soft, nostalgic feel of a Studio Ghibli film and the sharp intensity of a modern shonen series.
You need to think like an art director. Instead of just clicking a generic "anime" button, use descriptive words in the text prompt (if available). Is it a soft, painterly vibe? Use words like "watercolor," "dreamy," and "pastel colors." If you're going for a bold, action-oriented image, try terms like "dynamic lines," "high contrast," and "vibrant colors."
This level of control is a relatively new thing, thanks to sophisticated models like NijiGAN. The viral "Ghiblified" trend has created a massive demand for tools that can replicate these nuanced looks. If you're curious about the tech, there are great discussions on advances in semi-supervised learning that dive into the nitty-gritty.
Creating a Specific Look: A Practical Example
Let's make this practical. Say you have a photo of a friend in a sunlit garden. To get that soft, Ghibli-esque vibe, your step-by-step process would look something like this:
- Upload the Photo: Start with your well-lit garden photo.
- Select a Base Style: Choose a preset that looks painterly or soft, if one is available.
- Enter a Style Prompt: In the text prompt field, type:
Anime girl in a garden, soft painterly style, nostalgic afternoon light, Studio Ghibli aesthetic, Hayao Miyazaki art style. - Use a Negative Prompt: To steer the AI, find the "negative prompt" field and add terms for what to avoid:
sharp lines, modern, CGI, 3D, photorealistic. - Generate and Refine: Click generate. If the result is too strong, lower the "Style Strength" slider slightly and try again.
Pro Tip: Specificity is your best friend. Don't just ask for an "anime style." Tell the AI you want a "90s cel-shaded anime style" or a "modern webtoon illustration." The more details you feed it, the closer the result will be to what you're picturing in your head.
This process of guiding the AI is called style transfer. For anyone who wants to go deeper, you can read our detailed guide on AI image style transfer to really understand the techniques at play.
Fine-Tuning and Exporting Your Creation

The AI has done the heavy lifting, but the real magic often happens in the final touches. A few simple tweaks can take a good result and make it absolutely fantastic.
Most AI anime generators give you some basic adjustment sliders. Here’s a quick tutorial for polishing your image:
- Adjust Saturation: Find the "Saturation" slider. A slight boost (e.g., to +10%) will make the colors pop, which is a signature of many anime styles.
- Adjust Contrast: Next, find the "Contrast" slider. A small increase will help define the line art and make your subject stand out.
- Review and Save: Look at the before/after to ensure you haven't pushed the edits too far.
Key Takeaway: You don't need to go crazy with adjustments. Small, subtle changes to saturation and contrast are often all it takes to make an AI conversion look much more polished and vibrant.
Preserving Quality and Detail
The best tools to make photo into anime are the ones that respect your original photo's composition. Modern converters can achieve a 94% style transfer accuracy rate while managing to keep about 98% of the original photo’s composition.
This means you can get high-resolution, print-ready art without losing the soul of the original picture. If you're curious about the tech behind this, you can learn more about how AI maintains image integrity on komiko.app.
Choosing the Right Export Format
Once you're happy, it's time to save. You'll usually see two main options: PNG and JPG.
- Choose PNG for Quality: PNG files are "lossless," meaning they don't lose quality when saved. Use Case: Perfect for a high-quality master file, an avatar you'll use everywhere, or if you need a transparent background.
- Choose JPG for Sharing: JPGs are smaller files, ideal for social media or email. Use Case: Best for when file size matters more than perfect quality, like posting on Instagram or sending to a friend.
My final piece of advice? Always export in the highest resolution possible as a PNG. You can always create a smaller JPG from it later if you need to.
Common Questions About Creating Anime Photos
When you first dive into turning your photos into anime, it's totally normal to have a few questions pop up. Let's walk through some of the most common ones with clear, practical answers.
Can I Turn a Group Photo Into Anime?
Yes, absolutely! Most modern AI generators can handle photos with multiple people.
How to get the best result:
- Choose a photo where everyone’s face is clear, well-lit, and relatively close to the camera.
- Avoid shots where some people are very close and others are far in the background, as the AI might apply the style inconsistently.
- Upload the photo and select your desired style. The AI should detect and convert each person.
My Experience: I've found that group shots work best when everyone is on a similar focal plane. If you have one friend right up against the lens and another way in the back, the AI sometimes struggles to apply the style consistently across the board.
What Makes a Photo Ideal for Anime Conversion?
You want to set the AI up for success. High-resolution portraits with a single, clear subject almost always deliver the most jaw-dropping results. The best ingredients are good lighting and a simple, uncluttered background.
You'll want to steer clear of photos that are:
- Blurry or out of focus: The AI needs crisp details to do its magic.
- Too dark or poorly lit: Heavy shadows can swallow up important features the AI needs to see.
- Full of chaotic backgrounds: A messy room can confuse the AI, leading to a muddled final picture.
Can I Blend Different Anime Styles?
Yes, with a bit of post-editing work. Here’s a step-by-step tutorial for a creative blend:
- Generate Two Versions: Run your photo through the AI generator twice. For the first, pick a style like "Shonen." For the second, pick something different like "Ghibli-esque." Save both images.
- Open in an Editor: Open a free editor like Canva or Photopea.
- Layer the Images: Place the "Ghibli-esque" image on a layer on top of the "Shonen" image.
- Erase to Reveal: Select the eraser tool with a soft edge. Gently erase parts of the top layer (e.g., erase the character but leave the Ghibli background) to reveal the Shonen-style character underneath. This creates a unique composition.
Will I Lose Detail From My Original Photo?
Not as much as you'd think. The best converters are designed to hang on to the core details of your shot. The AI is smart enough to identify key features—like your facial structure, posture, and even that favorite necklace you're wearing—and reinterpret them in the new anime style. You're trading photographic realism for artistic expression, but the soul of the original picture stays beautifully intact.
Ready to stop wondering and start creating? With AI Photo HQ, you can transform your photos into stunning anime art in just a few seconds. Get started with AI Photo HQ today!

