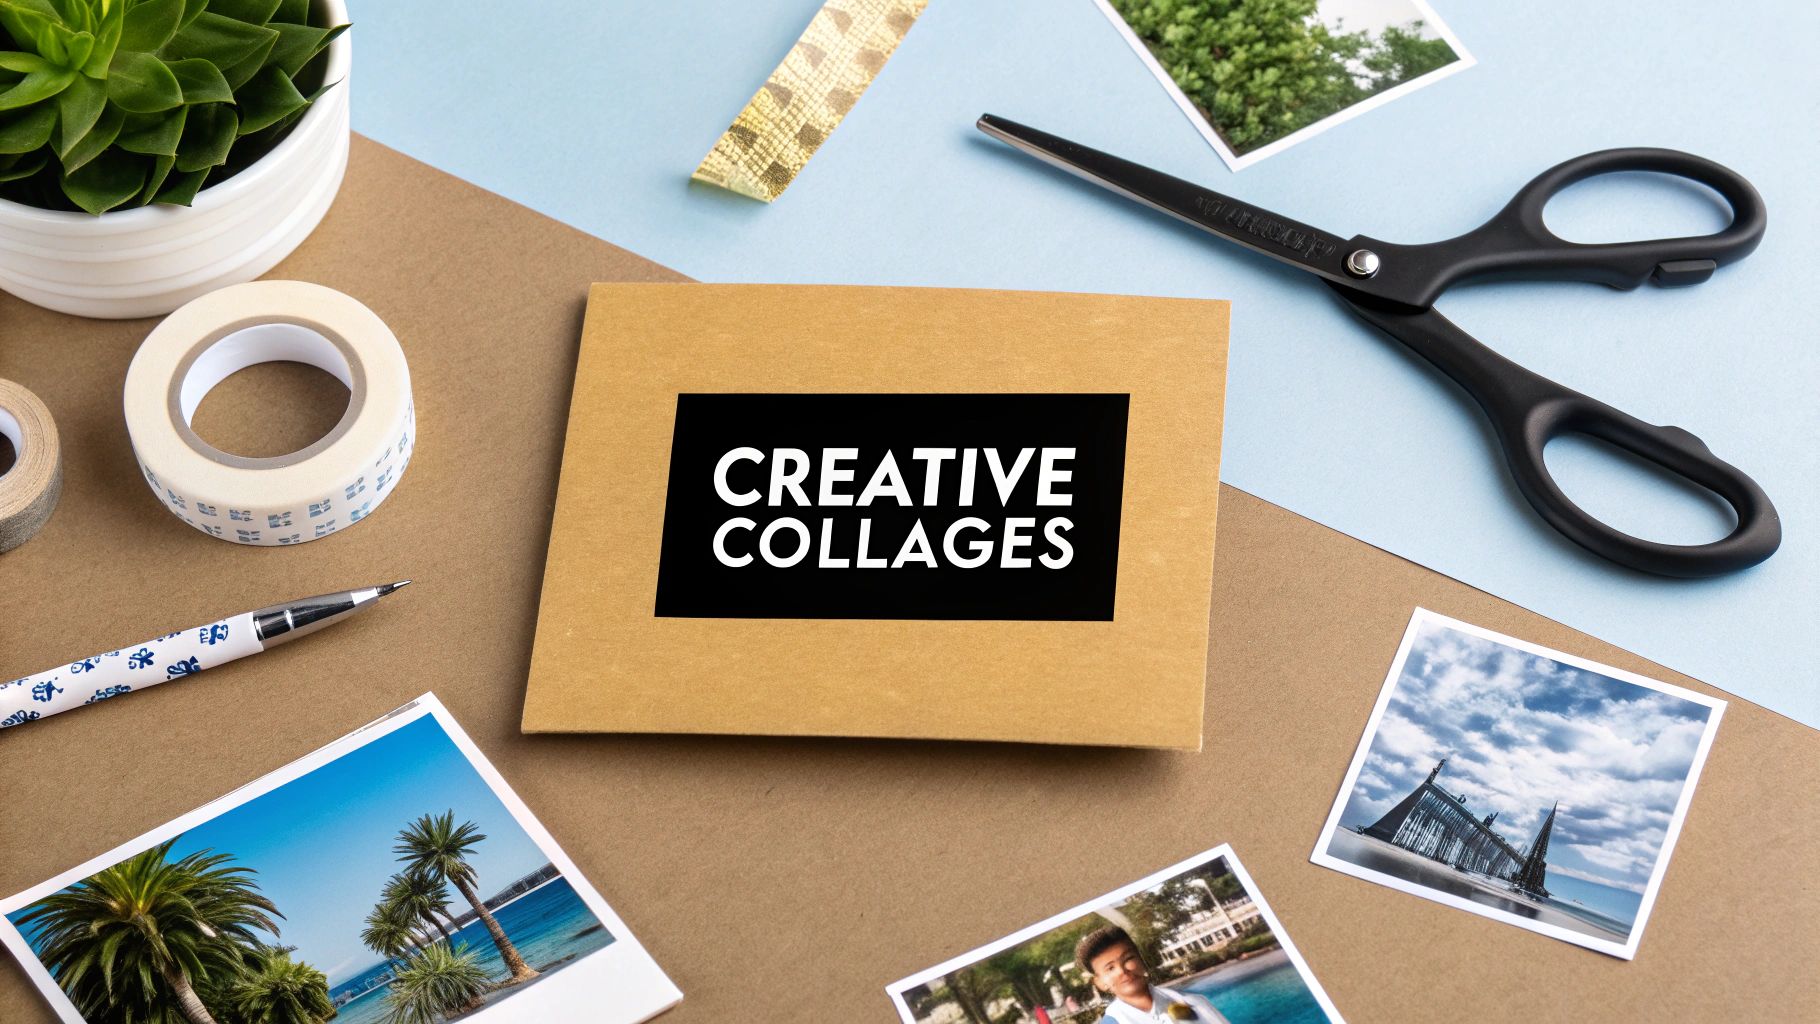
Ready to move beyond basic photo arrangements? This guide explores seven diverse and inspiring photo collage examples, but it offers more than just a gallery of ideas. We dive deep into the practical "how-to" for each style, providing step-by-step instructions, strategic tips, and the specific tools you need to replicate these stunning designs yourself. This is a hands-on resource designed to give you a replicable blueprint for creating professional-level visual content.
From the clean structure of a memory grid to the intricate design of a layered masterpiece, you will gain actionable techniques to transform your photos into compelling visual stories. We'll break down the strategy behind each example, showing you not just what to create, but why it works. Whether you're a marketer building a brand campaign, a blogger enhancing your content, or a hobbyist preserving memories, these methods are for you.
To ensure your final creations look their best, especially when working with digital tools, it helps to have a solid grasp of file types. For instance, correctly understanding JPEG vs. PNG formats is crucial for managing image quality and using transparency in layered designs. Let’s get started and explore the practical steps behind each creative collage.
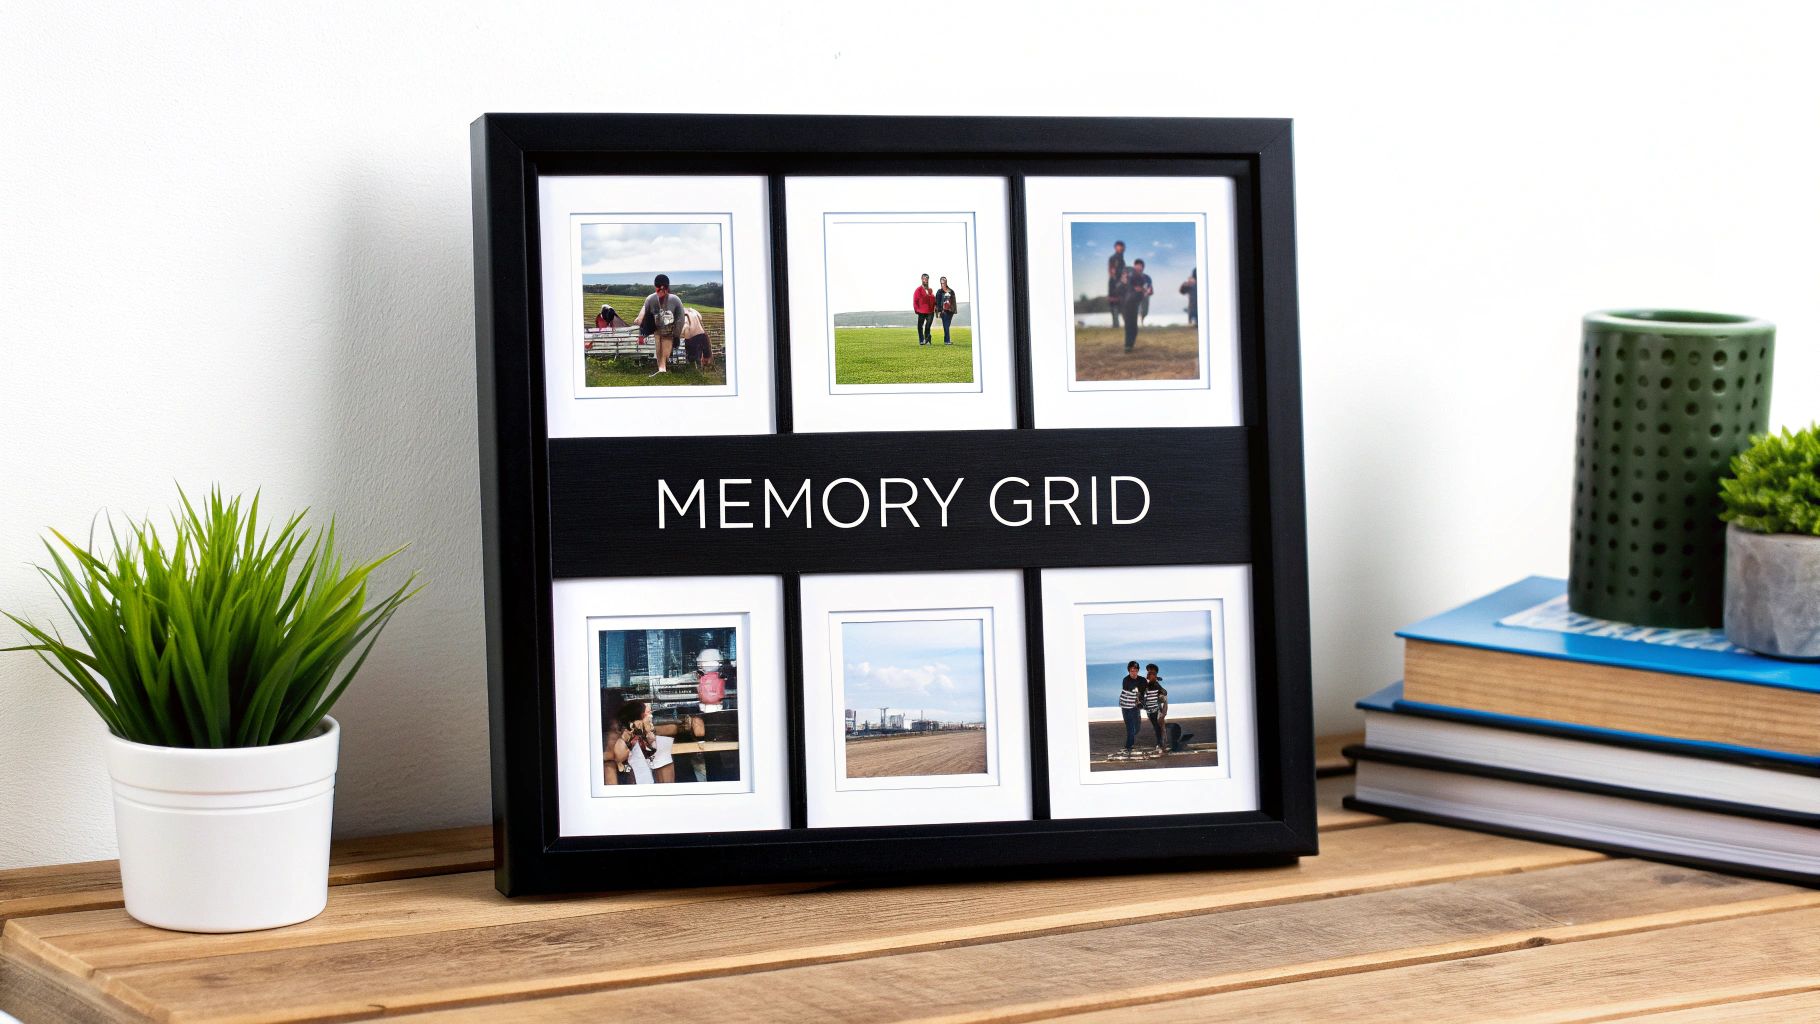
1. The Memory Grid Collage: A Step-by-Step Tutorial
The Memory Grid is a foundational and highly effective approach to collage creation. Its power lies in its simplicity and structure, arranging photos in a uniform grid with consistent spacing. This clean, organized layout creates a sense of order and balance, making it one of the most accessible yet professional-looking photo collage examples available. It's ideal for telling a linear story, like a vacation day-by-day, or for presenting a collection of images united by a common theme, such as family portraits or product shots.
Strategic Breakdown
The Memory Grid’s main advantage is its visual rhythm. The repeating shapes and consistent gutters (the space between photos) guide the viewer's eye smoothly from one image to the next without overwhelming them. This structure allows each individual photo to shine while contributing to a cohesive, unified whole. It’s a design that feels intentional and curated, elevating a simple collection of photos into a deliberate piece of visual storytelling.
Key Insight: The grid's uniformity transforms a potentially chaotic group of photos into an elegant, easy-to-digest visual narrative. The structure itself becomes part of the design, providing a framework that enhances the content.
How to Create a Memory Grid Collage
Creating a classic grid collage is a straightforward process. Here’s a step-by-step tutorial using a common design tool like Canva or Adobe Express:
- Select Your Canvas & Grid: Start a new project and choose a pre-made grid template. A simple 2x2, 3x3, or 2x3 grid is a great starting point.
- Gather & Curate Photos: Choose high-quality images with a consistent color palette or theme. For the best result, ensure all photos have a similar orientation (all horizontal or all vertical) or are cropped to fit the square or rectangular grid cells.
- Arrange with Purpose: Drag and drop your photos into the grid cells. Place your most compelling image in a position that naturally draws the eye, like the top-left or center. Arrange other photos to create a visual flow, perhaps chronologically or by color.
- Adjust Spacing & Borders: Most tools allow you to adjust the "gutter" or spacing between images. A thin, white border provides a clean, classic look that helps separate and define each photo. Experiment with the thickness to see what best suits your images.
- Final Review & Export: Check for visual balance. Do the colors clash? Is the arrangement logical? Once satisfied, export your collage in a high-resolution format.
2. Mosaic Photo Collages
The Mosaic Photo Collage is an advanced and visually stunning technique where hundreds or even thousands of small photos are arranged to form a single, larger master image. When viewed from a distance, the collective photos create a distinct picture, but up close, each tiny tile photo retains its individual identity. This sophisticated approach turns a vast photo library into a single, compelling piece of art, making it one of the most intricate and meaningful photo collage examples. It's perfect for creating powerful commemorative pieces, like a wedding portrait made from guest photos or a corporate logo built from employee headshots.
Strategic Breakdown
The power of a Mosaic collage lies in its dual-view experience, a "forest for the trees" effect. From afar, it delivers the impact of one primary image, but upon closer inspection, it reveals a rich tapestry of individual moments and memories. This layering of detail creates an interactive and emotional connection, as viewers are drawn in to explore the smaller photos that make up the whole. This technique is unmatched for projects that need to represent a collective entity, community, or a long span of time in one cohesive visual.
Key Insight: The mosaic's magic is in its complexity and personal depth. It transforms a large image into a discoverable gallery of memories, making the final piece deeply personal and engaging.
How to Create a Mosaic Photo Collage
Creating a mosaic requires specialized software to analyze and place images, but the process is manageable with dedicated online tools or plugins. Here’s a step-by-step tutorial for using a common mosaic generator:
- Select Your Master Image: Choose a high-contrast, simple, and recognizable main photo. Images with clear subjects and uncluttered backgrounds work best, as the details will be formed by other photos.
- Gather & Curate Your Tile Photos: This is the most crucial step. Collect hundreds (or thousands) of smaller "tile" images. For the best result, ensure your library has a wide variety of colors, tones, and subjects. The software needs a diverse palette to accurately recreate the master image.
- Use a Mosaic Generator: Upload your master image and your library of tile photos to a dedicated mosaic creation tool (like Mosaically or a Photoshop plugin). The software will analyze the color and tone of each tile and place it in the corresponding area of the master image.
- Adjust Settings & Render: Fine-tune the settings. You can often control the size of the tile photos, how often they repeat, and the blending level with the master image. A lower blend will make the tile photos sharper, while a higher blend will make the master image clearer.
- Final Review & Export: Generate a preview to check the clarity of both the overall image and the individual tiles. Once you are satisfied with the balance, export the final collage in the highest possible resolution, especially for printing.
3. The Timeline Story Collage
The Timeline Story is a powerful narrative-driven format that arranges photos chronologically to tell a complete story or document a progression over time. Unlike a static grid, this approach uses visual flow and sequential placement to guide viewers through experiences like a baby's first year, a business's growth, or a home renovation. This is one of the most effective photo collage examples for demonstrating change and building an emotional connection through storytelling.
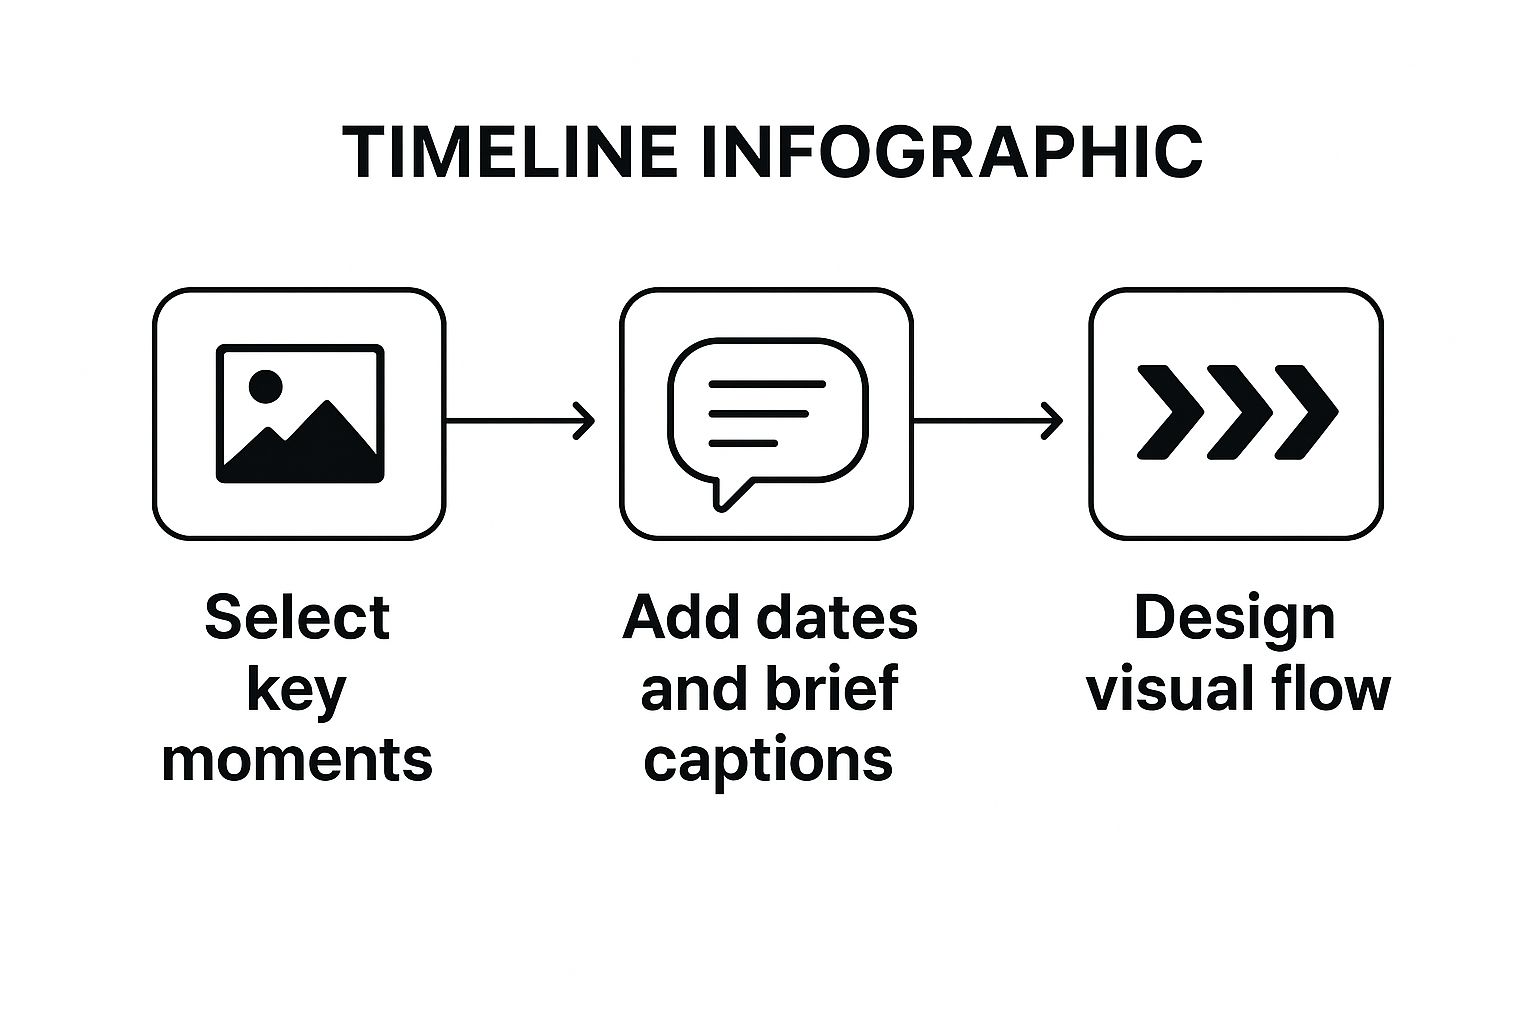
This infographic outlines the core workflow for building a narrative timeline, breaking it down into three simple stages. Following this progression ensures that your collage not only looks organized but also successfully communicates a story from start to finish.
Strategic Breakdown
The core strength of the timeline collage is its ability to create a clear narrative arc. By placing images in a specific sequence, often reinforced with dates, captions, or connecting lines, you transform a collection of photos into a journey. This format is exceptionally good at showing cause and effect, growth, or the passage of time, making the final result feel more significant than the sum of its parts. Learn more about how to structure these narratives effectively with visual storytelling techniques.
Key Insight: The chronological structure isn't just a design choice; it's a storytelling tool. It gives context to each photo, turning a simple gallery into a compelling and easy-to-follow history.
How to Create a Timeline Story Collage
Building a timeline collage requires more focus on narrative flow than other styles. Here’s how to create one using a flexible design tool:
- Establish Your Narrative & Key Milestones: Before touching any photos, define the story you want to tell. List the key moments or milestones that must be included, like "January: The Foundation," "March: Framing Goes Up," or "June: Final Touches."
- Select Your Canvas & Layout: Choose a long horizontal or vertical canvas to give your timeline room to breathe. Unlike a grid, you'll be building this layout manually by placing images along a central guiding line or path.
- Place Photos and Add Context: Position your curated photos in chronological order. Leave space between them to add crucial context like dates, short captions, or milestone titles. This text is what turns a photo series into a true timeline.
- Create Visual Flow: Use graphic elements like lines, arrows, or even dotted paths to connect the photos and guide the viewer’s eye from one point in time to the next. This visual connector is essential for reinforcing the sequence.
- Ensure Consistency and Export: Check that your font styles, photo sizes, and spacing are consistent to maintain a professional look. Review the flow one last time before exporting your final, high-resolution story.
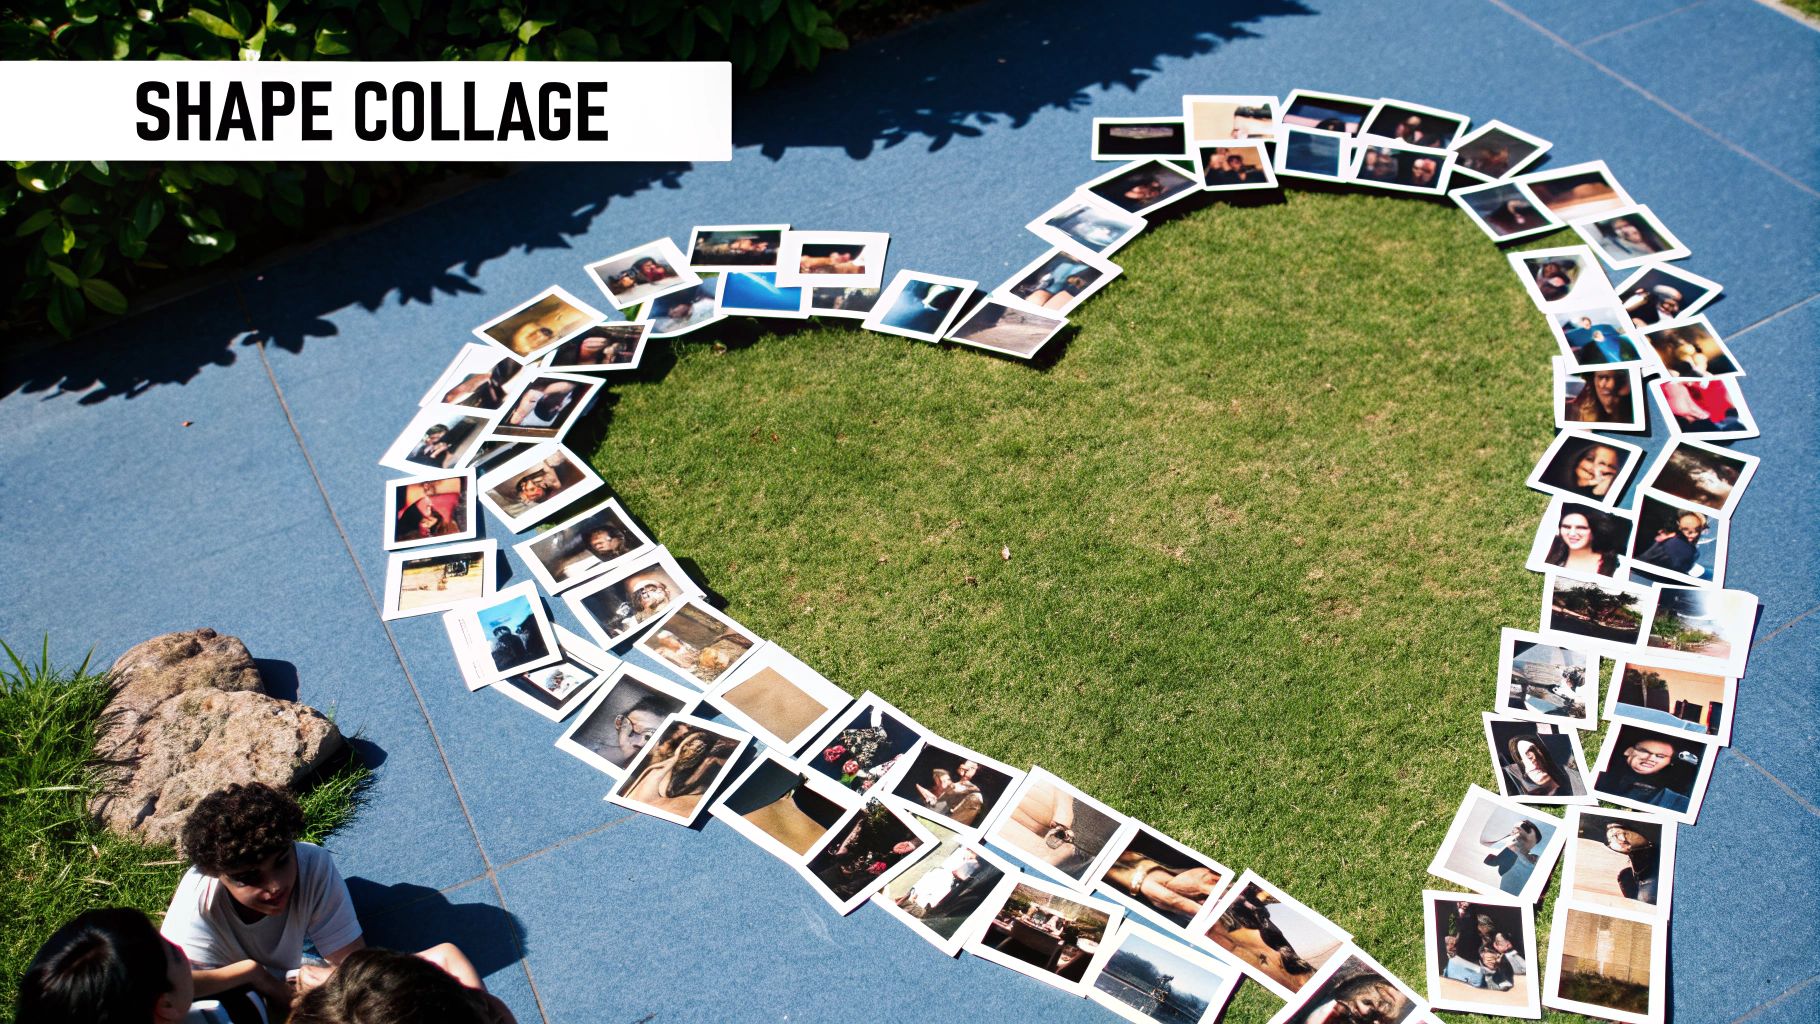
4. Themed Shape Collages
Themed Shape Collages move beyond simple rectangles and squares to arrange photos into a meaningful symbol or silhouette. This technique uses the overall composition to tell a story, where the shape itself adds a layer of context and emotional resonance. The individual photos provide the detail, while the collective arrangement creates a powerful, instantly recognizable icon. This makes it one of the most creative photo collage examples for events and branding.
Strategic Breakdown
The power of a shape collage lies in its dual-read capability. From a distance, the viewer sees the symbolic shape, like a heart, a star, or a number. Up close, they can explore the individual moments captured in each photo. This creates an engaging experience that invites deeper inspection. It’s perfect for milestone events like a 50th birthday (using the number "50"), a wedding (a heart shape), or even a corporate logo formed from employee photos for a team-building campaign.
Key Insight: The shape is not just a container; it's part of the message. This method transforms a collection of photos into a symbolic statement, making the final piece more memorable and emotionally impactful.
How to Create a Themed Shape Collage
Building a shape collage is easier than it looks, especially with modern design tools. Here’s a tutorial for making one in a platform like Canva or a dedicated collage maker:
- Choose a Meaningful Shape: Start by selecting a shape that is thematically linked to your photos. Many design tools offer pre-made shape frames (hearts, stars, letters, numbers). For a custom shape like a logo, you may need to use a more advanced tool’s masking or frame creation features.
- Gather and Prepare Images: Collect a large number of photos. Shape collages often require more images than grids to fill out the form without leaving awkward gaps. Vary the orientation and subject matter to add visual interest.
- Populate the Shape: Begin dragging your photos into the shape mask or frame. Place key images in prominent positions, like the center or along clear lines of the silhouette. Use smaller or less critical photos to fill in the complex curves and edges.
- Refine the Composition: Adjust the position and crop of each photo to ensure important details are visible. Check the overall silhouette to make sure the shape is clear and recognizable. Some tools allow you to adjust the spacing between photos; a slight gap can help define each image.
- Review and Finalize: Step back and view the collage from a distance to confirm the shape is legible. Then, look closely to ensure the individual photos are well-placed. Export the final design in high resolution for printing or sharing.
5. Layered Depth Collages
Moving beyond flat, two-dimensional layouts, the Layered Depth Collage is a sophisticated technique that creates a sense of three-dimensionality and visual hierarchy. This method involves overlapping photos at different scales, angles, and opacity levels, mimicking the way memories are often layered in our minds. A primary image may stand out, while secondary photos peek out from behind or fade into the background, providing texture and context. This is one of the more artistic photo collage examples, ideal for fashion lookbooks, travel journals, and brand storytelling where mood and emotion are paramount.
Strategic Breakdown
The core strength of a layered collage is its ability to direct the viewer's focus intentionally. Unlike a uniform grid where all images hold equal weight, this style establishes a clear focal point. By manipulating size, placement, and transparency, you guide the eye to the most important element first, then allow it to explore the supporting details. The use of shadows and careful positioning creates a tangible sense of depth, making the composition feel dynamic and alive. It transforms a simple collection of photos into an immersive visual experience.
Key Insight: Layering allows you to tell a more complex story within a single frame. The main subject takes center stage, while contextual images provide background, detail, and emotional resonance without creating clutter.
How to Create a Layered Depth Collage
Creating a layered collage requires a bit more finesse than a simple grid, but modern design tools make it very achievable. Here’s a step-by-step guide using a tool with layer support like Photoshop, Canva, or Procreate:
- Establish Your Background: Start by choosing a background. This could be a solid color, a subtle texture, or one of your photos set to a low opacity. This base layer sets the overall mood.
- Define the Focal Point: Select your most important photo. Place it prominently on the canvas. This will be your main subject, so ensure it is high-resolution and compelling.
- Build Supporting Layers: Begin adding secondary images. Place them on new layers behind your main photo. Experiment with rotating, resizing, and positioning them so they emerge from the edges of the focal point.
- Manipulate Transparency and Effects: Select individual background layers and reduce their opacity (e.g., to 50-70%) to make them feel more distant. Add subtle drop shadows to your foreground elements to create separation and enhance the 3D effect.
- Refine and Harmonize: Review the composition. Do the colors work together? Is the hierarchy clear? You might need to adjust the position or opacity of certain layers to achieve visual balance and ensure nothing looks cluttered. For more creative approaches, explore these additional ideas for photo collages.
6. Instagram-Style Square Grid Collages
This modern collage format is specifically optimized for social media, particularly Instagram, by arranging square-format photos into clean, minimalist grids. The style emphasizes visual consistency, using a unified aesthetic to create a cohesive and professional feed. This approach has become one of the most popular photo collage examples for brands and influencers aiming to build a strong visual identity that thrives on mobile-first platforms. It's perfect for fashion brands showcasing collections, food bloggers displaying recipes, or any creator looking to tell a broader story across multiple posts.
Strategic Breakdown
The power of the Instagram-style grid lies in its ability to transform an individual profile into a larger, interconnected canvas. By planning posts in rows of three, creators can form larger images, create checkerboard patterns, or establish a visual rhythm with alternating content types. This strategy encourages profile visits over single-post engagement, as viewers are drawn in to see how the individual pieces fit together to form the complete picture. The result is a highly curated and intentional brand aesthetic that feels premium and thoughtfully designed.
Key Insight: This collage style extends beyond a single image; it treats the entire social media profile grid as the collage. Consistency in filters, color palettes, and composition is paramount to its success.
How to Create an Instagram-Style Square Grid Collage
Planning and executing this type of collage requires foresight and the right tools. Here’s a step-by-step tutorial for creating a seamless Instagram grid:
- Define Your Aesthetic: Before selecting photos, decide on a consistent theme. Will you use a warm, moody, or vibrant color palette? Choose 1-2 photo editing presets (filters) and stick to them for all images to ensure visual harmony.
- Plan Your Grid Layout: Use a grid planning app like Planoly or Later. These tools allow you to upload your images and arrange them visually before you post, so you can see how they will look together on your profile.
- Gather & Curate Content: Collect a batch of high-quality, square-cropped images. For those creating Instagram-style grid collages, understanding how to safely acquire images directly from the platform is key. You can find a practical guide on downloading photos from Instagram for inspiration or reposting.
- Balance Your Content: Arrange your photos to create visual interest. Mix close-up shots with wider scenes, and intersperse product photos with lifestyle images or even simple text graphics to avoid monotony. Think in rows of three to create mini-stories or patterns. If you need more inspiration, you can learn more about social media post ideas here.
- Post in Order: Once your grid is planned, post the images in the predetermined sequence. You must upload them in reverse order of how they appear on the planner (bottom-right first) to achieve the correct layout on your live profile.
7. Vintage Scrapbook Style Collages
The Vintage Scrapbook Style collage brings the heartfelt, tactile charm of traditional scrapbooking into the digital realm. This approach mimics handcrafted memory books by layering photos with digital embellishments like torn paper edges, vintage frames, handwritten fonts, and decorative stickers. The result is a warm, personal composition that feels intimate and nostalgic, making it one of the most emotionally resonant photo collage examples for telling a personal story. It is perfectly suited for documenting family history, celebrating milestones like weddings or new babies, or creating a touching memorial tribute.
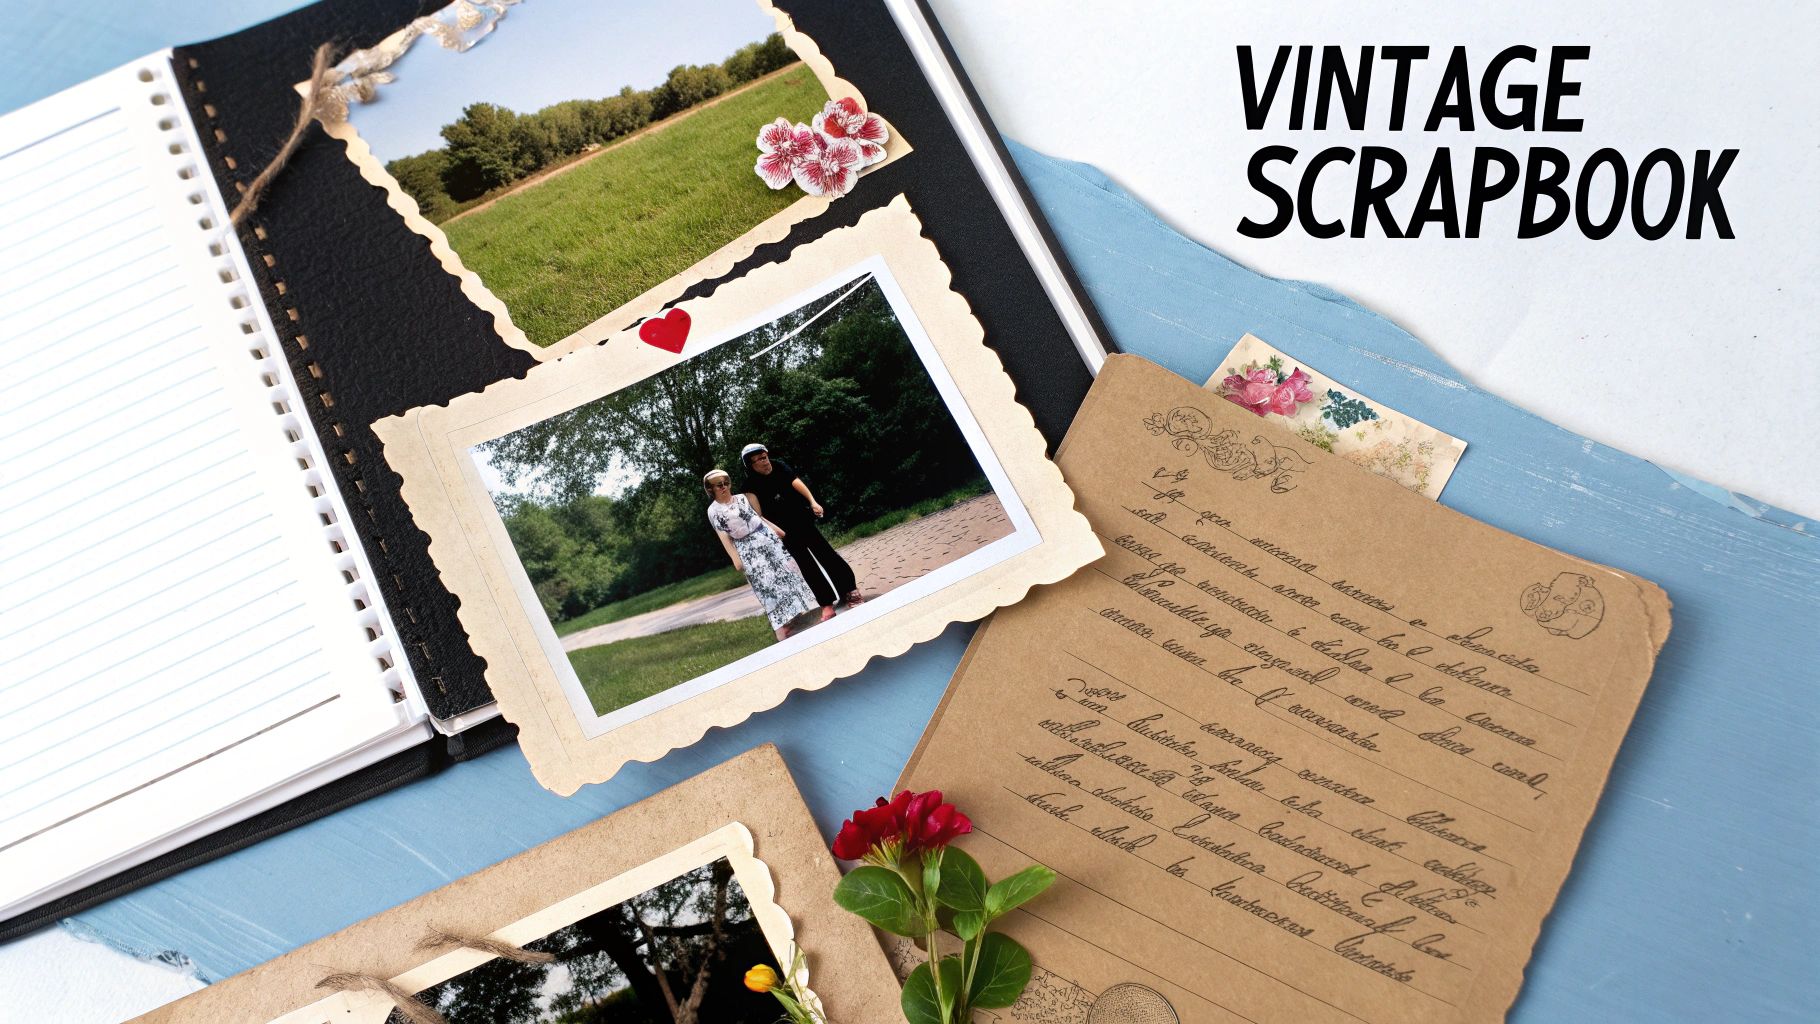
Strategic Breakdown
The strength of the scrapbook style lies in its ability to evoke emotion through curated imperfection. Unlike clean, grid-based designs, this collage embraces asymmetry, overlapping elements, and varied textures to create a sense of authenticity and warmth. The design intentionally looks assembled by hand, which adds a layer of personal meaning and care. This makes the collage feel less like a simple image arrangement and more like a cherished keepsake.
Key Insight: The deliberate use of nostalgic textures, aged effects, and handcrafted elements transforms a digital collage into an emotional artifact. The "imperfect" layout is key to its charm, making the composition feel genuine and heartfelt.
How to Create a Vintage Scrapbook Collage
Creating this nostalgic look is about layering different visual elements to build a rich, textured narrative. Here is a step-by-step guide using a versatile design platform.
- Choose a Textured Background: Start with a background that mimics scrapbook paper. Look for digital assets like aged parchment, kraft paper, or subtle floral patterns.
- Gather Photos & Ephemera: Collect your primary photos. Also, find digital "ephemera" like vintage postcard graphics, stamps, washi tape PNGs, and dried flower illustrations to use as decorative elements.
- Layer and Arrange: Place your main photos onto the canvas. Overlap them slightly and rotate them at different angles to avoid a rigid look. Place your decorative ephemera in the gaps, behind photo corners, or along the edges to build depth.
- Add Textural Details: Apply subtle effects to your photos. Use filters to give them a sepia or faded color tone. Add digital "torn edge" frames or soft drop shadows to make them look like physical prints taped to the page.
- Incorporate Handwritten Fonts: Add dates, names, or short anecdotes using a script or serif font that looks like handwriting. Place the text organically, as if you were writing in a real journal. Review the final piece for a balanced, yet lovingly cluttered, feel.
7 Photo Collage Styles Comparison
| Collage Type | Implementation Complexity 🔄 | Resource Requirements 📊 | Expected Outcomes ⭐ | Ideal Use Cases 💡 | Key Advantages ⚡ |
|---|---|---|---|---|---|
| Memory Grid Collages | Low - simple grid layout, easy customization | Moderate - photos of similar sizes | Consistent, balanced visual story ⭐ | Family portraits, portfolios, social media, wall art | Timeless design, scalable for many photos ⚡ |
| Mosaic Photo Collages | High - requires specialized software and color analysis | High - hundreds/thousands of photos + software | Stunning large-scale image with dual view ⭐ | Corporate logos, memorials, event tributes | Unique artistic impact, scalable output ⚡ |
| Timeline Story Collages | Medium - needs chronological arrangement and planning | Moderate - photos + captions/dates | Clear narrative flow, engaging storytelling⭐ | Milestones, business growth, educational projects | Effective progression communication ⚡ |
| Themed Shape Collages | High - arranging photos precisely within shapes | Moderate to high - shape templates, photo selection | Strong symbolic visual impact ⭐ | Weddings, branding, celebrations | Memorable, symbolic, highly customizable ⚡ |
| Layered Depth Collages | High - requires advanced design skills/software | Moderate - layered photos with effects | Sophisticated, rich textured visuals ⭐ | Fashion portfolios, reports, art catalogs | Professional depth, flexible photo emphasis ⚡ |
| Instagram-Style Square Grid Collages | Low - standardized square formats, mobile-friendly | Low - consistent photo format & filters | Cohesive, aesthetically curated feed ⭐ | Social media marketing, influencers, small businesses | Easy creation, high engagement potential ⚡ |
| Vintage Scrapbook Style Collages | Medium to High - creating authentic vintage effects | Moderate - vintage textures, decorative elements | Warm, nostalgic, personal atmosphere ⭐ | Family heritage, weddings, memorials | Emotional connection, highly customizable ⚡ |
From Inspiration to Creation: Your Next Steps
You've just journeyed through a comprehensive gallery of powerful photo collage examples, from the clean, structured lines of Memory Grids to the freeform artistry of Layered Depth Collages. We have systematically deconstructed each style, moving beyond simple aesthetics to uncover the strategic purpose and tactical execution behind every composition. This exploration has equipped you not just with inspiration, but with a practical, replicable framework for creating compelling visual narratives.
The core lesson from these diverse examples is that the most effective collages begin with a clear objective. Before you place a single image, ask yourself: What story am I trying to tell? Who is my audience? What emotional response do I want to evoke? Your answers will guide you toward the perfect format, whether it's a linear Timeline Collage for a chronological story or a Themed Shape Collage for a powerful branding statement.
Actionable Roadmap: From Concept to Completion
Mastering the art of the photo collage is an iterative process. It's about experimenting, refining, and understanding how different elements work together to create a cohesive whole. Here is your step-by-step roadmap to start creating with confidence.
- Define Your Narrative: Revisit the core purpose of your collage. Is it to celebrate a personal milestone, promote a product line, or build a visual mood board for a creative project? Write down your primary goal.
- Select Your Style: Based on your narrative, choose a style from the article that best aligns with your goal. Use the strategic analysis provided for each example to make an informed decision. For instance, a vintage scrapbook style is ideal for evoking nostalgia, while a mosaic collage is perfect for showcasing a large volume of images to create a single, impactful visual.
- Curate and Prepare Your Assets: Gather your photos with intention. Look for a consistent color palette, theme, or subject matter. This is a critical step; even the best layout can be undermined by mismatched or poor-quality images. Remember the tip for layered collages: use photos with transparent or easily removable backgrounds for a seamless effect.
- Execute the Layout: Follow the practical step-by-step instructions outlined for your chosen style. Pay close attention to spacing, alignment, and visual hierarchy. Use negative space strategically to avoid a cluttered look and guide the viewer's eye through your composition.
By following this structured approach, you transform the process from a guessing game into a deliberate creative act. You are no longer just arranging pictures; you are architecting a story, piece by piece. The photo collage examples we've analyzed serve as your blueprint for success.
Ready to elevate your creations? Many of the most stunning photo collage examples rely on high-quality, crisp images. If you're working with old family photos or low-resolution digital files, let AI Photo HQ restore and enhance them to professional-grade clarity before you begin. Unlock the full potential of every image and build your next masterpiece at AI Photo HQ.

