Think of your words as the paintbrush and Stable Diffusion as your canvas. The more specific and descriptive you are, the more control you have over the final image. It's like giving instructions to an incredibly talented, but very literal, artist.
Your First Steps in Stable Diffusion Prompting
So, what exactly is a "prompt"? It's simply the text you feed into Stable Diffusion to create an image. This is the single most important part of the entire process—it’s how you translate the vision in your head into a tangible piece of digital art. For now, let's forget about the complex technical side of things. Great AI art starts with mastering the art of description.
The difference between a vague prompt and a detailed one is staggering. Let's walk through a practical example to see this in action.
Step 1: The Basic Idea
Start with a simple concept.
- Prompt:
sunset over the ocean
This will likely give you something generic and uninspired. It's a starting point, but it lacks direction.
Step 2: Adding Detail and Mood
Now, let's give the AI more to work with. Think about the colors, the lighting, and the overall feeling you want to convey.
- Prompt:
vibrant sunset over a calm ocean, warm golden hues, cinematic lighting, ultra-detailed
By adding these modifiers, you're guiding the AI toward a much more compelling and specific visual. You're not just asking for a sunset; you're dictating the mood, the colors, and the quality, turning a simple idea into a work of art.
The Building Blocks of a Great Prompt
To get started, let's focus on three core components. I've found that nearly every solid prompt is built on this foundation. Mastering these will give you a reliable framework before you start experimenting with more advanced tricks.
For a deeper look into these fundamentals, our guide on how to write a good prompt for AI text-to-image generation is a great resource.
Here are the essential building blocks:
- The Subject: This is the "what" of your picture. Be precise. Don't just say "a person." Instead, try "an old wizard with a long white beard." The more detail, the better.
- The Style or Medium: This is the "how." Are you looking for a
photograph, adigital painting, a3D render, or ananime drawing? This single element can completely change the visual language of the image. - Lighting and Atmosphere: This is what creates mood and depth. Words like
cinematic lighting,soft morning light,dramatic shadows, or evenneon glowcan take a scene from flat and boring to dynamic and immersive.
Step-by-Step Example: Let's combine these blocks.
- Start with the Subject:
an old wizard with a long white beard- Add the Medium:
A photorealistic portrait of an old wizard with a long white beard- Inject the Lighting:
A photorealistic portrait of an old wizard with a long white beard, under dramatic cinematic lighting
This simple, step-by-step structure is a fantastic starting point for almost any idea you can dream up. Below is a quick table to help you remember these core components.
Core Prompt Components at a Glance
This table breaks down the essential building blocks for any effective Stable Diffusion prompt. Keep these in mind as you start writing.
| Component | Purpose | Simple Example |
|---|---|---|
| Subject | Defines the main focus or "what" of your image. | a majestic lion |
| Style/Medium | Sets the overall aesthetic or artistic format. | oil painting |
| Lighting/Atmosphere | Creates the mood, depth, and emotional tone. | golden hour light |
As we go on, we'll explore how to add more layers to this foundation—things like camera angles, artist influences, and other powerful modifiers that give you even more precise control over the final output.
Breaking Down a High-Impact Prompt
So, how do you get from a simple idea to a genuinely jaw-dropping image? It's all about breaking your vision down into its essential parts. A great prompt isn't just one phrase; it's a recipe. Let's build a prompt from the ground up, piece by piece, to show you the process. This is hands-down the fastest way to learn how different keywords work together to create something incredible.
Our Goal: Create an epic image of a fantasy knight.
Step 1: The Subject - The Core of Your Vision
First things first: your subject. This is the anchor of your image. Being vague here is a recipe for a generic picture.
- Vague idea:
a knight - Detailed Subject:
An old, weathered knight in ornate silver armor, holding a glowing sword
This prompt immediately gives the AI a clear character (old, weathered knight), texture (ornate silver armor), and a dynamic focal point (glowing sword). If you want to dive deeper into defining your subject, check out our complete guide on how to write AI prompts that really work.
Step 2: The Medium and Style - Defining the Look and Feel
Next, decide on the artistic form. This is one of the most powerful levers you can pull. Choosing photograph tells the AI to aim for realism. But swap that for digital painting, and you'll get visible brushstrokes and a more artistic feel.
Here’s a quick look at how different mediums can completely transform the same subject:
- Photograph: Aims for realism, capturing light and detail just like a camera would.
- Oil Painting: Creates a classic, textured feel with rich colors and visible brushwork.
- 3D Render: Produces a clean, often polished look, similar to what you’d see in modern video games.
- Anime Sketch: Implements the distinct visual style of Japanese animation.
Let's add a medium to our knight prompt:
- Current Prompt:
An old, weathered knight in ornate silver armor, holding a glowing sword, **digital painting**
Step 3: Adding an Artist's Touch
To push the style further, reference specific artists. This is a fantastic shortcut. For instance, adding by Greg Rutkowski is famous for steering the AI toward dark, epic fantasy art. Using by Artgerm will produce a sleeker, more polished image. We can even mix them.
Let's inject that artistic influence:
- Current Prompt:
An old, weathered knight in ornate silver armor, holding a glowing sword, digital painting, **by Greg Rutkowski and Artgerm**
Step 4: Finishing Touches - Lighting, Camera, and Detail
Now for the final layer. This is where you add keywords that control atmosphere and composition. Think like a photographer.
Here are a few essential finishing touches:
- Lighting:
cinematic lighting,dramatic shadows,volumetric light,golden hour - Camera Angle:
low angle shot,wide angle,close-up portrait,drone shot - Detail and Quality:
ultra detailed,4k,sharp focus,intricate details
This is where the true power of Stable Diffusion becomes clear. Its ability to interpret these nuanced instructions comes from being trained on billions of meticulously labeled images.
Let’s add our final touches to lock in the prompt.
The Final High-Impact Prompt:low angle shot of an old, weathered knight in ornate silver armor, holding a glowing sword, digital painting, by Greg Rutkowski and Artgerm, cinematic lighting, dramatic shadows, ultra detailed, sharp focus, 4k
By building our prompt step-by-step, we've given the AI a comprehensive set of directions. This methodical approach is the key to mastering prompt creation.
Advanced Prompt Syntax for Precision Control
Ready to move beyond basic descriptions? Great. This is where you grab the steering wheel. Mastering a few key symbols and techniques will give you an incredible amount of precision, turning you from a simple prompter into a true AI artist.
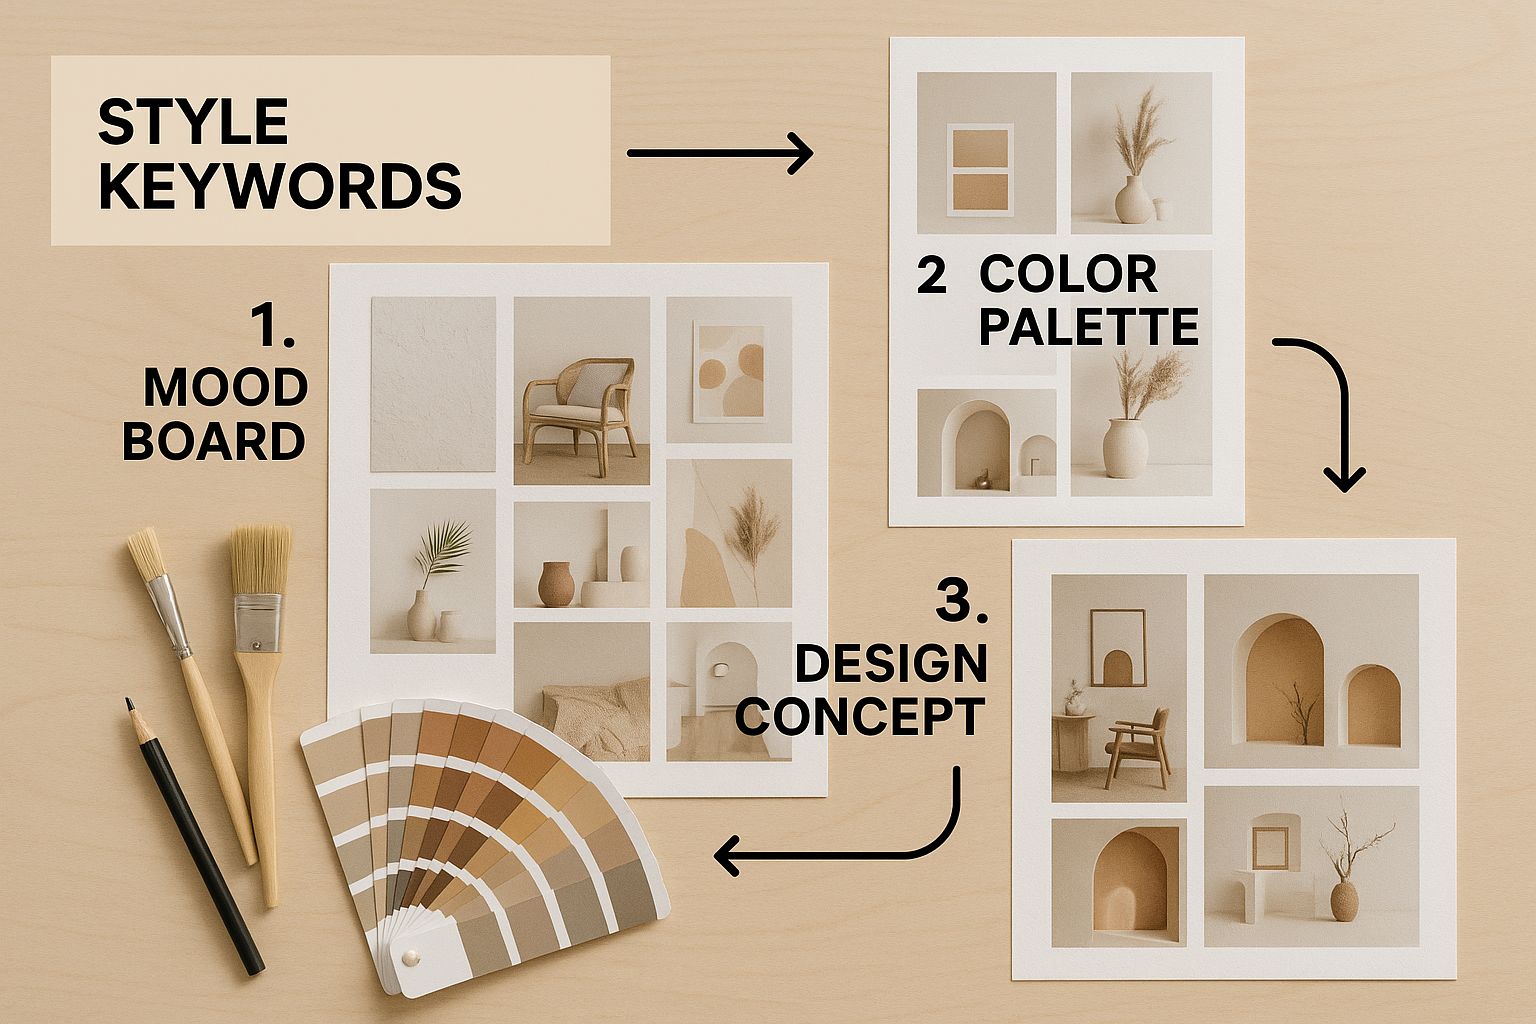
As the image shows, every style keyword is like a different tool on a designer's desk. Each one adds a distinct flavor to the final image, and learning to combine them is part of the fun.
Practical Tutorial: Amplifying and Reducing Concepts with Weighting
Weighting is your way of telling the AI which parts of your prompt are more important. You use parentheses () to increase weight and square brackets [] to decrease it.
Goal: Create an image of a cat wearing a distinctly red hat.
- Step 1: Simple Prompt. Start with
cat wearing a red hat. The AI might make the hat blue or just blend it in. - Step 2: Increase Emphasis. To tell the AI "red" is important, use parentheses:
cat wearing a (red) hat. This adds a small boost. - Step 3: Add a Multiplier for More Power. For even more emphasis, add a colon and a number, like
cat wearing a (red:1.3) hat. The number is a multiplier, where 1.0 is the default. This cranks up the importance of "red" by 30%. - Step 4: Decrease Emphasis (If Needed). If the hat becomes too prominent, you can dial it back with square brackets:
cat wearing a [red] hat. This makes it a more subtle detail.
This technique is a lifesaver when the AI latches onto one keyword too strongly or completely ignores another.
Practical Tutorial: Mastering Negative Prompts
While your main prompt tells the AI what to create, the negative prompt tells it what to avoid. This is one of the most effective ways to clean up common issues.
Goal: Generate a clean portrait without distorted hands.
- Step 1: Write your main prompt. For example:
portrait of a beautiful queen, intricate jewelry, fantasy art. You might get results with mangled hands—a classic AI art problem. - Step 2: Identify what to avoid. The issues are distorted anatomy and poor quality.
- Step 3: Write your negative prompt. Create a list of things to forbid:
mutated hands, extra fingers, deformed, ugly, blurry, text, watermark, signature. - Step 4: Combine them. When you generate the image, use your main prompt in the prompt field and your list of forbidden terms in the negative prompt field.
By adding that negative prompt, you actively steer the AI away from common flaws, dramatically increasing your chances of getting a clean, usable result.
Controlling Adherence with CFG Scale
The Classifier-Free Guidance (CFG) Scale is a setting that controls how strictly the AI follows your prompt. It's a number, usually between 1 and 30.
- A low CFG Scale (e.g., 2-6) gives the AI more creative freedom. The result might stray from your prompt.
- A high CFG Scale (e.g., 10-15) forces the AI to stick very closely to your instructions.
- A very high CFG Scale (e.g., 20+) can cause artifacts and weird colors. Most people find the sweet spot is somewhere between 7 and 12.
Think of it like a leash on a dog. A low CFG is a long, loose leash. A high CFG is a short, tight leash.
The Subtle Power of Word Order
Finally, never underestimate the impact of word order. Stable Diffusion generally pays more attention to the words at the beginning of your prompt.
- Example 1:
a cybernetic forest, glowing mushrooms. This will likely prioritize the forest as the main subject. - Example 2:
glowing mushrooms in a cybernetic forest. Flipping it puts more initial focus on the mushrooms. This simple shift can completely change the composition.
When you start combining all these techniques—weighting, negative prompts, CFG adjustments, and strategic word order—you unlock a whole new level of precision.
Prompt Syntax Cheat Sheet
| Syntax Element | Function | Example Usage |
|---|---|---|
(word) |
Increases the weight/importance of a word. | A (red) car |
(word:1.3) |
Increases weight by a specific multiplier (e.g., 30%). | A (fast:1.3) car |
[word] |
Decreases the weight/importance of a word. | A car, [blue] sky |
[from:to:when] |
Changes from one concept to another during generation. | A [cat:dog:0.5] |
| `(wordA | wordB)` | Alternates between two concepts at each step. |
This table is a great starting point. As you experiment, you'll find that these little adjustments are the key to producing truly refined and stunning AI art. To dive even deeper, check out these efficient strategies for effective Stable Diffusion prompting for more advanced concepts.
Practical Tutorials for Popular Art Styles
Knowing the theory is one thing, but getting your hands dirty is where the real magic happens. This is the practical part of our guide where we’ll dive in and build four completely different images from the ground up, each in a popular and useful style.
For every example, I’ll give you the exact prompt I used and, more importantly, break down why it works. Think of this less as a list of recipes and more as a playbook you can tear apart and rebuild for your own projects.
Tutorial 1: Creating a Photorealistic Character Portrait
Our first goal is pure realism—an image that feels like it was snapped with a high-end camera. To pull this off, you have to think like a photographer. It's all about using camera-specific terms and focusing on the tiny details that sell the illusion.
Goal: A photorealistic portrait of a female astronaut looking out a starship window.
Full Prompt:close-up photorealistic portrait of a female astronaut, wistful expression, looking out a starship window at a nebula, detailed textures on helmet visor, Canon EOS R5, 85mm f/1.2 lens, soft ambient light from the nebula casting blue and purple hues on her face, cinematic, high detail, sharp focus, professional photography
Why This Prompt Works (A Step-by-Step Breakdown):
- The Subject:
female astronaut, wistful expression, looking out a starship window at a nebulais incredibly specific. It doesn't just describe a person; it sets a scene and a mood. - Photography Language:
Canon EOS R5, 85mm f/1.2 lensis a powerful shortcut. It tells the AI to mimic the look of a professional portrait lens, which often means a beautifully blurred background (bokeh) and a sharp subject. - Mastering Light:
soft ambient light from the nebula casting blue and purple huesis a fantastic instruction for creating mood. It's not just "good lighting"; it's specific, colorful, and motivated by the environment. - Quality Control:
cinematic, high detail, sharp focusare final polishing words. They push the AI to deliver its A-game, refining the details and ensuring a crisp final image.
Tutorial 2: Generating a Cinematic Fantasy Landscape
For this one, we're aiming for something epic and moody, like a still from a fantasy blockbuster. The trick here is to shift your vocabulary from realism to artistry, using words that scream scale, drama, and emotion.
Goal: An epic view of a hidden elven city in a forest.
Full Prompt:epic fantasy landscape, a hidden elven city built into giant ancient trees, glowing magical lanterns, ethereal mist rolling through the valley, volumetric lighting, matte painting, by Greg Rutkowski and John Howe, cinematic wide shot, Lord of the Rings aesthetic, ultra detailed, atmospheric
By referencing artists like Greg Rutkowski and John Howe, we tap into their signature styles—dark, grandiose, and rich in detail—which is a powerful shortcut to achieving a specific fantasy look.
Why This Prompt Works (A Step-by-Step Breakdown):
- Atmosphere is Everything: Keywords like
ethereal mistandvolumetric lightingare your best friends for creating depth and a sense of mystery right out of the gate. - Cinematic Style: The term
matte paintingtells the AI to think like a film's visual effects artist, creating a highly detailed, painting-like background. - Artist Influence: Simply naming famous fantasy artists is one of the strongest tools in your arsenal. It’s like giving the AI a perfect visual reference without needing an image.
- Framing the Shot:
cinematic wide shotis a direct order to the AI to pull the camera back and show off the immense scale of the scene.
Tutorial 3: Designing a Retro Sci-Fi Poster
Here, the mission is to capture the unique vibe of science fiction posters from the 1970s and 80s. This means embracing bold, saturated colors, grainy textures, and a certain design flair. You need to think like a graphic designer, not just a scene descriptor.
Goal: A retro movie poster for an explorer on a desert planet.
Full Prompt:1970s sci-fi movie poster, a lone astronaut in a retro silver suit standing on a red desert planet, two suns in the sky, vintage futuristic typography, bold colors, screen print texture, grainy, art by Moebius and John Berkey, classic sci-fi aesthetic, graphic design
Why This Prompt Works (A Step-by-Step Breakdown):
- Nailing the Era:
1970s sci-fi movie posterandretro silver suitimmediately place the image in the right time period. - Graphic Elements: This is key. Terms like
vintage futuristic typography,bold colors, andscreen print textureare about the medium itself, not just the content. They’re crucial for faking that poster look. - Artistic Homage: Moebius and John Berkey are titans of this genre. Mentioning them steers the AI's composition, color choices, and overall feel.
- Setting the Context: Adding
graphic designreinforces the idea that this is a composed piece with a layout, not a random snapshot of a scene.
Tutorial 4: Producing a Clean Vector Logo Concept
Finally, let’s switch gears entirely to graphic design. Making a clean, simple logo demands a totally different prompting strategy. You have to be precise and minimalist, actively avoiding the "arty" and descriptive words that work so well for other styles.
Goal: A simple logo concept for a tech company called "Orbit."
Full Prompt:minimalist vector logo, a stylized planet with a single swooshing orbit ring, flat design, clean lines, professional, icon, graphic design, on a white background, Behance, Dribbble
Why This Prompt Works (A Step-by-Step Breakdown):
- Design-Speak:
minimalist vector logo,flat design, andclean linesare the most critical phrases here. They explicitly tell the AI to avoid textures, complex shading, and clutter. - The Power of Negative Space:
on a white backgroundis a simple but vital command. It isolates the logo, prevents the AI from adding a busy background, and mimics how a real logo file would look. - Platform Influence: This is a sneaky-good trick. Adding
Behance, Dribbblenudges the AI to generate something that looks like the modern, high-quality work found on those design portfolio sites. - Less is More: The prompt is short and direct. For logos, long, descriptive prompts often confuse the AI and produce messy, over-designed results.
These four walkthroughs should give you a solid foundation. The real learning curve starts when you take these frameworks, plug in your own wild ideas, and see what you can create. Happy experimenting
Solving Common Prompting Frustrations

Even after you've nailed the perfect prompt structure, some generations will just... fail. It happens. You'll get muddy images, nightmarish anatomy, or an AI that seems to completely ignore your instructions. This is a totally normal part of the learning curve, but it can be incredibly frustrating.
Think of this section as your troubleshooting guide. We're going to break down the most common headaches and give you practical, no-nonsense fixes to get your images back on track.
Why Are My Images Muddy or Generic?
Ever write a detailed, thoughtful prompt only to get back a blurry, generic mess? This is a classic symptom of the AI being confused. When it gets conflicting signals or the instructions are too vague, it defaults to a "safe" middle ground, blending everything into a soupy average.
The Fix in 3 Steps:
- Identify the Vagueness: Look at your prompt. Is it generic like
A knight fighting a dragon in a castle? - Inject a Strong Style: Add keywords that provide clear artistic direction. Think
oil painting,matte painting, orphotograph. - Add Quality Modifiers: Finish with terms like
dramatic lighting,sharp focus, andintricate details. An artist name likeart by Frank Frazettais also a powerful anchor.
- Problem Prompt:
A knight fighting a dragon in a castle - Solution Prompt:
Epic oil painting of a knight in shining plate armor fighting a fearsome red dragon, crumbling castle courtyard, **dramatic lighting, sharp focus, intricate details, art by Frank Frazetta**
Those extra keywords are like a creative anchor. It's also interesting to see how different AI models handle these kinds of stylistic prompts. For a deeper dive, check out our comparison of Stable Diffusion vs Midjourney to see how their results can vary.
What to Do When the AI Ignores Part of Your Prompt
This is one of the most maddening issues. You ask for blue eyes, and you get brown. This happens because other, "louder" keywords in your prompt are grabbing all the AI's attention.
The Fix in 2 Steps:
- Reorder Your Prompt: Move the ignored keyword closer to the beginning. The start of the prompt carries the most weight.
- Add Weight: If reordering doesn't work, give the keyword a boost with parentheses. Change
blue eyesto(blue eyes)or, for more power,(blue eyes:1.3). This tells the model, "Hey, this detail is 30% more important—pay attention!"
Pro-Tip: When a keyword is being ignored, try to isolate it. Create a super simple prompt like
a person with (blue eyes:1.4)to see if the model can even generate it on its own. Once you confirm it works, you can re-integrate it into your more complex scene.
How to Fix Distorted Faces and Hands
Ah, the infamous AI-mangled hands and bizarre faces. This is a byproduct of the AI's training data. It's seen millions of photos where hands are blurry or half-hidden, and it learns those bad habits.
The Fix: Use a Strong Negative Prompt
- Create your "don't" list. You have to be explicit about what you don't want to see.
- Copy and paste this into your negative prompt field. This acts as a filter, telling the AI to discard generations with common flaws.
Your Go-To Negative Prompt for Anatomy:deformed, distorted, disfigured, poorly drawn, bad anatomy, wrong anatomy, extra limb, missing limb, floating limbs, (mutated hands and fingers:1.4), disconnected limbs, mutation, mutated, ugly, disgusting, blurry, amputation
Notice the extra weight on (mutated hands and fingers:1.4)—this puts a special emphasis on avoiding the most frequent and obvious problem. It's not a silver bullet, but it will dramatically improve your success rate when creating characters.
Your Stable Diffusion Questions Answered
As you get your hands dirty with Stable Diffusion, you're bound to run into a few head-scratchers. It happens to everyone. Think of this section as a quick chat with a seasoned user, where we tackle some of the most common hurdles creators face.
Why Does Stable Diffusion Ignore Parts of My Prompt?
This is probably the most frequent frustration I hear about. You’ve crafted the perfect prompt, but the AI seems to have selective hearing. It usually boils down to two things: prompt length or conflicting ideas.
When your prompt gets too long, the AI has to break it down, and sometimes the core details get diluted. Try stripping your prompt back to its most essential elements. If a specific detail is still getting ignored, give it a little nudge by adding weight, like this: (blue eyes).
Also, double-check for contradictions. Telling the model to create 'bright darkness' or 'a tiny giant' can confuse it. Often, a simple rephrasing is all it takes to get the AI back on track.
How Can I Get Consistent Characters Across Images?
Ah, the holy grail of AI art. Getting the same face or character to show up time and time again is tricky, but not impossible.
The quickest method is to reuse the seed parameter. A seed is just a number that kicks off the image generation process. By using the same seed with a very similar prompt, you can generate variations that look like they belong to the same character. It's not perfect, but it's a great starting point.
For those who need more precise control, the more advanced route is training a custom LoRA (Low-Rank Adaptation) model. This involves feeding the AI a handful of your own images to "teach" it a specific character. It’s a more technical process, but the results can be incredibly consistent.
What Is the Difference Between a Prompt and a Negative Prompt?
Think of it this way: the main prompt is your "what to do" list for the AI. It's where you lay out your creative vision—the subject, the style, the lighting, all the good stuff you want to see.
A negative prompt is the "what not to do" list. This is your secret weapon for cleaning up your images and steering the AI away from common glitches.
For example, I almost always include terms like 'deformed, blurry, bad anatomy, extra limbs, watermark, text' in my negative prompt. This simple step helps the AI avoid those classic AI mistakes, leaving you with a much more polished and professional-looking image.
Can I Use Prompts from Other AI Models?
You can certainly try, but don't expect a one-to-one translation. Prompts that work beautifully in models like Midjourney often fall flat in Stable Diffusion without a few tweaks. Midjourney is built to handle more natural, flowing sentences.
Stable Diffusion, on the other hand, really shines when you give it direct, keyword-focused instructions, often using specific syntax like weighting. A long, poetic sentence that creates magic in Midjourney might need to be broken down into core concepts and modifiers to get the same effect in Stable Diffusion.
And while you're mastering AI image generation, it's interesting to see how this tech is branching out. For instance, an AI faceless video generator applies similar principles to create compelling content without ever showing a face. The key takeaway is to always adapt the idea behind a prompt to fit the specific syntax and strengths of the tool you're using.
Ready to stop troubleshooting and start creating? With AI Photo HQ, you get access to the latest AI models in an intuitive interface, taking the guesswork out of generating stunning visuals. Create anything from photorealistic portraits to professional logos in seconds at https://aiphotohq.com.

