Think of AI photo enhancement as having a seasoned photo editor on call, ready to instantly fix your images. Instead of you needing to fiddle with sliders for sharpness, color, and lighting, these smart tools do all the heavy lifting with just one click. This guide will walk you through practical, step-by-step tutorials to get you started.
What Is AI Photo Enhancement
Imagine an expert who has spent a lifetime studying millions of photos—from flawless professional shots to blurry, faded memories. That's essentially what an AI photo enhancer is. It's way more sophisticated than slapping on a generic filter that treats every picture the same.
These tools are powered by complex algorithms, like neural networks, that actually understand the content of your photo. The AI can tell the difference between a person's face, a building, and the sky, allowing it to apply corrections exactly where they're needed. This context-aware approach is what really sets it apart from old-school editing software.
How Does It Actually Work
At its core, AI enhancement is all about training. Developers feed the AI model a massive library of images, showing it pairs of low-quality and high-quality examples. Through this process, the AI learns to recognize the patterns that make a photograph great. It figures out what a sharp, vibrant image looks like compared to a blurry or washed-out one.
When you upload your own photo, the AI taps into all that learned knowledge to diagnose and fix the problems. It’s surprisingly effective at tackling a whole range of common issues.
- Upscaling Resolution: Instead of just stretching a small image and making it pixelated, AI intelligently adds new pixels, creating a larger, clearer version.
- Removing Noise and Grain: It pinpoints and smooths out that distracting grainy texture you often get in low-light photos, all while keeping the important details intact.
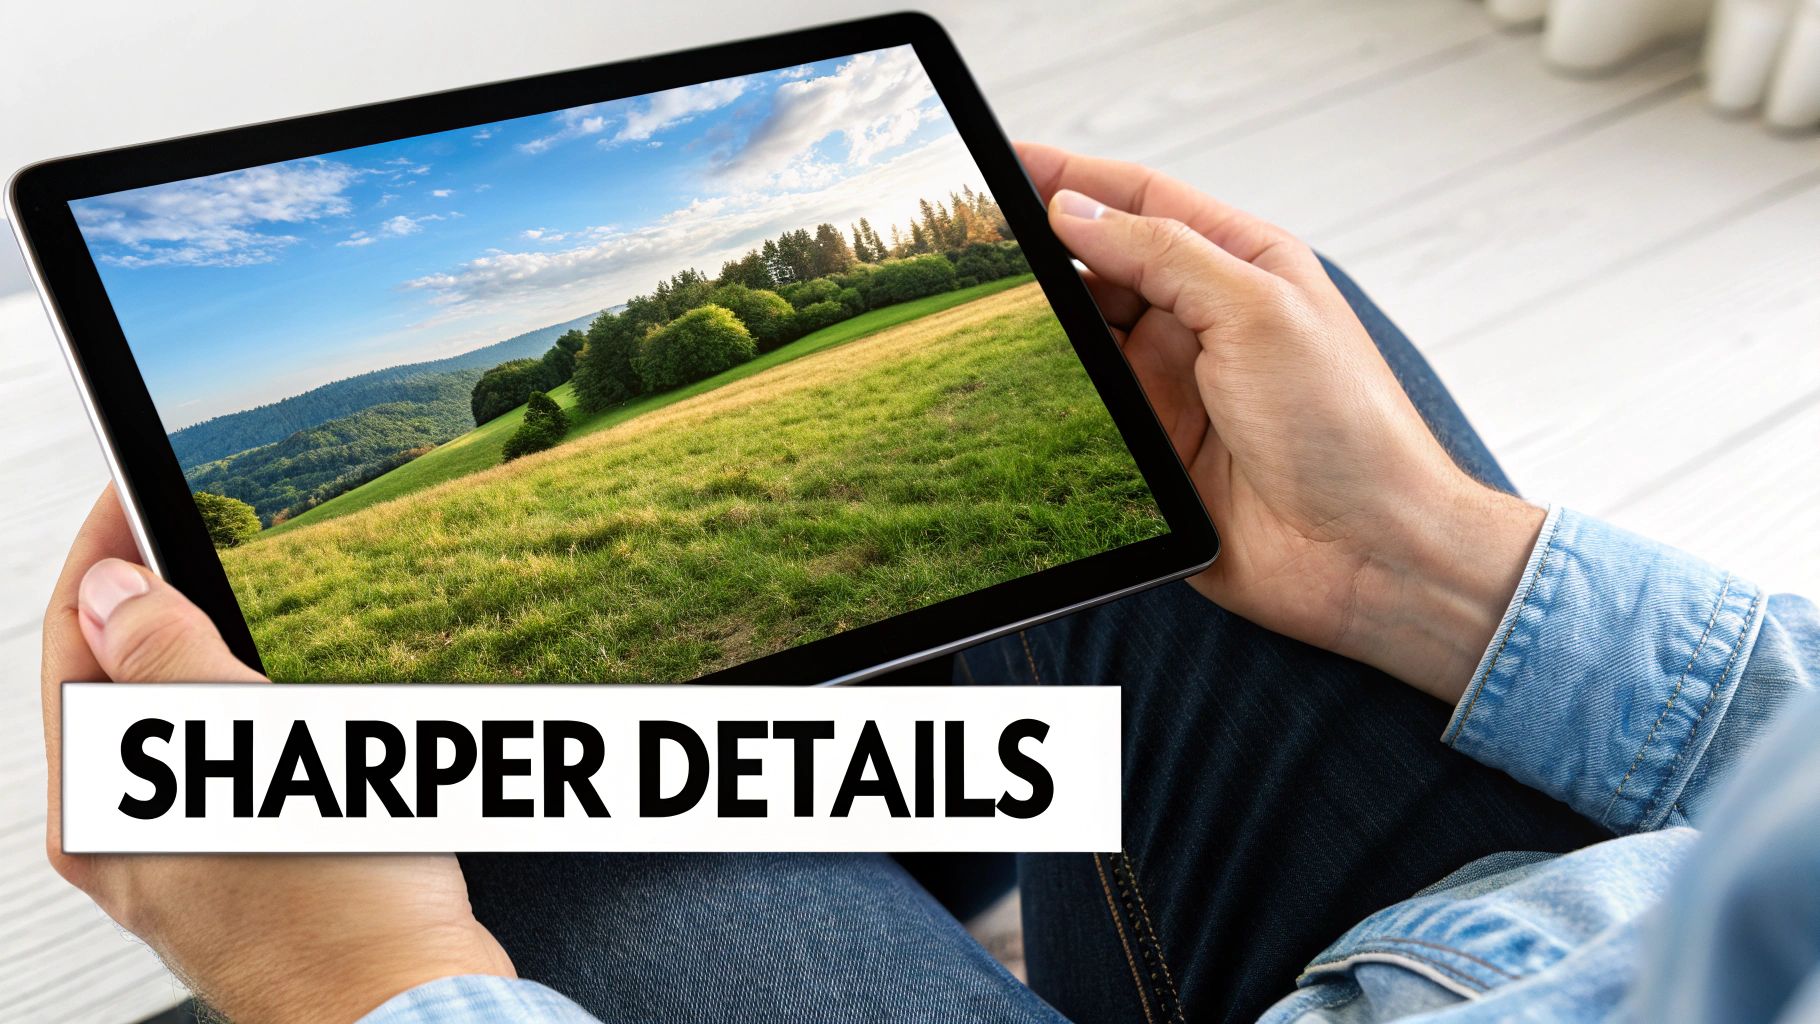
- Sharpening Details: The AI can find areas that are just a bit soft or out of focus and selectively sharpen them for a much crisper look.
- Color and Light Correction: It analyzes the entire photo and automatically tweaks exposure, contrast, and saturation to make the colors pop and the lighting feel natural.
The real magic is that the AI does all this contextually. It won't just blindly sharpen the entire image; it'll sharpen the crisp edges of a building while leaving the soft, fluffy clouds in the sky untouched.
The Growing Demand for Better Images
This kind of tech isn't just for pro photographers anymore. The global AI image enhancer market is exploding, projected to rocket from USD 2.6 billion in 2024 to about USD 50.7 billion by 2034. That massive jump shows just how much everyone, from social media managers to families wanting to preserve old photos, values a high-quality image.
This powerful, easy-to-use technology is a huge part of the bigger story of artificial intelligence in photography, where human creativity meets smart algorithms. In this guide, we’ll walk you through the practical, step-by-step process to start using these tools yourself.
How to Upscale Low-Resolution Images Step by Step
Alright, let's get practical. This tutorial will show you how to take a small, pixelated image and transform it into something crisp and clear enough for a professional print or a high-quality social media post.
We'll walk through a typical workflow using a standard AI upscaling tool. The goal here isn't just to make the image bigger, but to get a natural-looking result without those weird, waxy artifacts. We’ll cover picking the right photo, dialing in the best settings, and judging the final result.
The whole process boils down to a few key stages, as you can see here.
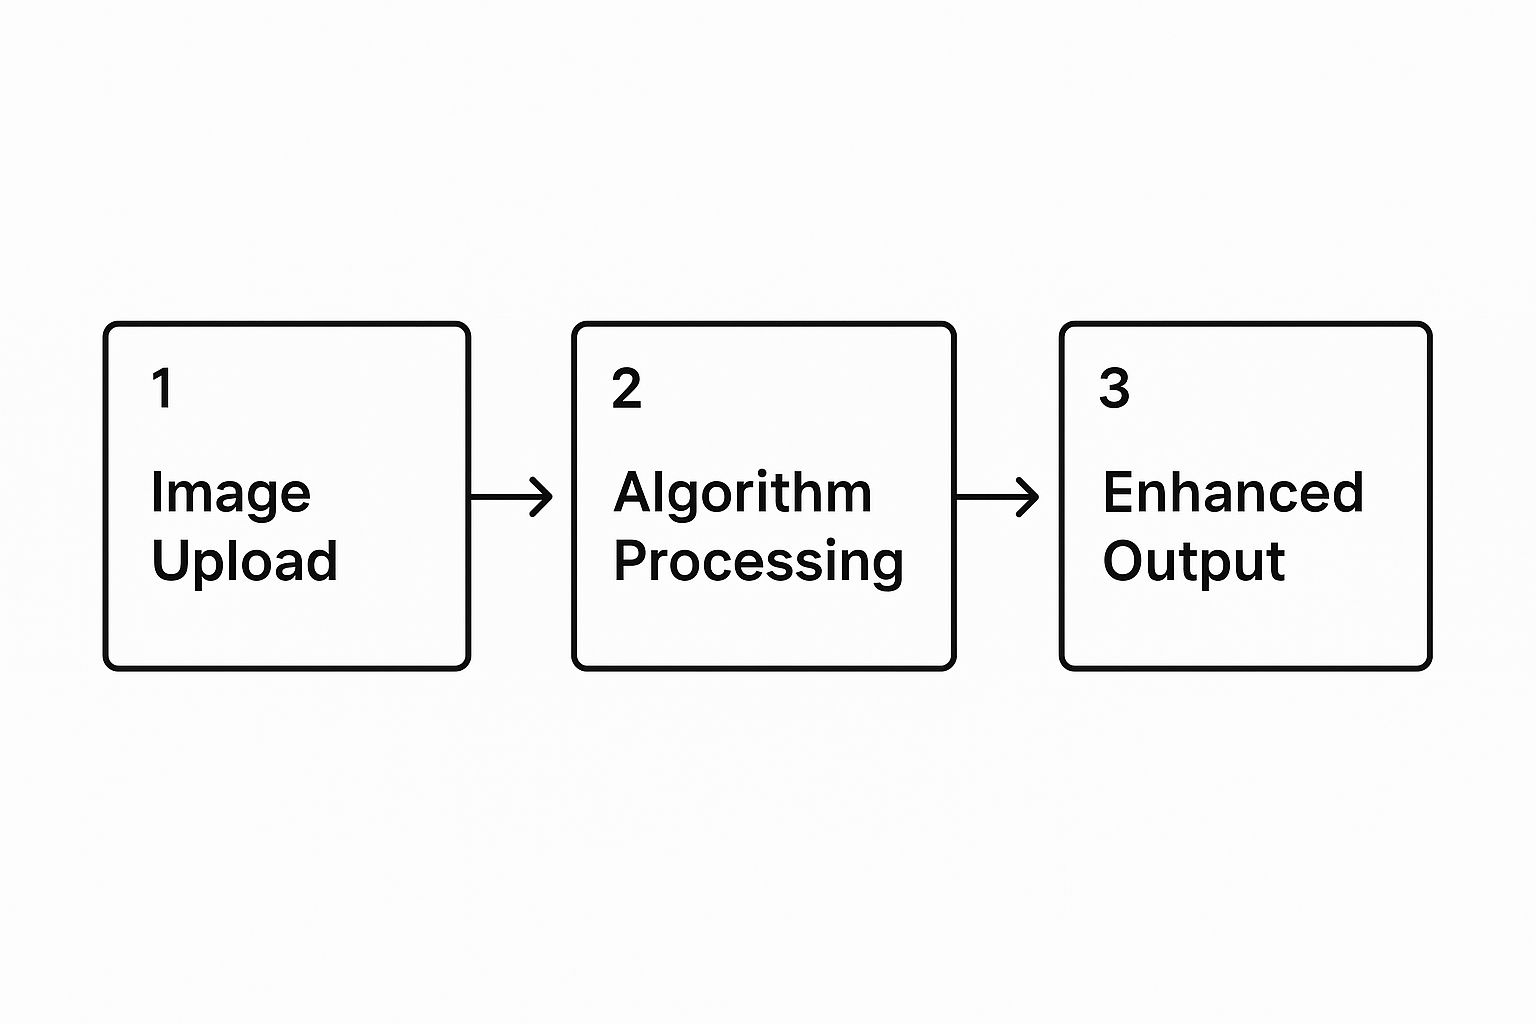
As the graphic shows, the core idea is straightforward: you give the AI your image, it does its magic, and you get a polished version back. But let's dig into the details of each step to make sure you're getting the absolute best results possible.
Step 1: Selecting the Right Photo
You’ve probably heard the old saying, "garbage in, garbage out." While modern AI is incredibly powerful, you’ll always get a better result if you start with a decent source image. Look for a photo that's small but has reasonably clear subjects. An image that's a complete, blurry mess will give the AI a much harder time.
For this walkthrough, we'll use a low-resolution photo of a cityscape snapped on an older smartphone. The original file is a tiny 800x600 pixels—way too small for a good print or for cropping.
Step 2: Uploading and Choosing Your Settings
Got your photo? Great. Now, let's upload it to your chosen AI enhancement tool. Most have a simple drag-and-drop box or an "Upload" button.
Once uploaded, you'll see the most important setting: the magnification factor. This tells the AI how much larger to make your image.
- 2x Upscale: Doubles the dimensions (800x600 becomes 1600x1200). This is a safe bet that produces very clean results with almost no risk of strange artifacts.
- 4x Upscale: Quadruples the image dimensions (800x600 becomes 3200x2400). This is often the sweet spot, perfect for turning a small digital photo into something printable.
- 8x Upscale or Higher: Creates massive files. Use with caution, as the AI has to "invent" more details, which can sometimes look unnatural. This is best for when you need a huge print from a tiny source.
Action: For our cityscape photo, we’re selecting a 4x upscale. This gives us a major size boost without pushing the AI too far.
Step 3: Fine-Tuning with Additional Enhancements
Going bigger is just the start. Many tools offer extra AI-powered features to clean up the image even more. If you want to see what's out there, our guide on the best online image upscaler tools is a good place to start.
Some of the most common fine-tuning options you’ll see are:
- Noise Reduction: This is a lifesaver for photos taken in low light, smoothing out ugly graininess.
- Face Correction: A dedicated AI model can reconstruct blurry facial features with shocking clarity.
- Color Correction: This can automatically tweak brightness, contrast, and saturation to make your photo pop.
Action: For our cityscape shot, we’ll toggle on Noise Reduction to clean up the sky. Since there are no people up close, we'll leave Face Correction off.
Step 4: Comparing Before and After
This is the most critical step. Don't just blindly trust the AI. Every good tool provides a side-by-side comparison or a slider to check the new version against the original.
Action: Zoom in and look closely. Check the fine lines on buildings and the texture of the roads. Did the AI add clarity while preserving the original character? If it looks good, download your enhanced image.
By following this simple workflow, you’ll be getting professional-looking results in no time.
Breathing New Life into Old and Damaged Photos
Old photographs are irreplaceable windows into our past, but time is rarely kind. This tutorial will guide you through using AI photo enhancement to restore faded, scratched, and damaged family pictures. It's a step-by-step playbook for preserving your history.
Step 1: Start with a High-Quality Digital Copy
Before the AI can work its magic, you need a solid digital version of your physical photograph. The quality of your scan directly impacts the final result. A flatbed scanner is your best friend here.
How-To:
- Clean: Gently wipe both the scanner glass and the photograph with a soft, lint-free cloth to remove dust.
- Set Resolution: In your scanner software, set the resolution to at least 600 DPI (dots per inch). Use 1200 DPI if you plan to make larger prints.
- Choose Format: Save the scan as a TIFF or PNG file. These "lossless" formats preserve every detail, giving the AI the best possible image to work with.
Step 2: Let the AI Repair the Damage
With your high-quality scan ready, it’s time for the restoration. AI tools are trained on massive datasets of damaged photos, allowing them to intelligently “inpaint”—or fill in—missing information from scratches and tears.
How-To:
- Upload: Open your AI restoration tool and upload your scanned TIFF or PNG file.
- Activate Repair: Look for a feature named "Scratch Removal," "Damage Repair," or "Restoration." In many tools, this is an automatic process that begins upon upload.
- Process: Let the AI analyze and reconstruct the damaged areas. This can take a few seconds to a minute, resulting in a version with scratches and creases seamlessly removed.
This process shows exactly how algorithms can fill in missing sections by learning from the intact parts of the image. That’s the core principle behind AI-driven photo repair.
Step 3: Bring Portraits Back to Life with Face Enhancement
Sometimes, a general restoration can leave faces in old portraits looking a little soft. Specialized AI face enhancement models are a game-changer here.
How-To:
- Find the Feature: After the initial repair, look for an option called "Face Enhancement" or "Face Restore."
- Apply: Toggle this feature on. The AI will specifically focus on bringing clarity back to the eyes, nose, mouth, and skin texture, sharpening blurry details to make the person's features distinct again.
This targeted approach is crucial for preserving the identity and expression of your ancestors. For a deeper dive, our guide on old photo restoration walks through more advanced techniques.
Step 4: Add a Splash of Color to Black-and-White Memories
The final step—and often the most dramatic—is colorization. AI colorization models have studied millions of photos to learn the natural colors of everything from skin tones to landscapes.
How-To:
- Select Colorize: Find and click the "Colorize" button or tool.
- Process: The AI will analyze the black-and-white image and apply realistic colors based on its training.
- Review: The result adds a new layer of emotion and realism, making the past feel that much closer. Download your fully restored and colorized memory.
The hunger for these capabilities is part of a much bigger story. The global AI market was valued at around USD 391 billion in 2025 and is projected to multiply by five over the next five years. With an estimated 97 million people expected to work in AI-related fields by the end of 2025, this rapid expansion is exactly what's fueling the development of these incredible photo restoration tools.
Diving Into Advanced AI Editing Techniques
Once you've mastered the basics, you're ready to tackle more specific photographic problems. Advanced AI photo enhancement is about using targeted tools to fix the common issues that drive photographers crazy. This is where you really level up your editing game.
We're going to break down three powerful techniques in mini-tutorials. Each one tackles a familiar challenge—grainy low-light shots, blurry images, and dull colors—with a simple process to get professional-looking results.
Tutorial 1: Using AI to Kill Noise in Low-Light Photos
We've all taken a photo in a dimly lit setting, only to find it covered in ugly digital "noise" or grain. Traditional noise reduction tools often smudge the details, but AI is smarter. It can tell the difference between fine details you want to keep and random grain you don't.
Here’s a quick step-by-step to clean up a grainy image:
- Load Your Photo: Open your noisy, low-light shot in an AI enhancer that has a dedicated noise reduction feature.
- Find the Denoise Tool: Look for a slider or toggle labeled "Noise Reduction" or "Denoise." Most tools will suggest a starting point automatically.
- Adjust the Strength: Play with the slider. The goal is to eliminate grain without turning your photo into a watercolor painting. A good place to start is often around 50-70% intensity.
- Compare Before and After: Zoom in on different areas, like someone's hair or the texture of a brick wall. Make sure the AI hasn't smoothed away important details. If things look waxy, dial back the intensity.
A great AI noise reduction keeps your subject sharp while making the background and shadows look clean and smooth. It's a tricky balance that modern AI handles incredibly well.
Tutorial 2: AI Deblurring and Sharpening for Softer Images
There’s nothing more frustrating than a photo that’s just a little out of focus. AI deblurring tools are built to rescue these shots by analyzing the blur and intelligently reconstructing the lost detail. This is far more advanced than a simple sharpening filter, which can create ugly halos.
Follow these steps to bring a soft or slightly blurry shot back into focus:
- Upload and Select: Upload your image to a tool with a "Deblur" or "Sharpen" function.
- Let the AI Run: Let the software run its first automatic pass. It will detect the out-of-focus areas and apply a correction to bring back definition.
- Refine the Result: Tweak the final look with a "Clarity" or "Sharpness" slider. Go easy here—pushing it too far is the quickest way to make a photo look over-processed.
- Check for Artifacts: Look closely at the edges and fine textures. A good deblurring job adds clarity without introducing weird digital glitches or making the noise worse.
Tutorial 3: Intelligent Color and Light Correction with AI
Sometimes a photo is sharp and noise-free, but it just looks... flat. AI-powered color tools analyze the whole scene to fix dull, underexposed images or weird color casts automatically. The AI identifies things like sky, skin tones, and plants, then applies adjustments that look natural.
Here’s how to breathe some life back into a dull photo:
- Find an "Auto-Enhance" Tool: Open your image in an AI enhancer that has a feature called something like "Auto Enhance," "Color Correction," or "Light EQ."
- Click and Wait: With a single click, the algorithm adjusts exposure, contrast, highlights, shadows, and color saturation based on what it "sees" in the photo.
- Fine-Tune (Optional): If the colors pop a little too much, you can usually pull back a "Vibrance" or "Saturation" slider for a more subtle result.
This push for high-quality, automated image improvement is why the industry is growing so fast. The AI image enhancement software market is expected to jump from roughly USD 1.59 billion in 2025 to about USD 4.76 billion by 2033. That growth is all about the increasing demand for perfect visuals on social media, in e-commerce, and in professional photography. You can find more data on this trend from Archive Market Research.
And for those who really want to push the creative envelope, you can explore techniques to create 3D models from 2D images, which opens up a whole new world of possibilities.
How to Choose the Right AI Photo Enhancer

With a flood of new AI photo enhancement tools on the market, picking the right one can feel overwhelming. Do you need a desktop app, a quick online tool, or a plugin for your existing software?
The "best" choice comes down to your specific needs, budget, and workflow. Let's break down the main options so you can find the perfect fit.
What’s Your Main Goal?
First, ask yourself: What problem am I trying to solve most often? Your answer will instantly narrow the field.
Different tools excel at different jobs. Some are masters at upscaling low-resolution images, while others are miracle workers for repairing old family photos. A tool that’s amazing for artistic flair might be useless for removing digital noise.
By figuring out your primary use case—whether it’s batch-processing 500 e-commerce photos, restoring a single priceless heirloom, or just sprucing up your social media posts—you can zero in on tools designed to do exactly that.
Understanding the Different Types of Tools
Generally, AI enhancers fall into three main categories. Knowing the pros and cons of each is key to finding your match.
Free Online Enhancers
These are web-based, quick-and-dirty tools perfect for one-off jobs. Using them is usually as simple as dragging, dropping, and downloading. The catch? They often have limits on file size, resolution, or how many edits you can do for free. They're great for casual users but lack the power for serious professional work.
Dedicated Desktop Software
This is the big leagues: powerful applications you install on your computer, built for serious photographers and designers. These programs offer advanced features like batch processing, RAW file support, and work completely offline. Of course, all that power comes with a steeper learning curve and a higher price tag.
Plugins for Existing Software
Already live and breathe in programs like Adobe Photoshop or Lightroom? A plugin might be your best bet. It hooks AI capabilities directly into your current workflow, so there’s no need to learn a whole new program. This is ideal for professionals who want to add AI magic without disrupting their process.
A Quick Comparison
To help you see the differences at a glance, we've put together a simple table comparing the main types of AI photo enhancers.
Comparison of AI Photo Enhancement Tools
This table breaks down the tool types by who they're for, what they do best, and how you'll likely pay for them.
| Tool Type | Best For | Key Features | Common Pricing Model |
|---|---|---|---|
| Free Online Enhancers | Quick edits, casual users, and trying out AI features. | Simple interface, fast processing for single images, limited options. | Free (with ads or limits), or low-cost subscriptions. |
| Dedicated Desktop Software | Professionals, high-volume work, and maximum quality control. | Batch processing, RAW support, advanced settings, offline access. | One-time purchase or higher-tier monthly/annual subscription. |
| Plugins | Photographers and designers already using pro editing software. | Seamless workflow integration, access to familiar tools. | One-time purchase or included with a larger software subscription. |
Ultimately, choosing the right AI photo enhancement tool is a personal call. By weighing your goals, workflow, and budget against these categories, you can confidently pick the software that will help you produce incredible images every single time.
Where AI Photography Is Headed Next
The world of AI photo enhancement is moving at a breakneck pace, and we've long since left simple sharpening and upscaling in the rearview mirror. We're now charging into a genuinely creative era where AI is less of a clean-up tool and more of an imaginative collaborator. This is fundamentally changing not just how we edit photos, but how we think about creating them in the first place.
New tools are popping up that completely redefine what's possible in an edit. We're moving beyond just improving what’s already in the frame. Now, we can add, remove, and completely transform elements within a photo with a level of realism that’s honestly a little mind-blowing. This throws open the doors to a world of creative control that used to be the exclusive domain of Photoshop wizards with years of experience.
The Game-Changer: Generative Editing
One of the most exciting developments is generative fill. Picture this: you take a great shot, but there's an ugly trash can cluttering up the background. The old way involved a tedious, painstaking process of cloning, patching, and hoping it looked seamless.
Now? You just select the object and tell the AI to get rid of it. But the magic is that it doesn't just leave a blurry patch. The algorithm intelligently regenerates the background, perfectly matching the lighting, textures, and even the perspective of the original scene as if the object was never there.
And it works both ways. You can expand a photo's canvas and let the AI dream up the rest of the landscape, or maybe add a flock of birds to an empty sky. All you need is a simple text prompt.
Bending Reality with Style and Composition
Beyond just fixing things, AI is becoming an incredible artistic partner. Take AI style transfer, for example. This lets you apply the entire aesthetic of a famous painting or a specific art style directly to your photo. Want to see what your cityscape shot would look like if Van Gogh painted it? Done. How about turning a family portrait into a vibrant pop-art piece? Easy.
What all this really means is that high-end, complex editing is no longer locked away for the pros. These tools are becoming accessible to everyone. We're seeing a true partnership form between human creativity and machine intelligence, and it's shaping a future where the only real limit to what you can create is your own imagination.
Common Questions About AI Photo Enhancement
As you start exploring what AI photo enhancement can do, it's natural for a few questions to come up. Let's walk through some of the most common ones to help you use these incredible tools with confidence.
Can AI Photo Enhancement Damage My Original Photo?
Nope, not at all. Every credible AI photo enhancer out there works non-destructively. When you upload a picture, the tool gets to work on a copy, leaving your original file completely untouched and safe on your device.
Think of it like making a high-tech photocopy to experiment on. You can go wild with different settings, models, and enhancements, and you'll never risk losing that original shot.
Will My AI-Enhanced Photos Look Fake or Unnatural?
That’s a fair question, especially if you remember some of the earlier, clunkier AI tools. While you can push the settings too far and end up with something that looks artificial, modern tools are far more sophisticated at delivering natural-looking results.
The real secret is to treat the AI's first pass as a suggestion, not a final product. If an enhancement feels too strong, just dial it back. A great enhancement is one you don't even notice—the photo just looks like it was perfectly shot from the start.
Is It Ethical to Use AI to Edit Photos?
The ethics really boil down to two things: context and honesty. If you're using AI to restore an old family photo or clean up technical glitches like noise or blur, it's a fantastic tool. It's just a faster, more powerful way to do what editors have done for decades.
Where things get tricky is when AI is used to change the reality of a photo without telling anyone, especially in fields like journalism or advertising. A good rule of thumb is to be transparent. If you've significantly altered an image, it's best practice to be open about it.
How Is AI Affecting Different Industries?
AI photo tools are making waves far beyond just professional photography. In e-commerce, for instance, they're used to create consistently high-quality product shots, which can have a direct impact on sales.
You can see the broader implications when you look at how AI is shaping the AI in the beauty industry, powering everything from flawless product images to virtual try-on apps. Real estate agents are using it to make listings pop, and social media managers rely on it to create content that stops the scroll.
Ready to see what AI can do for your photos? With AI Photo HQ, you can upscale, restore, and generate stunning images in seconds. Start creating with AI Photo HQ today!

