Ever found yourself looking at one of those vibrant, Warhol-style portraits and thinking, "How do they even make those?" The good news is, you don't need to be an art-school grad to pull it off. This guide will walk you through, step-by-step, how to turn your everyday photos into stunning, colorful masterpieces with tools that are surprisingly simple to use.
Turn Your Photos into Bold Pop Art
We’re going to skip the overly technical stuff and dive right into the practical side of things. The goal here is to help you transform your favorite pictures into art that really pops. Think of it for a new social media profile pic, a one-of-a-kind gift, or even some cool decor for your wall.
Here’s a quick look at the steps we’ll cover:
- Step 1: How to pick the perfect photo for the pop art treatment.
- Step 2: Applying classic, iconic effects with modern AI tools.
- Step 3: Tweaking the final image so it feels uniquely you.
By the time you're done, you'll know exactly how to create some seriously eye-catching artwork. And hey, if you get hooked and decide to take on a bigger project, you’ll also understand why finding the right creative partner can be a game-changer.
Step 1: Choose the Perfect Photo for Pop Art

Here’s a little secret I've learned from experience: the magic of a killer pop art piece happens before you even touch the AI. It all comes down to choosing the right photo. Get this first step right, and the rest is easy. Not every snapshot is cut out for the job, but knowing what to look for will set you up for a fantastic result.
The number one rule? Your photo needs a strong, clear focal point. I'm talking about a close-up portrait where the subject is the undeniable star, not some wide-angle landscape shot where everything is fighting for your attention. In the world of pop art, simplicity is king.
Busy backgrounds are the enemy. They create a chaotic mess that completely buries your subject. Always look for photos with plain, uncluttered, or even blurry backgrounds. If you have the perfect picture but the background is a disaster, don't give up on it—a quick crop might be all it takes to save the day.
A Quick Checklist for Your Photo
Lighting is another make-or-break element. Pop art thrives on high contrast—those bold, graphic shapes created by distinct bright areas and dark shadows. A photo that’s flatly lit will just look dull and lifeless once you convert it. You need that dramatic punch.
So, when you're digging through your camera roll, use this checklist:
- Is it High Resolution? Start with a sharp, clear image. A blurry or pixelated photo will only get worse once you start applying effects.
- Is the Subject Strong? Make sure your subject is well-defined and instantly recognizable. No guesswork allowed.
- Does it Have Good Contrast? Look for that dynamic lighting. You want obvious highlights and shadows to give the image depth and energy.
Pro Tip: Here’s a quick test you can do. Before uploading your photo, open it in your phone's photo editor and apply a black and white filter. If your subject still pops and you can clearly see the defined shapes, you’ve got a winner. This simple test is the best way to see the underlying contrast you’re working with.
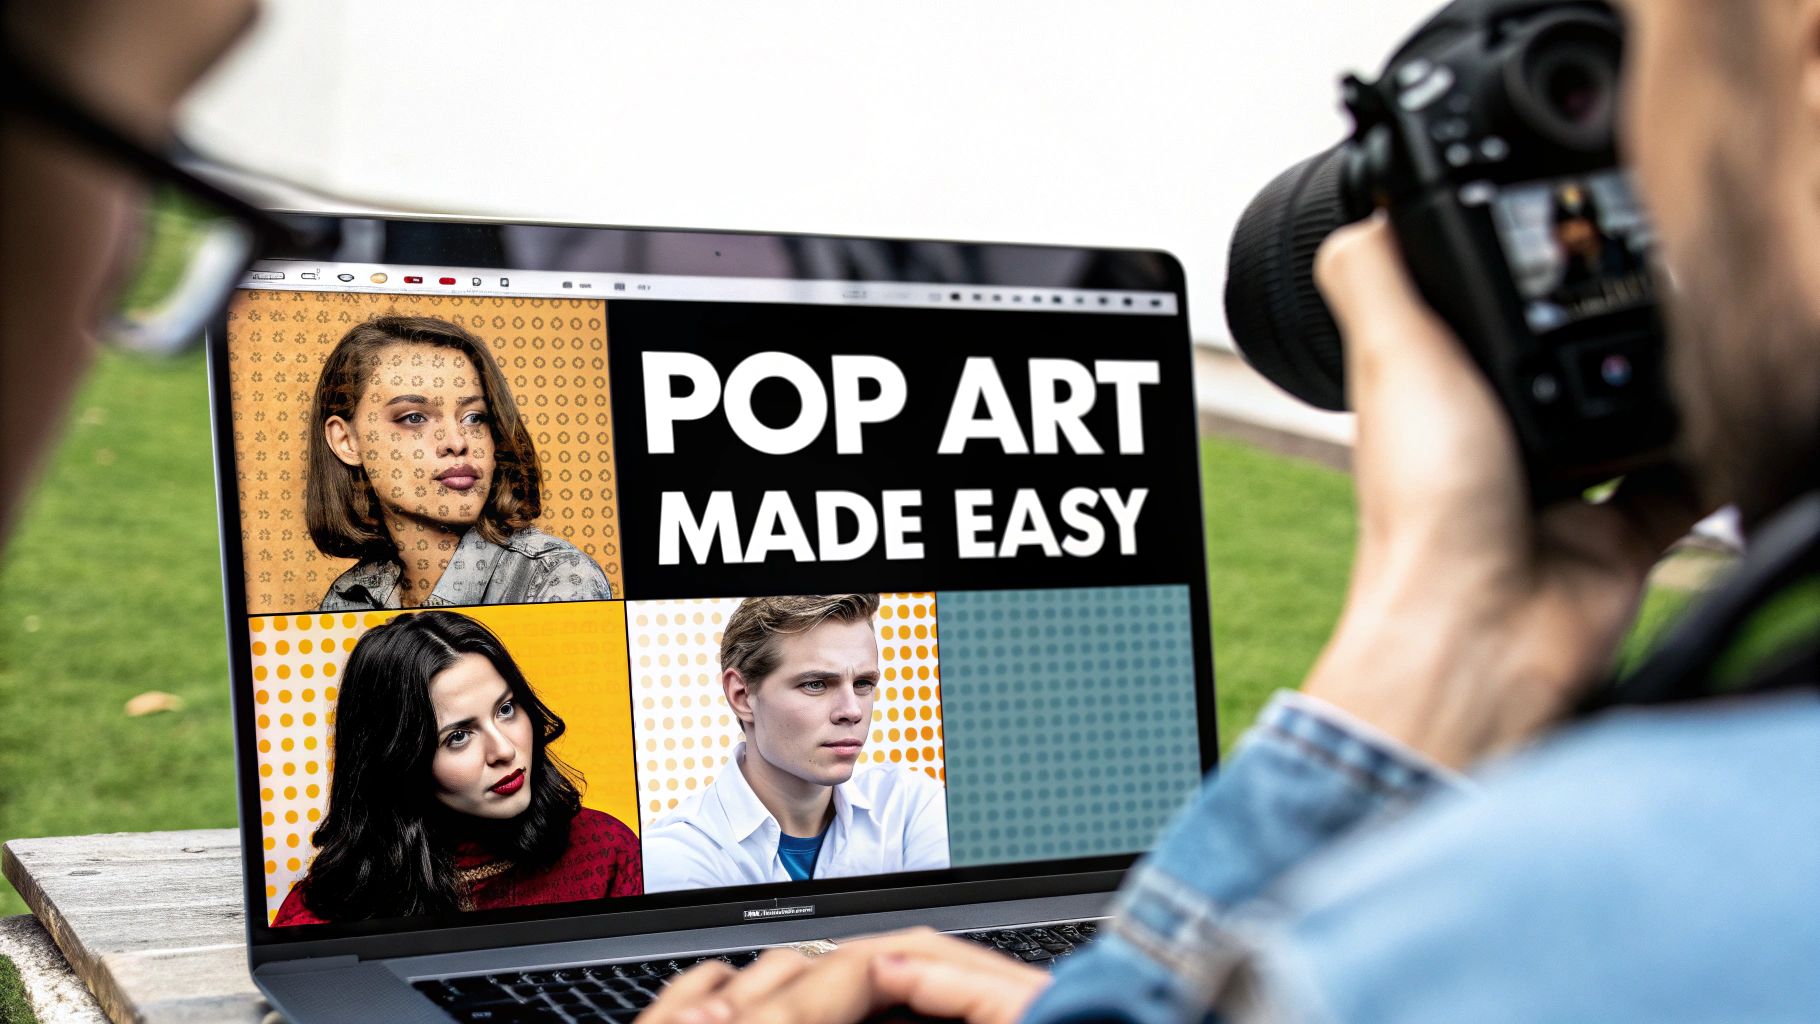
Step 2: Use AI Tools for Instant Pop Art Effects
Alright, you’ve picked the perfect photo. Now for the fun part: turning it into pop art with the almost magical speed of an AI tool. Forget about spending hours in complicated software. The new wave of AI editors lets you skip the technical headache and jump straight into the creative process.
Think about it. You could take a simple snapshot of your dog and, in just a few seconds, have a classic Warhol-inspired four-panel print. That’s exactly what these tools are built for. You upload your image, and suddenly you have a whole library of styles to play with.
These aren't just generic filters. You can find everything from Lichtenstein-inspired Ben-Day dots to the bold, flat color blocks that practically scream pop art. For anyone curious about the bigger picture, it's fascinating to see how AI can enhance creative processes beyond just simple edits.
A Simple Tutorial: From Photo to Pop Art
The whole process is incredibly straightforward. Most AI platforms are designed to get you from A to B with just a few clicks. Here's a typical step-by-step workflow:
- Upload Your Image: Start by uploading that high-contrast photo you picked out earlier. Look for a button that says "Upload" or "Choose File."
- Navigate to Styles: Find the effects or styles library. Scroll through the pop art effects—they’re often labeled "Warhol," "Comic," or "Posterized" for easy spotting.
- Apply and Preview: Click a style and watch the magic happen with an instant preview. Don't just stop at one! The same photo can take on a completely different vibe with a new effect. Try at least three different ones to see what you like best.
An interface with visual thumbnails makes it a breeze to compare different looks side-by-side before you settle on a final version.
This trend of turning personal photos into custom art is bigger than you might think. The global market for artistic photography, which includes pieces made from photos, is valued at over $1.7 billion. It's a space that just keeps growing.
Honestly, the key is just to experiment. Play around and see how different styles react to your photo’s unique lighting and composition. If you want to go deeper into finding the right platform for your needs, our guide on choosing the best AI art generator from a photo is a great place to start.
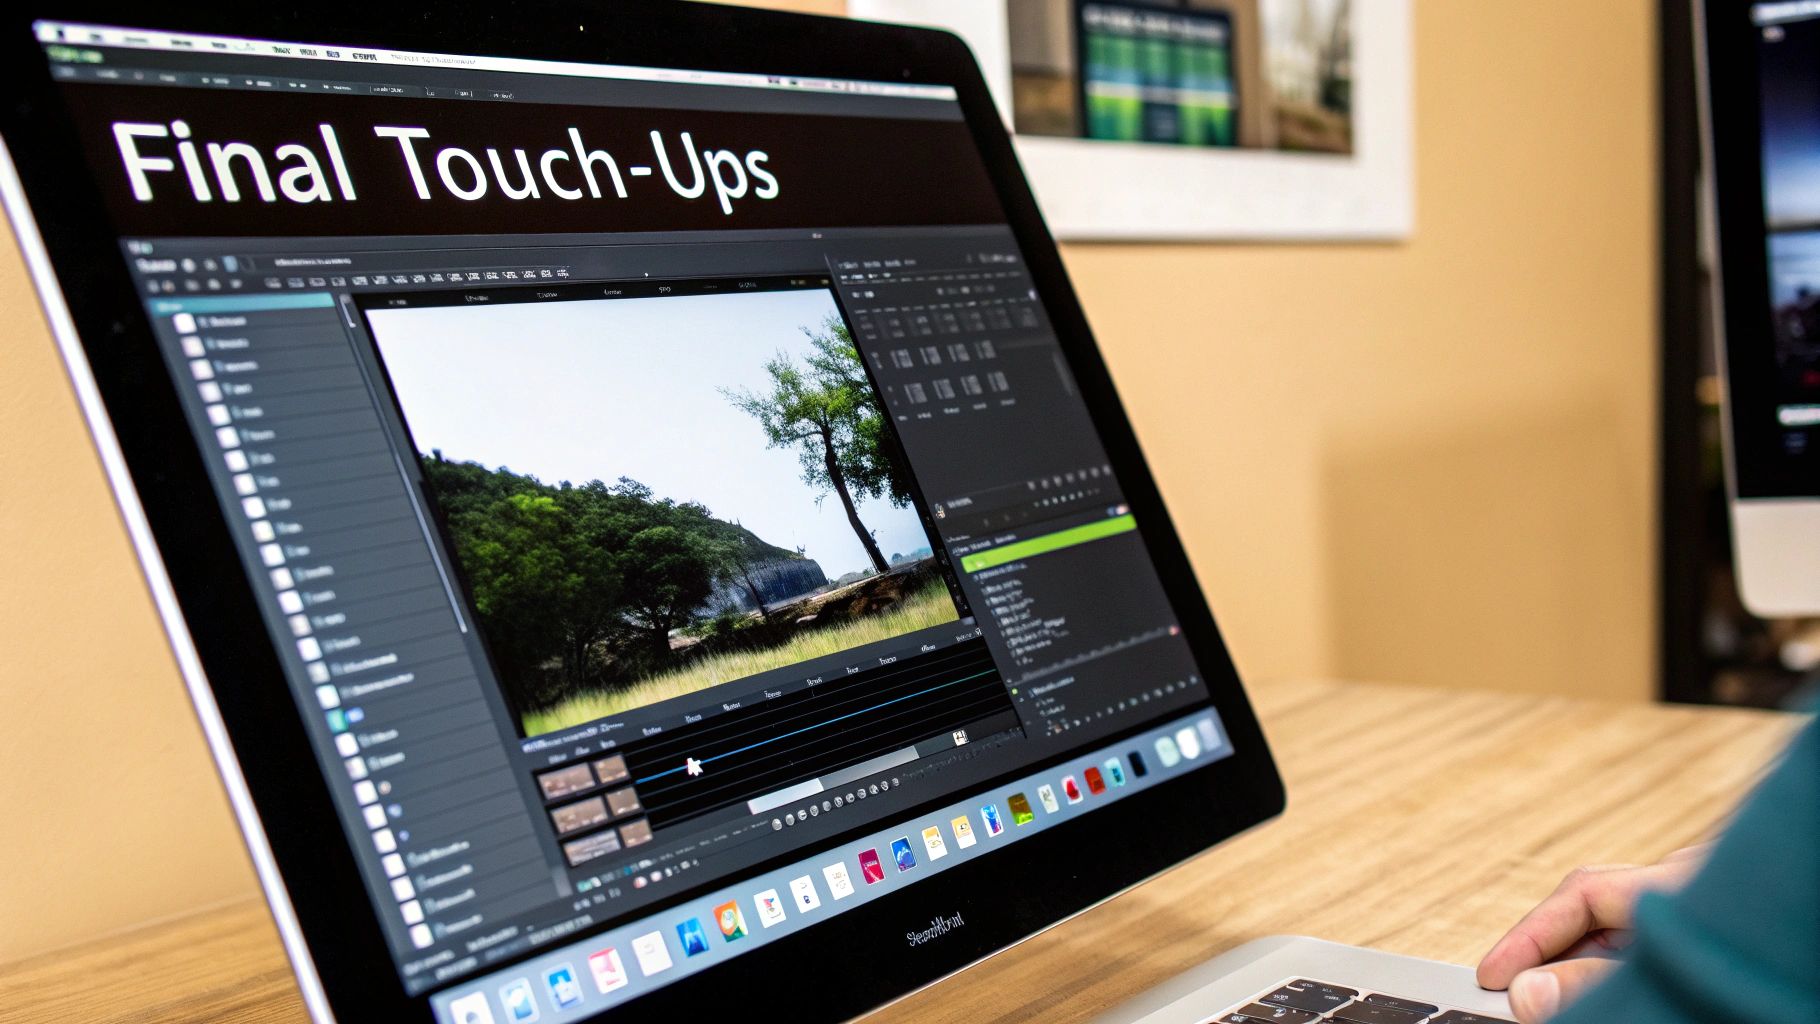
Step 3: Fine-Tune Your Colors and Textures
An AI preset is a fantastic launchpad, but the real artistic magic happens in the details. This is where you graduate from simply applying a filter to crafting a piece of art that’s uniquely yours. This step is what separates a quick edit from a genuinely stunning final image.
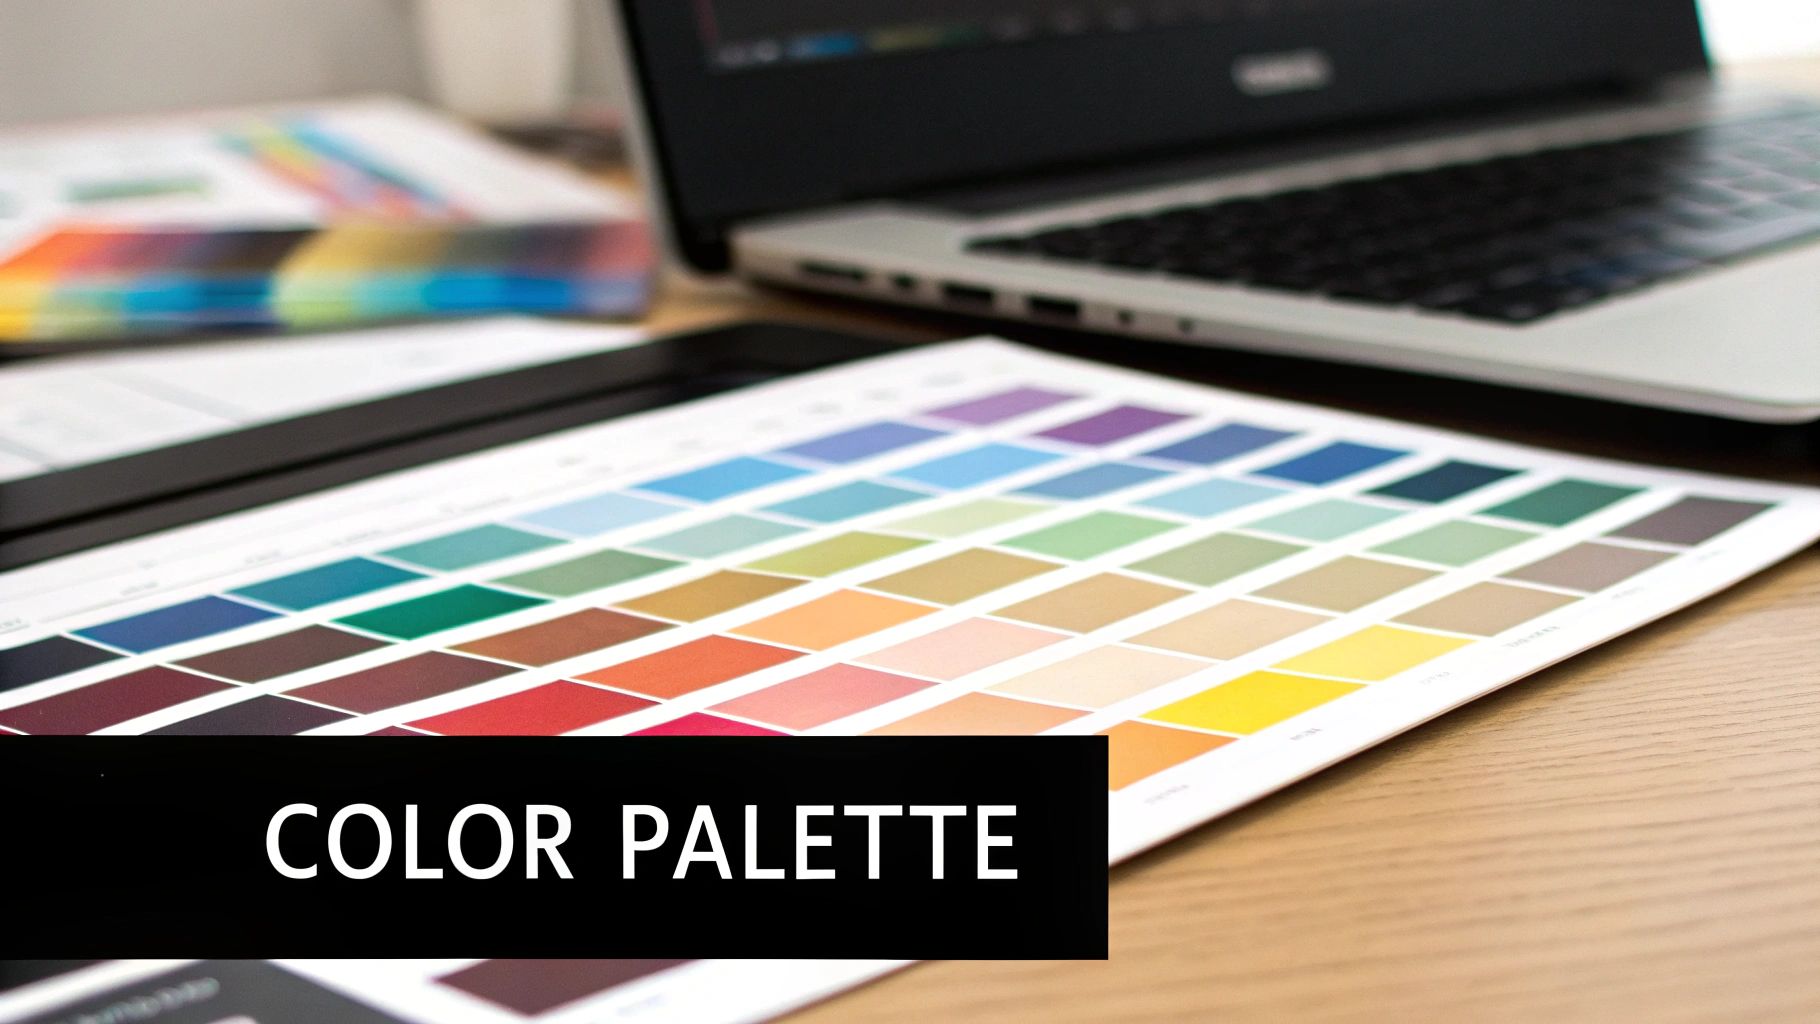
The first and most impactful adjustment you can make is color. Instead of just sticking with the default hues, look for a color palette editor. You can swap them for a custom scheme to match the art to your home decor or even align it with your personal brand colors for a cohesive social media feed. It’s a simple change, but it completely alters the mood.
If you really want to go deep on this, our guide on mastering photo colour grading is packed with advanced techniques.
A Practical Guide to Adjusting Details
Beyond color, the texture and linework offer another layer of control. So many tools let you tweak the finer points of the effect, and these can dramatically alter the final look.
Look for these sliders and settings and try adjusting them:
- Outline Thickness: Do you want a subtle, thin line or a bold, comic-book-style outline? Drag the slider to see how it makes the image feel more delicate or way more graphic.
- Halftone Dot Scale: That classic pop art dot pattern can be customized. Use the slider to make the dots smaller for a finer, more detailed texture, or larger for a grittier, retro vibe.
- Shadow Intensity: Deepening or softening the shadows can shift the entire mood of a photo. Try increasing the shadows to make a portrait feel more dark and dramatic.
Example in Action: I once took a daytime photo of a cityscape, changed the palette to deep blues and purples, and cranked up the shadow intensity slider. The result? A completely convincing nighttime scene.
Ultimately, these fine-tuning options are your playground. Experimenting with these settings is the best way to develop a signature style and create pop art from photos that feels authentic and intentional.
Advanced Technique: Layering Effects for One-of-a-Kind Art
Ready to move beyond a single filter? This is where you can really start to develop a signature style. The secret is to think like an artist and begin layering multiple effects or applying them selectively to different parts of your photo. It’s how you go from a cool picture to a piece of art that’s uniquely yours.
Instead of just slapping one effect over the entire image, this approach lets you combine different pop art styles for a far more dynamic result.
Tutorial: Multi-Panel Family Portrait
Imagine you're putting together a family portrait collage. Instead of one uniform filter, try this:
- Isolate Each Person: Crop the photo to focus on one person at a time. Save each as a separate file.
- Apply Unique Styles: Upload the first person and apply a bold, posterized look. For the second person, use a classic halftone pattern. Continue for each family member.
- Recombine the Images: Use a simple collage tool (like Canva or even PowerPoint) to place the individually-styled portraits back together into a single image. The final piece feels cohesive but still incredibly personal and fun.
Another really powerful technique is digital masking. This lets you apply an effect to just one part of your photo, leaving everything else untouched. You could, for example, render a whole portrait in a stylized, comic-book look but mask the eyes to keep them hyper-realistic. That contrast creates an incredible focal point that just pulls the viewer in.
Combining Styles for Impact
The key is to just play around and see what works. Some of the most popular filters are perfect for layering, and you can come up with some amazing combinations.
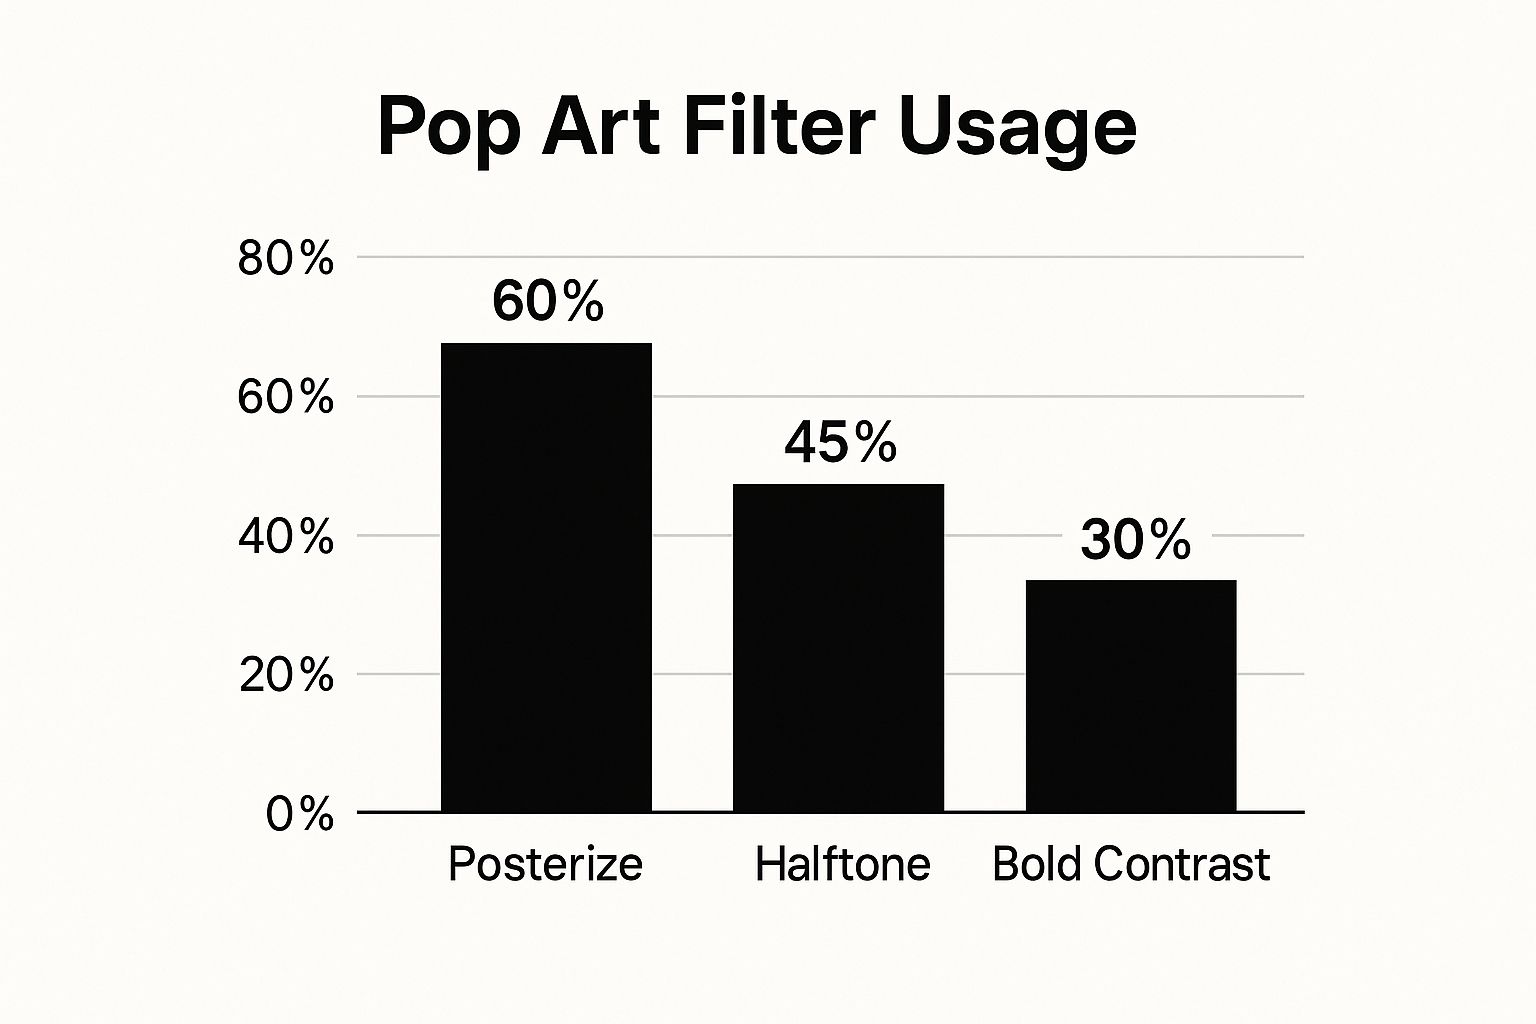
This data shows that Posterize effects are a huge favorite, which makes sense given their classic, bold color-blocking. Try layering a subtle Halftone texture over a Posterized base—you'll be amazed at the depth and retro feel it adds.
This kind of creative mixing really gets to the heart of the Pop Art movement itself, which has seen a massive resurgence lately. In 2022 alone, Pop Art prints pulled in roughly £36 million at auctions, a figure driven by modern works that creatively blend in photographic elements. If you're curious, you can explore more about these market trends to see just how much the style continues to evolve.
To give you a better idea of which styles to start with, here’s a quick breakdown of the big three and what they’re best suited for.
Pop Art Style Comparison
| Style | Key Characteristics | Best For |
|---|---|---|
| Andy Warhol | Bright, saturated, often contrasting colors. Repetitive silkscreen-like images. | Portraits, everyday objects, celebrity-style shots. |
| Roy Lichtenstein | Comic-book aesthetic with thick black outlines, Ben-Day dots, and bold primary colors. | Action shots, dramatic portraits, images with a narrative feel. |
| Keith Haring | Simple, bold lines, vibrant colors, and dynamic figures in motion. Minimalist and energetic. | Photos with clear silhouettes, action poses, and a sense of movement or fun. |
Each of these iconic styles offers a completely different vibe. Don't be afraid to mix and match elements—like Lichtenstein's dots on a Warhol-esque color palette—to create a look that is entirely your own.
Final Step: Saving and Sharing Your Pop Art Creation
You've done the creative work, tweaked every detail, and now your pop-art masterpiece is ready. But what’s next? Getting it off your screen and into the world—whether that's your Instagram feed or a frame on your wall—requires a few final steps.
First things first, let's talk file formats. Here’s how to choose:
- For Online Sharing (Social Media, Websites): Save as a JPEG. It keeps the file size down for fast loading without sacrificing too much quality.
- For Artwork with Sharp Lines or Transparency: Save as a PNG. It’ll preserve those crisp details perfectly.
Prepping for Print and Creative Projects
Taking your art from digital to physical is where you need to be a bit more careful. To make sure your print comes out looking sharp and not like a blurry, pixelated mess, you must save it at a high resolution. The gold standard for any physical print is 300 DPI (dots per inch). Look for this setting in the "Export" or "Save As" options of your tool.
A common mistake to avoid: Assuming what you see on screen is what you'll get in print. Screen and print colors can vary wildly, so I always recommend doing a small test print first to check the colors before committing to a large, expensive one.
Once your high-res file is saved, the real fun begins. Don't just let that incredible piece of art collect digital dust on your hard drive! You can easily turn your creation into:
- Custom Phone Cases: Carry your art with you everywhere you go.
- Unique Greeting Cards: Nothing beats a personalized card for a birthday or holiday.
- Canvas Prints: Instantly liven up any room with your own wall decor.
Following these final steps is what makes all your effort to create pop art from photos worth it. You’ll end up with a stunning, professional-looking piece you can be truly proud to show off.
A Few Questions You Might Have About Pop Art
If you're just dipping your toes into pop art, you probably have a few questions, especially when it comes to turning your own photos into something amazing. I get it. Let's walk through some of the most common things people ask, so you can feel more comfortable experimenting.
So, what kind of photos actually work for this? Honestly, while high-contrast portraits are a no-brainer, you can get creative with almost any clear, well-defined image. I've seen incredible results with pictures of pets, cool architectural shots, or even something as simple as a vibrant piece of fruit. The real secret is a strong silhouette and a background that isn't too busy.
Another big one is originality. Is it really art if an AI is doing a lot of the work? I say absolutely. The AI is just a tool, like a modern paintbrush. You're the one calling the shots—picking the photo, the style, the color scheme, and the final look. You are the creative director here, guiding the tech to bring your vision to life.
The Value and Tools of the Trade
People are often curious about how photo-based art fits into the bigger picture. It's an interesting space. While pop art prints are more popular than ever, the broader photography auction market has seen some wild shifts.
Believe it or not, between 2005 and 2024, global auction sales for photography hit about $3.07 billion. But during that same time, the average price for a single piece actually fell by 52.7%, dropping from $16,068 to $7,608. You can dig deeper into these photography market trends on news.artnet.com.
The best tool for the job really depends on your goal. Simple apps are great for quick, fun edits, while more advanced platforms give you granular control over colors, textures, and layering for a truly professional finish.
What if your original photo isn't quite perfect? Don't sweat it. Small issues like dust spots or tiny scratches can often be cleaned up before you even start the pop art conversion. In fact, if you're working with older family photos that have seen better days, you can use similar AI tech to fix them up first. We have a whole guide on powerful AI old photo restoration that shows you how. Prepping your image this way ensures your final pop art piece starts from the best possible foundation.
Ready to bring your own photos to life with vibrant, eye-catching styles? With AI Photo HQ, you can instantly transform any image into a stunning pop art masterpiece. Explore our templates and start creating today at https://aiphotohq.com.

