
To really get a handle on removing photo grain, it helps to first know what causes it. Once you understand why that gritty texture shows up, you can not only clean it up in your photos but also learn to stop it from happening in the first place.
What Is Photo Grain and Why Does It Appear?
You know that speckled, almost sandy look you sometimes see in pictures, especially ones taken in low light? That’s photo grain, or what we often call digital noise in the digital world. It's the classic sign of a photo taken at a dimly lit concert or an indoor party where you didn't use a flash.
It all comes down to your camera's ISO setting. When you crank up the ISO, you’re making the camera's sensor more sensitive to light. This is great for getting a bright enough shot when it’s dark, but there's a trade-off. Boosting that sensitivity also amplifies tiny imperfections in the signal, creating that grainy texture.
High ISO is the usual suspect, but it's not the only thing to blame. Underexposing your photo, even with a low ISO, can also bring out the grain. Noise loves to hang out in the dark, shadowy areas of an image. If you try to brighten an underexposed picture later in editing software, you're essentially dragging those shadows into the light—and all that hidden noise comes right along with them.
Here’s a pro tip I live by: A properly exposed photo taken at a higher ISO will almost always look cleaner than an underexposed photo taken at a lower ISO that you have to "fix" later. Don't be scared to bump up the ISO to get the shot right in-camera.
The Difference Between Film Grain and Digital Noise
Even though we often use the terms "grain" and "noise" interchangeably, they're not quite the same thing.
True film grain is a product of old-school analog photography. It’s caused by the tiny clumps of metallic silver crystals that make up a film photograph. Its pattern is random and has an organic feel, which is why some photographers actually add it to digital photos for a nostalgic, artistic vibe.
Digital noise is the modern, electronic version of that. It’s a digital artifact created by your camera's sensor. It typically shows up in two ways:
- Luminance Noise: This is the monochromatic, salt-and-pepper speckling that looks a lot like classic film grain. It just affects the brightness of pixels, not their color.
- Chroma (Color) Noise: This one is usually more distracting. It shows up as random splotches of red, green, and blue, making parts of your photo look messy and discolored.
Trying to get a clean, crisp image is a challenge photographers have faced for a long time. Back in the 19th century, early chemical processes often led to very coarse images. A huge leap forward came with the wet collodion process in 1851, which used a much finer chemical layer to create negatives with stunning detail.
At the end of the day, the more you know about grain, the better choices you can make—whether you're tweaking settings on your camera or restoring an old family photo. If you want to dive deeper into improving your pictures, check out our guide on how to make an image clear. And to keep your physical photos looking great, these expert tips on how to preserve old photographs are a fantastic resource.
Classic Manual Methods for Grain Reduction
Before AI tools became the go-to solution, photographers mastered manual grain reduction in software like Adobe Lightroom or Photoshop. These programs have powerful features that offer precise control over your image. It’s a hands-on approach that requires a delicate touch.
This quest for cleaner images pushed innovators for decades. A breakthrough came in 1887 when Reverend Hannibal Goodwin invented a flexible, cellulose-based film. This film, made famous by Kodak, used finer emulsions with smaller silver halide crystals, drastically cutting down on the visible grain common with older glass plates. You can dive deeper into the fascinating history of early photography on Wikipedia.
This image below is the first-ever permanent photograph, taken by Joseph Nicéphore Niépce.
It’s a stark reminder of how far technology has come—from hours-long exposures on pewter plates to instant digital captures where we can manage grain with a few clicks.
Tackling Grain in Adobe Lightroom
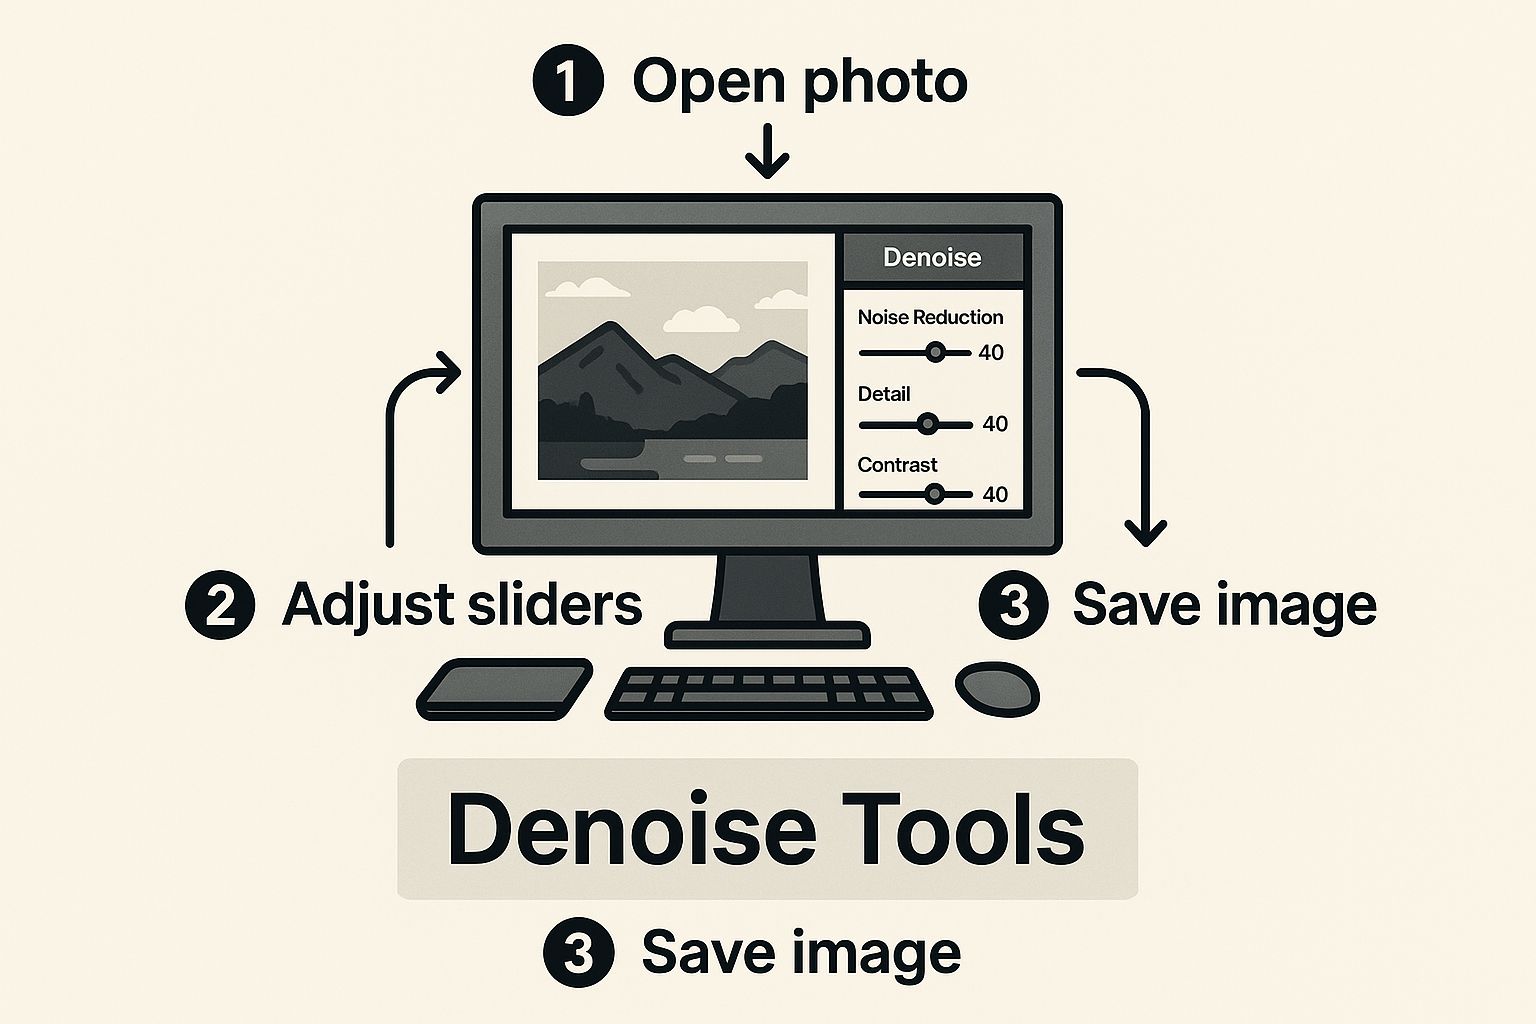
Inside Lightroom, the Detail panel is your command center for noise reduction. Here's a step-by-step guide to using it effectively:
- Open the Detail Panel: In the Develop module, scroll down the right-hand side until you find the "Detail" panel.
- Zoom In: Before you touch anything, zoom into your photo at a 1:1 (100%) view. This is critical for accurately judging the noise and the effect of your adjustments.
- Adjust Luminance: Find the Noise Reduction section. Start by slowly moving the Luminance slider to the right. Watch the grainy texture smooth out. Aim for a value between 20 and 40 as a starting point.
- Be Careful: Pushing this slider too far will make your photo look soft and plastic. The goal is to reduce distracting grain, not eliminate all texture.
- Bring Back Detail: Now, use the Detail and Contrast sliders under Luminance to recover some of the fine texture you lost. Gently increase the Detail slider to bring back sharpness in key areas. It's a balancing act: reduce grain with one slider, reclaim detail with the next.
A Non-Destructive Photoshop Workflow
For more complex jobs, Adobe Photoshop offers more control using Smart Objects. This method lets you edit your settings at any time without permanently altering your original image.
Here's a step-by-step tutorial:
- Convert to Smart Object: Open your image in Photoshop. In the Layers panel, right-click on your image layer and select "Convert to Smart Object." You'll see a small icon appear on the layer thumbnail.
- Apply the Noise Filter: Go to the main menu and navigate to
Filter > Noise > Reduce Noise. This opens a new window with several sliders. - Adjust the Sliders:
- Strength: This is your main control for luminance noise. Adjust it until the grain is reduced to an acceptable level.
- Preserve Details: This slider is key. Increase it to protect the sharp edges in your photo. A value between 30-70% is often a good range.
- Reduce Color Noise: If you see colored splotches, increase this slider to even them out.
- Confirm the Filter: Click OK. The filter is now applied as a "Smart Filter" listed below your layer. You can double-click this filter anytime to reopen the dialog box and refine your settings.
While these manual methods are solid, they often force a trade-off between noise and sharpness. Fixing grain can leave your photo a bit soft. If that's an issue, check out our guide on how to fix blurry pictures.
Using AI Photo HQ to Remove Photo Grain
Manual tools in Photoshop or Lightroom give you control, but they can be a massive time sink. This is where a tool like AI Photo HQ shines. It offers a simple, one-click fix to remove photo grain, minus the frustrating learning curve.
Here's a practical, step-by-step guide to using it:
- Upload Your Photo: Go to the AI Photo HQ website. Drag and drop your grainy photo into the uploader, or click to select the file from your computer. The interface is clean and built to be straightforward.
- Let the AI Work: As soon as your photo is uploaded, the AI automatically analyzes it. It intelligently identifies unwanted grain versus essential details, like hair texture or fabric patterns. You don't have to do anything—the initial processing is instant.
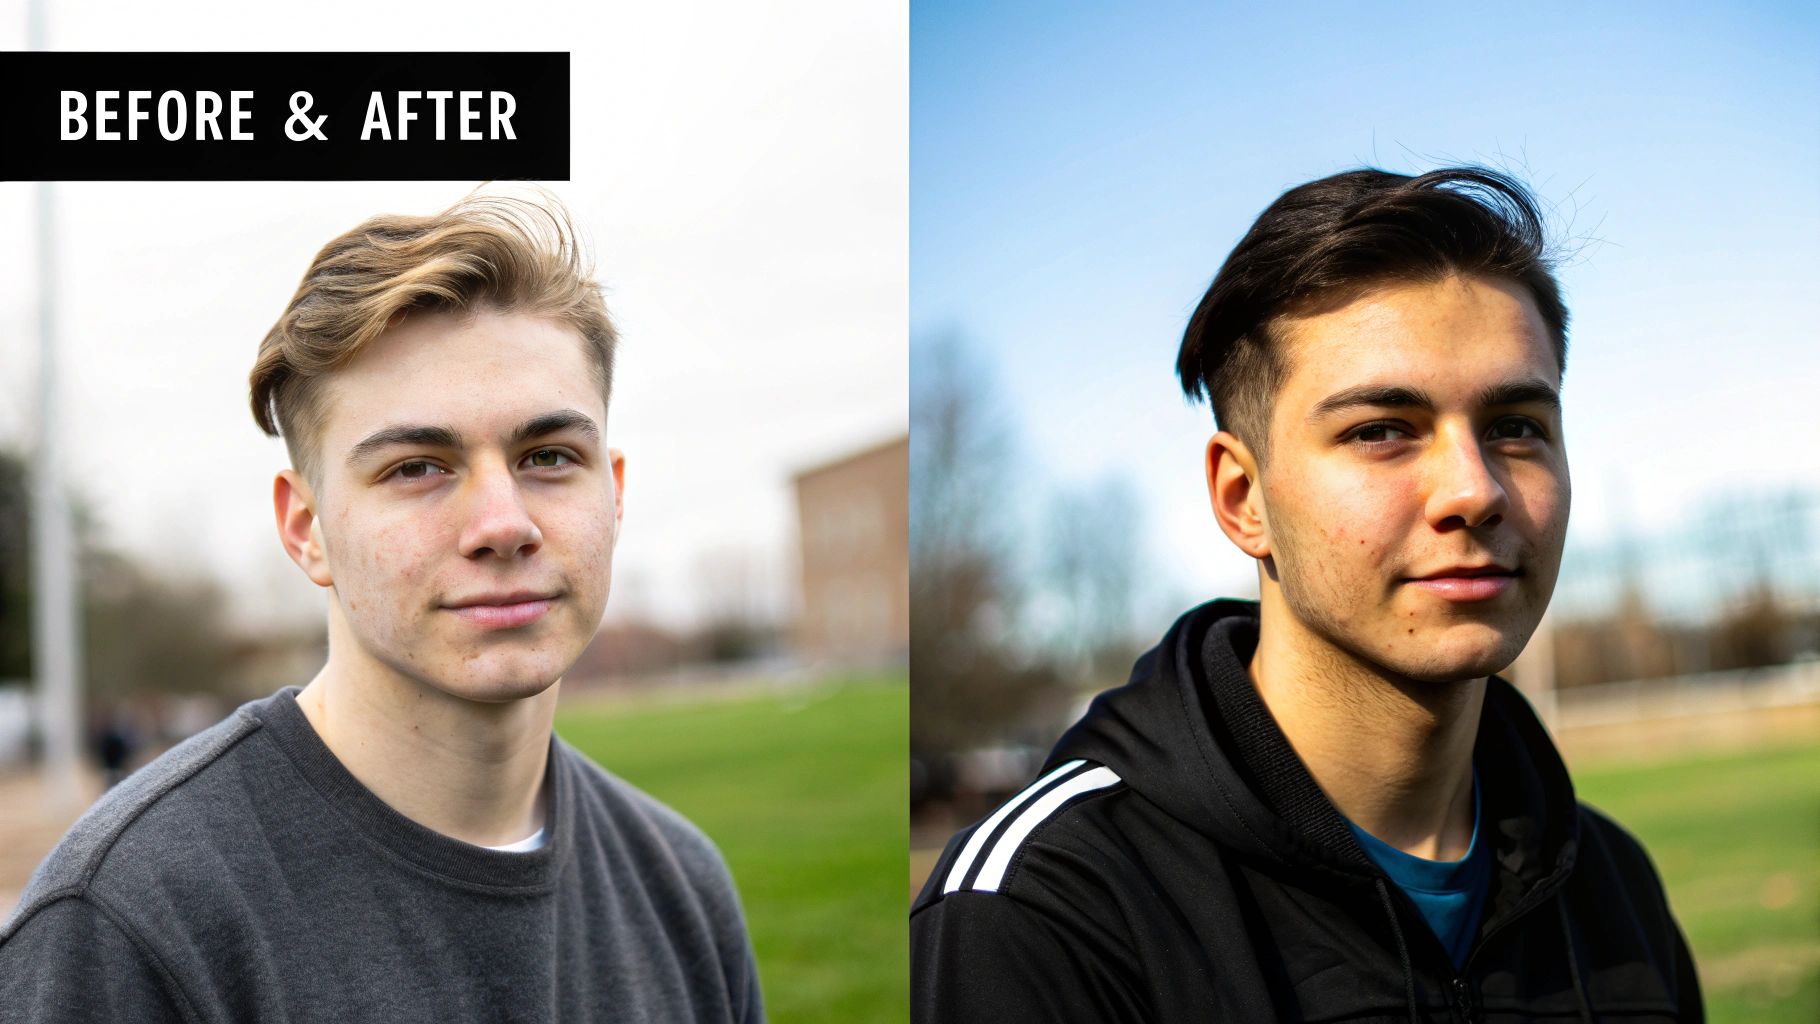
- Review the Result: You’ll immediately see a before-and-after slider comparing your original photo to the AI-enhanced version. The distracting speckles disappear, colors look more vibrant, and the overall image is sharper.
The Instant Impact of AI Denoising
The AI isn’t just applying a generic blur; it's making intelligent decisions. This is particularly effective for old scanned photos, which often have a mix of film grain, scanner noise, and color fading. The AI tackles all these issues at once, giving you a fantastic starting point. If you're curious about the tech behind this, our complete guide to AI image enhancement dives into the details.
Choosing the Right Intensity Level
For more control, AI Photo HQ provides intensity settings. Here’s a quick tutorial on when to use each one:
- Select "Low Intensity": Use this for portraits or photos with only a little grain. It gently smooths noise while carefully preserving delicate skin and fabric textures. This helps you avoid the "plastic" look.
- Select "Medium Intensity": This is your best bet for most photos, such as indoor shots taken without a flash or slightly underexposed images. It strikes a great balance between cleaning up grain and keeping the image crisp.
- Select "High Intensity": Reserve this for the most challenging photos, like a very dark concert photo or a night sky shot. This setting is aggressive and will remove heavy noise, though it may soften some fine details.
Below is a quick reference table to help you pick the right intensity level.
AI Denoising Intensity Guide
| Intensity Level | Best For | Expected Outcome |
|---|---|---|
| Low | Portraits, well-lit shots, and images with subtle grain. | Gently removes noise while preserving fine details like skin texture and hair. |
| Medium | Most everyday photos, like indoor shots or slightly underexposed images. | A balanced approach that cleans up moderate grain for a crisp, clear result. |
| High | Low-light photos, night shots, and images with significant digital noise. | Aggressively removes heavy grain, which may result in some softening of details. |
This table provides a solid starting point, but always trust your eye and experiment to see what works best for your specific image.
The image above gives you a sense of how modern tools can isolate and target noise, making precise adjustments that keep the important parts of your photo intact. Understanding this helps you appreciate what the AI is doing behind the scenes.
My personal rule of thumb: Always start with the lowest intensity that gets the job done. You can always dial it up if you need to, but you can't easily get back details that have been smoothed away by an overly aggressive setting.
The goal is to get a clean photo that still feels authentic. This AI-first approach takes the guesswork out of the equation, making pro-level photo restoration something anyone can do.
An Advanced Workflow for Grain Removal and Sharpening
For ultimate control, you can combine the power of AI with the precision of manual editing. This is how professionals achieve flawless results, especially on complex images.
For example, imagine a portrait where the background is noisy but the subject's face is relatively clean. Applying heavy noise reduction to the whole image would soften the background but also destroy critical facial details, resulting in an unnatural, waxy look. A selective workflow prevents this.
Combining AI with Selective Masking
This powerful technique uses AI Photo HQ for heavy lifting and Photoshop for fine-tuning. Here's a step-by-step tutorial:
- Process with AI: First, run your grainy photo through AI Photo HQ. Download the clean, noise-free version. This will serve as your base layer.
- Layer in Photoshop: Open both the original grainy photo and the clean AI version in Photoshop. Place the clean version as a new layer directly on top of the original grainy layer.
- Create a Layer Mask: Select the top (clean) layer. Click the "Add layer mask" icon at the bottom of the Layers panel (it looks like a rectangle with a circle inside).
- Hide the Clean Layer: With the mask selected, press
Ctrl+I(Windows) orCmd+I(Mac) to invert it to black. This will completely hide the clean layer, revealing the original grainy photo underneath. - Paint to Reveal: Select the Brush tool (
B). Choose a soft, round brush and set your foreground color to white. Now, paint over the areas where you want to remove the grain (like the background). As you paint, you are selectively revealing the clean AI-processed layer only where you need it, while leaving details on your subject untouched.
The Critical Role of Post-Reduction Sharpening
Any noise reduction process can cause a slight loss of sharpness. That's why a final sharpening pass is an essential last step to bring your image back to life. After removing grain, your photo might look clean but feel a bit flat. Sharpening restores crispness to the edges.
Here’s a quick tutorial for sharpening in Photoshop:
- Merge Layers (Optional): Create a merged copy of all your layers by pressing
Ctrl+Alt+Shift+E(Windows) orCmd+Option+Shift+E(Mac). - Apply Smart Sharpen: Go to
Filter > Sharpen > Smart Sharpen. - Adjust Settings:
- Amount: Set this between 50-80% for a subtle effect.
- Radius: Keep this low, around 0.8 to 1.2 pixels, to avoid creating harsh halos around edges.
- Reduce Noise: Leave this at a low value.
- Click OK to apply. The goal is to reclaim crispness, not create artificial-looking edges.
Batch Processing for Ultimate Efficiency
When you have hundreds of photos from an event shot in similar lighting, editing them one by one is impractical. Here's where a Photoshop Action saves you.
- Open the Actions Panel: Go to
Window > Actions. - Create a New Action: Click the "Create new action" button. Give it a name, like "AI Denoise & Sharpen," and click "Record."
- Perform Your Edits: Perform all the steps of your workflow (e.g., applying a filter, sharpening). Photoshop will record every step.
- Stop Recording: Click the "Stop" button in the Actions panel.
- Batch Process: Go to
File > Automate > Batch. Select your new action, choose the source folder with your photos, set a destination folder, and click OK. Photoshop will now apply your entire workflow to every photo automatically.
Common Mistakes When Removing Photo Grain
It's easy to get carried away when removing grain, but overdoing it can ruin a photo. Knowing the common pitfalls is key to getting clean, natural-looking results. Let's break down the most common mistakes so you can avoid them.

