Ever had a killer visual idea pop into your head but just couldn't get it onto paper or a screen? That's where an AI image generator comes in. It's a tool that takes your written words and turns them into unique art, all with the power of artificial intelligence.
You just type out what you’re picturing—something like "a futuristic cityscape at sunset, neon lights reflecting on wet streets"—and the AI gets to work, crafting an image based entirely on your prompt. It’s a complete game-changer, making digital art something anyone can create.
Getting Started With AI Image Generation
Think of an AI image generator as your personal digital artist, on call 24/7. It bridges the gap between your imagination and a finished piece of art, no specialized skills required. This isn't just for tech gurus; it's built for anyone with a creative itch they need to scratch.
The magic behind this all comes from a technology called generative AI. In a nutshell, these systems have been trained on billions of images and their matching text descriptions. They've learned the connections between words and visual concepts. If you're curious about the nuts and bolts, you can dive deeper into what is generative AI and see how it all works. But for now, all you need to know is that when you write a prompt, the AI uses its massive library of knowledge to build an image that fits your words.
A Quick Step-by-Step to Your First Image
When you first open up a tool like AI Photo HQ, you’ll see it’s designed to be pretty intuitive. The main event is the text box where you'll type your prompt. That’s your canvas. Let's create our first image together.
- Find the Prompt Box: This is the large text field, usually at the top of the page.
- Type a Simple Idea: Let's start with something basic. Type:
a golden retriever puppy sitting in a field of flowers. - Choose a Style (Optional): Look for a dropdown menu labeled "Style." Select "Photorealistic" to make it look like a real photo.
- Set the Aspect Ratio (Optional): For this image, let's pick "Square (1:1)," which is great for social media.
- Click "Generate": Hit the button and watch the AI work. In a few moments, you'll have your first creation!
Key Takeaway: The quality of the image you get is almost entirely dependent on the quality of the prompt you write. A simple prompt will give you a simple image. A detailed, descriptive prompt is how you get those rich, stunning results. Your words are everything.
This whole field is moving incredibly fast, with new features and better models popping up all the time. To get a sense of the bigger picture, it's worth checking out the latest trends in AI content generation. For now, let's focus on making that first prompt even better.
Getting Photorealistic Results Starts With Your Prompt
The secret to getting a jaw-dropping image from an AI text-to-image generator isn't some hidden setting or secret trick. It all comes down to the quality of your prompt. Moving beyond a simple phrase like "a dog" is what separates a generic, forgettable image from a stunning, photorealistic piece of art.
You have to think like a photographer setting up a shot. Your prompt is your recipe, and the main subject is just one ingredient. To create a masterpiece, you need to layer in details about the environment, the lighting, the mood, and even the camera gear you want the AI to mimic.
This infographic gives you a bird's-eye view of how a basic idea becomes a fully rendered image.
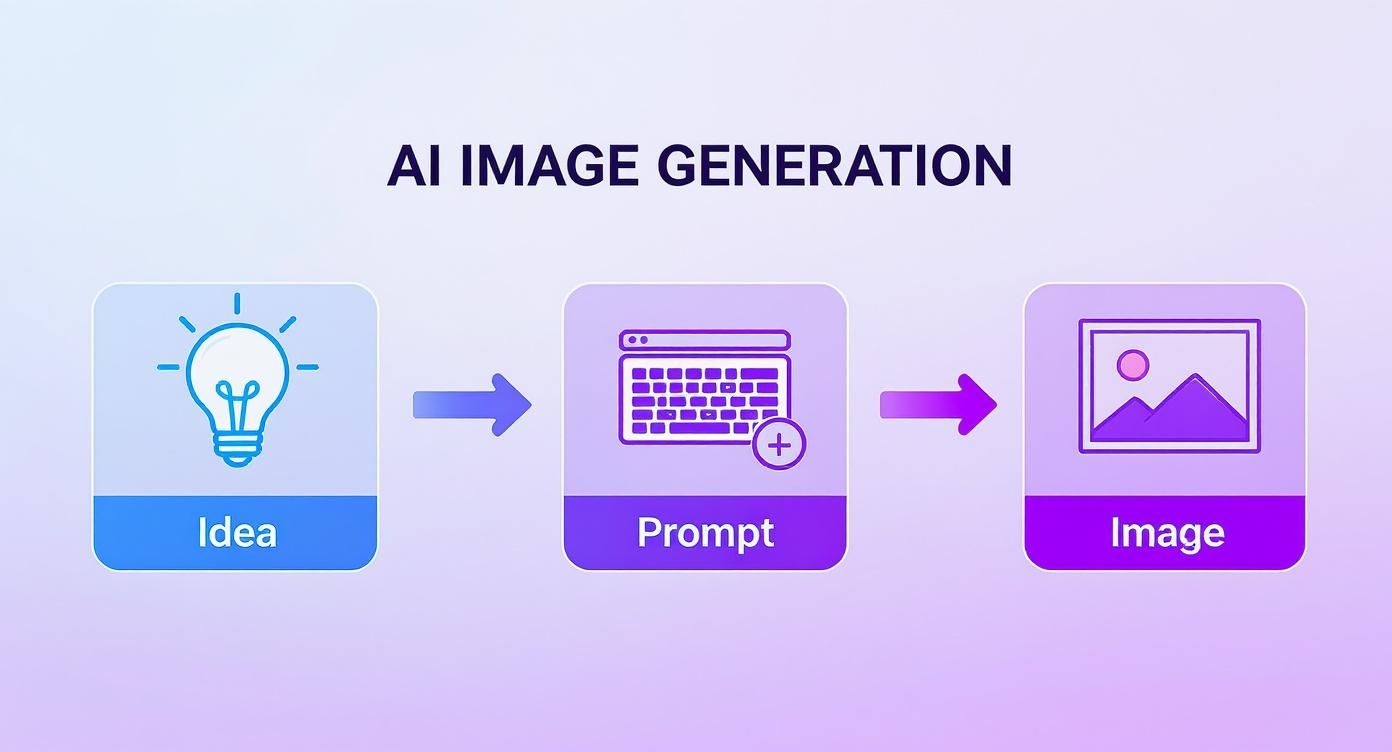
As you can see, the prompt is the crucial bridge between your creative vision and what the AI actually produces. A vague prompt gives the AI very little to work with, resulting in something bland. A detailed one provides a clear blueprint.
How to Build a Powerful Prompt Step-by-Step
So, how do you build a prompt that gets results? It's best to start with your core subject and then just keep adding layers of detail. A structured approach makes sure you hit all the key elements that contribute to realism.
Let's build a prompt from scratch. Our goal: a photorealistic portrait.
- Start with the Subject: Get specific. Don't just say "a woman." Try "a smiling elderly woman with laugh lines around her eyes."
- Add the Environment: Ground your subject. Add, "sitting on a rustic wooden porch swing, surrounded by blooming wisteria vines."
- Describe the Lighting: This sets the mood. Specify details like "soft golden hour light filtering through the leaves, creating dappled shadows."
- Define the Style & Details: Guide the final aesthetic. Add terms like "photorealistic, hyper-detailed, 8K, cinematic shot, 50mm lens, shallow depth of field."
Now, combine all those pieces into one complete prompt in the text box. The AI now has a rich, detailed scene to interpret with incredible accuracy.
To really see this in action, check out how a prompt evolves from basic to advanced.
Prompt Evolution From Basic to Advanced
| Element | Basic Prompt | Advanced Prompt | Impact on Image |
|---|---|---|---|
| Subject | a car | a vintage red Ford Mustang | Specifies make, model, and color for a classic look. |
| Setting | on a road | on a winding coastal highway at sunset | Creates a dramatic, scenic backdrop. |
| Lighting | daytime | golden hour, lens flare, warm glow | Adds a professional, cinematic mood. |
| Style | photo | photorealistic, cinematic, 8k resolution, shot on 35mm film | Defines the quality and aesthetic for a high-end result. |
The difference is night and day. Going from a four-word prompt to a detailed description gives the AI a clear direction, moving it from a generic guess to a specific, high-quality creation.
Mastering this layering technique is fundamental. For a much deeper dive with even more examples, check out our guide on how to write a good prompt for AI text-to-image generation.
Tutorial: Using Negative Prompts to Fine-Tune Your Work
Sometimes, what you don't want in an image is just as important as what you do. This is where negative prompts come in—they're essentially a list of terms you tell the AI to actively avoid.
I lean on negative prompts all the time to clean up common AI mistakes. If I'm generating portraits, for example, adding things like "blurry face, distorted hands, extra fingers" to the negative prompt can dramatically improve the final image.
Let's try a practical example. Say you want a photorealistic image but it keeps coming out looking like a cartoon.
- Write Your Main Prompt:
a close-up portrait of a female astronaut looking out a spaceship window at Earth. - Find the Negative Prompt Box: It's usually a separate text field below the main one.
- Enter Your Exclusions: Type the things you want to avoid. For this, a good negative prompt would be:
cartoon, painting, illustration, anime, blurry, low quality, watermark. - Generate the Image: Compare the result to one without the negative prompt. You'll notice it's much closer to the photorealistic style you wanted.
Think of negative prompts as a pro-level technique for steering the AI away from its usual quirks and pitfalls. It’s an essential step for getting your photorealistic images to look as flawless as possible.
Mastering Advanced Settings and Styles
Once you've gotten the hang of crafting a good prompt, it's time to really take control. Digging into the advanced settings of an ai image generator from text is where the magic happens. This is how you move from getting what the AI thinks you want to getting exactly what you envisioned.
First up, a simple but crucial one: aspect ratio. This setting dictates the shape of your image. If you're going for a sweeping, dramatic landscape, a wide 16:9 format is your best bet. Need a slick new profile picture? The classic 1:1 square is perfect. Don't gloss over this—the shape of your canvas completely changes the feel of the final piece.
Tutorial: Blending Artistic Styles
Now for the fun part. Most tools, like AI Photo HQ, let you pick from a menu of artistic styles. But the real creative power comes from mixing them together in your prompt. Let's create a unique image by blending two distinct styles.
Goal: Create an image of a lion that combines steampunk and art deco aesthetics.
- Start with the Core Subject:
a majestic lion. - Add the Primary Style: We want steampunk to be dominant, so we'll add
steampunk style. - Add the Secondary Style: We'll mix in art deco for flair:
art deco influence. - Add Supporting Details: To reinforce these styles, add keywords like
intricate metal gears, gold filigree, symmetrical design. - Combine and Generate: Your final prompt is:
a majestic lion, steampunk style, art deco influence, intricate metal gears, gold filigree, symmetrical design.
By describing both styles in the prompt, you guide the AI to blend their elements, creating a visual you'd never get otherwise.
Understanding Seed Numbers and Resolution
Another setting you'll want to get familiar with is the seed number. A "seed" is basically a starting number the AI uses to begin generating your image. If you get a result you absolutely love, you can grab its seed number and use it again with a slightly tweaked prompt. This is the secret to creating consistent characters or scenes across multiple images.
Pro Tip: Think of the seed number as an image's unique DNA. Reusing it is like creating a genetic sibling to your original—they'll look similar, but each will have its own distinct personality.
The tech is moving fast, and image quality has soared. As of early 2025, the top models can push out images up to 2048x2048 pixels, although many still default to 1024x1024. Even with these improvements, you'll still run into classic AI quirks like wonky anatomy or jumbled text, which is why fine-tuning your settings is so important. It's always a good idea to read up on the current state of AI image generation to stay in the loop.
This screenshot from Wikipedia perfectly illustrates how a few words can completely change the output, even when using the same AI model.

See how just adding "in the style of Greg Rutkowski" transforms the entire mood and texture of the image? That’s the power of a well-crafted prompt.
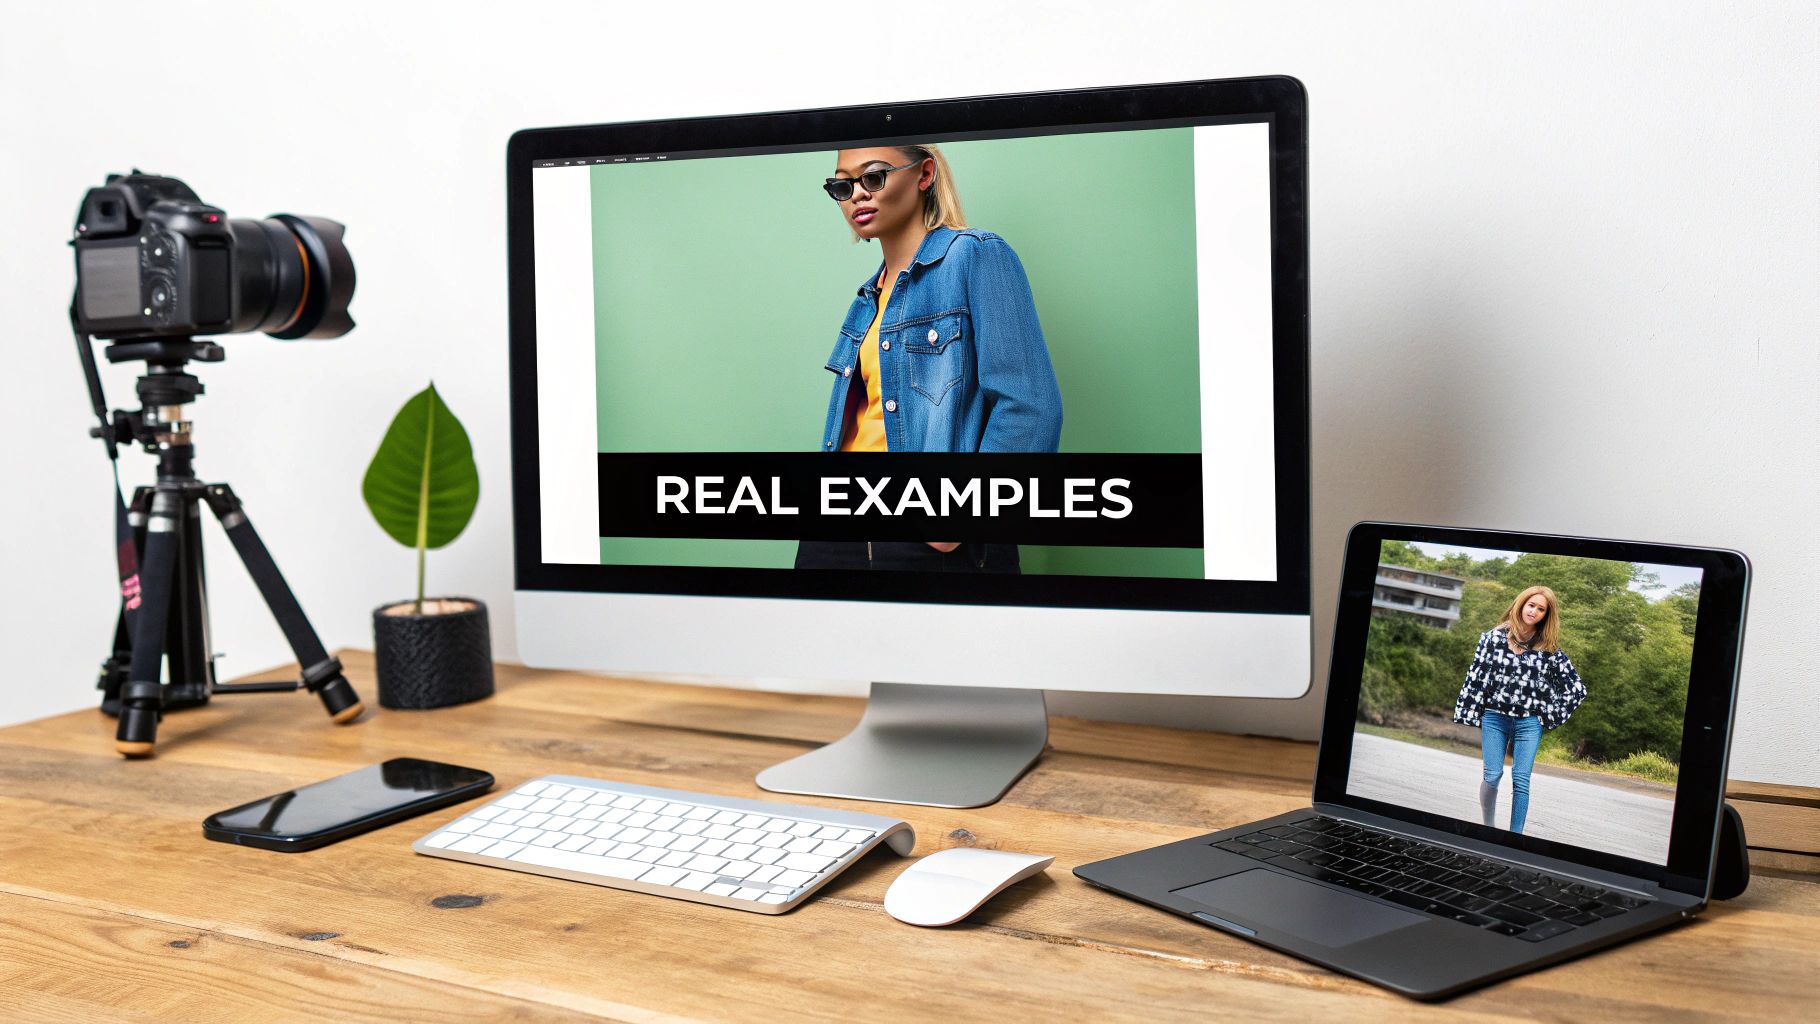
Practical Use Cases for AI-Generated Images
Let's get real for a moment. An ai image generator from text isn't just a fun toy to create wacky images of astronauts riding unicorns. It's a seriously powerful tool for creatives, marketers, and even hobbyists. I've seen it completely change workflows, smash through creative blocks, and deliver professional-grade visuals for projects that simply didn't have the budget for a custom photoshoot.
This isn't just a niche trend, either. A 2022 market analysis showed that advertising was the biggest adopter of this tech, with fashion and e-commerce right behind. It makes perfect sense—these industries need a constant stream of fresh, custom content to stay on top. If you want to dive deeper, there's a great breakdown of AI's impact on global creative trends on canva.com.
Tutorial: Creating a Unique Blog Post Header
Think about it. You’ve just finished a fantastic article on remote work productivity. The last thing you want is to slap a generic, overused stock photo on top. Instead, you can craft something that perfectly captures the vibe of your piece in just a few steps.
- Define the Scene: Brainstorm the key elements. For a productivity article, you might want a clean desk, natural light, and a hint of tech.
- Draft the Prompt: Start building your description. Let's try:
A vibrant, minimalist home office scene, large window with morning light streaming in, a sleek laptop on a wooden desk, a potted snake plant, and a steaming coffee mug. - Add Stylistic Keywords: To give it a professional look, add:
Photorealistic, clean aesthetic. - Set the Aspect Ratio: Blog headers are wide, so select
16:9from the settings. - Generate and Refine: Create the image. If it's not quite right, tweak a word or two (e.g., change "morning light" to "soft afternoon light") and try again.
This is how you get a unique, engaging header that feels like it was made just for your article.
Tutorial: Designing Product Mockups for E-commerce
Imagine you're about to launch a new skincare line. Your star product is a honey-based face cream, but the professional photoshoot is still weeks away. No problem. An AI image generator can create stunningly realistic mockups in just a few minutes.
Key Takeaway: For product mockups, the magic is in the details. Describe the product's texture, its packaging, and the world it lives in. This builds a believable scene that truly showcases what makes your product special.
Let's build that prompt step-by-step:
- Describe the Product: Start with the hero. "A luxurious amber glass jar of honey face cream."
- Create the Setting: Place it in an appealing scene. "Resting on a white marble surface next to a honeycomb and a sprig of lavender."
- Specify the Photo Style: Dial in the professional look. "Soft, natural morning light, macro shot, photorealistic, high detail, shallow depth of field."
- Generate the Mockup: Combine these elements into your prompt. The AI will generate a high-quality visual ready for social media posts, email newsletters, or your online store.
It's a game-changer for getting products to market faster, saving you a ton of time and money in the process.
How to Choose the Right AI Image Tool
With new AI image generators popping up all the time, picking the right one can feel like a shot in the dark. The trick is to match the tool’s specialty with what you actually want to create.
It’s not a one-size-fits-all situation. Some generators are wizards at creating photorealistic images, while others have a knack for more illustrative or anime-inspired art.
The market for these tools is absolutely exploding. It was valued at around USD 401.6 million in 2024 and is on track to smash USD 1.5 billion by 2034. More tools are great, but it definitely adds to the confusion.
Evaluating Key Differences
Before you dive in and subscribe to a platform, take a minute to think about your end goal. Are you trying to generate crisp, realistic product shots for an e-commerce store, or are you bringing a whimsical fantasy character to life?
A tool like Midjourney, for instance, is famous for its artistic, almost cinematic, output. On the other hand, Stable Diffusion models are perfect for users who love to get under the hood and tweak every possible setting. We actually have a detailed breakdown comparing Stable Diffusion vs Midjourney that can help you figure out which one fits your workflow.
When you’re weighing your options, keep these key things in mind:
- Artistic Style: Does the tool naturally lean toward realism, fantasy, anime, or another style that you need?
- User Experience: How easy is it to use? Is the interface simple and intuitive, or is it built for someone with a more technical background?
- Customization: How much control do you get? Can you fine-tune things like style weights, specific seeds, and negative prompts?
My Advice: The best way to find your match is to test-drive a few. Find a couple of generators with a good free trial. Spend an afternoon using the exact same five prompts on each one. You'll quickly get a feel for which tool's "creative brain" thinks most like yours.
Don't forget to look at the pricing. Most services offer a handful of free credits to get you started, which is perfect for this kind of testing. From there, you can upgrade to a subscription for more images and powerful features.
If you’re looking to fit image generation into a bigger workflow, it’s worth checking out the best AI content creation tools to see how everything can work together. By balancing the art style, ease of use, and cost, you'll be able to pick the perfect generator with confidence.
Troubleshooting Common AI Image Issues
Let's be honest, even the most powerful AI image generators can spit out some seriously weird stuff. If you’ve ever generated a person with six fingers or a face that's deep in the uncanny valley, you're in good company. These are common bumps in the road, but the good news is, most of them have pretty simple fixes.
One of the classic struggles for AI is complex anatomy. Hands and faces, in particular, have so much intricate detail that the models can easily get them wrong. It's a known growing pain in the world of AI art.
Step-by-Step Fix for Weird Hands and Faces
Instead of just rolling the dice again, you can be more direct with the AI. One of the most effective tricks up my sleeve is using negative prompts to tell the generator exactly what I don't want to see.
Tutorial: Cleaning Up a Portrait
- Identify the Problem: You generated a portrait, but the hands look distorted.
- Use a Negative Prompt: In the negative prompt field, type:
malformed hands, extra fingers, distorted face, blurry features. - Generate in Batches: In the settings, ask the AI to generate 4 images at once. This increases your odds of getting a perfect one.
- Review and Select: Look through the batch. The negative prompt should have filtered out most of the bad results, leaving you with a much better-quality portrait.
For those really stubborn areas, many advanced tools offer an "in-painting" feature. This is a game-changer. It lets you mask off just the problem spot (like a wonky hand) and have the AI regenerate only that section with a more focused prompt. It’s like performing digital microsurgery on your artwork.
Tutorial: Creating Consistent Characters
Keeping the same character from one image to the next is another big challenge. The most reliable way to pull this off is by using the seed number from an image you really like.
Here's how to do it:
- Generate Your First Character: Create your character with a detailed prompt (e.g.,
a young female adventurer with short red hair and green eyes, wearing leather armor). - Find the Seed Number: Once you get an image you love, look for its "seed number" in the image details. Copy it.
- Create a New Scene: Write a new prompt for a different setting (e.g.,
standing in an ancient forest, sunlight filtering through the trees). - Apply the Seed: Paste the copied seed number into the "Seed" field in the advanced settings.
- Generate: The AI will now create the new scene, but it will use the original seed as a starting point, ensuring your character's appearance remains highly consistent.
Ready to move past these common frustrations and start creating jaw-dropping visuals? With AI Photo HQ, you get all the advanced settings, powerful style options, and a clean interface you need to bring your ideas to life without the headache. Start generating your first masterpiece with AI Photo HQ today!

