
What if you could make your favorite photos move? That's exactly what AI picture to video technology does. It takes a static image and intelligently generates motion, turning a single snapshot into a short, eye-catching video clip.
It's not just a simple animation effect; the AI is smart enough to breathe life into a photo in a way that feels real.
Bringing Still Images to Life with AI
So, how does a still photograph magically start moving? This is where the real power of AI comes into play. We're going to break down the core ideas behind how an AI interprets an image, figures out what should move, and then creates that motion from scratch.
This isn't just a technical deep dive. Understanding what's happening under the hood gives you a massive creative advantage.
Imagine making the clouds drift across a landscape you shot, or adding a subtle, knowing smile to a portrait. Animating still images with AI is a perfect example of how technology is completely changing the game for content creation and marketing. It’s also a key part of the larger trend of content automation.
What used to require a team of animators and complex software is now accessible to anyone. Before we jump into the "how-to," let's explore what's actually making this all possible.
The Power of Generative AI
At its core, this whole process runs on a fascinating branch of artificial intelligence. If you want to get a better handle on the basics, our guide on what is generative AI is a great place to start. In short, this technology uses sophisticated algorithms to predict and generate entirely new data—in our case, the video frames that come after your starting image.
The AI isn't just stretching or warping your picture. It’s far more clever than that.
It actually identifies the different elements in the photo—like clouds, water, or hair—and applies motion that makes sense for each one. It knows clouds should drift, water should ripple, and hair should sway in a breeze. This predictive power is what allows it to create a believable animation from just one single picture.
Key Takeaway: The goal isn't just to make an image move. It's to add motion that feels natural and enhances the story you're trying to tell, adding a whole new dimension to your visuals.
To give you an idea of how big this is, the global AI video market is exploding. It was valued at around USD 7.6 billion in 2024 and is on track to hit an incredible USD 156.57 billion by 2034. You can dig into the numbers in this AI video market research report. This rapid growth shows just how essential these tools are becoming for businesses and creators everywhere.
To help you get the best results, it helps to understand a few key concepts that the AI is working with.
Key Concepts in AI Image Animation
Here’s a quick breakdown of some fundamental ideas and how they influence the final video you create.
| Concept | What It Does | Why It Matters for Your Video |
|---|---|---|
| Motion Prediction | The AI analyzes the image to "guess" how objects would naturally move. | This determines whether the movement looks realistic. A good model knows a flag should wave, not melt. |
| Frame Interpolation | Creates the in-between frames that connect your starting image to the final motion. | This is what makes the animation smooth. Poor interpolation leads to jerky, unnatural-looking video. |
| Object Segmentation | The AI identifies and separates different objects in the photo (e.g., a person from the background). | This allows for more complex animations, like having a subject move independently of their surroundings. |
| Style Consistency | Ensures that the generated frames maintain the same artistic style, color, and lighting as the original photo. | Crucial for making the final video look like a cohesive piece, not a glitchy animation. |
Getting a handle on these concepts isn't just for tech nerds—it directly translates into better, more compelling video clips. Knowing why certain settings exist helps you make smarter creative choices.
Choosing and Prepping Your Images for Animation
The magic behind a stunning AI-generated video doesn't just happen when you click "generate." Honestly, it starts way before that—with the image you choose to bring to life. A well-chosen and carefully prepped photo gives the AI the best possible material to work with, setting you up for a much better result.
This is about more than just finding a high-resolution file. We're talking about thinking through the composition, the main subject, and even the background details. These elements are like a roadmap for the AI, guiding it on how to create motion that feels natural and intentional.
How to Select the Right Image: A Quick Checklist
Not all photos are created equal for animation. Some images have that something that makes them perfect. Use this checklist to pick a winner:
- Is there a clear focal point? An image with a single, clear subject almost always yields better results than a busy group shot.
- Is there potential for natural movement? Look for elements like clouds, water, fabric, hair, or steam that would realistically move.
- Is there good contrast? A photo where your subject really pops from the background makes the AI's job much easier. A person against a simple wall will animate more predictably than someone in a cluttered room.
Good choices include:
- Portraits with a clear subject
- Landscapes with natural elements (sky, water)
- Product shots with simple backgrounds
Pro Tip: Before animating, ask yourself: "What part of this image do I want to move?" If you can't answer that easily, the AI will likely struggle too.
Quick Prep Steps for Maximum Impact
You've picked your image. Now, let's do a 2-minute prep to level up your final animation. You don't need to be a Photoshop pro; some of the best photo editing software for beginners will do the trick.
Here’s a quick step-by-step prep routine:
- Step 1: Crop for Focus. Is there anything distracting on the edges? Crop the image to focus on the key subject and its potential movement. This removes noise for the AI.
- Step 2: Boost Contrast. Slightly increase the contrast. This helps the AI separate your subject from the background, giving it a better sense of depth.
- Step 3: Sharpen the Subject. Use a sharpening tool to very slightly enhance the edges of your main subject (the part you want to animate). This gives the AI crisp, clean lines to work with.
These simple adjustments give the AI clearer instructions, leading to a more polished, professional-looking animation. If you want to dive deeper, our guide on AI image enhancement shows how AI can automate this prep work for you.
A Walkthrough of Your First AI Video Creation
Alright, this is where the fun begins. We're going to take a static picture and breathe some life into it. I’ll walk you through the exact steps, from upload to final export.
First, you'll need to upload your prepared image. Most tools, including AI Photo HQ, make this obvious with a big "Upload Image" or "Create Project" button on the main dashboard.
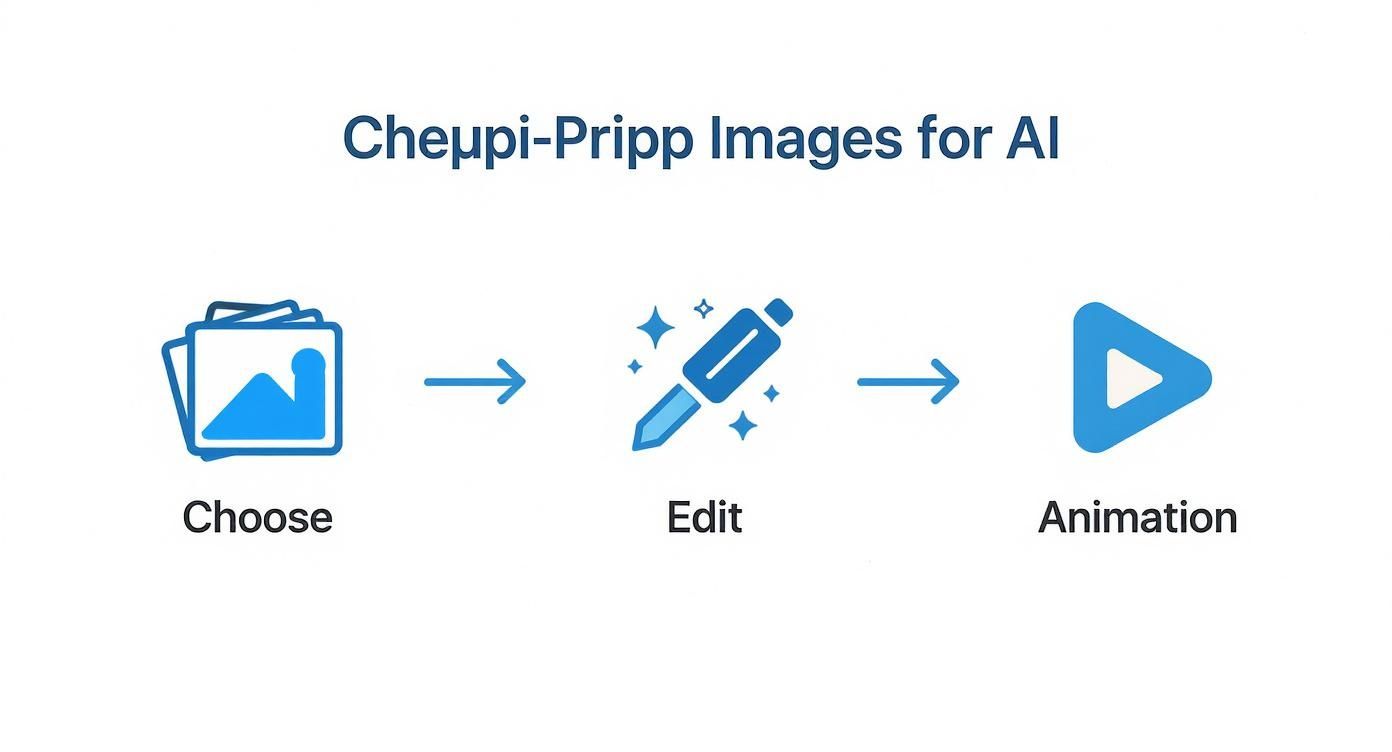
The whole process boils down to three key stages: choosing your image, giving the AI your instructions, and then animating it.
Step 1: Write a Clear Text Prompt
Once your image is loaded, you'll find a text box. This is your command center. Your prompt tells the AI what to animate and how to do it. Specificity is everything.
Instead of a vague prompt like: "make it move"
Try a descriptive prompt like: "Slowly drifting clouds moving from right to left, with gentle ripples forming on the water's surface."
Here are some practical examples you can copy and paste:
- For a portrait: "A subtle blink of the eyes and a gentle smile forming as strands of hair blow softly in a light breeze."
- For an object: "Steam gently rising from the coffee cup, with a slow, smooth zoom-in on the mug."
- For a landscape: "The northern lights shimmer and dance in the night sky."
This detail gives the AI concrete actions, which almost always leads to a better animation.
Step 2: Fine-Tune with Motion Controls
Next to the prompt, you’ll find motion controls. These are sliders or number fields that let you adjust the feel of the animation. The two most important settings are Motion Intensity and Duration.
- Motion Intensity (or Strength): This slider controls how dramatic the movement is.
- To use it: Start with a low setting (around 2-3 out of 10). This creates subtle motion, perfect for calm scenes. For more energy (like a crashing wave), you can push it higher, but be careful as high settings can look unnatural on faces.
- Duration: This sets the length of your video clip, usually from three to seven seconds.
- To use it: Select 3-4 seconds for a punchy social media loop. Choose 5-7 seconds for a slower, more cinematic effect.
Practical Tutorial: Generate the same video twice. First, with Motion Intensity at 2. Second, at 7. Put them side-by-side to see how the setting affects your specific image. This is the fastest way to learn.
Step 3: Generate and Export
Once you’ve written a clear prompt and tweaked your settings, hit "Generate." The AI will get to work, which can take a few seconds to a minute. After it's done, you can preview the result, make more adjustments, or export your new video.
For a deeper dive, our complete guide to using an AI video generator from an image covers even more advanced techniques.
Fine-Tuning Your Video with Advanced Controls
Getting a basic animation is just the start. The real magic happens when you dive into advanced controls to direct the scene with precision. This is how you add that professional polish.
Tutorial: Isolate Movement with Motion Masking
Motion masking lets you "paint" over the specific parts of your photo you want the AI to animate, while everything else stays perfectly still.
How to use it (a step-by-step example):
- Upload a photo of a waterfall in a forest.
- Select the "Motion Mask" tool. Your cursor will likely turn into a brush.
- Paint over the water. Carefully cover all the parts of the waterfall you want to see moving.
- (Optional) Use the "Eraser" tool to clean up any areas you accidentally painted, like the surrounding rocks or trees.
- Enter your prompt: "Water cascading down the rocks."
- Generate the video. Now, only the water will move, while the forest remains static, creating a clean, believable effect.
This level of control stops the AI from making weird movements in the background and puts the focus exactly where you want it.
Tutorial: Define Custom Camera Paths
This feature lets you set a starting and ending point for a virtual camera, creating a cinematic look.
How to create a dramatic pull-back reveal:
- Upload an image where a person is standing in front of a vast landscape.
- Select the "Camera Path" or "Camera Control" tool.
- Set the start point: Click and drag a box tightly around the person's face.
- Set the end point: Click and drag a second box that covers the entire image, from corner to corner.
- Generate the video. The final animation will start with a close-up on the face and slowly zoom out to reveal the full landscape.
This is an incredibly powerful technique for guiding the viewer's eye and telling a small story within your animation.
Layering Effects for Richer Content
The best tools let you combine effects. You don't have to choose between a zoom and an object animation—you can do both.
Example of layering:
- Base Animation: Use motion masking to animate steam rising from a coffee cup.
- Camera Motion: Add a custom camera path that performs a slow zoom-in on the mug.
- Result: A dynamic video where the steam rises realistically while the camera focuses in, adding depth and a professional feel.
The AI video generator market was valued at USD 534.4 million in 2024 because creators are demanding these powerful features. You can dive deeper into the stats on the AI video generation market size on KeywordSearch.com.
Putting Your Animated Videos to Work
So, you’ve turned a static photo into a slick, dynamic video. Awesome. Now let's get into the "why" and explore some practical use cases.
Whether you're a marketer, an artist, or running your own small business, the applications here are incredibly diverse.
Create Thumb-Stopping Social Media Content
For social media, the goal is to stop the scroll. An animated image does this beautifully.
Practical Example: Animating a Product Shot
- Start with a photo of a new pair of sneakers on a simple background.
- Use an AI picture to video tool to add motion.
- Prompt: "Slow pan from left to right across the shoe, with a subtle zoom-in. Make the laces gently sway."
- Result: A dynamic video perfect for an Instagram Reel or Facebook Story.
This tiny bit of motion is often all it takes to make someone pause and engage with your post, turning a simple announcement into eye-catching micro-content.
Bring Your Digital Art Portfolio to Life
If you’re a digital artist, this tech can add a new dimension to your work.
Practical Example: Animating a Portfolio Piece
- Select a piece from your portfolio, like a fantasy character illustration.
- Identify motion potential: The character's cloak, hair, or maybe a magical effect in the background.
- Prompt: "The character's cloak billows slowly in the wind. The glowing runes on the sword pulse with a soft light."
- Result: A mesmerizing loop for your portfolio website that showcases not just your art, but your creative vision.
This adds a layer of professionalism that makes your work pop for potential clients.
Boost Engagement for Small Businesses
Small businesses can create high-quality marketing assets without a big budget.
Practical Example: Animating a Storefront Photo
- Take a nice photo of your restaurant or shop exterior on a day with a clear sky.
- Prompt: "Clouds drift slowly across the sky from right to left. A gentle lens flare appears from the sun."
- Result: A welcoming video for your website's header or a local Facebook ad.
The development in AI 3D modeling and video generation from images is making this more accessible. The 3D rendering market—a closely tied field—was valued at USD 3.85 billion in 2023 and is projected to hit USD 23.78 billion by 2034. Read more about these trends in AI 3D modeling on SuperAGI.com.
Tackling Common Questions and Quirks
As you start turning static photos into moving scenes with AI picture to video tools, you’re bound to run into a few head-scratchers. Let's walk through some of the most frequent questions.
"Why Does My Animation Look So Wobbly?"
A "wobbly" or unnatural animation almost always happens when the AI gets confused by a busy or low-contrast image. It doesn't know what to animate, so it tries to animate everything.
The fix is a step-by-step troubleshooting process:
- Go back to your source image. Does it have a single, clear focal point?
- Check the contrast. Can you easily distinguish the subject from the background? If not, use an editor to increase contrast.
- Try motion masking. If the background is still moving, use the mask tool to tell the AI to only animate your subject.
Simpler images with a clear focal point almost always give you the cleanest animations.
"How Much Control Do I Actually Have Over This?"
You have more control than you think. The AI is doing the technical work, but your inputs guide its every move. Your main levers of control are your text prompt and the motion settings.
A lazy prompt like "make it move" will get you a generic result.
Let's compare prompts for a portrait:
- Vague Prompt: "Animate face."
- Specific Prompt: "A slow, 3-second blink. The right corner of the mouth lifts into a subtle, gentle smile."
The second prompt gives the AI clear, actionable instructions, resulting in a more controlled and intentional video.
My biggest tip: The quality of your video is a direct reflection of the quality of your input. A well-prepped image and a clear, descriptive prompt are the foundation for everything.
"Okay, So What Are the Limitations?"
It's just as important to know what the tech can't do (at least for now). These tools are fantastic for creating short, atmospheric clips, usually in the three to seven second range. They aren't built to generate a feature film from a single JPEG.
The technology shines when you're adding subtle, mood-enhancing motion.
- Think gentle steam rising from a coffee cup.
- Or clouds drifting slowly across the sky.
- Maybe the slow blink of an eye in a portrait.
Trying to generate fast-paced, complex action from a still photo is still a major challenge. Focusing on nuanced, atmospheric movements is the key to creating something truly stunning.
Ready to bring your own photos to life? With AI Photo HQ, you can go from a static image to a dynamic video in just a few clicks. Jump in and see what you can create today at https://aiphotohq.com.

