Turning your ideas into images with AI is surprisingly simple. You just need a tool, a clear concept, and a sentence to describe it. This guide provides practical, step-by-step instructions to help you generate stunning AI images from text, transforming your imagination into a tangible picture.
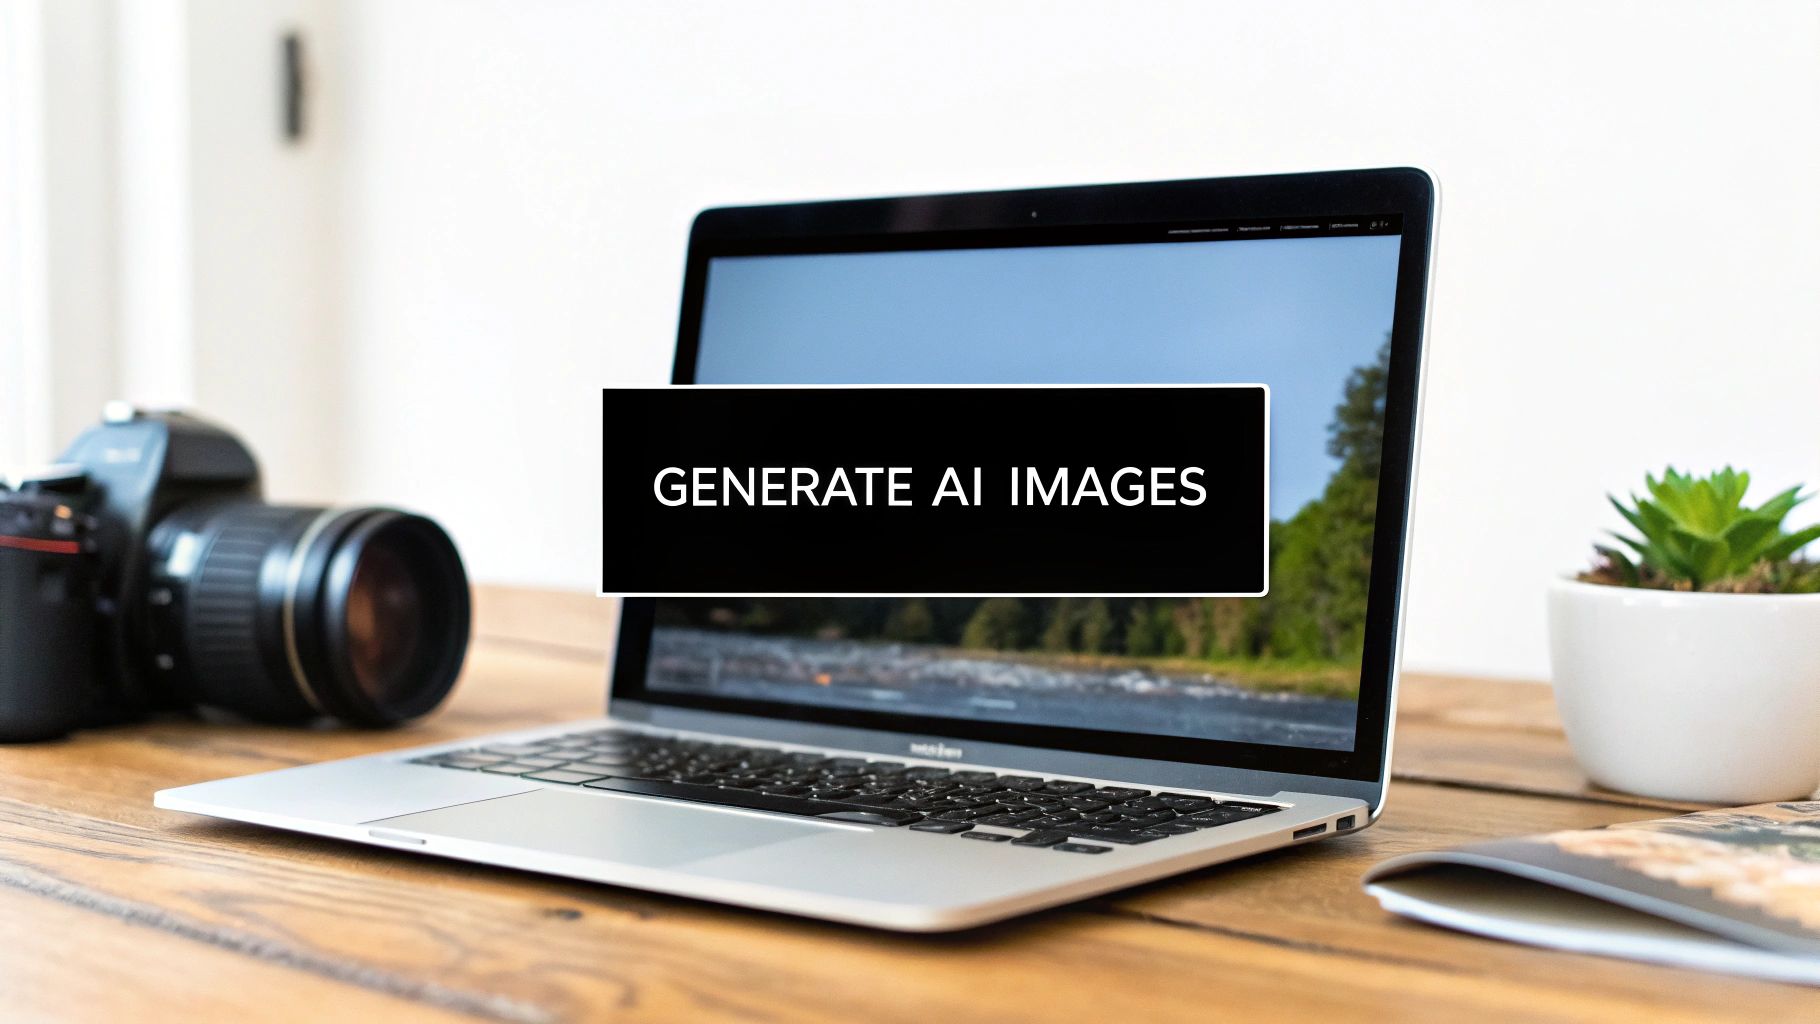
Your First AI Image Generation in Under 5 Minutes
Enough with the theory—let's create something. This quick tutorial will walk you through generating your first high-quality AI image using AI Photo HQ. We'll go from a blank text box to a finished picture in just a few steps.
You'll be surprised at how intuitive this is. AI image generation has completely changed the game for creatives. People are now cranking out an estimated 34 million images every single day. To put that in perspective, since 2022, creators have made over 15 billion AI-generated images—a number that took traditional photography almost 150 years to hit.
Step 1: Open the AI Photo HQ Generator
Your creative command center is the generation interface. This is where you’ll turn your written prompts into visual art.

As you can see, the layout is clean and simple. You have your main prompt box and a "Generate" button. That's really all it takes to get started.
Step 2: Write Your First Prompt
Let's begin with a clear, simple idea. Instead of just typing "dog," let's give the AI more to work with. For this tutorial, type the following into the prompt box:
"a happy golden retriever puppy playing in a field of flowers."
This simple addition gives the AI crucial details: the subject (golden retriever puppy), its emotion (happy), the action (playing), and the setting (a field of flowers).
Step 3: Click "Generate" and See the Result
With your prompt entered, hit the "Generate" button. In seconds, the AI will process your text and produce an image that matches your description. That's it—you've just generated your first AI image from text.
How to Build a Better Prompt: The Core Components
A well-crafted prompt gives the AI the specific direction it needs. Here’s a quick look at the building blocks for creating more advanced images.
| Component | Description | Example |
|---|---|---|
| Subject | The main focus of your image. Be specific! | A stoic Roman emperor |
| Medium | The style or art form. | oil painting, 3D render, photograph |
| Style | The artistic influence or aesthetic. | steampunk, surrealism, photorealistic |
| Action/Setting | What the subject is doing and where. | reading a book in a library on Mars |
| Lighting | The mood and time of day. | dramatic cinematic lighting, soft morning light |
| Details | Extra modifiers for color, resolution, etc. | vibrant colors, 8K, highly detailed |
Putting these components together helps you move from generic images to truly specific creations. It's the difference between asking for "a car" and "a vintage red convertible, photograph, driving down a coastal highway at sunset, cinematic lighting."
The secret to amazing AI images isn't mastering complex software; it’s learning to write a good description. The more vivid your text, the closer the result will be to what's in your head. Think of yourself as an art director guiding the artist.
To see a fantastic real-world application of this, check out how AI-powered virtual home staging apps are used to furnish empty real estate photos. It's a perfect example of how a simple text description can create a powerful commercial visual. Your first masterpiece is just one sentence away.
Crafting Prompts That Deliver Stunning Results
Moving beyond simple phrases is where the magic happens. To create images from text that truly capture your vision, you need to learn how to "speak" the AI's language. Think of the AI as an incredibly talented artist who takes everything you say very, very literally. If you just say "a car," you'll get exactly that: a generic, uninspired car. But if you describe exactly what you're imagining, the results can be breathtaking.
Tutorial: From a Vague Idea to a Vivid Scene
Let’s walk through the exact steps to take a basic concept and flesh it out into a rich, descriptive prompt. We’ll start with the simple idea: "a golden retriever on a beach."
Step 1: Start with the Basic Subject
Write down your core idea.
- Prompt:
a golden retriever on a beach
Step 2: Add Subject Details and Action
Make the subject more specific. What is it doing? What makes it unique? Let's make the retriever happy and add a fun prop.
- Prompt:
a happy golden retriever wearing aviator sunglasses, sitting on a beach
Step 3: Define the Setting and Lighting
Describe the environment. What time of day is it? What's the mood?
- Prompt:
a happy golden retriever wearing aviator sunglasses, sitting on a sunny tropical beach at sunset, cinematic lighting
Step 4: Specify the Artistic Style and Quality
Finally, tell the AI what style you want. Is it a photo? A painting? How detailed should it be?
- Final Prompt:
A photorealistic image of a happy golden retriever wearing aviator sunglasses, sitting on a sunny tropical beach at sunset, cinematic lighting, highly detailed.
Now that's a prompt. It gives AI Photo HQ all the specific instructions it needs to create something compelling and unique.
Just look at the result from running a very similar prompt, "A photorealistic image of a golden retriever wearing sunglasses on a beach," through our generator.
The final image perfectly reflects the details we provided—the photorealistic style, the sunglasses, the beach. This is a perfect example of how adding just a bit more precision can lead to a much better outcome.
Using Negative Prompts to Refine Your Vision
Sometimes, telling the AI what you don't want is just as important. This is where negative prompts become your secret weapon. They are your "do not include" list.
Tutorial: How to Use a Negative Prompt
Let's say you're creating a product shot for a new brand of organic soap.
- Write Your Main Prompt: Start with a clear positive instruction.
- Prompt:
A beautifully styled product shot of natural handmade soap bars on a rustic wooden table, soft morning light, minimalist aesthetic.
- Prompt:
- Identify Potential Problems: You might get results with distracting plastic packaging or colors that look too artificial.
- Add a Negative Prompt to Exclude Unwanted Elements: In the negative prompt box, list the things you want to avoid.
- Negative Prompt:
plastic, packaging, garish colors, clutter, text
- Negative Prompt:
This simple addition helps ensure the final image is clean, professional, and on-brand. For a deeper dive into this, check out our complete guide on how to write AI prompts.
Using Advanced Settings for Pro-Level Control
Once you're comfortable writing prompts, it’s time to use the control panel. This is where you fine-tune the output with precision. Think of it as switching your camera from auto to manual mode.
And a lot of people are jumping in. The AI image generation market was valued at around USD 9.10 billion in 2024, but it’s expected to explode to USD 63.29 billion by 2030. You can read more about the market's wild growth over at marknteladvisors.com. This isn't just a tech trend; it's driven by creators like you who want more control over their images.
Fine-Tuning with CFG Scale
One of the most powerful dials is the CFG Scale (Classifier-Free Guidance). Think of it as a slider that balances "follow my instructions" against "get creative."
- Low CFG (e.g., 3-6): Gives the AI more artistic freedom. Use this for brainstorming or when you want surprising, creative results.
- High CFG (e.g., 7-12): Forces the AI to stick to your prompt precisely. Use this for photorealistic product shots or when details are critical.
My rule of thumb is pretty simple: low CFG for creative exploration, high CFG for precise, controlled results. I usually start around 7 and then nudge it up or down to see what happens.
This infographic gives a great visual overview of how settings like CFG Scale, aspect ratio, and AI models all work together.
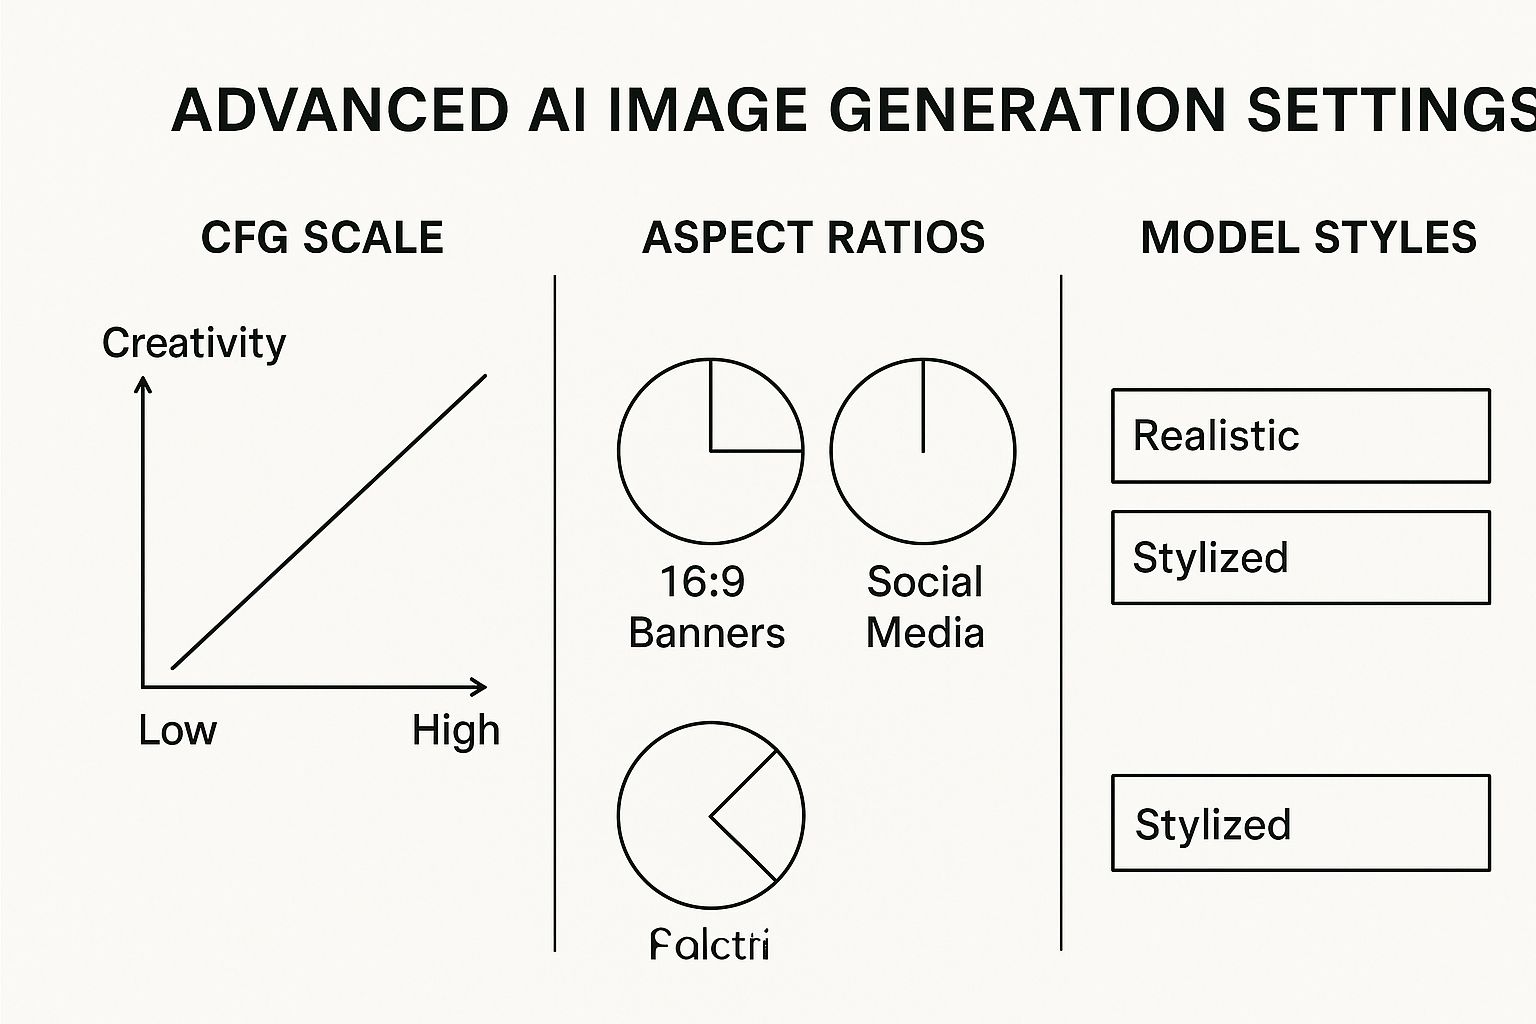
As you can see, even a small tweak can completely change the look and feel of your final image.
How to Choose the Right Aspect Ratio
The shape of your image is just as important as what's in it. Here’s a quick guide to choosing the right one in AI Photo HQ:
- For YouTube/Banners: Select 16:9 (Landscape). It has that classic cinematic feel.
- For Instagram Posts: Select 1:1 (Square). It's perfect for profile pictures and feed posts.
- For Mobile/Stories: Select 9:16 (Portrait). Use it for Instagram Stories, TikToks, and phone wallpapers.
The settings in AI Photo HQ are the key to unlocking truly unique images. This table breaks down some of the most important advanced settings to help you understand what they do and when to use them.
Key Advanced Settings in AI Photo HQ Explained
| Setting | What It Does | When to Use It |
|---|---|---|
| CFG Scale | Controls how strictly the AI follows your prompt. | Use a low value (3-6) for creative, artistic results. Use a high value (7-12) for photorealism and precise details. |
| Aspect Ratio | Sets the dimensions (width vs. height) of the final image. | Choose 16:9 for banners/video, 1:1 for social media posts, and 9:16 for stories and mobile content. |
| AI Model | Switches the underlying AI algorithm that generates the image. | If you're not getting the right aesthetic, try a different model. Some are better for realism, others for fantasy or anime. |
| Sampler | The method the AI uses to denoise the image during generation. | Euler a is great for speed and creative results. DPM++ samplers are excellent for high-detail, stable images. |
| Seed Number | A starting number for the random generation process. | Keep it random for new variations. Reuse a specific seed number to generate very similar images with minor prompt changes. |
Experimenting with these is how you find your signature style. For a much deeper dive into how all this works under the hood, I highly recommend checking out our Stable Diffusion prompt guide.
A Complete Walkthrough for Creating a Brand Mascot
Let's put all this theory into practice with a real-world project. It's one thing to talk about concepts, but the real magic happens when you generate AI images from text to solve an actual creative problem. We’re going to create a brand mascot for "TerraBrew," a fictional eco-friendly coffee company.
Our mission: create a friendly robot mascot made from natural materials. This is a repeatable blueprint you can use for your own projects.

This final image is exactly what we were aiming for. Here’s the step-by-step process we used to get there.
Step 1: Brainstorm Keywords and Draft an Initial Prompt
First, let's break down the core ideas into keywords:
- Subject: friendly robot, cute character
- Action: holding a coffee cup, smiling
- Key Details: made of recycled materials, eco-friendly
- Style: cute 3D character render, soft lighting
Now, let's stitch these into a first-draft prompt:
A friendly robot holding a coffee cup, made of recycled materials, cute 3D character render, smiling, eco-friendly.
This is a solid starting point that gives the AI enough direction for a first attempt.
Step 2: Generate and Analyze the First Results
Run the initial prompt and look at the results critically. What's working? What isn't? For our TerraBrew mascot, let's imagine the first attempts were a bit too metallic and lacked organic warmth. The "recycled" theme isn't coming through.
Step 3: Refine the Prompt with Specific Details
Now, we'll edit the prompt to fix the problems we identified. We need to be more specific.
Here’s the refined prompt:
*Cute 3D character mascot of a friendly little robot, made from smooth recycled wood and brushed metal, holding a steaming ceramic coffee mug. Tiny green sprouts are growing from its joints. Soft, warm studio lighting, simple background, highly detailed, octane render._
Let's break down the improvements:
recycled wood and brushed metalis more descriptive thanrecycled materials.steaming ceramic coffee mugadds a cozy, sensory detail.tiny green sproutsis a direct visual cue for the eco-friendly theme.soft, warm studio lightingandoctane renderspecify a professional, polished look.
The gap between a good image and a great one is often just a handful of well-chosen adjectives. Prompting is an iterative dance: you generate, you analyze, you refine with more descriptive details until the AI finally reads your mind.
This back-and-forth process is the core workflow for getting incredible results. If you want to dive deeper into creating compelling characters, we've got a ton of great insights in our guide to character design fundamentals.
Common Mistakes and How to Fix Them
Feeling frustrated when your AI images don't land right? Let's walk through some common hurdles and the step-by-step fixes to overcome them.
Problem 1: Your Images Look Vague and Generic
This is almost always caused by a vague prompt. Tossing "a person" at the AI gives it nothing to work with, resulting in a generic image.
- How to Fix It: Add specific, descriptive layers. Don't just ask for "a person." Instead, build a character with your words.
- Example: Instead of
a person, writeAn elderly man with a kind smile and deep wrinkles, wearing a tweed jacket.This provides a blueprint for a character with personality.
Problem 2: You're Getting Mangled Hands and Weird Faces
Welcome to the "uncanny valley." Faces and hands are complex, and AI models can struggle with them.
- How to Fix It: Guide the AI's focus directly in your prompt.
- For Hands: Add phrases like
highly detailed handsorperfect anatomy. Use a negative prompt to forbid errors:malformed fingers, extra limbs, mutated hands. - For Faces: Get more descriptive. Instead of
a woman smiling, guide the AI witha woman with a symmetrical face, detailed eyes, and a natural smile.
The key is to guide the AI's focus. By explicitly calling out the details you want rendered correctly, you're telling the model to pay extra attention to those specific areas. It’s often the little push needed to get the result from strange to stunning.
Problem 3: The AI Can’t Spell or Write Text
If you ask an AI to generate a sign that says "Welcome Home," you'll probably get garbled, alien-looking letters. This is because models draw the shape of letters without understanding what they spell.
- How to Fix It (The Only Real Solution): Don't try to generate text directly in the image.
The technology for generating AI images from text is evolving at a breakneck speed, largely thanks to some serious financial muscle. Between 2024 and 2025, global private investment in generative AI hit around USD 33.9 billion, which is an 18.7% jump from the previous year. You can dive deeper into these trends by checking out the growing AI image generator market on fortunebusinessinsights.com.
Your AI Image Generation Questions, Answered
As you start diving into the world of AI images from text, you're bound to have some questions. It's totally normal. Let's tackle some of the most common ones I hear, so you can get back to creating with confidence.
Can I Use My AI-Generated Images for Commercial Projects?
This is a big one, and thankfully, the answer is usually yes.
Most reputable platforms, including AI Photo HQ, give you full ownership and commercial rights to the images you create. That means you're free to use them for your marketing campaigns, product packaging, website banners, social media—you name it.
That said, it's always a good habit to quickly scan the terms of service for any tool you use. A quick check can save you a headache down the road.
How Do I Create Consistent Characters?
Getting the same character to show up in different scenes is one of the trickier parts of AI art, but it's absolutely doable. The secret is being almost obsessively specific in your prompt.
Don't just say "a woman with red hair." Think like a casting director. Get detailed: a woman with a short red pixie cut, bright green eyes, a small jagged scar above her left eyebrow, wearing a faded black leather jacket.
Using that exact, detailed description over and over is your best bet. Some advanced tools also let you use a specific seed number. A seed is like a unique starting point for the AI; reusing it tells the model to begin from the same random pattern, which dramatically increases the chances of getting a similar-looking character.
Think of it like describing a character for a novel. The more unique details you lock in—a scar, a specific haircut, a piece of jewelry—the easier it is for the AI to "remember" and recreate them accurately.
Why Does the AI Ignore Parts of My Prompt?
It’s incredibly frustrating when you craft the perfect prompt, only for the AI to seemingly ignore half of it. This usually happens for one of two reasons: the prompt is too long and convoluted, or it contains ideas that conflict with each other.
AI models are constantly weighing the importance of each word. Sometimes, the less "heavy" words just get lost in the noise.
Here’s how you can fix it:
- Simplify and Prioritize: Trim the fat from your prompt. Focus on the absolute must-have elements and put them right at the beginning. The first few words have the most influence.
- Add Emphasis: Many platforms have a syntax for adding weight to certain words. Using parentheses or brackets can be a game-changer. For example,
a majestic lion wearing a (crown)often signals to the AI that the crown is a non-negotiable part of the image.
If you're curious about the technology that makes all of this possible, there are some great resources that dive into the broader field of artificial intelligence. Understanding the basics can really help you get more out of these tools.
Ready to put this all into practice? AI Photo HQ gives you all the settings and power you need to turn your vision into reality. Start generating your first image today!

