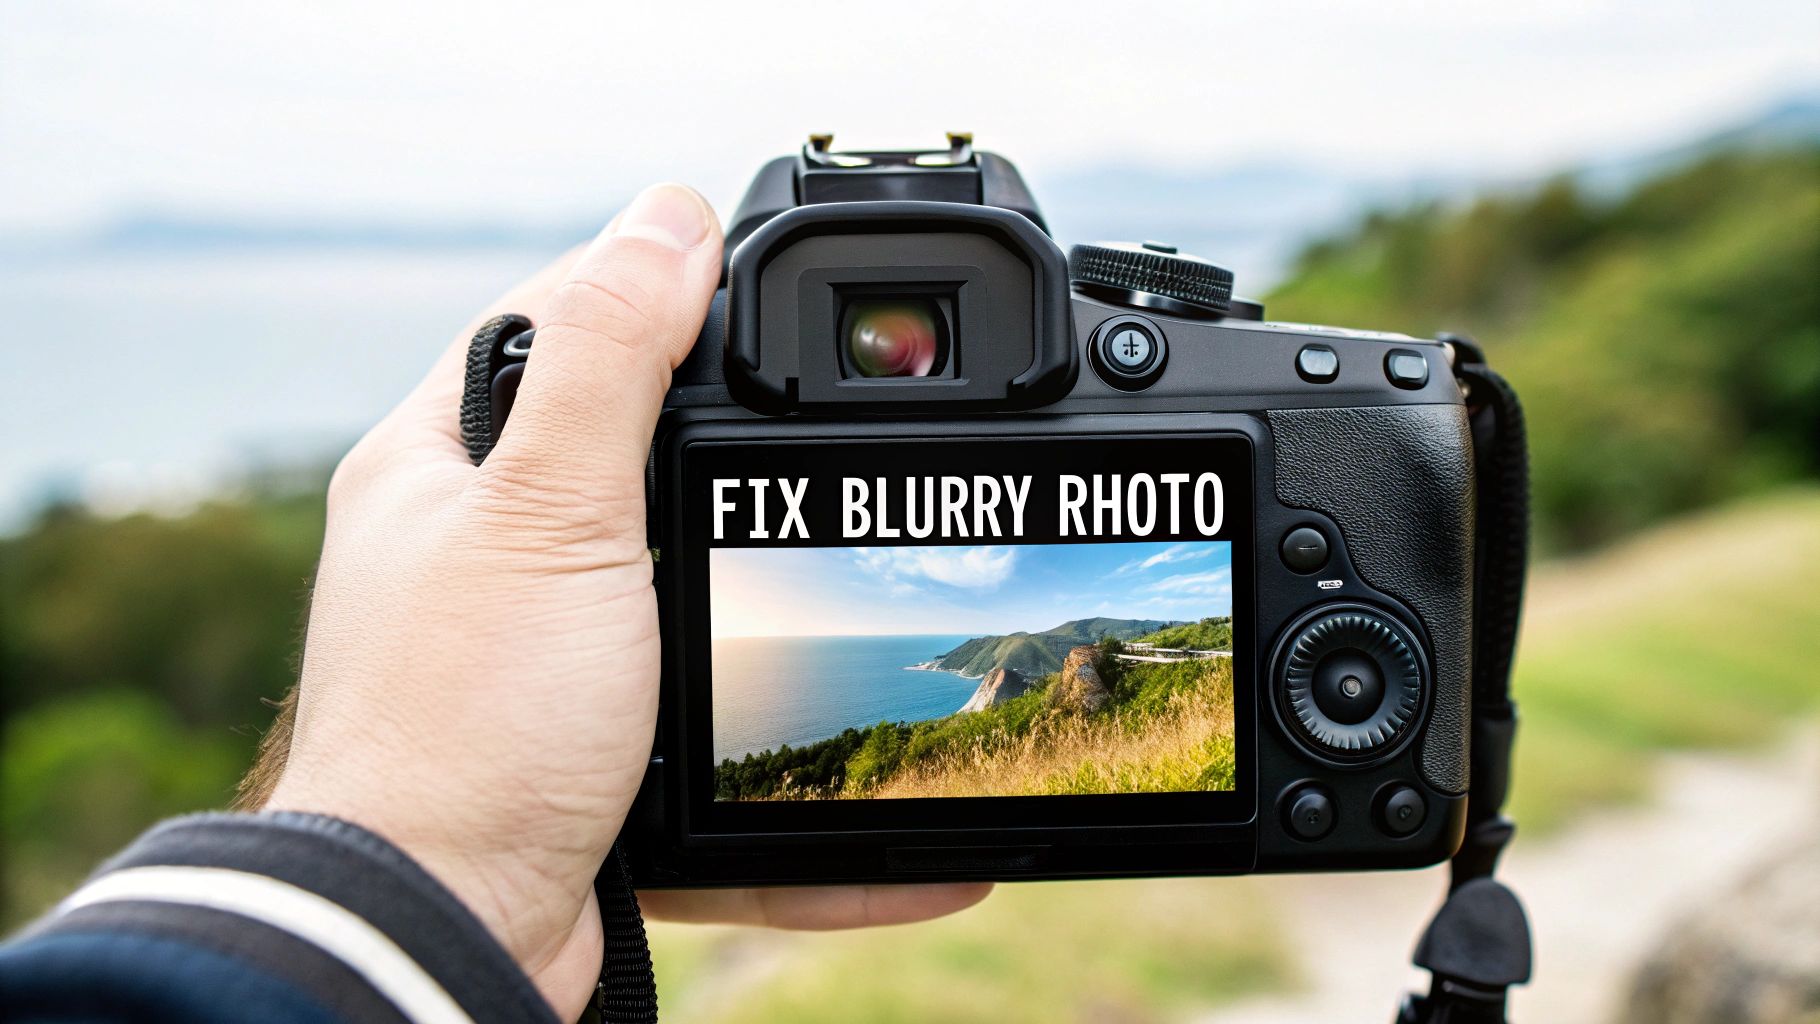
The absolute easiest way to fix a blurry photo is to let an AI-powered photo enhancer do the heavy lifting. These tools can automatically figure out what kind of blur you're dealing with and use some seriously impressive algorithms to bring back sharpness and detail. All it takes is a few clicks—no need to get lost in complex manual editing.
First, Understand Why Your Photos Are Blurry
Before you can fix a blurry picture, you have to play detective for a minute. Figuring out why an image is blurry is the single most important step because it tells you which tools and techniques are actually going to work.
If you just jump straight into fixing it without a proper diagnosis, you're setting yourself up for a lot of frustration and, frankly, subpar results.
Think of it like this: you wouldn't use the same method to fix a shaky video of a dog chasing a ball as you would for a portrait where the background is sharp but the person’s face is soft. Each issue has its own cause and, therefore, its own solution.
Diagnosing the Problem
Let's get into the three most common culprits behind blurry photos. Once you can spot which one you're up against, you’ll save yourself a ton of time.
- Motion Blur: This is what happens when either your camera or your subject moves while the shutter is open. It usually looks like streaks or a ghostly trail. You’ll see this a lot in low-light photos, where the camera needs to keep its shutter open longer to capture enough light.
- Focus Blur (Out-of-Focus): This one happens when your camera's lens just doesn't lock onto the right spot. The classic example is a portrait where the trees behind your friend are perfectly crisp, but their face is fuzzy. The camera just guessed wrong.
- General Softness: Sometimes a photo isn't technically blurry but just feels... flat. It lacks that crisp, defined look. This can come from a low-quality lens, a bit of atmospheric haze, or even digital noise from shooting at a high ISO.
To help you get a better handle on this, I've put together a quick reference guide. It's designed to help you identify the type of blur in your photo so you can choose the right editing approach from the get-go.
Common Types of Blur and Their Causes
| Type of Blur | What It Looks Like | Common Cause | Best Approach to Fix |
|---|---|---|---|
| Motion Blur | Streaky, directional lines or ghostly trails. | Camera shake or a fast-moving subject. | AI deblurring tools trained on motion. |
| Focus Blur | The intended subject is soft, but other parts of the image are sharp. | Autofocus locked onto the wrong object. | AI focus correction and sharpening. |
| General Softness | The entire image lacks crispness and fine detail. | Low-quality lens, digital noise, or atmospheric haze. | General sharpening and clarity adjustments. |
As you can see, each type of blur points to a specific fix. Trying to apply a generic sharpening filter to a photo with severe motion blur, for example, often just makes things look worse.
Why It Matters
Camera shake has always been a huge headache for photographers. Before image stabilization (IS) became a standard feature, some studies showed that a staggering 30-40% of consumer photos suffered from motion blur.
Today, with over 85% of modern cameras and smartphones having some form of IS, the problem isn't as widespread, but it definitely still pops up—especially in tricky lighting.
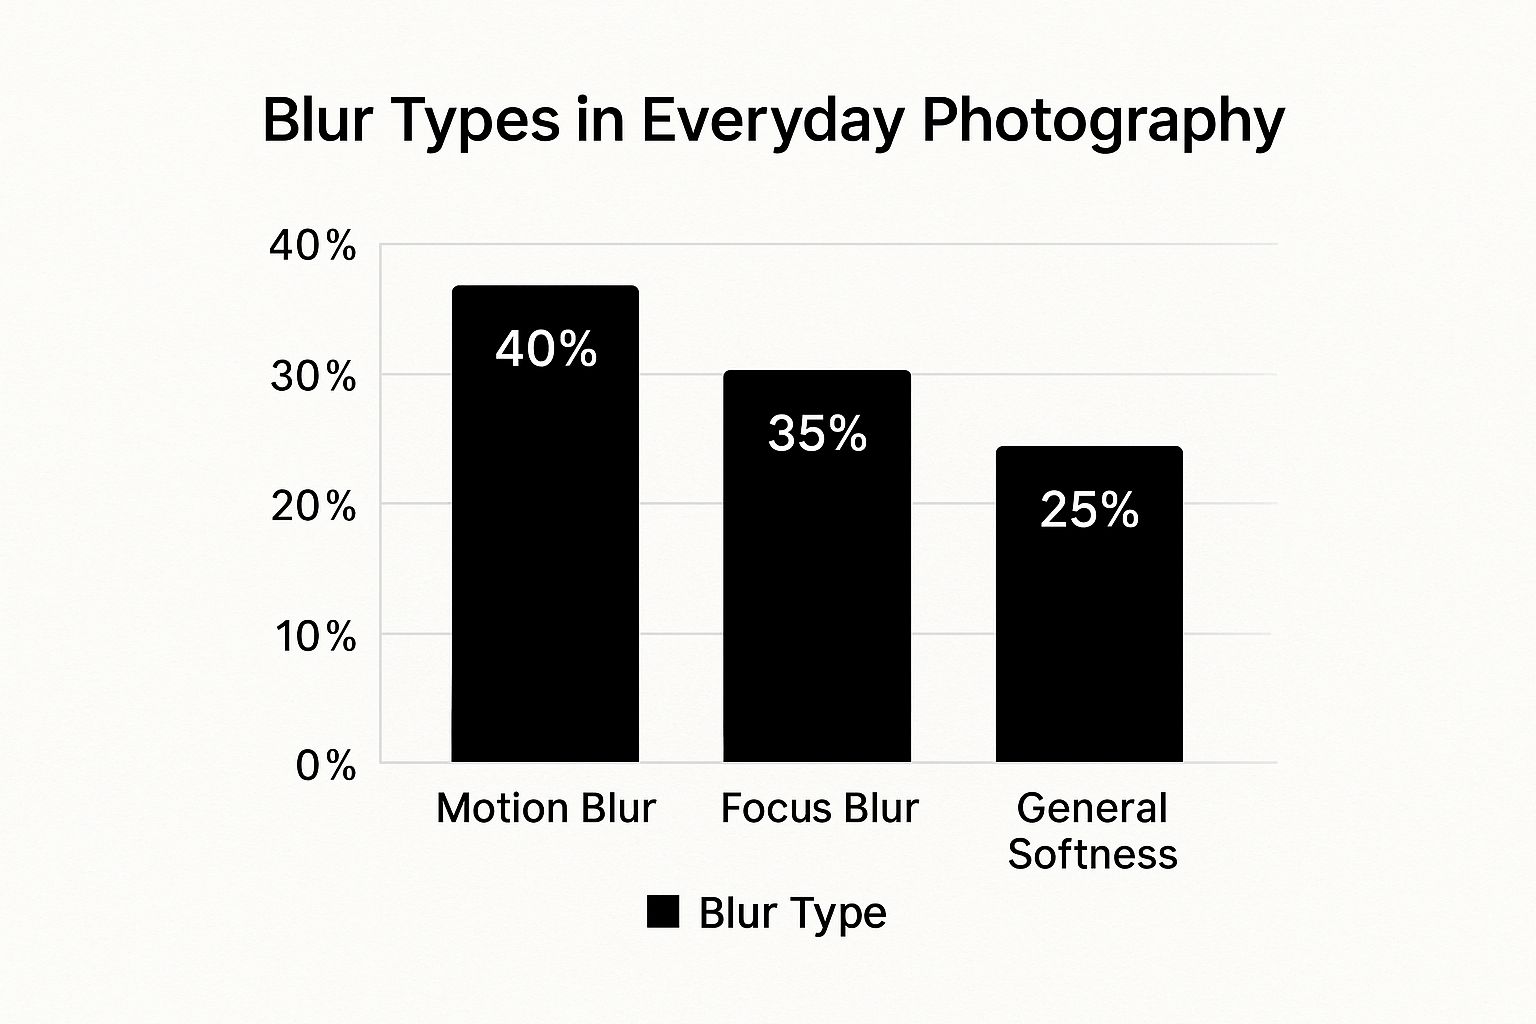
The data here is pretty clear: motion and focus blur are the two big ones you'll encounter most often.
The key takeaway is this: A correct diagnosis is half the battle. Once you know whether you’re fighting motion trails or a missed focus point, you can choose the right tool for the job instead of blindly applying sharpening effects that might make the image look worse.
One of the biggest reasons for blurry images is simply not having enough light, which forces your camera to use a slower shutter speed and ups the risk of motion blur. By mastering essential lighting techniques, you can prevent a lot of blur from ever happening.
For more tips on getting it right in-camera, check out our guide on how to take pictures professionally.
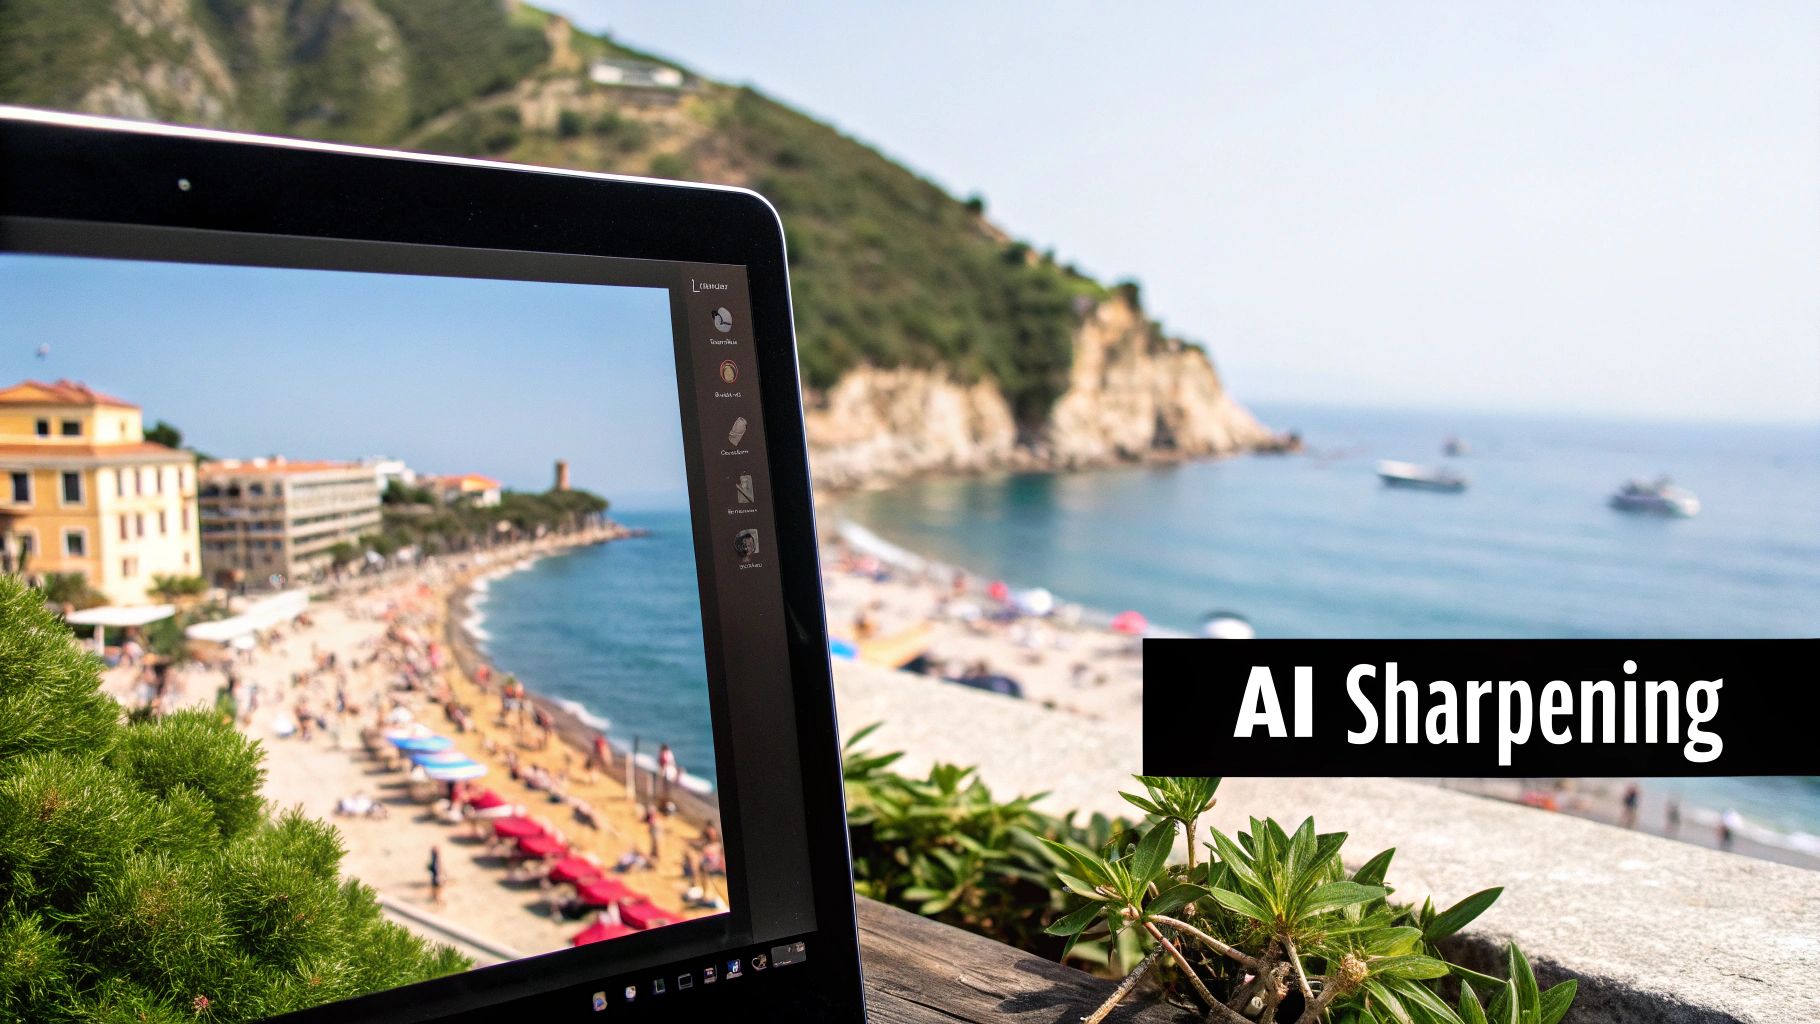
Sharpen Your Photos Instantly with AI Tools
Let's be honest, manual editing can be a real headache. When you're staring at a slightly soft photo, the last thing you want to do is dive into a complex program. This is exactly where AI photo enhancers come in—they offer a nearly instant fix for blurriness with almost zero effort on your part.
These clever tools analyze your image, figure out why it's blurry, and apply targeted corrections to bring back lost detail and clarity.
Picture this: you're just back from an amazing trip. You snapped the perfect candid shot, but a tiny hand shake made it just a bit fuzzy. It’s a classic problem. Instead of wrestling with confusing software for an hour, you can fix that blurry photo in just a few clicks. Seriously.
Step-by-Step: How to Fix a Blurry Photo with AI
Let’s take that slightly blurry vacation photo and rescue it. Here is a practical, step-by-step tutorial using a typical AI enhancer tool.
- Upload Your Photo: Navigate to the AI enhancer website. You'll see a prominent "Upload Image" button or a drag-and-drop area. Select the blurry photo from your computer or phone.
- Let the AI Work: The moment your photo is uploaded, the AI automatically analyzes it. This process usually takes just a few seconds. It identifies the type of blur and applies an initial correction.
- Review the Initial Result: The software will present you with a side-by-side or slider view comparing the original and the enhanced version. In many cases, this automatic fix is all you need.
Here's what a typical AI photo enhancer looks like right after that first analysis.
Check out the instant difference in sharpness. The AI has already tightened up the key features without you having to touch a single slider.
Fine-Tuning for a Perfect Finish
If the automatic result isn't quite perfect, you can make manual adjustments. Here’s a quick tutorial on using the common sliders for a professional finish.
- Adjust Sharpness: Locate the Sharpness slider. Slowly increase its value until the edges in your photo look crisp and well-defined. Be careful not to go too far, or you'll see halos appear.
- Enhance Clarity: Next, use the Clarity slider. This adds mid-tone contrast, giving your photo more punch and dimension, especially in textured areas like fabric or foliage.
- Reduce Noise: Sharpening can sometimes amplify digital grain. If your photo looks noisy, gently increase the Noise Reduction slider until the image looks smooth again.
- Download Your Photo: Once you're satisfied with the result, click the "Download" button to save the newly sharpened image to your device.
The goal is to enhance, not overdo it. A great edit is one you don't even notice. The photo should just look like it was taken perfectly in the first place.
This tech is moving incredibly fast. If you're interested in how it's being built directly into new devices, check out the latest smartphone AI photo features that are designed to improve clarity right out of the camera.
The Power of One-Click Enhancement
For most of us, the best thing about these AI tools is how fast they are. Something that used to require expensive software and a lot of know-how can now be done in seconds. It has completely changed the game for everyone from pro photographers to people just wanting better Instagram photos.
Here are a few situations where an AI tool is the perfect fix:
- Restoring Old Family Photos: Scanned photos from old albums are almost always a bit soft. AI can not only sharpen them but sometimes even add color back.
- Improving Social Media Content: Need a quick touch-up before you post? An AI tool gives you a fast, effective solution without the hassle.
- Rescuing Low-Light Shots: Photos taken inside or at night are notorious for motion blur. AI deblurring is trained specifically to fix this common problem.
Behind the scenes, these tools use complex neural networks trained on millions of images. This massive library helps them understand what a sharp photo should look like, allowing them to intelligently fill in the missing details in a blurry one. If you want to nerd out on the technical side, our guide to AI photo enhancement dives deeper into how it all works.
Ultimately, using an AI tool to fix a blurry photo is about saving a memory you thought was lost. It’s a powerful and simple way to make sure your favorite moments are preserved with the clarity they deserve.
If AI sharpening feels like a blunt instrument, think of manual editing as a surgeon's scalpel. Sometimes, you just need that level of precision, and that's when you turn to the old pros: Adobe Photoshop and Lightroom.
When you jump into manual sharpening, you’re taking back control. It's a more deliberate, hands-on process that can produce incredibly natural results, especially when you're wrestling with a specific kind of blur that AI just can't seem to get right.
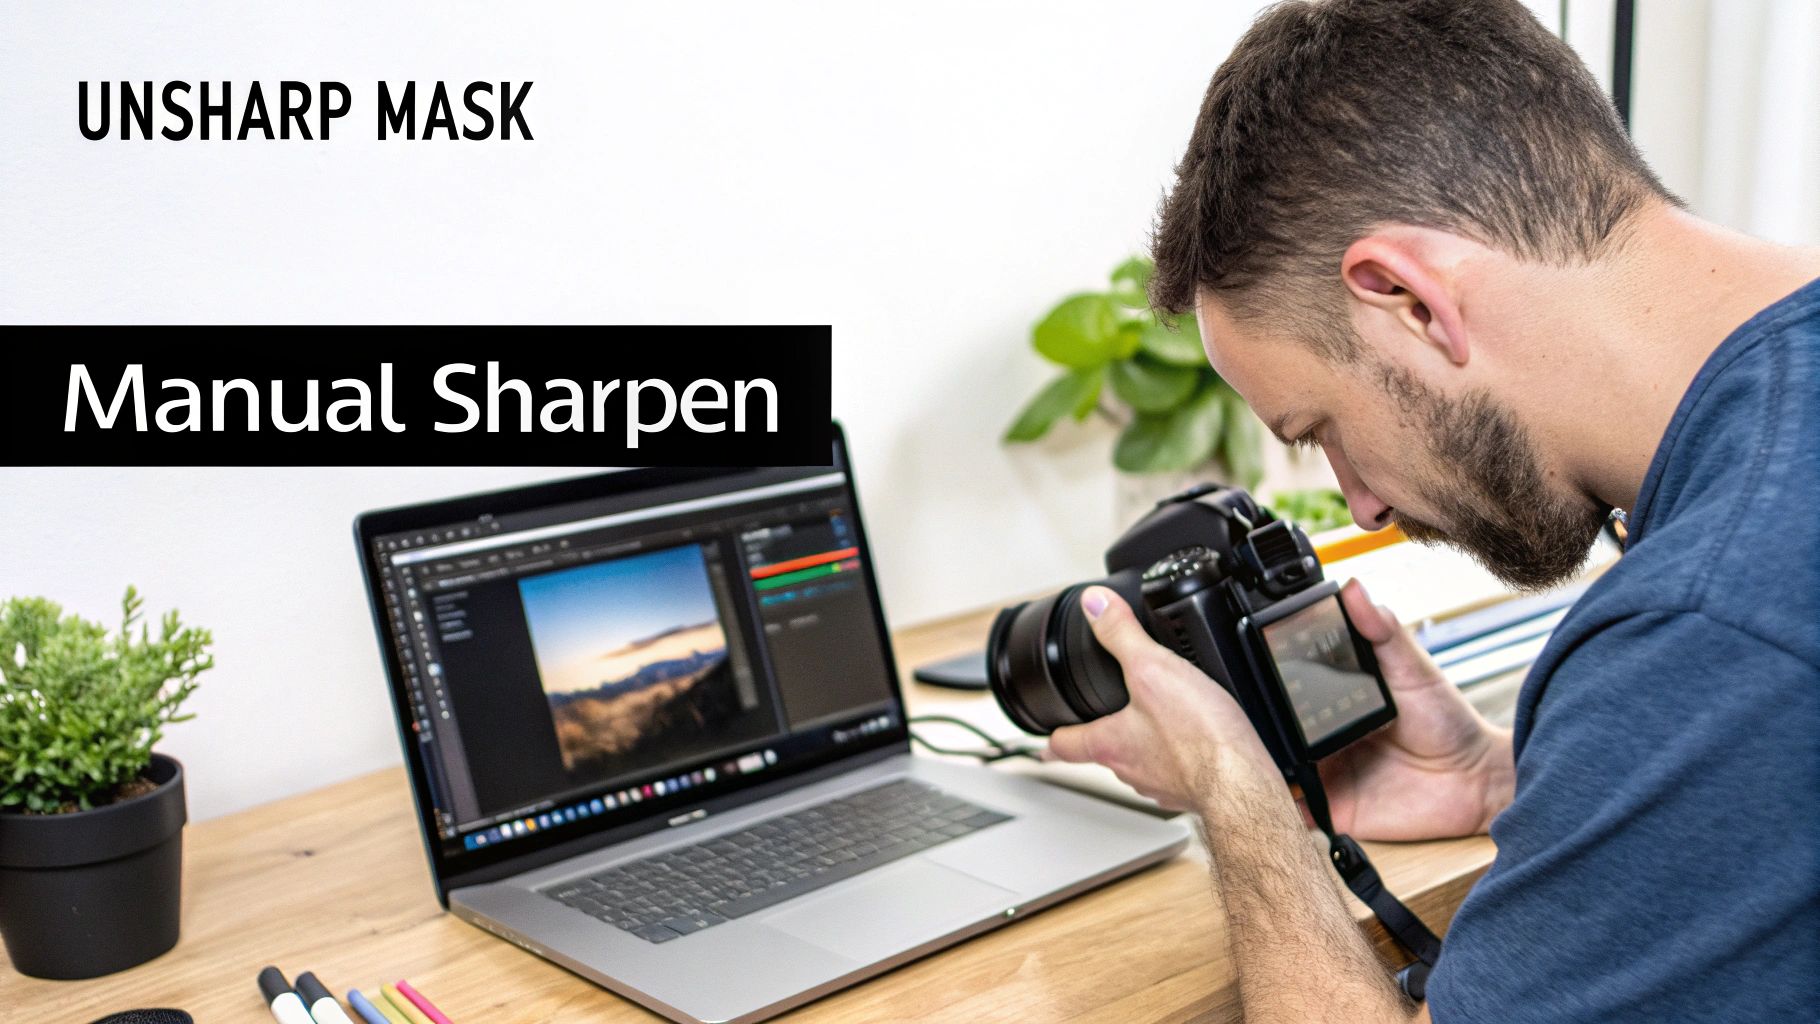
Tutorial: How to Use Unsharp Mask in Photoshop
The Unsharp Mask is a classic sharpening tool. Here’s a step-by-step guide to using it effectively.
- Open Your Image: Launch Photoshop and open the blurry photo you want to fix.
- Zoom to 100%: Go to
View > 100%or pressCtrl+1(Cmd+1 on Mac). This is crucial for judging the sharpening effect accurately. - Open Unsharp Mask: Navigate to the menu bar and select
Filter > Sharpen > Unsharp Mask. A dialog box with three sliders will appear. - Set the Amount: Start by setting the Amount slider to around 120%. This controls the overall strength of the sharpening.
- Adjust the Radius: Keep the Radius low to avoid halos. A value between 0.8 and 1.5 pixels is a good starting point for most web images.
- Fine-tune the Threshold: Use the Threshold slider to prevent sharpening of noise. A value of 3-10 tells Photoshop to ignore minor pixel differences, so you only sharpen actual edges.
- Preview and Apply: Toggle the "Preview" checkbox to see the before and after. If it looks good, click "OK" to apply the filter.
My biggest tip? Always, always sharpen while viewing your image at 100% zoom. This is the only way to see what's actually happening at the pixel level and stop yourself from going overboard.
Stepping Up to Smart Sharpen
For more advanced control, Photoshop's Smart Sharpen filter is your next best friend. Find it at Filter > Sharpen > Smart Sharpen. This tool is a bit more sophisticated, with algorithms specifically designed to counteract motion blur or lens blur.
It has the same Amount and Radius sliders you're familiar with, but it adds granular controls for shadows and highlights. This is huge. It means you can apply sharpening carefully without blowing out your highlights or crushing the detail in your shadows. It’s my go-to when I need to deblur a photo without creating a ton of nasty digital artifacts.
The demand for tools like this is exploding. The photo editing software market was valued at around USD 345 million in 2023 and is on track to hit over USD 580 million by 2032. It just goes to show how critical getting a sharp image is for everyone.
Great Free Alternatives for Manual Sharpening
Don't have an Adobe subscription? No problem. You can still get fantastic results with some powerful free tools.
GIMP (GNU Image Manipulation Program):
Often hailed as the best free alternative to Photoshop, GIMP is an open-source workhorse. To sharpen an image, open your photo, go to Filters > Enhance > Unsharp Mask, and adjust the same Radius, Amount, and Threshold settings as you would in Photoshop.
Snapseed (Mobile App):
For sharpening on the fly, I can't recommend Google's Snapseed enough. Here’s a quick mobile workflow:
- Open your photo in Snapseed and tap
Tools > Details. - Swipe vertically on the screen to choose between Structure (for texture) and Sharpening (for edges).
- Swipe horizontally to adjust the intensity.
- Tap the checkmark to apply your changes.
Getting these manual techniques down can make a world of difference. When you start weaving them into a repeatable process, your editing becomes faster and more effective. If you want to get more organized, take a look at our guide on building a solid photo editing workflow.
Knowing how to fix a blurry photo is a fantastic skill, but it’s just as important to know what not to do. It’s surprisingly easy to take a slightly soft image and, with a few wrong moves, push it into the realm of an over-processed, unnatural-looking mess.
The goal here is restoration, not destruction. Let's walk through the most common pitfalls so you can steer clear of them.
One of the most frequent errors is simply going too far with the sharpening tools. We’ve all seen it: a photo that looks so "crispy" it almost hurts your eyes. This happens when you get a little too enthusiastic with the sharpness slider, creating an effect that’s more distracting than clarifying.
Over-Sharpening and Its Telltale Signs
Over-sharpening introduces digital artifacts that scream "this has been edited." Once you learn to spot these issues, you'll be able to avoid them in your own work and get a much more professional result.
The most obvious sign is the halo effect. This looks like a bright, glowing outline around the edges of objects, especially where something dark meets a light background. It's a dead giveaway that the sharpening radius was set too high, causing the effect to "bleed" past the edge it was meant to define.
Another symptom is a "crunchy" or gritty texture. This is especially noticeable in areas that should be smooth, like skin or a clear blue sky. Pushing the sharpness amount too aggressively amplifies digital noise, turning subtle grain into a distracting, sandy texture.
The best sharpening is invisible. It should make the photo feel like it was captured perfectly in focus from the start, not like it was rescued by aggressive software. A subtle touch is always more effective than a heavy hand.
Setting Realistic Expectations
Another common misstep is expecting miracles from the software. While today's AI and manual tools are incredibly powerful, they do have their limits. Understanding what's possible and what isn't is key to avoiding frustration.
Here's what you need to keep in mind:
- Severely Out-of-Focus Images: If a photo is just a blurry blob with no discernible edges, there’s very little data for the software to analyze. Sharpening tools need at least some edge information to do their job; they can't invent details that were never captured in the first place.
- Extreme Motion Blur: Some AI tools are designed specifically to tackle motion blur, and they do a great job. But a photo with extreme, chaotic movement across the entire frame is often beyond saving. The software might reduce the blur, but it likely won't produce a perfectly sharp image.
The Golden Rule: Work on a Copy
This might be the most critical piece of advice I can give you: never, ever edit your original file. This is a non-negotiable rule in photo editing. Always, always work on a duplicate.
Why is this so important? Every time you make an edit and save a file (especially a JPEG), you are potentially degrading its quality. This is called destructive editing. If you make a mistake or decide you don’t like the result, you can't go back to the pristine original if you’ve already saved over it.
By creating a copy first, you give yourself a safety net. You can experiment freely, push sliders to their limits to see what happens, and even start over from scratch if you need to—all without risking the original memory you were trying to preserve.
Advanced Tips for Professional-Quality Sharpness
Once you've got the hang of the one-click fixes for blurry photos, it's time to dig into the techniques that the pros use. This is where you move beyond just "fixing" an image and start truly enhancing it for professional-level clarity.
The real secret is learning to guide the viewer's eye. Instead of just slapping a sharpening filter over the entire photo, you want to be more deliberate. It's all about selective sharpening.
A simple way to do this in programs like Photoshop or GIMP is with a layer mask. Here’s a quick tutorial:
- Duplicate Your Layer: Open your image and duplicate the main layer (
Ctrl+JorCmd+J). - Apply Sharpening: Apply your desired sharpening filter (like Unsharp Mask) to this new, duplicated layer. Don't worry about over-sharpening slightly.
- Add a Layer Mask: With the sharpened layer selected, click the "Add Layer Mask" icon (it looks like a rectangle with a circle in it). The mask will appear as a white thumbnail next to your layer.
- Invert the Mask: Press
Ctrl+IorCmd+Ito invert the mask to black. This will hide the sharpening effect completely. - Paint with a White Brush: Select the Brush tool, set your color to white, and simply paint over the areas you want to be sharp (like the eyes, hair, or details on clothing). The sharpening effect will be revealed only where you paint.
This targeted approach is what separates a great edit from an amateur one. It completely avoids that "crunchy," over-processed look that happens when you sharpen everything globally.
Your Ideal Editing Workflow
One of the biggest mistakes I see people make is sharpening their images at the wrong time. Think of sharpening as the final coat of polish on a piece of furniture—it absolutely has to be the last thing you do.
Here’s the order of operations I stick to for clean, crisp results:
- Global Adjustments: Get your exposure, color, and white balance right first.
- Noise Reduction: If your photo is grainy, tackle that before you even think about sharpening. Why? Because sharpening will amplify every speck of noise, making it look ten times worse.
- Retouching: Now’s the time to remove blemishes or clone out any distracting background elements.
- Final Sharpening: With everything else perfect, apply your sharpening as the very last step before you save or export.
Following this sequence saves a ton of headaches. You won't waste time sharpening pixels you end up editing out later.
The Delicate Balance of Sharpness and Noise
Sharpening and noise reduction are two sides of the same coin. When you boost sharpness, you're cranking up the contrast along the edges in your photo. This is great for detail, but it can also make digital noise or grain pop right out.
The mark of a great edit is finding that sweet spot. Always apply noise reduction first to create a clean canvas, then add your sharpness back in carefully. If you see the grain starting to reappear, just dial back the sharpening a little.
This balancing act is where modern software really shines. Old-school sharpening tools might improve a slightly soft image by 30-40%, but today's AI algorithms can work wonders. I've seen them recover incredible detail in 60-70% of photos I thought were goners, all while managing noise at the same time. It's a game-changer. If you're curious about the tech's evolution, it's worth checking out the trends in the photo editing software market.
Got Questions About Fixing Blurry Photos?
Even with the best tools on hand, you might still run into a few questions when trying to fix a blurry photo. Let's clear up some of the common ones so you can rescue your images with confidence.
Can Any Blurry Photo Be Fixed?
Honestly, not every photo is salvageable. While AI can work wonders on moderate motion or focus blur, an image that is severely out of focus or just a chaotic streak of light has very little data for the software to work with.
Think of it like restoring a painting. If the original canvas is too damaged or washed out, there’s simply not much there to bring back to life.
Sharpening vs. Deblurring: What Is the Difference?
You’ll hear these terms thrown around, often used interchangeably, but they describe two very different processes.
- Sharpening is all about increasing the contrast along the edges that already exist in the photo. It creates the illusion of a crisper image but doesn't add new detail.
- Deblurring is a much more complex process. Here, the software—usually AI—tries to reverse the specific type of blur (like motion or focus) by analyzing the image and actually reconstructing the details that were lost.
The takeaway? Sharpening enhances what's already there, while deblurring tries to recover what was lost. A great workflow often involves deblurring the image first, then applying a final, light touch of sharpening at the end.
How Can I Prevent Blurry Photos in the First Place?
The best fix is always prevention. If you want to avoid blur from the get-go, focus on building these simple habits into your photography routine:
- Get a Grip: Use both hands to hold your phone or camera. If it's dark, a tripod is your best friend. A steady shot is a sharp shot.
- Clean That Lens: A quick wipe with a microfiber cloth can make a huge difference. You'd be surprised how often a smudged lens is the culprit behind soft, dreamy-looking photos.
- Tap to Focus: Don’t just point and shoot. On a smartphone, manually tap your subject on the screen. This tells the camera exactly what you want in sharp focus, ensuring it locks onto the right spot.
Ready to bring your memories back into focus? See for yourself how AI Photo HQ can sharpen your images in just a single click. Restore your photos with AI today!

