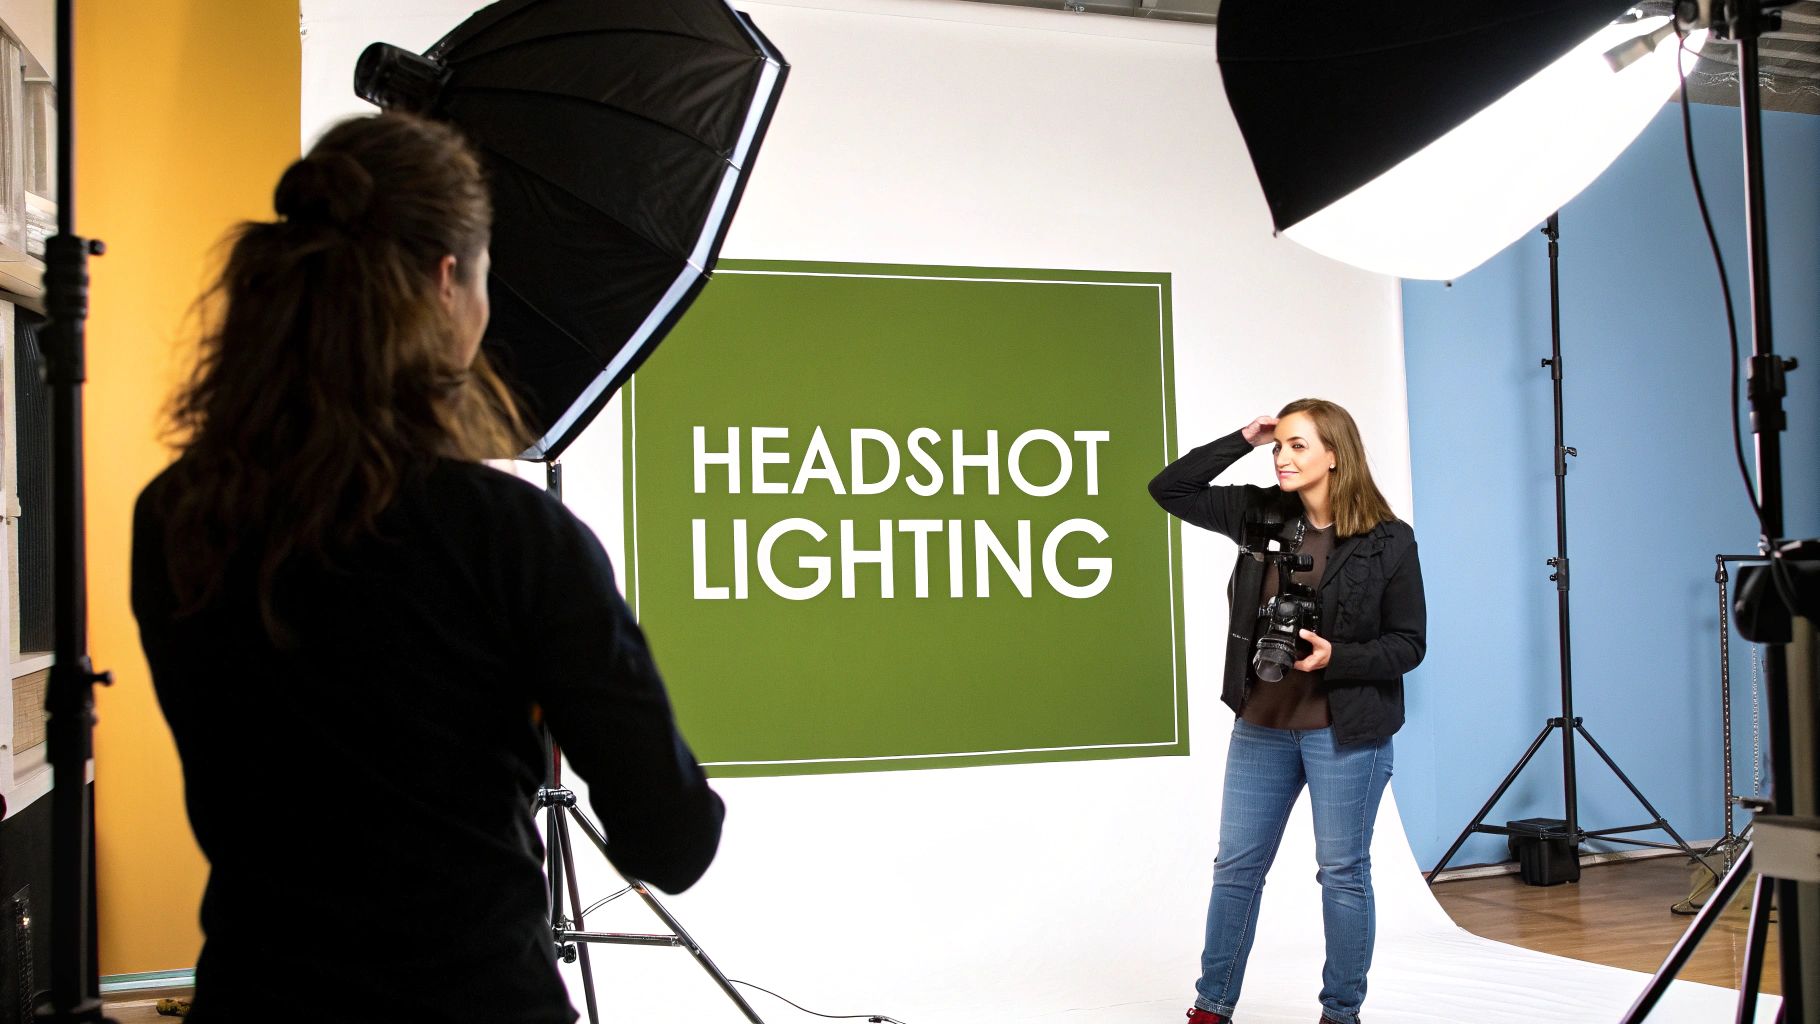
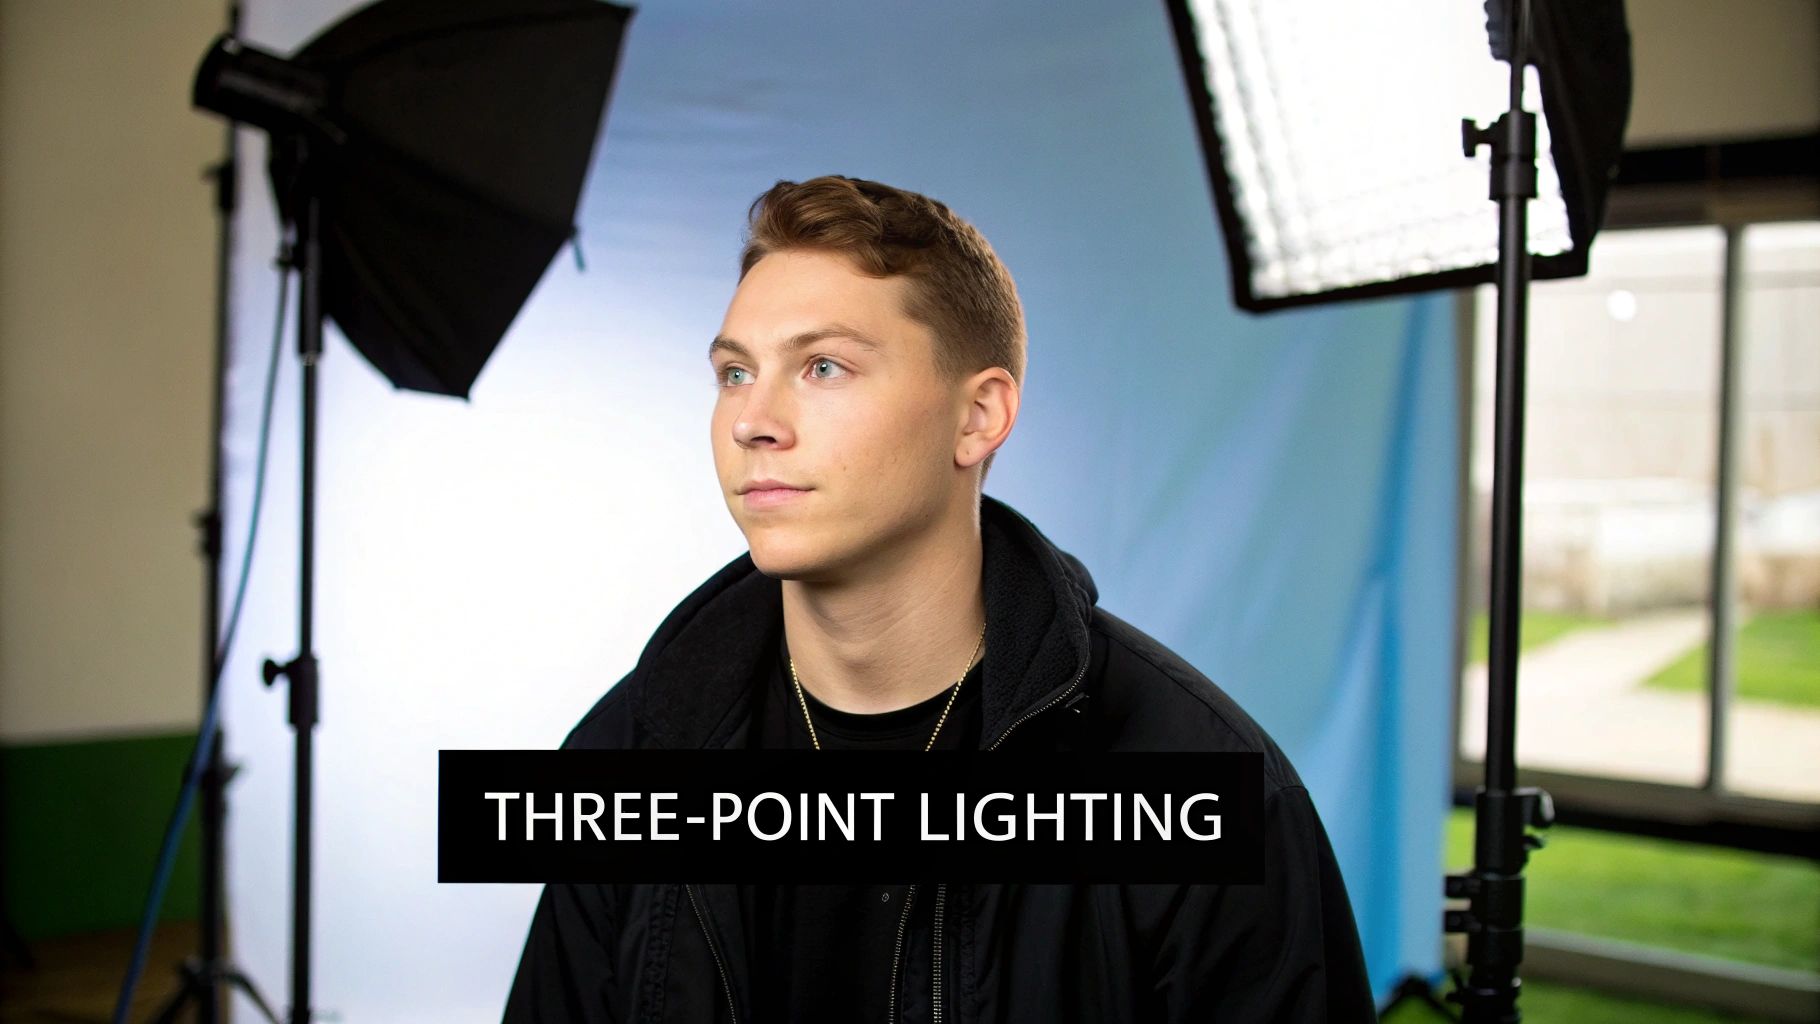
A truly professional headshot is all about the light. It’s not just about making someone visible; it’s about sculpting their features, controlling mood, and creating a polished, three-dimensional image. This all starts with a classic three-point setup: a key light, a fill light, and a background light, each shaped and softened by modifiers like softboxes.
Building Your Essential Headshot Lighting Kit
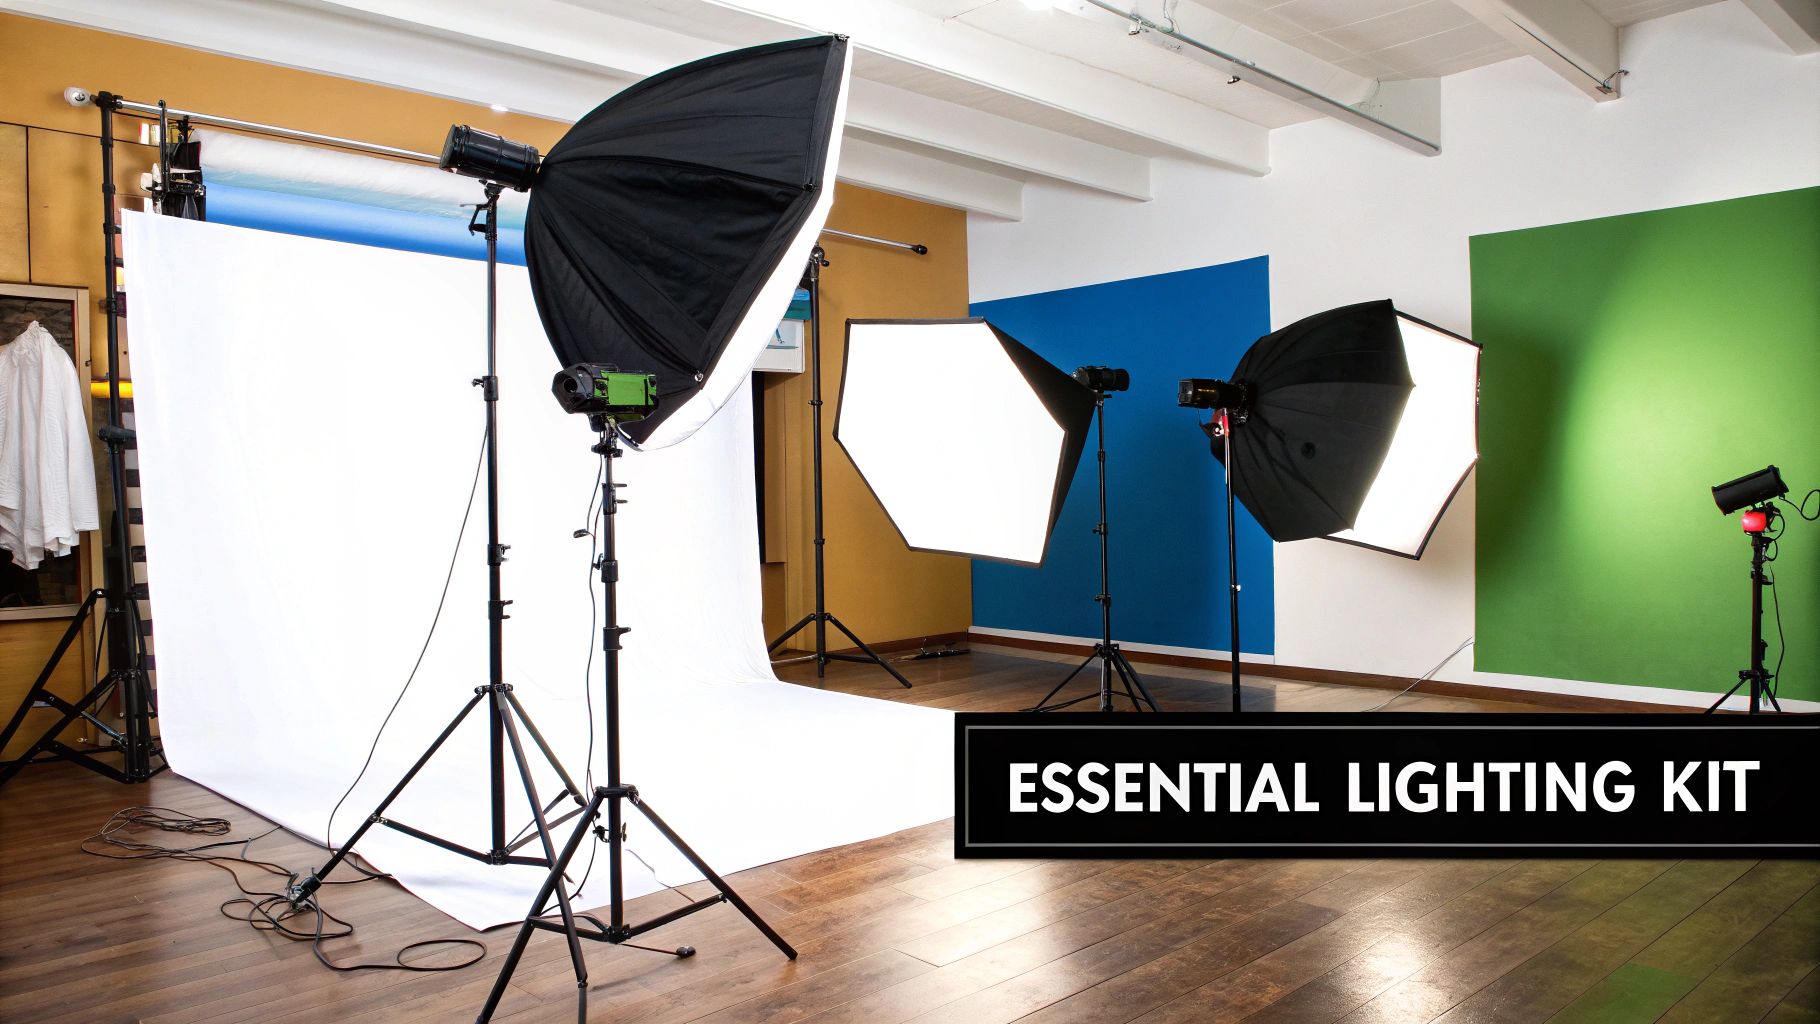
Before you can even think about crafting that perfect shot, you need the right tools. A great lighting setup doesn't have to break the bank or be overly complicated, but every single piece of gear serves a distinct purpose. Getting a handle on the "why" behind each component is your first real step toward mastering headshot photography.
Your first big decision is choosing between continuous lights and strobes. Continuous lights, like modern LEDs, are always on. This is a massive advantage for beginners because you see exactly how the light falls on your subject in real-time. It’s a true what-you-see-is-what-you-get approach that makes learning to shape light much more intuitive.
Strobes, also known as flash units, are a different beast. They fire a powerful, instantaneous burst of light the moment you press the shutter. They pack significantly more power, which lets you use lower ISOs for cleaner, sharper images and excel at freezing any motion.
The Core Lights and Their Roles
Every versatile headshot kit, from the minimalist to the elaborate, is built around a few essential light sources that have to work in harmony. Each one has a specific job to do in shaping the final portrait.
- Key Light: This is your main event, your primary light source. It's the brightest of the bunch and is responsible for defining your subject's features and casting the main shadows that give the image its depth and character.
- Fill Light: Placed opposite the key light, the fill’s job is to "fill in" the shadows created by the key. It’s all about controlling contrast and making sure you don’t lose important details on the darker side of the face.
- Hair or Rim Light: This light typically comes from behind and slightly above the subject. It creates a subtle, beautiful outline of light around the hair and shoulders, which is the secret to separating your person from the background and adding that final professional polish.
The recent explosion in powerful, affordable strobes and continuous LEDs has given photographers more control than ever before. For example, the 2 Stop Lighting Ratio, a go-to in beauty photography, is achieved by setting the key light two full stops brighter than the fill. This level of precise control has fueled demand, with the global market for professional lighting equipment growing by 12% in 2020 alone.
Shaping Light With Modifiers
Raw, unmodified light from a bulb is harsh, unflattering, and the fastest way to ruin a good headshot. This is where modifiers come into play. They are absolutely essential tools that you’ll use to soften, direct, or shape your light into something beautiful.
The bigger the light source is relative to your subject, the softer the light will be. This one principle is why massive softboxes are a staple for creating that gentle, flattering light we love in headshots.
A softbox is basically a fabric box that fits over your light, diffusing it to create soft, even illumination that wraps around your subject and minimizes hard shadows. When shooting actor headshots, which often demand a very natural and approachable look, large octagonal softboxes are a top choice. You can dive deeper into crafting that specific style in our guide to professional actor headshots.
To get you started, here's a quick rundown of the gear that should be on your list.
Essential Gear for Your Headshot Lighting Kit
This table breaks down the must-have equipment for any headshot photographer, explaining what each piece does and where it shines.
| Equipment | Primary Function | Best For |
|---|---|---|
| Key Light | Main light source, defines features and shadows. | The foundational light for any setup. Can be a strobe or continuous light. |
| Fill Light | Softens shadows created by the key light. | Controlling contrast and revealing detail in darker areas of the face. |
| Rim Light | Separates the subject from the background. | Adding a professional, polished outline to hair and shoulders. |
| Softbox | Diffuses and softens the light source. | Creating flattering, gentle light ideal for portraits and headshots. |
| Reflector | Bounces existing light to fill in shadows. | A simple, low-cost alternative or supplement to a dedicated fill light. |
Finally, don't underestimate the power of a simple reflector. It’s just a collapsible disc—often with white, silver, or gold surfaces—used to bounce light from your key source back onto your subject. It's an incredibly versatile and affordable way to add a touch of fill light without needing a whole separate fixture.
Creating Powerful Portraits with a Single Light
You don't need a studio overflowing with gear to create a killer headshot. Honestly, learning how to master a single light is one of the most valuable skills you can build. It forces you to get back to the fundamentals and truly understand how to shape a face with light and shadow.
This minimalist setup is all about being deliberate. Your main light source—the key light—does the heavy lifting, and a simple reflector steps in to manage the shadows. This isn't just a beginner's technique, either. It’s a go-to for seasoned pros who need to work fast on location or are stuck in a tight space. With just these two pieces of kit, you have total control over mood, dimension, and making your subject look their best.
Step-by-Step: Your First One-Light Setup
Let's walk through the exact steps to create a classic, universally flattering portrait with one light and a reflector.
- Position Your Subject: Have your subject sit on a stool facing the camera.
- Place the Key Light: Position your main light (with a softbox attached) at a 45-degree angle to the subject. Raise the light stand so the center of the softbox is slightly above their eye level, angled down.
- Dial in the Light: If using a continuous light, adjust the brightness until the side of the face closest to the light is well-exposed. If using a strobe, start at a low power setting (like 1/16) and take test shots, increasing power until exposure is correct.
- Introduce the Reflector: Have the subject (or an assistant) hold a white reflector on the opposite side of their face from the light. Start it close to their body.
- Adjust and Shoot: Watch the shadows on the "dark" side of the face as you slowly move the reflector away. The closer it is, the more light it bounces back, softening the shadows. Find a distance that looks natural and balanced, then start shooting.
The real magic of a single-light setup isn't about adding more gear. It's about learning how to subtract light and control your shadows. A reflector on one side and a black card (what we call negative fill) on the other gives you complete command over the contrast.
This chart shows you exactly how moving your light up or down affects the contrast on your subject's face.
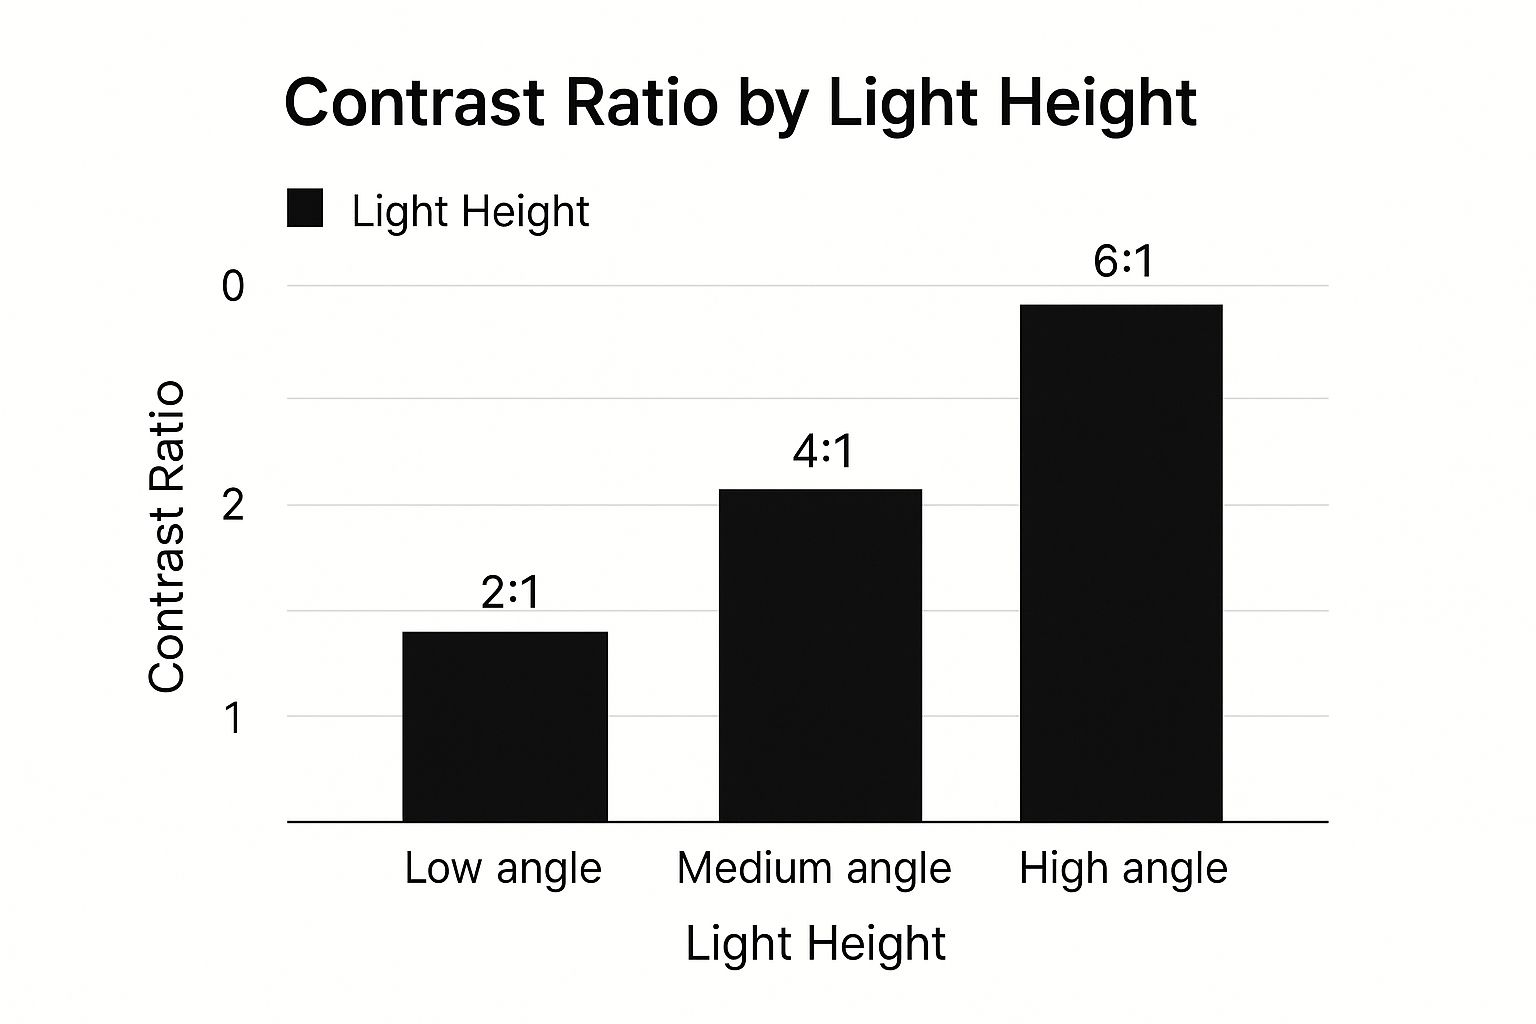
See? A higher light angle creates a higher contrast ratio. That means more dramatic shadows and a much moodier feel to the final portrait.
Using a Reflector as Your Fill Light
In a one-light setup, a reflector is your best friend. It’s a cheap, simple, and incredibly powerful tool for bouncing some of that key light back into the shadows on your subject’s face. It basically becomes your fill light, making sure the dark side of the face doesn't get lost in pure blackness.
The effect you get depends entirely on the reflector's surface and how close you hold it.
- White Surface: This is your workhorse. It provides a soft, neutral fill that gently lifts the shadows without messing with the color. It's the most versatile choice for headshots.
- Silver Surface: This one bounces back a lot more light, giving you a brighter, punchier fill with more contrast. It's fantastic for adding a crisp pop of light when you need it.
- Gold Surface: This adds a warm, golden hue to the light. It can be really flattering on some skin tones, but be careful—it’s easy to overdo it and make things look unnatural.
The best way to learn is to just do it. Hold the reflector close to your subject and then slowly back it away, watching the shadows on their face change in real time. This simple move lets you dial in the exact amount of fill you want, giving you the precision of a second light without any of the extra hassle.
How to Achieve Classic Headshot Lighting Patterns
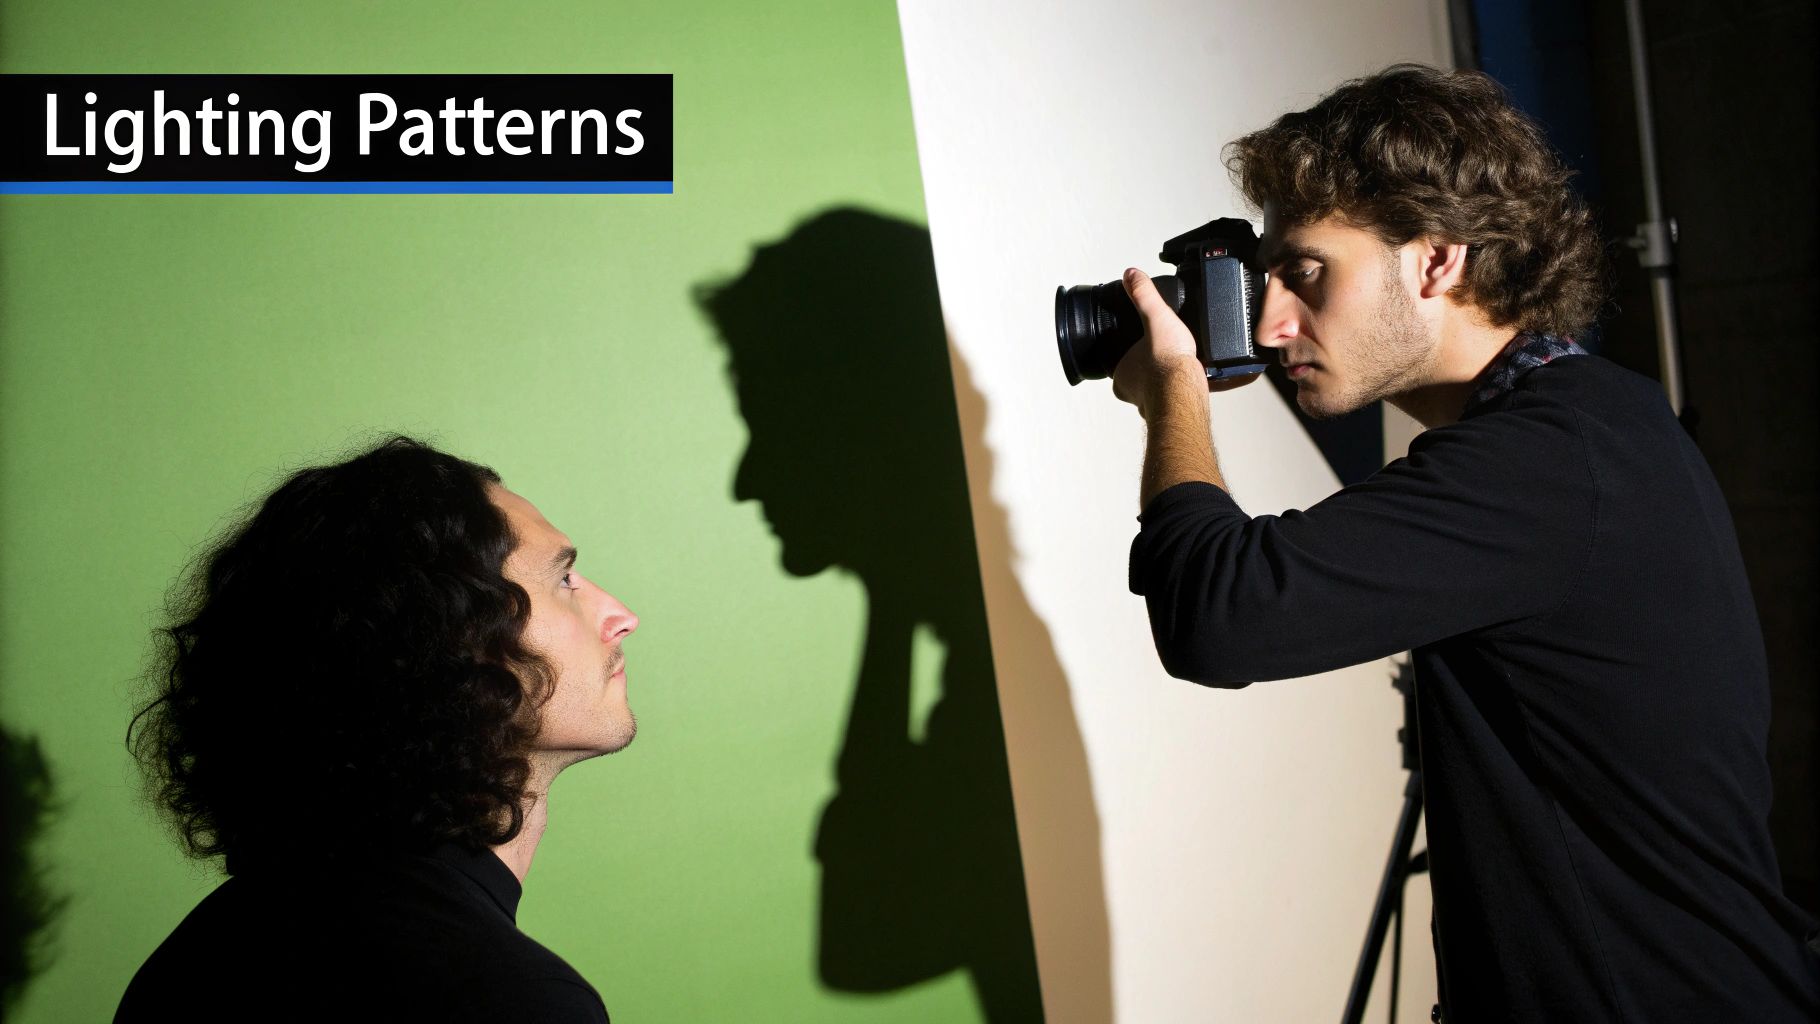
If you really want to understand portraiture, you have to speak the language of lighting patterns. These are the classic, repeatable setups that use light and shadow to quite literally sculpt a person's face. By mastering just a few, you gain a powerful toolkit to flatter any subject and deliver consistently professional shots.
The beauty of these patterns is their simplicity. Most rely on small, deliberate adjustments of a single key light. The real secret? Pay close attention to the shadow cast by the nose—it’s the tell-tale sign that you’ve nailed the look.
Tutorial: Setting Up Loop Lighting
Loop lighting is a workhorse. It creates just enough depth to be interesting without getting overly dramatic, making it perfect for corporate portraits. Here’s how to set it up step-by-step:
- Start Position: Place your key light (with softbox) about 30-45 degrees to the side of the camera.
- Set the Height: Raise the light so it's just a bit above your subject's eye level, pointing down at them.
- Observe the Shadow: Look at the shadow created by their nose. You're looking for a small "loop" shadow that points down toward the corner of their mouth.
- Fine-Tune: If the loop shadow connects to the shadow on their cheek, your light is too far to the side. Move it closer to the camera. If the shadow is too long, your light is too high. Lower it slightly. The goal is a small, distinct shadow.
Tutorial: Creating Butterfly Lighting
This pattern is a staple in beauty and fashion. It’s named for the small, symmetrical shadow it creates right under the subject's nose.
- Light Placement: Move your key light directly in front of your subject, centered with the camera.
- Raise it High: Elevate the light stand significantly, so the light is angled down sharply onto your subject's face. This creates the signature "butterfly" shadow under the nose.
- Add Fill from Below: Because the light is high, it can create deep shadows under the chin. To fix this, have your subject hold a white reflector flat in their lap. This will bounce light back up, softening those shadows for a clean, glamorous look.
Tutorial: Achieving Rembrandt Lighting
Named after the Dutch painter, this pattern is all about mood. It’s defined by a small, inverted triangle of light on the cheek opposite your key light.
To achieve true Rembrandt lighting, the triangle of light on the cheek should be no wider than the eye and no longer than the nose. Precision is everything with this classic pattern.
- Push the Light: Move your key light further to the side than you did for loop lighting—around 45-60 degrees.
- Adjust Height: Raise the light until the shadow from the nose connects with the shadow on the cheek. This "connection" is what closes the gap and creates the iconic triangle of light on the far cheek.
- Control the Spill: This is a more dramatic, shadow-heavy look. You may not need a reflector at all, or you might use a black card (negative fill) on the opposite side to deepen the shadows even more.
These patterns aren't just creative choices; they're strategic ones. You'll see Loop Lighting in roughly 40% of corporate headshots because it's so balanced and reliable. On the technical side, the use of softboxes has become standard practice, with over 80% of professional photographers relying on them to shape and perfect their lighting.
Headshot Lighting Pattern Cheat Sheet
This little table breaks down the key features of each pattern and gives you a quick reminder of when each one shines.
| Pattern Name | Key Characteristic | Best For |
|---|---|---|
| Loop Lighting | A small "loop" shadow from the nose pointing toward the corner of the mouth. | Corporate headshots, general portraits, and universally flattering looks. |
| Butterfly Lighting | A small, symmetrical shadow directly under the nose, resembling a butterfly. | Beauty, glamour, and fashion portraits; excellent for highlighting cheekbones. |
| Rembrandt Lighting | An isolated triangle of light on the cheek opposite the main light source. | Dramatic, moody, and artistic portraits that emphasize character and texture. |
Memorize these three patterns, and you'll have a solid foundation for handling almost any headshot that comes your way. They're the building blocks for more advanced lighting techniques in photography and will serve you well.
Adding Depth with Three-Point Lighting
While you can get incredible portraits with a single light, adding more sources gives you ultimate control. The classic three-point lighting setup is the professional standard because it lets you perfectly sculpt features, manage shadows, and make your subject pop right off the background.
We're simply building on our single-light foundation by bringing a fill light and a hair light (or rim light) into the mix. Your key light is still the star, but these two supporting lights give you granular control over contrast and separation. This is how you get that clean, high-end look.
Step-by-Step: Adding a Fill Light
The fill light’s only job is to soften the shadows from your key light. Let's add it to your setup:
- Set Your Key Light: First, position your key light to create a pattern you like (e.g., Loop Lighting).
- Place the Fill Light: Bring in your second light and place it on the opposite side of the camera from the key.
- Set the Power Ratio: The golden rule: your fill light must be less powerful than your key. A great starting point is to set the fill's power to half the intensity of your key light (a 2:1 ratio).
- Take a Test Shot: Look at the shadows. Too dark? Nudge the fill power up slightly. Is the face looking too flat and losing dimension? Dial the fill power back down.
One of the most common mistakes I see is setting the fill light as bright as the key light. This completely kills all the shadows and nukes the dimensionality of the face, leaving you with a flat, uninteresting image. The goal is to soften shadows, not obliterate them.
You can see the influence of legendary photographers in how we approach these setups today. For instance, Peter Hurley, the man behind the Headshot Crew, often shows how different lighting ratios can completely change the feel of a portrait. His work with continuous lights really highlights the versatility we have now, encouraging photographers to play with key and fill to craft a specific mood.
Step-by-Step: Adding a Hair Light
This third light is the secret weapon for a professional polish. It creates a subtle outline that separates your subject from the backdrop.
- Position the Light: Place your third light on a stand (a boom arm is ideal) behind the subject, either directly behind them or slightly off to one side. Make sure the light itself is out of the camera's view.
- Aim and Modify: Aim the light down at the top of the subject's head and shoulders. To prevent light from spilling into your lens and causing flare, you must control the beam. Use a modifier like a grid or a snoot to create a tight, narrow beam of light focused only on the subject.
- Set the Power: Start with the light's power turned all the way down.
- Dial it In: Take test shots, gradually increasing the power until you see a crisp but subtle edge of light appear on the hair and shoulders. The moment it looks like a bright halo or becomes distracting, you’ve gone too far.
Dialing in Your Camera and Choosing a Background
https://www.youtube.com/embed/vu5ohljtB-A
You can have the most beautifully arranged lights in the world, but the final image lives or dies by your camera settings and background. These are the elements that translate all your hard work with lighting into a polished, professional headshot.
Getting these right ensures every detail, from the catchlights in your subject’s eyes to the tone of the backdrop, is rendered exactly as you envision it. Think of your camera as the final gatekeeper.
Nailing Your Camera Settings for Headshots
Let's get your camera dialed in. In a studio with strobes, your settings have very specific jobs, and it's simpler than you might think.
First up, your aperture. While that creamy, blurry background from a wide-open f/1.8 lens is tempting, it’s often too shallow for headshots. You need sharpness from the tip of the nose all the way to the ears. For that, an aperture of f/8 or f/11 is the professional sweet spot. This guarantees the entire face is in crisp, critical focus, which is non-negotiable.
Next, lock in your ISO. You're in complete control of the light with your strobes, so there's absolutely no reason to introduce digital noise. Set your ISO to its lowest native setting, which is usually 100. This gives you the cleanest, highest-quality image file your camera can produce.
Finally, your shutter speed is all about syncing with your flash. Most cameras have a maximum sync speed around 1/200s or 1/250s. Set it there and forget about it. Going faster will give you a nasty black bar across your image, and going slower won't change your flash exposure—it just risks picking up unwanted ambient light or motion blur.
If you want a deeper dive into how these three pillars of exposure work together, check out our guide on how to take pictures professionally.
In a dark studio, a simple rule of thumb is: aperture controls the flash exposure, shutter speed controls the ambient light, and ISO sets the overall sensitivity. Since your ambient light should be near zero, only your aperture and ISO really matter for the subject.
Selecting the Perfect Background
The background is there to support your subject, not compete with them. A clean, non-distracting backdrop keeps all the attention where it belongs: on the person you're photographing.
- Seamless Paper: This is the industry standard for a reason. It gives you a perfectly smooth, clean look and comes in tons of colors. A mid-gray roll is incredibly versatile because you can make it look white, gray, or even black just by changing how much light you throw on it.
- Textured Walls: A brick or concrete wall can add some awesome character and depth. The trick is to light it subtly. Use a separate light, maybe with a grid to control the spill, and just skim it across the surface. This will bring out the texture without being distracting.
For more advanced setups, like using a green screen for composite work, the lighting becomes even more critical. To get that right, take a look at A Modern Guide for the Green Screen Creator for some fantastic insights into properly lighting these specialized backdrops. A great background is just as important as great lighting.
Common Questions About Headshot Lighting
As you start dialing in your lighting, you'll inevitably run into a few common roadblocks. Getting past these hurdles is what separates a decent headshot from a truly magnetic one. Let's tackle some of the questions I hear all the time.
One of the big ones is, "Why do my headshots look so flat?" This almost always boils down to your lighting ratio. If your key light and fill light are pumping out similar amounts of power, you're killing all the shadows that give a face depth and dimension.
The fix is simple. Start by turning your fill light completely off. Position your key light until you get a lighting pattern you love, then bring in the fill at a much lower power. I'm talking a 4:1 or even 8:1 ratio. Its only job is to gently lift the darkest shadows, not to flatten everything out.
Another frequent headache is dealing with reflections, especially for clients who wear glasses.
This is just a little high school physics in action: the angle of incidence equals the angle of reflection. If you can see a bright, distracting reflection of your softbox in your subject's glasses, you just need to change the angle. Try raising your key light higher or shifting it further to the side until that reflection moves right out of the frame.
How Many Lights Do I Actually Need?
Ah, the million-dollar question. While the classic three-point setup is a great textbook standard, you can absolutely create stunning, professional-level headshots with just one light and a reflector.
The real skill is learning to shape the light you have. Don't feel like you need to run out and buy a massive kit right away. Get to know one light intimately. Understand how it wraps, how it falls off, and how a simple reflector can bounce it back to solve problems. Only add more lights when you have a specific reason—like needing a hair light to separate a dark-haired subject from a dark background—that your single light can't handle alone.
Finally, let's talk about catchlights. Those little glints of light in a subject's eyes are what bring a portrait to life. But getting them right is crucial.
- Placement is Everything: You want those catchlights to land around the "10 o'clock" or "2 o'clock" position in the eyes. It looks the most natural and engaging.
- Modifier Shape Matters: The shape of your light source (like a round octabox or a square softbox) will be visible in the catchlight. Pick a shape that you find pleasing.
- One is Usually Enough: Be careful not to clutter the eyes with multiple, distracting catchlights from every light source in the room. Your key light should be the star, creating a single, clean reflection that adds that essential spark of life.
Ready to create stunning headshots without the hassle of a physical studio? AI Photo HQ gives you the power to generate professional-quality, perfectly lit portraits in seconds. Skip the setup and get straight to the results. Discover your next great headshot today at https://aiphotohq.com.

