You’ve probably seen it before—an otherwise great photo that looks a little gritty or speckled up close. That’s photo grain, and in the digital age, we usually call it “noise.” It’s a super common problem that can make a sharp, professional-looking image feel a bit fuzzy or amateur.
So, how do you get rid of it? The most straightforward way to tackle photo grain removal is with software designed to smooth out these tiny imperfections. Understanding what causes it in the first place is key to both fixing it and preventing it.
What Is Photo Grain and Why Does It Happen?
Photo grain usually pops up when you're shooting in low light. To compensate for the lack of light, your camera bumps up its sensor sensitivity, a setting called ISO. The higher you push the ISO, the more likely you are to see that grainy texture appear.
This is especially true for older digital cameras or smartphones with smaller sensors. They just can't handle high ISO settings as cleanly as modern, high-end cameras. Think of it as the digital version of the classic, sometimes charming, grain you see in old film photos.
The Origins of Image Noise
Dealing with imperfections in photos is nothing new; it’s a challenge that’s been around since the very beginning of photography. The quest for a perfectly clear image has driven innovation for nearly 200 years.
Back in 1824, Nicéphore Niépce developed one of the first photographic processes, heliography, which was a far cry from the instant, high-resolution shots we take today. Even later inventions like the daguerreotype had their own issues with grain and noise, which were just part of the chemical processes.
Just look at the first permanent photograph ever taken, "View from the Window at Le Gras." The limitations of the technology are immediately obvious.

It’s a powerful reminder that fighting for image clarity has always been part of the game.
Proactive vs. Reactive Solutions
Since we know grain is tied directly to your camera settings and the lighting you're working with, you can approach the problem from two angles. You can either try to minimize it while shooting or clean it up afterward in post-production.
For some solid advice on getting cleaner shots right from the start, you might want to check out our guide on how to take pictures professionally. The history of image quality also has a huge impact on historical archives, and there are specific techniques for preserving old photographs that deal with similar issues.
Key Takeaway: The best approach to photo grain removal is two-pronged: shoot smart to prevent as much noise as possible, then use the right editing tools to handle what's left. It’s always easier to clean up a little grain than to rescue a photo that's completely covered in it.
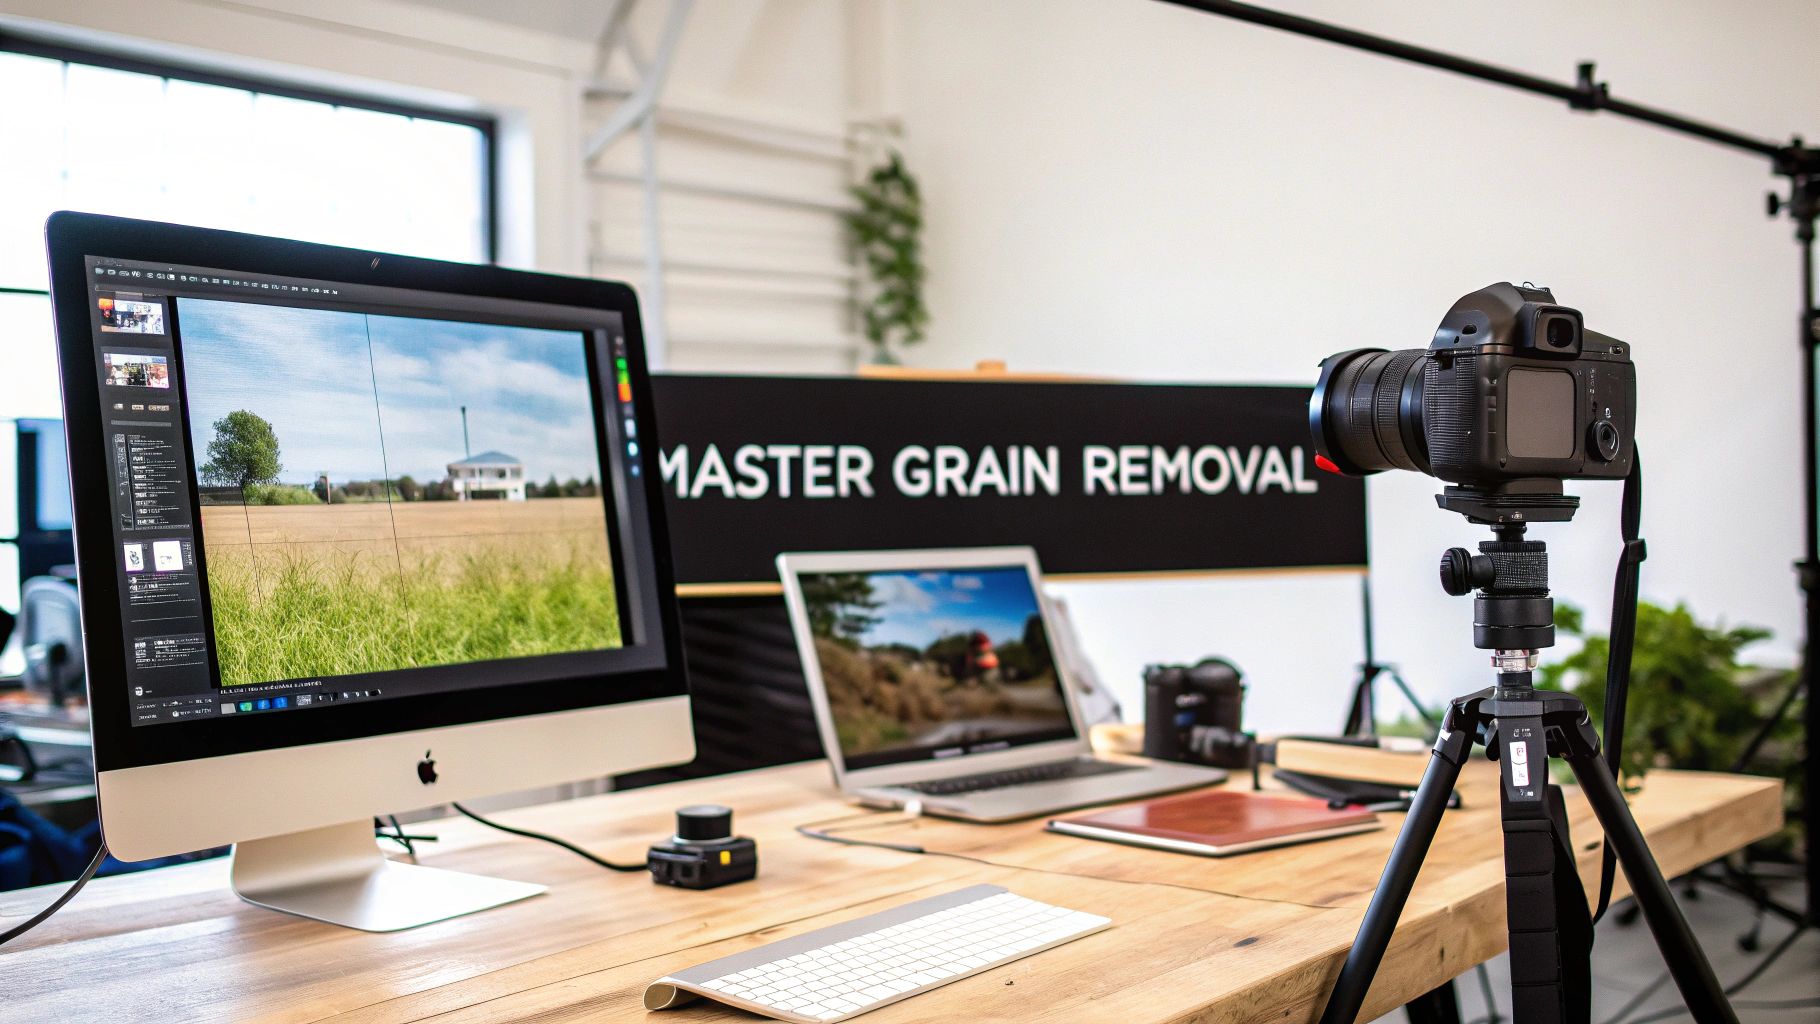
A Practical Walkthrough of Removing Grain with AI
Let's move from theory to practice. This section provides step-by-step tutorials showing how a tool like AI Photo HQ can transform a noisy, grainy image into a clean and sharp one. We'll tackle three common scenarios: a scanned family photo, a low-light cityscape, and a high-ISO wedding picture.

Each of these examples presents a unique challenge, making them perfect for demonstrating the power and precision of modern AI-powered photo grain removal.
Tutorial 1: Rescuing a Scanned Family Photo
Old photos, whether scanned from a print or taken with an early digital camera, often have two problems: grain and low resolution. The goal is to clean up the noise without losing the nostalgic feel or making faces look plastic.
Step-by-step Instructions:
- Upload Your Image: Start by uploading your scanned family photo to an AI-powered editor.
- Apply Moderate Noise Reduction: Locate the Noise Reduction slider. Begin by setting it to a moderate level, around 40-50%. This initial pass will eliminate the most obvious speckles without being overly aggressive.
- Enhance Lost Details: Old photos are often soft, and noise reduction can sometimes worsen this. Find the Detail Enhancement or Sharpening slider. Gently increase it to bring back clarity in important features like hair, eyes, and clothing textures.
- Compare and Adjust: Use the before-and-after toggle frequently. This is crucial for checking if you've gone too far. The aim is a cleaner, clearer photo that still looks authentic. Sometimes, leaving a hint of the original texture is best.
Tutorial 2: Cleaning a Low-Light City Skyline
Night photography often requires a high ISO, which inevitably introduces digital noise. With cityscapes, the challenge is to smooth out the dark sky while preserving the sharp points of light and crisp architectural lines.
Step-by-step Instructions:
- Upload Your Cityscape: Load your low-light photo into the AI tool.
- Use Aggressive Noise Reduction: For dark skies, you can be more aggressive. Push the Noise Reduction slider up to 60-70%. The AI is designed to target large, uniform areas like the sky where noise is most visible.
- Recover Architectural Details: After smoothing the sky, the buildings might look a bit soft. Carefully increase the Detail Enhancement slider. Watch closely as the edges of buildings and distant lights become crisp and defined again.
- Final Check: Zoom in on different parts of the image. Ensure the sky is smooth and the city details are sharp. This two-step process achieves a clean result without turning the image into a blurry mess.
Tutorial 3: Sharpening a Dimly Lit Wedding Photo
Indoor events like weddings are classic high-ISO situations. The priority here is preserving natural skin tones and textures. Over-processing can result in an unnatural "wax figure" appearance.
Step-by-step Instructions:
- Upload the Portrait: Begin with your dimly lit wedding photo.
- Prioritize Detail Enhancement: This time, start with the Detail Enhancement slider. Increase it slightly first. This tells the AI which textures (like skin, hair, and fabric) are important to protect before you remove noise.
- Apply Gentle Noise Reduction: Now, use the Noise Reduction slider with a lighter touch. An adjustment of only 30-40% is often enough. This cleans up distracting noise in the background without affecting the facial features you just prioritized.
- Evaluate the Result: Check the skin texture at 100% zoom. The goal is to reduce the distracting speckles while retaining a natural look. This method helps you find the perfect balance.
Understanding how an AI Photo Analyzer identifies different parts of an image is key to seeing how these intelligent adjustments work. For more techniques, see our guide to AI image enhancement.
Advanced Techniques for Pro-Level Results
While automated AI tools can get you 80% of the way there, achieving professional-grade results often requires more manual control. The key difference between a good edit and a great one is nuance—knowing exactly where and how much to apply an effect. This is where advanced techniques like selective editing and texture preservation come in.
This targeted approach is like performing surgery on your photo. You can smooth out distracting noise in a dark sky while keeping every intricate detail on a building's facade perfectly sharp.
Mastering Selective Grain Removal with Masking
Most professional editing software, including many of the best AI photo editing software, offers masking capabilities. A mask lets you apply an effect to a specific area of your image. This is a game-changer for photos with mixed textures.
Tutorial: Using a Mask for a Portrait
Imagine a portrait shot in a dim room. The background wall is noisy, but you want to preserve the detailed texture of the subject's wool sweater.
- Apply Light Global Denoise: Start by applying a gentle noise reduction (e.g., 20%) to the entire image for a clean base.
- Create a Stronger Denoise Layer: Add a second, much stronger noise reduction adjustment (e.g., 70%).
- Mask the Strong Layer: Use a layer mask to hide this strong effect from the entire photo. Your image will revert to its previous state.
- Paint to Reveal the Effect: Select a soft-edged brush tool. Carefully paint over the background wall on the mask. As you paint, you are revealing the strong noise reduction effect only in that area.
The result is a silky-smooth background while the sweater's texture remains sharp and detailed. This precise control is a hallmark of professional editing.
Balancing Denoise with Detail Preservation
The ultimate goal is to remove unwanted noise while preserving the essential textures that give a photo character. Overly aggressive noise reduction creates a soft, plastic-like appearance.
A classic example is a nature shot of a tree. The bark's complex, rough texture is what makes it look real. Heavy-handed, global noise reduction will sand down that detail, making the tree look fake.
Key Insight: Great photo grain removal isn't about eliminating every speckle. It's about reducing visual distractions so the important details can shine. A little remaining texture is what makes an image feel authentic.
The struggle with image noise goes way back. Early film grain was an inherent part of the medium, a type of noise that statistically behaves like shot noise, often modeled as a Gaussian distribution. Before digital took over, this grain was a huge limiting factor in photo clarity. Modern digital processing and clever algorithms have given us tools to combat noise in ways photographers from the film era could only dream of.
The Final Touch: Sharpening for Crispness
After carefully managing the noise, the final step is to add back a touch of sharpness. Noise reduction can slightly soften an image, and a final sharpening pass gives it a crisp, professional pop.
Tutorial: Selective Sharpening
- Apply a Sharpening Filter: Use a sharpening tool that includes a masking feature (like the Unsharp Mask in Photoshop).
- Create a Mask: Apply the sharpening effect and then use a mask to control where it appears.
- Target Key Edges: With the mask, paint the sharpening effect only onto the important edges of your subject. For a portrait, this would be the eyes, eyelashes, and lips. For a cityscape, it would be the edges of buildings.
This technique enhances the details that matter without re-emphasizing any leftover grain in smoother areas like skin or the sky.
Choosing the Right Grain Removal Tool for You
Getting rid of photo grain effectively isn't a one-size-fits-all job. The best tool depends on the photo itself and your desired outcome. Your choices range from basic sliders in your camera's software to dedicated programs like AI Photo HQ or specialized plugins for Lightroom and Photoshop.
A quick fix in your phone's app might suffice for social media. But for a print-worthy image or a treasured memory, you’ll want more control.
Navigating Your Options
The key is to balance quality, speed, and control. A built-in camera function is fast but offers little control, sometimes leaving images looking overly smoothed. A dedicated AI tool, however, is built specifically for this task and intelligently preserves important details while removing noise.
This infographic can help you decide when a quick, automated fix is sufficient and when a more selective, hands-on approach is needed.
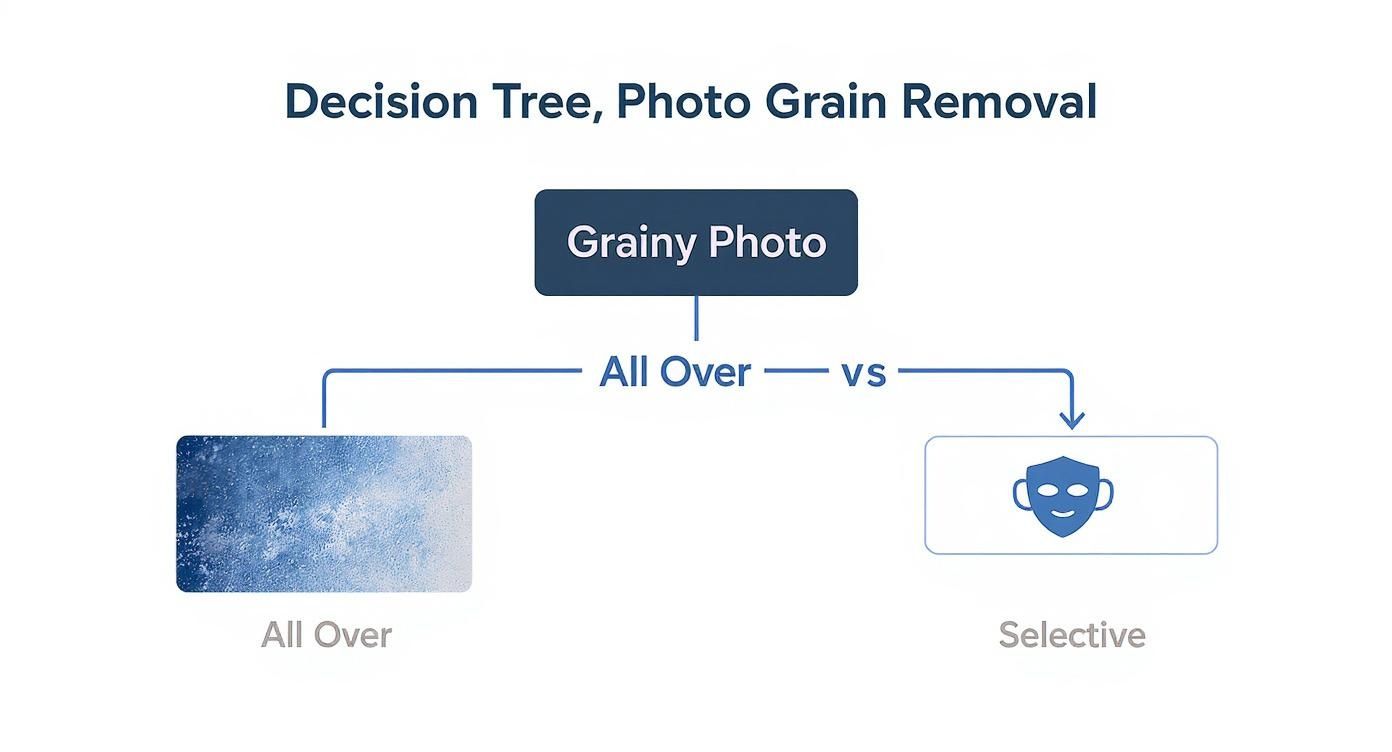
Remember, when fine details are critical, a selective approach using masks will almost always outperform a blanket filter applied to the whole image.
From Film Grain to Digital Noise
The jump from film to digital photography completely changed the game. Thanks to massive leaps in sensor technology, today's digital cameras produce images with way less inherent noise than their film ancestors. The signal-to-noise ratio (SNR) in modern cameras often tops 40 dB, which is a huge testament to this progress. Digital software can then take this even further, using smart algorithms to hunt down and eliminate unwanted patterns. For a deeper dive into the tech, you can read the full research about these imaging advancements.
Key Takeaway: Don't just pick one tool and stick with it. The best photographers have a toolkit. They might use a simple app for a quick edit, a powerful AI for a major restoration, and manual masking in Photoshop for a high-stakes client project.
To help you choose, here's a quick look at how different methods stack up.
Comparison of Photo Grain Removal Techniques
| Method | Effectiveness | Control Level | Speed | Best For |
|---|---|---|---|---|
| In-Camera/Basic Sliders | Low to Moderate | Low | Very Fast | Quick fixes for social media, non-critical shots. |
| Dedicated AI Tools | High | Moderate (Automated) | Fast | High-quality, automated results with excellent detail preservation. |
| Software Plugins (e.g., Photoshop) | Very High | High (Manual) | Slower | Professional work where precise control over specific areas is needed. |
Ultimately, knowing which tool to grab from your toolkit is what separates a good result from a great one. Think about what you need for each specific photo.
- For speed and convenience: In-camera or basic software sliders will do the trick.
- For high-quality, automated results: A dedicated tool like AI Photo HQ is your best bet.
- For maximum control and precision: Nothing beats plugins within Lightroom or Photoshop that let you use masks for pro-level work.
Common Grain Removal Mistakes to Avoid
We all want a perfectly clean photo, but it's easy to get carried away. The biggest mistake isn't leaving some grain behind; it's over-smoothing an image until it looks fake and lifeless. This guide will help you avoid the common pitfalls that can ruin a great photo.
One of the most obvious signs of over-processing is a "waxy" skin texture in portraits. When you max out the noise reduction sliders, the software can no longer distinguish between digital noise and the fine, natural textures of human skin. This results in an unnaturally smooth surface that looks more like a mannequin than a person.
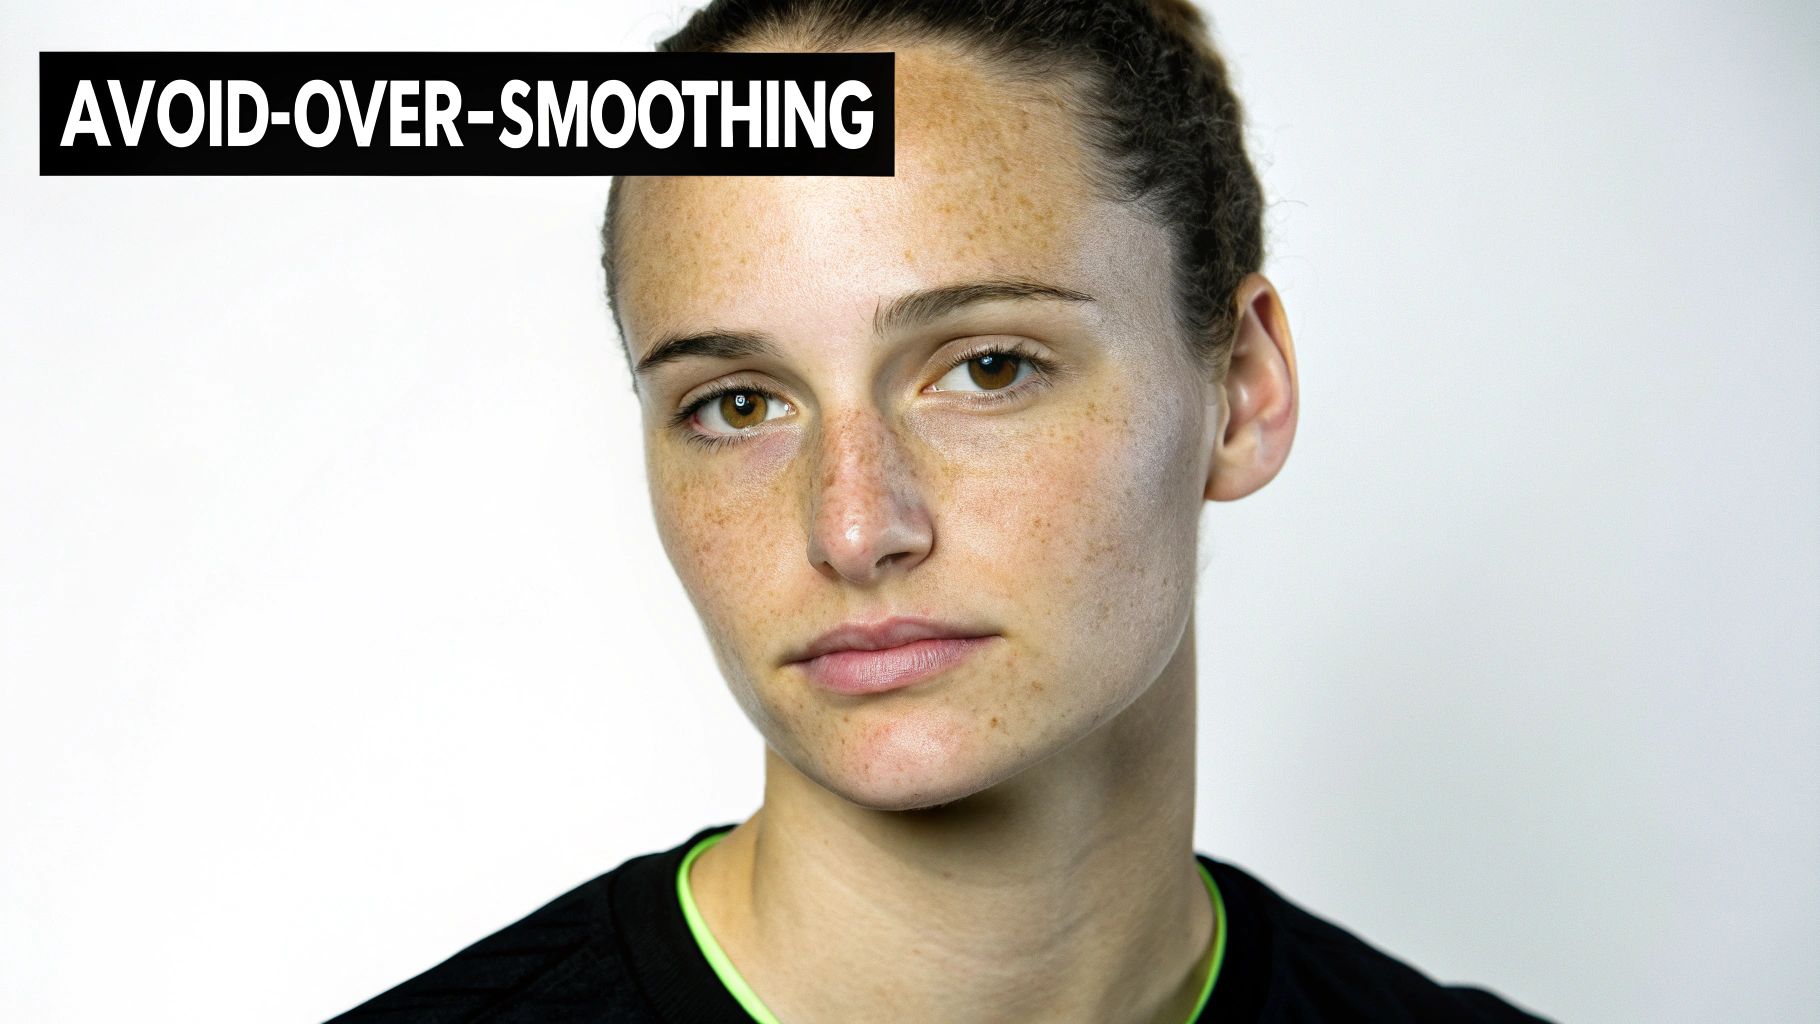
Don't Erase Essential Details
This problem extends beyond skin. Pushing edits too far can wipe out the very details that give a photo depth and realism—the weave of fabric, the lines of tree bark, or the crisp edges of architecture. Excessive grain removal flattens these textures, making the entire image feel soft and undefined.
Here's a pro tip: noise loves to hide in shadows. If you underexpose a photo and then brighten it in post-production, that noise becomes ten times more noticeable. It’s almost always better to expose your shot correctly in-camera. A properly exposed, higher-ISO image often has less problematic grain than an underexposed, low-ISO shot that you had to "rescue" later.
Practical Tips for a Balanced Edit
To avoid these common errors, adopt a more methodical editing workflow. Here are a few practical steps to keep your edits clean yet authentic:
- Zoom in to 100%. You can't truly see what's happening to fine details until you are at a 1:1 view. This is the only way to accurately judge the impact of your adjustments.
- Take a break. Staring at an image for too long can trick your eyes. Step away for five minutes and then come back for a final check. You'll notice things you missed before.
- Learn to love a little texture. The goal isn't a sterile, flawless image. A tiny bit of uniform grain often makes a photo feel more organic and real.
Key Insight: Successful grain reduction is a balancing act. You're not trying to obliterate every single speckle. The real goal is to reduce the distracting noise so that the important, character-defining details can shine through. A clean, yet real, photo will always look better.
A Few Common Questions About Denoising Photos
To wrap things up, let's tackle some of the most common questions photographers run into when dealing with grainy images. Think of this as the quick-and-dirty FAQ to help you get better results, faster.
Is There a Difference Between Grain and Noise?
Yes, absolutely—though you'll hear people use the terms interchangeably all the time. It's a classic analog vs. digital thing.
Film grain is actually a physical part of the photo, made up of tiny silver particles in the film's emulsion. It gives film that classic, textured character. On the other hand, digital noise is purely an electronic glitch—those random, off-color pixels you see, usually from cranking up the ISO or shooting a long exposure in the dark.
So while they might look similar at a glance, grain is an intended feature of film, while noise is an unwanted byproduct of digital sensors. AI-powered tools are specifically built to hunt down and smooth out those digital noise patterns.
Can Removing Too Much Grain Ruin a Photo?
Without a doubt. This is probably the number one mistake people make. When you get too aggressive with noise reduction, the software starts scrubbing away not just the noise, but also the fine details that make a photo look real—like the texture of a person's skin or the weave of fabric.
The result is a photo that looks unnatural and "plastic." Your goal should always be to reduce distracting noise, not obliterate every last bit of texture. It's a balancing act.
Expert Tip: Always punch in and edit at 100% zoom. This is the only way to see what's really happening to the details. You can spot that overly smooth, waxy look and back off the sliders before you go too far. Honestly, leaving a little bit of texture often makes an image feel more authentic.
Why Are My Low ISO Photos Still Grainy?
This one is super common and can be incredibly frustrating. You did everything right—shot at ISO 100 or 200—but your image is still noisy. What gives?
The most likely culprit is underexposure. Noise just loves to hang out in the dark, shadowy parts of an image.
When you underexpose a shot and then try to brighten it in post, you're not just bringing up the light; you're amplifying everything in those shadows, including all that hidden noise. It's almost always better to get a clean exposure in-camera at a higher ISO (like 800) than it is to "rescue" an underexposed shot taken at a low ISO. So, don't be afraid to bump up that ISO when you need to.
Ready to see what clean, detailed images look like without the distracting noise? AI Photo HQ uses some seriously smart algorithms to deliver professional photo grain removal in just a few seconds. Give it a try and see the difference for yourself!

