If you’ve ever stared at a slightly blurry photo, wishing you could just dial up the crispness, you're not alone. The quickest way to tackle that softness is by using a dedicated tool to sharpen the image. These tools work by cleverly increasing the contrast along edges, which makes the whole picture look clearer.
For a light touch-up, you can often get great results with the built-in editor on your phone. But for photos that need a bit more help, advanced AI tools can work wonders by intelligently adding back detail without making everything look harsh and over-processed.
Why Photos Get Blurry and How Sharpening Helps
Before we can fix a blurry photo, it helps to understand what went wrong. In my experience, it usually boils down to one of three things: a shaky hand (camera shake), a subject that wouldn't stay still, or just plain missing the focus point. Knowing the cause helps you pick the right fix to bring your image back to life.
It's important to know that sharpening isn't magic. It can't pull detail out of thin air if a shot is completely out of focus. What it does is create an illusion of sharpness by boosting the contrast right where different colors and tones meet—the edges. This little trick is what makes our eyes perceive the photo as being much more defined.
AI Sharpening vs Traditional Methods
You've got two main camps when it comes to sharpening: the old-school methods and the new AI-powered approach.
Traditional tools, like the classic "Unsharp Mask" filter in Photoshop, are pretty straightforward. They find edges and crank up the contrast around them. They’re perfect for giving a slightly soft image that extra bit of "pop," but if you get too aggressive, you’ll end up with ugly halos and digital noise.
Modern AI tools are a different beast altogether. They don't just blindly boost contrast. Instead, they analyze the photo, figure out why it's blurry, and then intelligently reconstruct the missing details. This leads to a much more natural-looking result, especially for those frustrating photos with motion blur or significant softness.
Sharpening is all about perception. You're not adding new information to the photo; you're just making the existing details more prominent to the human eye. The key is finding the balance between crisp and over-processed.
The push for crystal-clear images has fueled a massive industry. The market for photographic services hit USD 37.51 billion in 2025 and is expected to climb to USD 47.46 billion by 2030. A huge driver of this growth is AI, which allows pros to slash their editing time—including fixing blur—by up to 96%. That right there shows you just how powerful these new tools have become. You can dig into more data about the photographic services market growth if you're curious.
Here's a quick rundown to help you decide which method is right for your photo.
AI Sharpening vs Traditional Methods
| Feature | AI-Powered Sharpening | Traditional Sharpening (e.g., Unsharp Mask) |
|---|---|---|
| How it Works | Analyzes content and intelligently reconstructs details. | Increases contrast along existing edges. |
| Best For | Motion blur, severe softness, and complex images. | Slightly soft images that need a little pop. |
| Potential Issues | Can sometimes create "uncanny" or artificial textures. | Can introduce halos, noise, and artifacts if overused. |
| Ease of Use | Often one-click and automated. | Requires manual adjustment of sliders (radius, amount). |
| Result Quality | Tends to look more natural and convincing. | Can look harsh or "digital" if not done carefully. |
Ultimately, AI tools offer a more sophisticated, "smart" approach that's great for tougher jobs, while traditional methods are still a reliable go-to for quick, minor adjustments.
Get Instant Clarity with AI Photo Sharpeners
If you've ever found yourself with a great photo that's just a little bit soft, you know the frustration. In the past, fixing it meant diving into complex software. But now, AI-powered tools have completely changed the game. They analyze your photo to figure out why it's blurry—was it motion? Camera shake? A missed focus?—and then intelligently reconstruct the lost detail. The result is a sharp, clear image that still looks completely natural.
A Step-by-Step Guide to Using an AI Sharpener
Let's walk through the process of sharpening a photo that suffers from slight motion blur, a common issue when capturing moving subjects.
- Navigate to the Tool: Open your web browser and go to an online AI photo sharpener, such as AI Photo HQ.
- Upload Your Image: Locate the "Upload" button on the homepage. Click it and select the blurry photo from your computer or phone.
- Let the AI Analyze: Once uploaded, the tool automatically analyzes the image. In seconds, it identifies the motion blur and applies an initial correction. You'll typically see a side-by-side or slider view comparing the original blurry photo with the new, sharpened version.
- Fine-Tune the Result: While the automatic result is often excellent, you can usually adjust the intensity. Look for a slider labeled "Sharpening" or "Strength." Move it slightly to the right for more sharpness or to the left to reduce the effect if it looks too strong.
- Download Your Photo: Once you're satisfied with the clarity, click the "Download" button to save the high-quality, sharpened image to your device.
To see what else is possible, check out our complete guide to AI tools for photo editing.
Here’s a quick look at what you’d typically see after uploading your image.
This kind of accessibility is a huge reason the photo editing software market is booming. The industry was valued at a massive USD 42.85 billion in 2024 and is expected to more than double to USD 94.24 billion by 2034. This growth is heavily driven by AI features that make professional-level fixes, like deblurring, available to everyone. You can dig deeper into the photo editing market's expansion to see the full picture.
Pro Tip: I always recommend starting with the default or "auto" setting when using an AI sharpener. The algorithms are surprisingly good right out of the box. Only start making manual adjustments if the result feels a little too aggressive or not quite sharp enough for your liking.
Once the AI works its magic, you'll almost always get a before-and-after preview. This is your chance to see the dramatic difference it made. If you’re happy with the fix, just hit download. The entire process of how to sharpen a blurry photo often takes less than a minute, turning what used to be a technical headache into a quick, satisfying win.
Sharpening Photos Like a Pro in Adobe Photoshop
While one-click AI tools are a godsend for quick fixes, sometimes you need granular control. For that, nothing beats Adobe Photoshop. It’s the industry standard for a reason, giving photographers a powerful suite of tools to fine-tune every last detail.
As of 2025, Photoshop is still the king of the castle, used by about a third of the entire photo editing market. A huge part of that is because 92% of photos are now snapped on smartphones, where a little bit of blur from shaky hands or dim lighting is practically a given. Millions of us are turning to Photoshop to rescue those everyday shots. You can dig into more of this data on the global photo editing software market on Statista.com.
Mastering Unsharp Mask and Smart Sharpen
The two tools you'll live in for sharpening are Unsharp Mask and Smart Sharpen. Let’s do a quick tutorial using the Unsharp Mask filter for a portrait photo that's just a little soft.
- Open and Duplicate: Open your image in Photoshop. In the Layers panel, right-click your background layer and select "Duplicate Layer." This non-destructive step is crucial.
- Access Unsharp Mask: With the new layer selected, go to the top menu and click
Filter > Sharpen > Unsharp Mask.... - Adjust the Sliders: A dialog box will appear with three sliders.
- Amount: Start with a value around 100-150%. This controls the intensity.
- Radius: For a high-resolution portrait, a small radius of 1-2 pixels is usually best. This defines the edge width.
- Threshold: Set this to around 5-10 levels. This protects smooth areas like skin from being sharpened, preventing a gritty look.
- Preview and Apply: Check the "Preview" box to see your changes live. Zoom in to 100% to check for halos or noise. Click "OK" when you're happy.
- Refine with Opacity: If the effect is too strong, you can lower the opacity of your duplicated layer in the Layers panel for a more subtle result.
This infographic breaks down the basic process that modern AI tools use to fix blur, which is a great foundation for understanding what Photoshop's manual controls are doing.
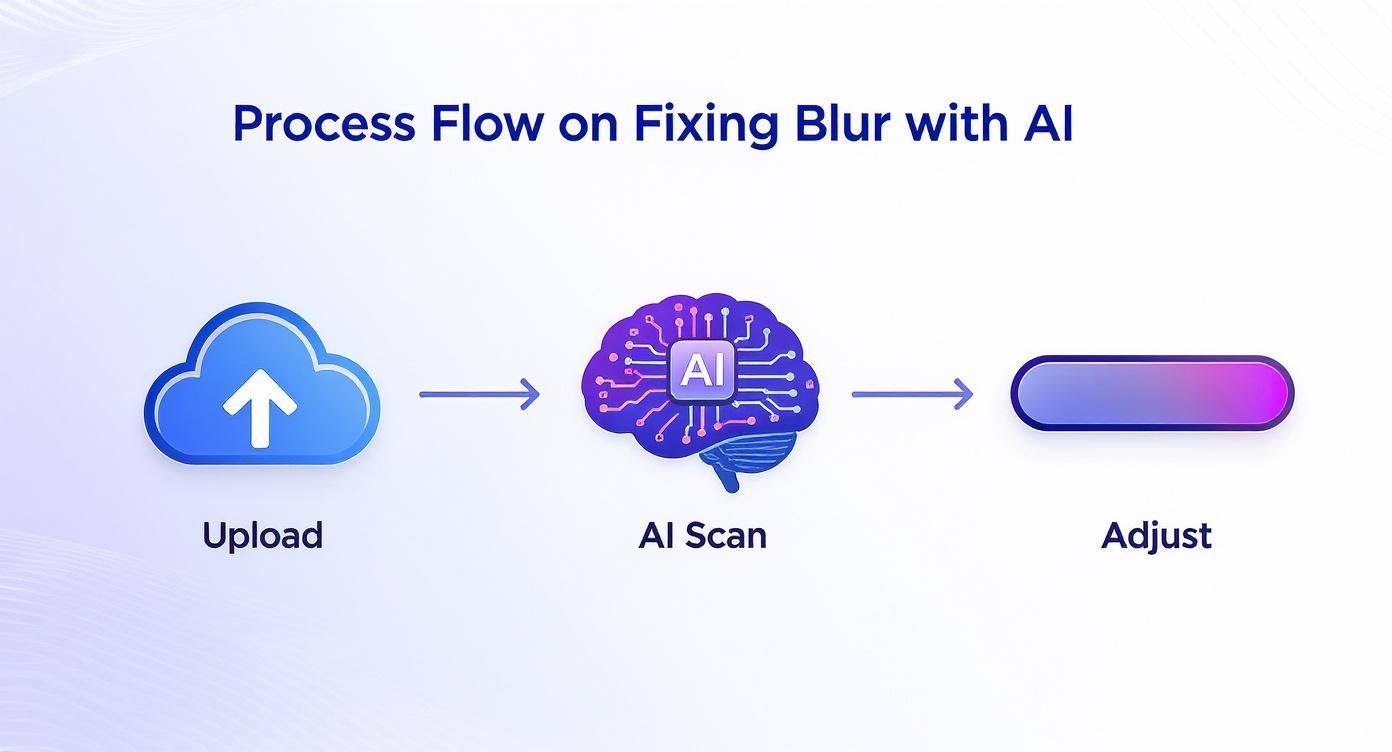
Whether you’re using an automated tool or digging into Photoshop, the core workflow of uploading, analyzing, and adjusting remains the same.
Pro Tip: Never, ever work on your original image. Always duplicate your layer first (Ctrl+J on Windows, Cmd+J on Mac). This non-destructive approach lets you tone down the sharpening by lowering the layer's opacity or even mask out parts you don't like, all without messing up your original photo.
Using Layer Masks for Selective Sharpening
Here’s where you can really start to work like a pro. Let's sharpen just the eyes in a portrait to make them pop.
- Sharpen the Layer: Follow the steps above to sharpen your duplicated layer. Don't worry if the skin looks bad; we're about to fix that.
- Add a Layer Mask: With the sharpened layer still selected, go to the bottom of the Layers panel and click the "Add layer mask" icon (a rectangle with a circle inside). A white mask thumbnail will appear next to your layer thumbnail.
- Invert the Mask: Press
Ctrl+I(Windows) orCmd+I(Mac) to invert the mask to black. This will hide the sharpening effect completely. - Paint to Reveal: Select the Brush tool (
B). Choose a soft, round brush and set your foreground color to white. - Reveal the Sharpness: Gently paint over the areas you want to be sharp—the irises, eyelashes, and eyebrows. The white brush will "paint back" the sharpening effect only where you apply it, leaving the skin soft and natural.
Once you’ve nailed sharpness, you might want to learn how to improve image resolution to take your image quality to the next level.
Fixing a Blurry Photo with Free Online Tools
You don't need a pricey Photoshop subscription just to sharpen up a blurry photo. There are plenty of fantastic, free online tools that can bring back detail and add that missing crispness, all from the comfort of your web browser.
These browser-based editors are perfect for those quick fixes. Think of that slightly soft photo you want to share on social media, or a snapshot you need to send to a friend. The whole process is usually dead simple: upload your picture, let the tool work its magic, and download the finished product.
A Quick Walkthrough: Online Sharpening
Let's imagine a common scenario: you took a landscape photo on a recent trip that's almost perfect, but it just doesn't have that pop. We can fix that in less than a minute with a generic online editor.
- Find a Tool and Upload: Go to a free online photo editor (like Pixlr, Fotor, or BeFunky) and find the "Upload" or "Open Image" button. Select the photo you want to fix from your device.
- Locate the Sharpen Tool: Look through the editing menu for an option called "Sharpen," "Detail," or "Clarity." It's often found under an "Adjust" or "Edit" tab.
- Adjust the Slider: Once you click the tool, a slider will appear.
- Slide it to the right to increase the sharpening effect.
- Keep a close eye on the preview as you adjust. You'll see the changes happen in real-time. Watch for harsh edges or noise.
- Find the sweet spot where details are crisp but the image still looks natural.
- Save Your Work: When you're happy with the result, find the "Save," "Export," or "Download" button to save your newly sharpened photo.
The real beauty of these tools is their simplicity. They cut out all the confusing, pro-level options and focus on doing one thing really well: sharpening your image. It makes them incredibly easy for anyone to use, regardless of their tech skills.
What’s the Catch? Understanding the Trade-Offs
While free online tools are a lifesaver, it’s helpful to know their limitations. To keep server costs down, many services will have restrictions on things like file size or resolution. For example, you might find you can only upload JPGs under 10MB.
You might also notice that some free versions add a small watermark to your final image or limit you to a certain number of edits per day. These are usually minor trade-offs, and it's a fair exchange for getting a quick, high-quality fix at no cost. For different tasks, like making an image bigger without it getting pixelated, you'll want to check out a specialized online image upscaler.
Common Sharpening Mistakes to Avoid
Knowing how to sharpen a blurry photo is a powerful skill, but it’s just as easy to push things too far. The goal is to add crispness and clarity, not create a crunchy, over-processed digital mess. Trust me, it's a look nobody wants.
The single most common mistake is simply over-sharpening. When you do this, you start to introduce some really ugly digital artifacts into your image.
You'll see these bright, glowing outlines called halos pop up along high-contrast edges—think of a building against a bright sky. Over-sharpening also amplifies any digital noise that was already there, making your photo look grainy and dirty. The whole thing ends up with an unnatural, gritty texture that just screams "over-edited."
Finding the Sweet Spot
So how do you get it right? It really comes down to your workflow. I can't stress this enough: always make sharpening the very last step in your editing process. Do it after you've adjusted your colors, exposure, and composition. If you sharpen first and then edit, you'll just exaggerate the effect in all the wrong ways.
Most importantly, you have to judge your adjustments at 100% zoom. Looking at the photo fitted to your screen is totally misleading; it can hide the subtle damage you're doing to the pixels. Zoom right in to see what's actually happening.
A subtle approach is always better. I've found it's far more effective to apply a small amount of sharpening and build it up slowly, rather than slamming the slider to the max and trying to dial it back.
Finally, always remember the context. A photo destined for a small Instagram post can get away with a lot more sharpening than a large, fine-art print where every single flaw will be under a microscope. By being patient and paying close attention, you can achieve that perfect clarity without wrecking your shot.
Your Questions About Photo Sharpening Answered
When you're just getting the hang of how to fix a blurry photo, a lot of the same questions tend to pop up. Let's walk through some of the most common ones I hear from other photographers.
Can Any Blurry Photo Be Fixed?
This is the big one, and the honest answer is no. While today's software can work some serious magic on soft-focus images or shots with a bit of motion blur, it can't create detail that was never there to begin with.
Here’s a good rule of thumb I use: if you can still make out the general shapes and subjects in your photo, you've got a great chance of improving it. If the image is just a soupy, unrecognizable mess, trying to sharpen it will probably just make it look worse.
Sharpening vs. Clarity: What's the Difference?
It’s easy to get these two mixed up, but they do very different jobs. I like to think of it like this:
- Sharpening is all about the edges. It finds the edges of objects in your photo and boosts the contrast right along those lines. This is what gives an image that crisp, well-defined look.
- Clarity, on the other hand, works on the mid-tones. It adds punch and definition to textures, making things like fabric, wood grain, or stone really pop.
So, you’d use sharpening to dial in the overall focus, and then use clarity to bring out the rich textures within the image.
Should I Sharpen Before or After Resizing?
Ah, the classic workflow question. Here’s the process that pros follow: always do your main sharpening pass as one of the final steps on your full-resolution image. For professional photographers, making sure every image is razor-sharp is non-negotiable, especially when they create a stunning photography portfolio.
Then, if you need to resize that photo for the web or social media—a process which naturally softens an image—you’ll apply a second, much lighter round of sharpening to the new, smaller version. This just brings back that crispness you lost during resizing.
Ready to fix your blurry photos in a single click? Experience the power of AI with AI Photo HQ and get stunningly clear results in seconds. Try it now at https://aiphotohq.com and see the difference for yourself.

