If you've ever tried to sharpen a blurry picture, you know the first step is figuring out what went wrong. Was it a shaky hand? Did the autofocus miss its mark? Or was your subject just moving too fast?
The answer really dictates your next move.
Why Your Photos Look Blurry and How to Fix Them
Before you jump into any software, you need to play detective. The type of blur you're dealing with leaves its own unique fingerprint on the image, and each one needs a slightly different touch to fix.
The usual suspects are camera shake, missed focus, and good old-fashioned motion blur. Getting a handle on these is crucial. If you want a deep dive, these expert tips for blurry wedding photos are surprisingly useful for just about any situation, not just weddings.
Choosing Your Sharpening Method
Once you know the why, you can tackle the how. You've got two main routes you can take: the hands-on, manual approach with software like Photoshop, or the quick-and-easy fix using an AI-powered tool.
- Manual Control: This is for the perfectionists. You get granular control over every little detail, letting you selectively sharpen parts of your image. It’s perfect if you're a pro or just someone who loves to be in the driver's seat.
- AI-Powered Fixes: Think of this as the "easy button." These tools analyze the blur and correct it for you, often with a single click. It's a lifesaver for beginners or anyone who just needs great results, fast.
This infographic lays out the decision perfectly—it all comes down to whether you value speed or precision more.
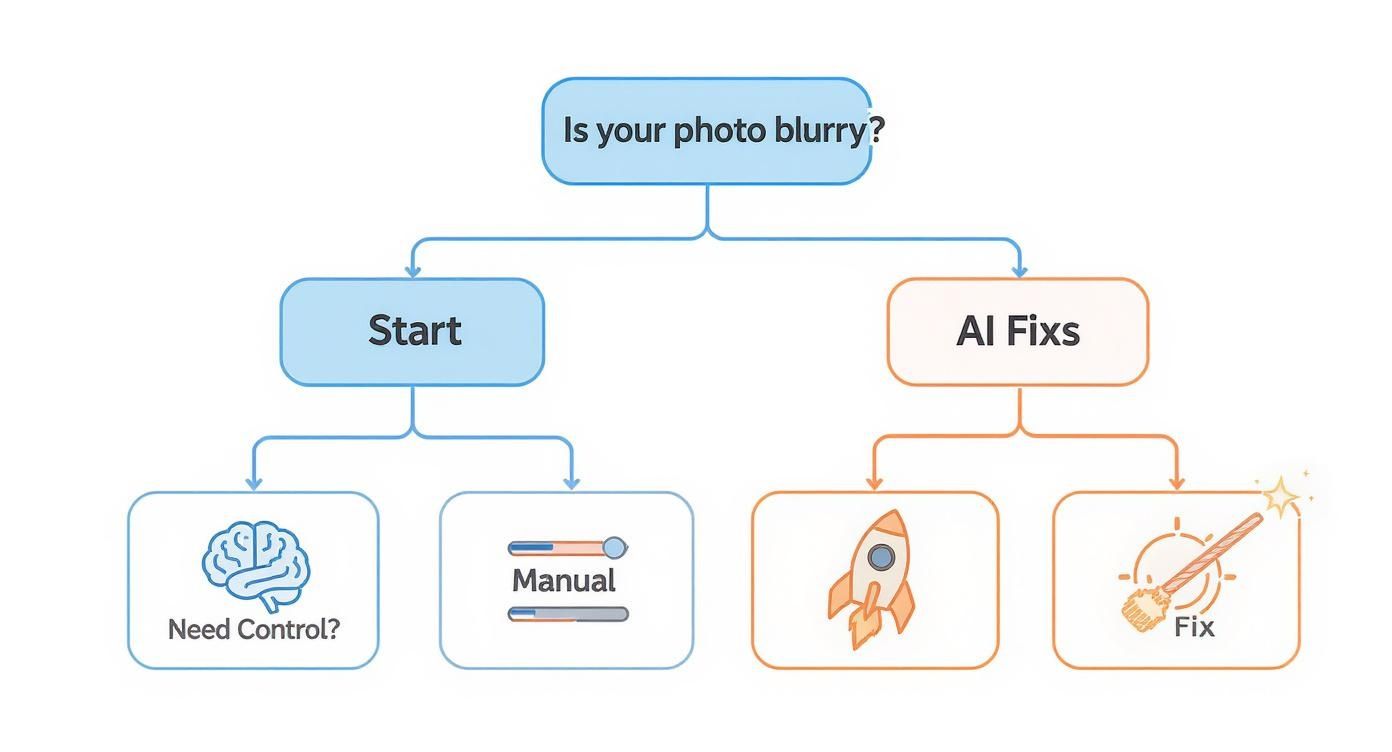
As you can see, your choice really depends on what you're trying to achieve. Do you need a quick fix for a social media post, or are you editing a high-stakes professional shot?
To give you a clearer picture, let's break down the pros and cons of each approach.
Manual vs AI Sharpening at a Glance
| Feature | Manual Sharpening (e.g., Photoshop) | AI Sharpening (e.g., AI Photo HQ) |
|---|---|---|
| Control | High. Precise, layer-based adjustments. | Low. Primarily automated, one-click process. |
| Learning Curve | Steep. Requires knowledge of tools and techniques. | Minimal. Extremely user-friendly for beginners. |
| Time Investment | High. Can be a time-consuming, detailed process. | Low. Delivers results in just a few seconds. |
| Best For | Professional photographers, complex edits, fine art. | Quick fixes, social media, beginners, high volume. |
| Consistency | Depends on user skill; can vary between images. | Highly consistent results across different photos. |
Ultimately, both paths lead to a sharper image. Your personal workflow, skill level, and how much time you have will be the deciding factors.
It's no surprise that tools for this are in high demand. The global photo editing software market hit USD 2.37 billion in 2025 and is expected to climb to USD 3.29 billion by 2032, largely thanks to smartphone cameras and the magic of AI.
Of course, the best fix is avoiding the blur in the first place. For a solid foundation, check out our guide on how to take pictures professionally.
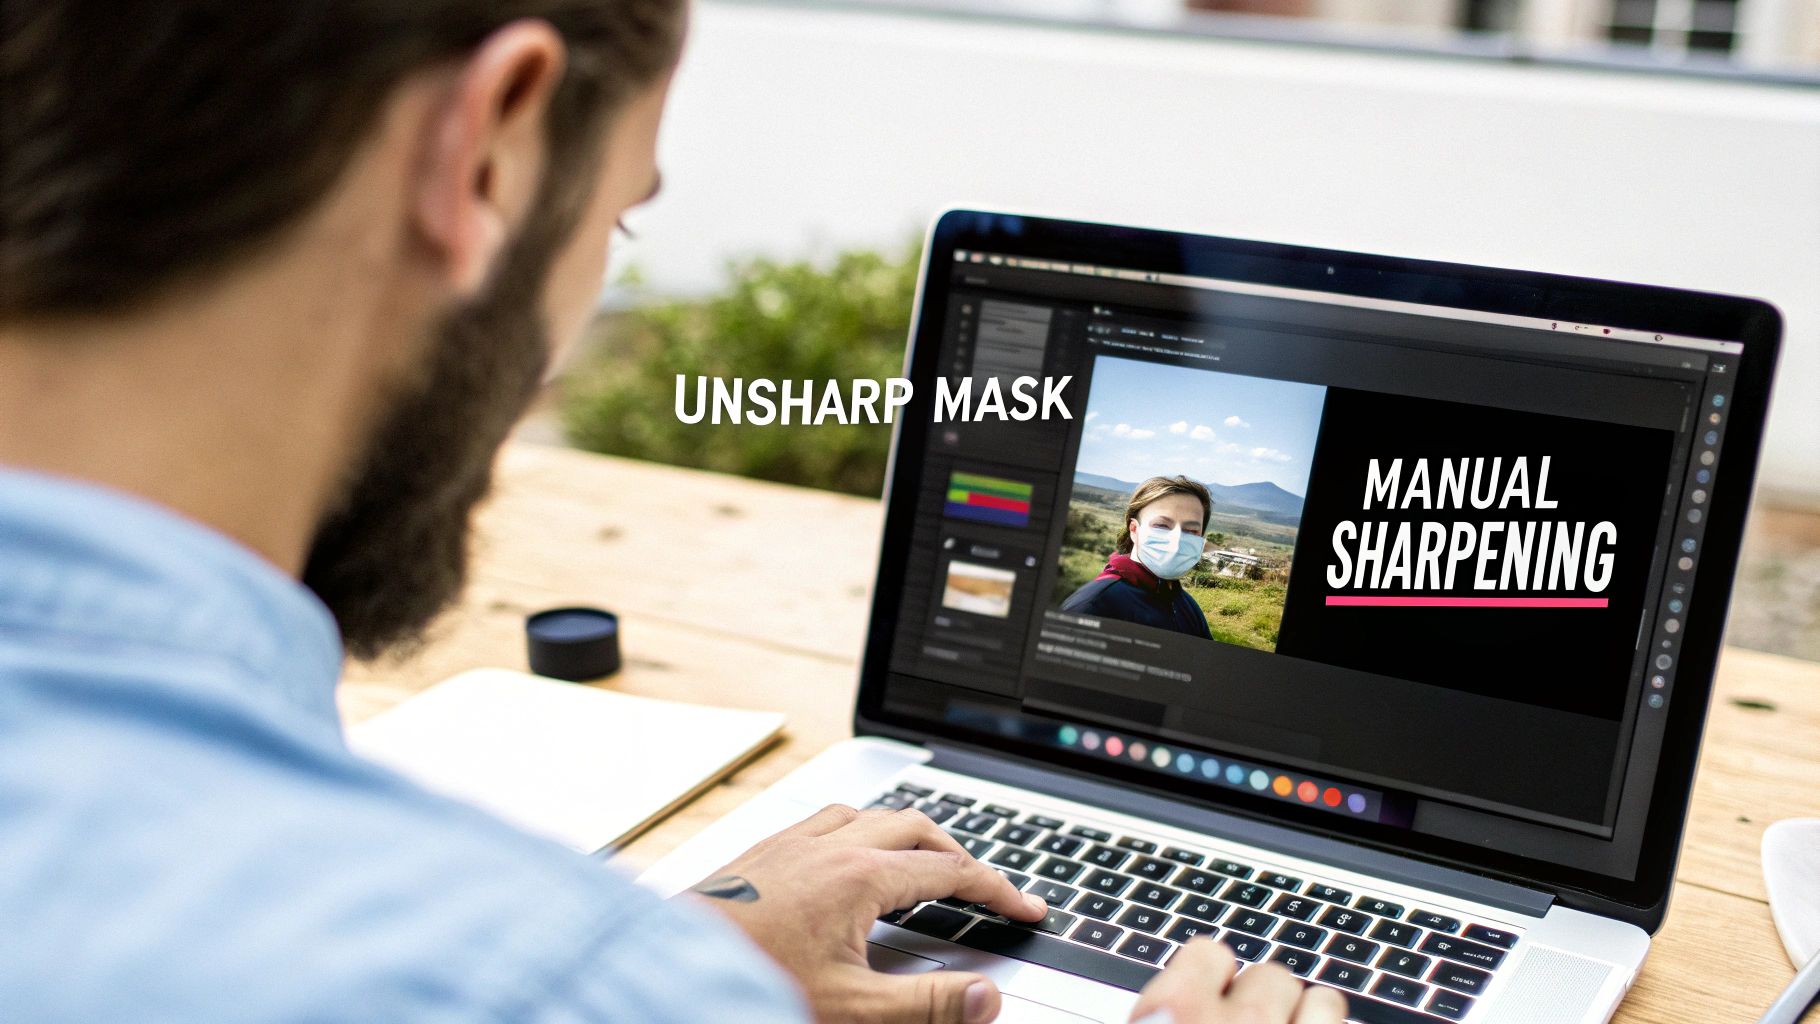
Taking the Wheel: Sharpening Images Manually
For those who want total creative control, manually sharpening a blurry picture in software like Adobe Photoshop or GIMP is the way to go. It’s a game of finesse. The two most effective tools are the Unsharp Mask and the High Pass filter. Both work by boosting contrast along the edges of objects, which is how our brains perceive sharpness. Mastering them is a core part of any serious photo editing workflow.
How to Use the Unsharp Mask Filter in Photoshop
The name "Unsharp Mask" is a bit counterintuitive, but it's a powerhouse for sharpening. It finds edges by creating a blurred version of your image and comparing it to the original. Where it finds differences (the edges), it increases the contrast.
Here’s a step-by-step guide to using it:
- Open Your Image: Launch Photoshop and open the blurry photo you want to fix.
- Zoom In: Zoom to 100% to accurately see the effect of your adjustments. You can do this by pressing
Ctrl+1(Windows) orCmd+1(Mac). - Find the Filter: Go to the top menu and select
Filter > Sharpen > Unsharp Mask.... - Adjust the Sliders: A dialog box with three sliders will appear.
- Amount: This controls the intensity. Start with a value between 50% and 150%.
- Radius: This determines how far the sharpening spreads from the edges. For most photos, a small radius like 0.5 to 1.5 pixels is ideal. Going higher can create ugly halos.
- Threshold: This slider protects smooth areas from being sharpened. A value between 2 and 10 will prevent skin or skies from looking grainy.
- Preview and Apply: Tick the "Preview" box to see your changes in real-time. Adjust the sliders until the image looks crisp but natural, then click "OK".
Pro Tip: For non-destructive editing, right-click your image layer and select "Convert to Smart Object" before applying the filter. This lets you go back and tweak the settings later.
How to Use the High Pass Sharpening Technique
The High Pass filter offers more precision and is a favorite among professional photographers, especially for portraits. It allows you to sharpen specific parts of an image, like eyes and hair, while leaving skin texture soft.
Here's the step-by-step tutorial:
Duplicate Your Layer: Open your image in Photoshop. In the Layers panel, right-click your background layer and choose
Duplicate Layer.... Click "OK".Apply the High Pass Filter: With the new layer selected, go to
Filter > Other > High Pass.... Your image will turn grey.Set the Radius: Adjust the Radius slider so you can just start to see the outlines of the objects in your photo. A value between 1 and 3 pixels is usually a good starting point. Click "OK".
Change the Blend Mode: In the Layers panel, click the dropdown menu that says "Normal" and change the blend mode to Overlay or Soft Light. The grey will disappear, and the image will look sharper.
Refine with a Layer Mask (Optional): To apply the sharpening selectively, click the "Add Layer Mask" icon (a rectangle with a circle inside) at the bottom of the Layers panel. Select the Brush tool, set the color to black, and paint over areas you want to keep soft, like skin or a blurry background.
Using AI Photo Enhancers for Instant Clarity
When you need to sharpen a blurry picture without the manual effort, AI photo enhancers offer an incredibly simple and effective solution. They are designed for speed, making them perfect for beginners or anyone who needs great results fast.
Think about that old, digitized family photo you have. Instead of navigating complex menus, an AI tool like AI Photo HQ can restore clarity and detail in a few moments.
A Simple Step-by-Step Guide to AI Sharpening
Using an AI sharpener is typically a one-click process. You don't need any technical background—just your blurry image and a web browser. The AI does all the heavy lifting for you.
Here’s a quick step-by-step tutorial on how it works:
- Navigate to the AI Tool: Open your web browser and go to an AI photo enhancer website.
- Upload Your Image: Drag and drop your blurry photo onto the designated area, or click the "Upload" button to select the file from your computer.
- Let the AI Analyze: The tool’s algorithms will automatically analyze the image to identify the type of blur (e.g., motion, focus, low-resolution). This process usually takes only a few seconds.
- Preview and Download: The platform will present a sharpened version of your photo, often with a slider to compare it with the original. If you’re happy with the result, click the "Download" button to save the clear image.
The growth in this tech is huge. The image processing software market is expected to jump from USD 5.2 billion in 2026 to over USD 10.2 billion by 2033, and it's all thanks to advances in deep learning.
The real magic of AI is its ability to understand what's in the picture. It intelligently sharpens important things like faces and textures while leaving smoother areas alone. This gives you a result that feels natural, not like it was just run through a generic filter.
Of course, when you're using AI to improve a photo's clarity, it’s also a good idea to know how to verify a photo's authenticity. This helps make sure the final image is still believable, which is especially important when you’re sharing restored memories.
This automated approach is a game-changer if you find manual editing intimidating or just don't have the time. You can dive deeper into the technology behind these tools in our article on AI photo enhancement. For quick and impressive fixes, AI is definitely the fastest way to get a sharper picture.
Advanced Techniques for Tackling Severe Blur
Sometimes, a standard sharpening filter just won't cut it. For photos you might have written off—like a nighttime shot ruined by shaky hands or a picture of your dog mid-sprint that’s more streak than snout—you need to bring in the heavy hitters.
We're talking about specialized deblurring tools designed to computationally reverse the blur, not just mask it.

Unlike basic sharpeners, advanced tools analyze the image to figure out the direction and type of blur. A great example is Photoshop’s Shake Reduction filter, which can trace the path of your camera's movement and attempt to undo it.
A Quick Tutorial for Using Photoshop's Shake Reduction
If you have a photo with moderate camera shake, this tool can be a lifesaver.
- Open the Image and Tool: In Photoshop, open your blurry photo. Go to
Filter > Sharpen > Shake Reduction. - Let Photoshop Analyze: The tool will automatically analyze the image and apply a correction. A progress bar will appear.
- Adjust the Blur Trace: The tool creates one or more "Blur Traces" represented by boxes on your image. You can click and drag these boxes to different areas of the photo that have good contrast, which can help the algorithm get a more accurate reading of the blur.
- Fine-Tune the Settings: Use the sliders on the right-hand panel to refine the result.
- Blur Trace Settings: Adjust the bounds to define the blur's length and direction.
- Smoothing: Use this to reduce the noise that sharpening often creates. A value of 10-30% is often enough.
- Artifact Suppression: Increase this slider if you see strange digital patterns or halos appearing. Start around 30-50%.
- Preview and Apply: Toggle the "Preview" checkbox to see the before and after. Once you're satisfied, click "OK".
My biggest piece of advice here is to make small, incremental adjustments. Keep a close eye on the live preview. Finding that sweet spot between all the settings is what separates a natural-looking fix from a digital mess. Don't be afraid to just play around and see what each slider does.
It's fascinating to think that the tech behind these fixes is closely related to the systems that power facial recognition and automated content tagging. The ability to sharpen blurry images is absolutely crucial for those applications. It helps explain why the image recognition market is expected to explode from USD 62.7 billion in 2024 to USD 231.54 billion by 2034. You can actually explore more data about this rapid market expansion.
Once you get the hang of these powerful tools, you can start rescuing images you once thought were unsalvageable. You can turn that disappointing, blurry shot into a memory you're proud to share.
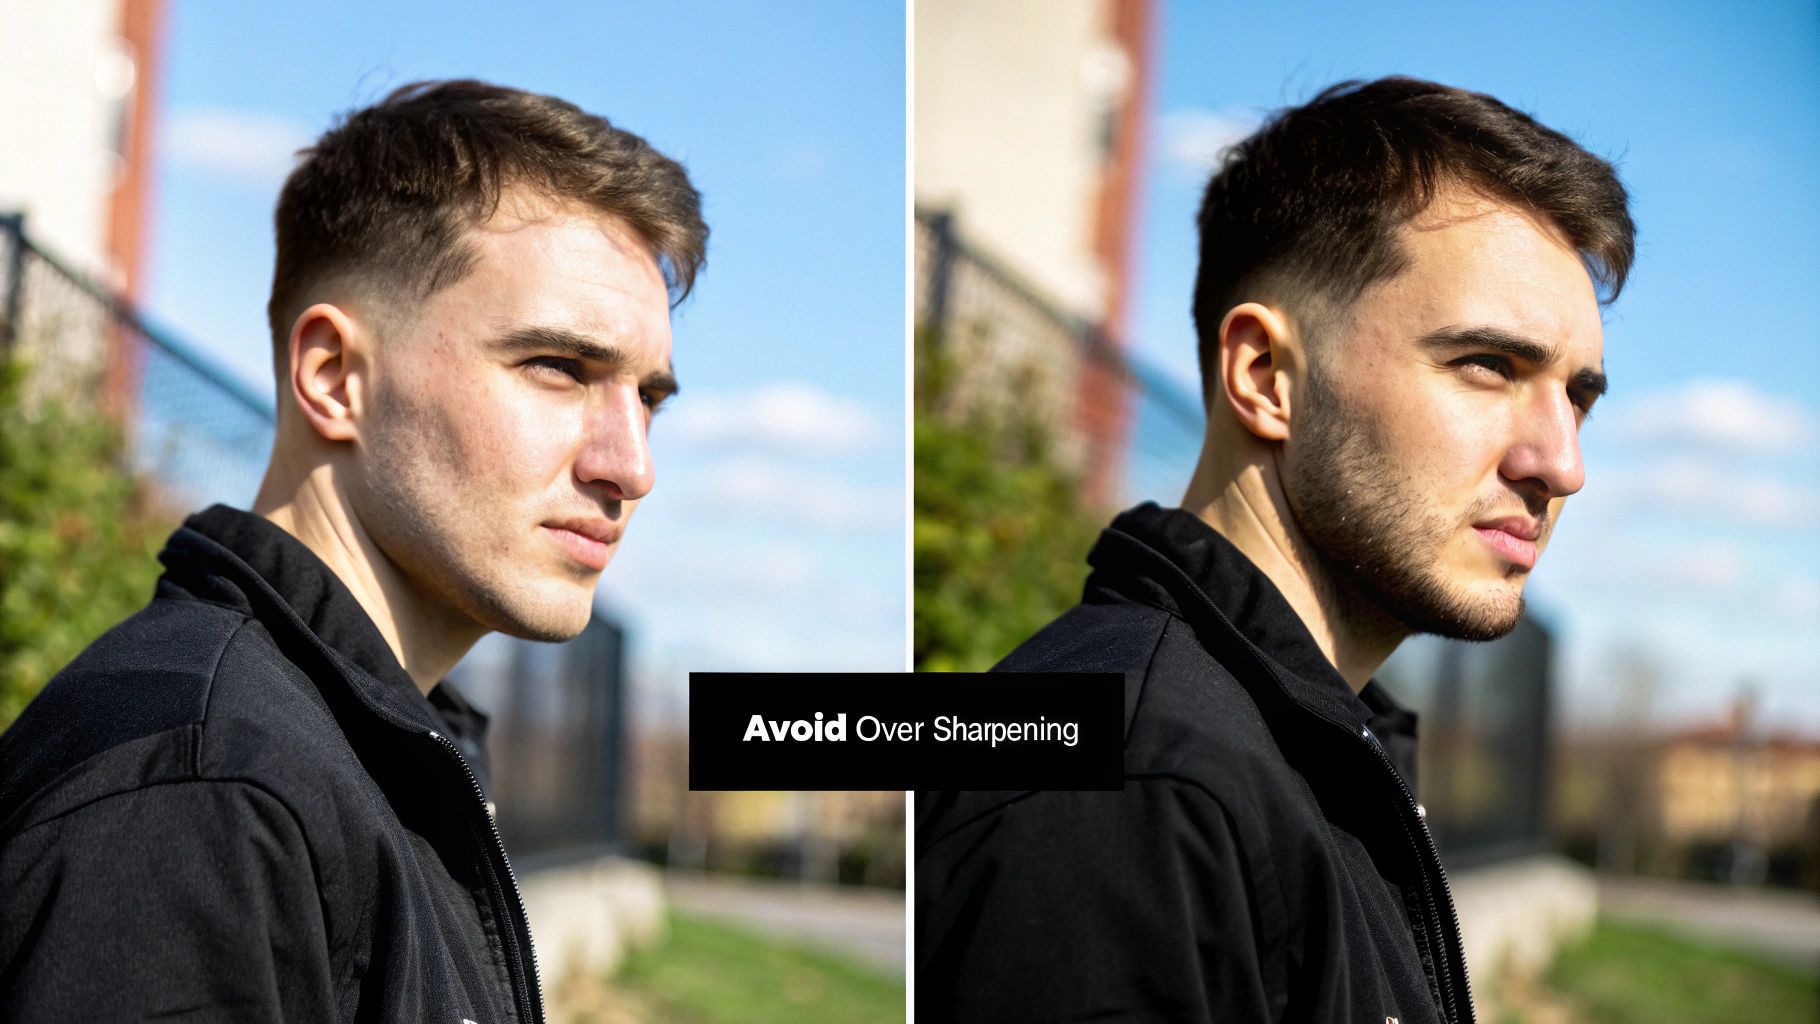
Common Mistakes to Avoid When Sharpening Photos
Knowing how to sharpen a blurry picture is one thing; knowing when to stop is a completely different skill. It's incredibly easy to push those sharpening sliders a little too far, and before you know it, the photo looks even worse than when you started. A light touch is everything.
One of the most obvious signs of over-sharpening is the dreaded "halo" effect around the edges of objects. This happens when the sharpening radius is cranked up too high, creating a bright, glowing outline that just screams "over-edited." The fix is pretty simple: keep your radius settings low. I usually find that somewhere between 0.5 and 1.5 pixels is the sweet spot.
Don't Magnify Imperfections
Another classic mistake is accidentally amplifying digital noise. Sharpening tools are pretty blunt instruments—they can't tell the difference between fine detail and unwanted grain. If you push the sharpening amount too high, all that existing noise becomes way more obvious, giving your photo a gritty, almost sandy texture.
To get around this, I always make sharpening the absolute last step in my editing workflow, long after I've dealt with any noise reduction. It's also a good habit to take these precautions:
- Work on a duplicate layer: This is a lifesaver. It’s a non-destructive way to work, letting you easily dial back the sharpening effect's opacity or use a layer mask if you get a little carried away.
- Zoom in to 100%: You simply can't judge the true effect of sharpening unless you're looking at the image at its actual pixel size. What looks fine zoomed out can be a mess up close.
The real goal of sharpening isn't to create new detail out of thin air. It's to create the illusion of more detail. A perfectly sharpened image should just look crisp and clear, without making you notice the technique itself.
When it comes to sharpening, less is almost always more. Stick to subtle adjustments, always check your work at 100% zoom, and make sure you have an easy way to undo your changes.
Your Questions About Sharpening Pictures Answered
When you're trying to fix a blurry photo, a few common questions always seem to pop up. Let's tackle them head-on so you can get back to editing with confidence.
Can You Truly Unblur a Photo?
This is the big one, isn't it? The completely honest answer is no—you can't magically recover picture data that the camera never captured in the first place. If a shot is hopelessly out of focus or suffering from severe motion blur, no tool on earth can reconstruct it with perfect accuracy.
That said, modern software can get you remarkably close. AI-powered tools, in particular, do an incredible job of creating the illusion of sharpness. They intelligently analyze the image, increase contrast along the edges, and can even reconstruct plausible details, making a photo look worlds clearer than the original.
What Is the Best Software to Fix a Blurry Picture?
The "best" tool really boils down to what you need and how much time you want to spend. I tend to break it down like this:
- For Total Control: If you're a pro or an enthusiast who wants to get your hands dirty, nothing beats Adobe Photoshop. It gives you advanced, granular tools like Shake Reduction and High Pass filters for meticulous manual adjustments.
- For Instant Results: This is where AI platforms shine. They're built for speed and simplicity. You just upload the image, and the AI handles all the complex corrections with a single click.
The real difference is the workflow. Manual tools have a learning curve but offer ultimate finesse. AI gives you a fast, powerful, and often shockingly effective fix for most common blur issues.
Sharpening vs. Noise Reduction: What's the Difference?
Think of sharpening and noise reduction as two sides of the same coin—they're closely related and you often need to balance them. Sharpening works by increasing the contrast along edges, which makes details pop. The downside? It can also amplify any ugly digital noise or grain in the photo.
On the flip side, noise reduction is designed to smooth out that grainy texture. The trade-off is that it can also soften the image, sometimes mushing the very details you want to preserve. A solid editing workflow often involves applying careful noise reduction first, then using selective sharpening to bring back that crispness without reintroducing the grain. It's all about finding that sweet spot.
Ready to fix your blurry photos in seconds? With AI Photo HQ, you can restore clarity and detail with a single click. Try it now and see the difference AI can make.

