
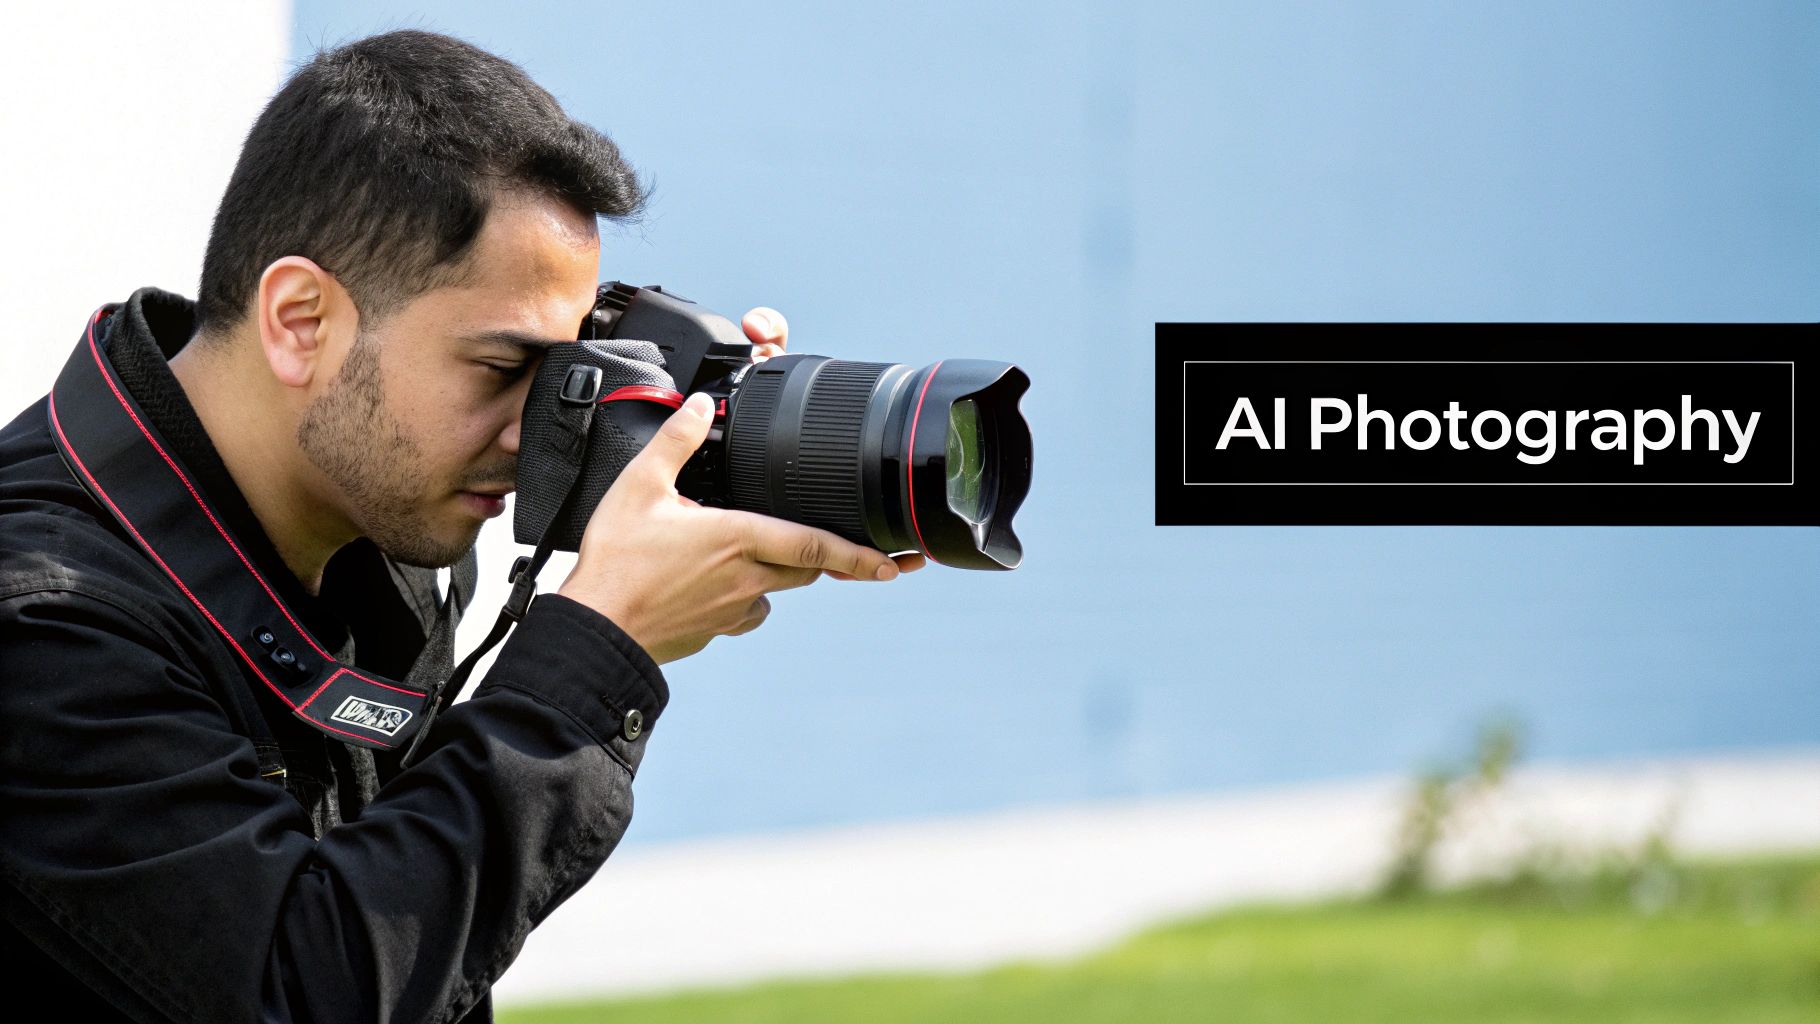
Imagine having a creative assistant who handles all the tedious stuff, freeing you up to focus on the actual art. That’s the new reality with artificial intelligence in photography. This isn't just some far-off theory; it's about practical tools reshaping the modern workflow, automating complex jobs, and opening up entirely new creative doors. This guide is your roadmap to getting hands-on with the AI tools you can use today.
Your New AI-Powered Digital Darkroom
The days of spending hours on repetitive editing are numbered. Instead of manually cloning out blemishes or painstakingly masking a subject, photographers are now using smart tools that get it done in seconds.
Think of AI in photography less as a replacement for your skills and more as a powerful collaborator in your digital darkroom. It handles the technical, time-sucking steps so you can pour your energy into what really matters: composition, storytelling, and connecting with your subjects.
This shift is more than just a passing trend—it's a massive evolution for the industry. The global market for AI in photography was valued at around USD 2.85 billion and is expected to rocket to USD 8.95 billion by 2033. That growth is all thanks to machine learning and computer vision getting baked right into the software we use every day. You can find more insights on this market expansion over at DataHorizzon Research.
What AI Means for Your Workflow
So, what does this actually look like in your day-to-day? The biggest win is efficiency. The tedious stuff that once ate up hours can now be done in minutes, and that completely changes how photographers approach their work from start to finish.
This guide is all about hands-on applications. We're going to walk through step-by-step tutorials to help you get these tools into your workflow smoothly. We’ll cover how to:
- Automate Photo Culling: Stop manually sifting through thousands of images. We'll show you how to let AI find the keepers for you by analyzing focus, composition, and even spotting closed eyes.
- Enhance and Restore Images: Finally rescue those slightly blurry or noisy photos. Learn the steps to correct colors with perfect balance or even swap out a boring sky with a single click.
- Generate Creative Elements: Use generative AI to magically remove distracting objects, extend a photo’s background to nail the composition, or even create entirely new backdrops for portraits.
By mastering these tools, you're not just saving time; you're creating more room for artistic expression. The goal is to make your process faster and your final images more powerful.
This journey starts with understanding that AI is just a tool—one designed to serve your vision. In the next sections, we’ll dive into specific, actionable tutorials that show you exactly how to get professional results using the power of artificial intelligence.
Mastering AI Photo Enhancement Step-By-Step
Theory is great, but seeing artificial intelligence in photography actually work is what really makes it click. Let's get our hands dirty and move past the concepts. We're going to take a regular, everyday photo—you know the kind, a little blurry, with less-than-perfect lighting—and turn it into something that looks professionally shot using standard AI tools.
This walkthrough will break down three key stages: rescuing lost detail with noise reduction and sharpening, balancing the lighting and color, and finally, adding a bit of drama with an instant sky replacement. You'll see just how much easier AI makes tasks that used to take hours of tedious work.
Step 1: AI Noise Reduction and Sharpening
Let's start with a portrait that’s a bit soft and grainy from a low-light situation. In the old days, fixing this meant complex masks and careful adjustments. With AI, it’s a whole different ballgame.
Here's how to do it in Adobe Lightroom, but the steps are similar in Topaz Photo AI or Luminar Neo.
- Open the Detail Panel: Import your photo into Lightroom and go to the "Develop" module. Scroll down on the right-hand side until you find the "Detail" panel.
- Activate AI Denoise: Inside the Detail panel, you'll see a "Denoise" button. Click it. A new window will pop up showing you a preview of the changes.
- Adjust and Apply: The AI will automatically suggest a strength level (usually around 50). You can move the slider to fine-tune the effect if needed. Click the "Enhance" button to apply the changes.
The AI intelligently identifies the important parts of your photo, like a person's face, and separates them from the background. It then selectively smooths out noise in areas like skin and sky while carefully sharpening the details that matter—like eyes and hair. A shot you might have deleted is now crisp and clear in just a few seconds.
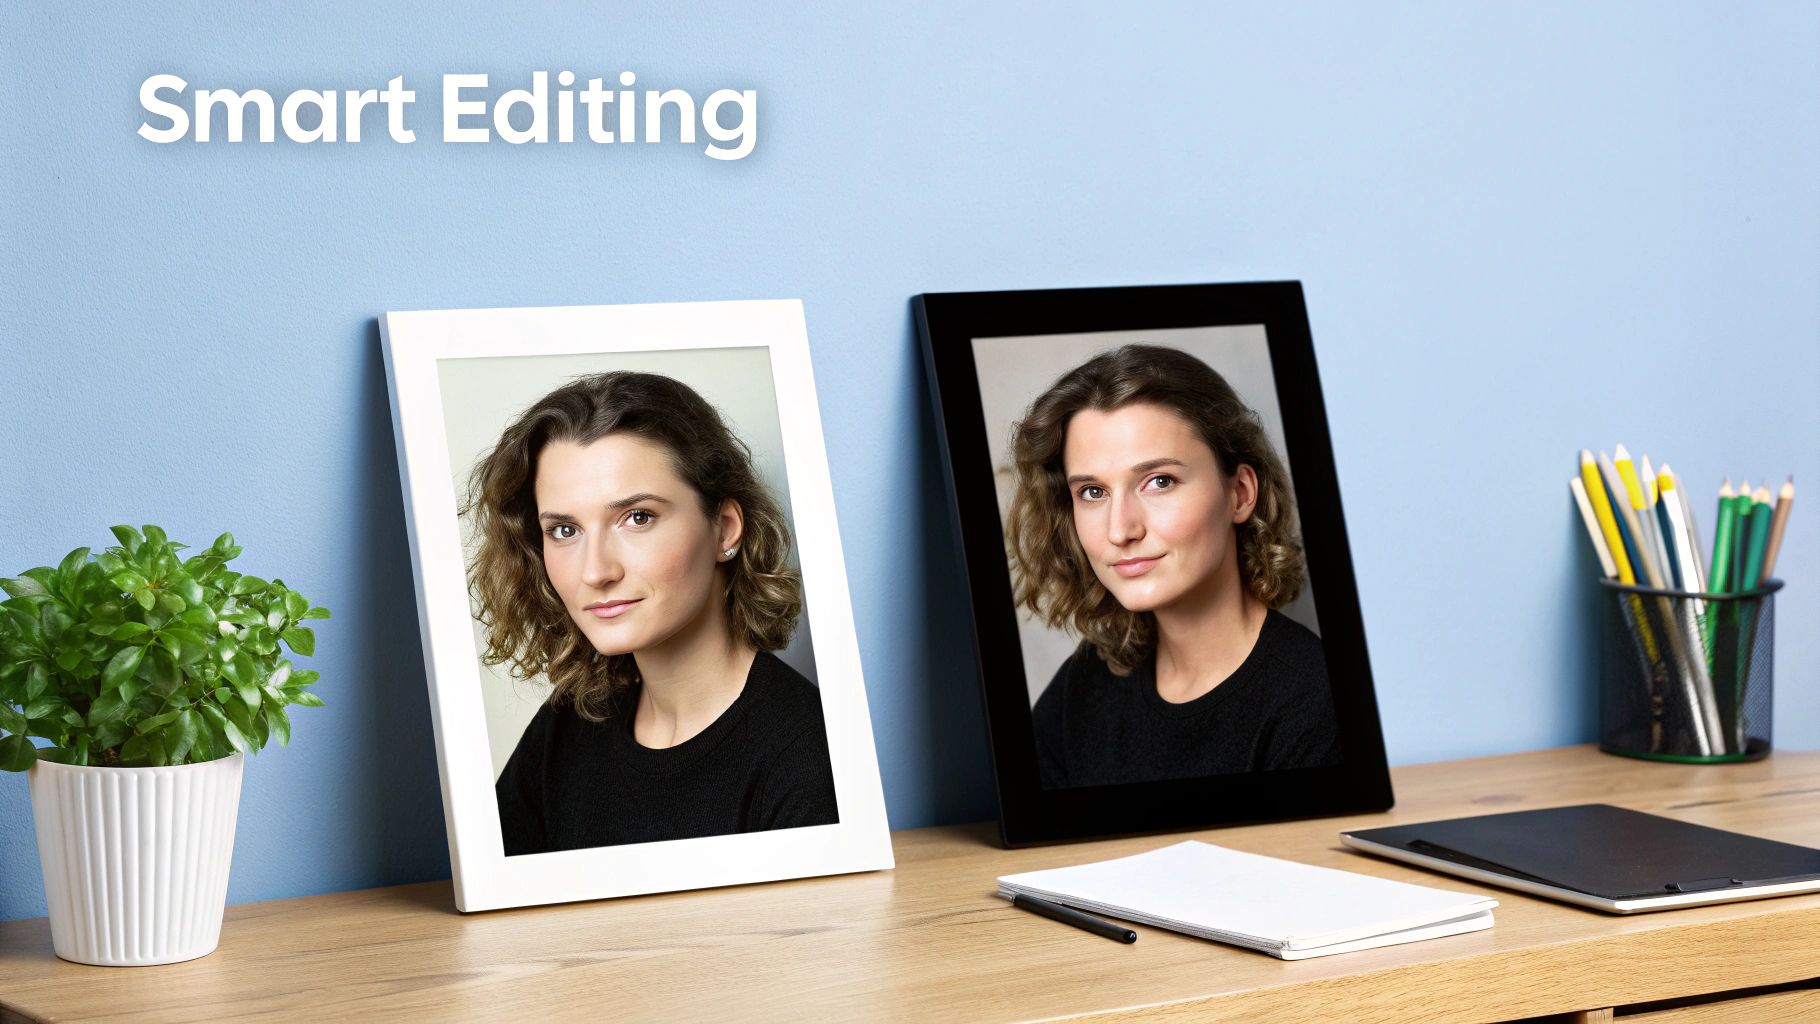
Step 2: Intelligent Color and Light Correction
Okay, our image is sharp, but the lighting is flat and the colors are dull. Fixing this manually would mean diving into curves, levels, and juggling multiple selective masks. This is where AI-powered tools really simplify things.
Let's use Lightroom's AI masking as an example:
- Open the Masking Tool: In the "Develop" module, click the circular "Masking" icon.
- Select Subject or Sky: The AI will offer options like "Select Subject," "Select Sky," or "Select Background." Click "Select Subject." Lightroom will instantly create a precise mask around the person.
- Make Targeted Adjustments: Now, with only the subject selected, you can use the sliders to increase exposure or lift the shadows just on them, without affecting the background.
- Repeat for the Background: Create another mask, this time choosing "Select Background." Now you can darken the background or adjust its color temperature to make your subject pop.
This is miles ahead of a simple brightness slider; it’s a context-aware fix that understands what each part of the photo actually needs.
The AI is basically making dozens of tiny, precise adjustments all at once, creating a balanced and vibrant look that would take a human editor a whole lot of time and effort to match.
The workflow below gives you a peek into how these AI tools see an image and apply these targeted fixes.

This visual shows the core of the process: the software identifies different objects and gives each one the specific enhancement it needs, leading to a much more balanced and polished final image.
To put the efficiency gains into perspective, let's look at how these tasks stack up.
Comparing Traditional vs. AI Photo Enhancement Tasks
This table really highlights the difference between the old way of doing things and the new, AI-assisted workflow. It's not just about speed; it's about simplifying complex processes that used to require years of experience to master.
| Enhancement Task | Traditional Method (Manual) | AI-Powered Method (Automated) | Estimated Time Saved |
|---|---|---|---|
| Noise Reduction | Careful masking, multiple filter layers, manual slider adjustments. High risk of over-smoothing. | One-click analysis. AI differentiates subject from background and applies targeted smoothing. | 5–15 minutes |
| Color Correction | Adjusting curves, levels, and HSL sliders. Requires multiple selective masks for different areas. | Single "Auto" or "Enhance" function. AI balances exposure, contrast, and color temperature contextually. | 10–20 minutes |
| Sky Replacement | Meticulous masking around foreground elements (hair, trees). Complex blending and color matching. | One-click tool. AI automatically masks the sky and blends the new one with matching light/color. | 15–30+ minutes |
As you can see, the time savings are massive. AI handles the grunt work, freeing you up to focus on the creative side of things.
Step 3: One-Click Sky Replacement
Our portrait is finally sharp and well-lit, but the sky is just a blanket of boring gray. This is where AI pulls off one of its most impressive tricks. In the past, swapping a sky meant painstakingly tracing around trees, buildings, and hair. Today, it’s practically instant.
Here’s the step-by-step in Luminar Neo or Photoshop:
- Select the Tool: In Luminar, find the "Sky AI" tool. In Photoshop, go to
Edit > Sky Replacement. The AI will immediately analyze the image and create a flawless mask around the original sky. - Choose a New Sky: The tool will pop up a library of high-quality sky options, from dramatic sunsets to clear blue afternoons. Click through them to see a live preview on your photo.
- Refine the Details: The AI automatically handles the hard part—blending the new sky into the scene and adjusting the foreground's lighting and color to match. You can still use simple sliders to tweak the horizon ("Shift Horizon") or warm up the foreground lighting ("Foreground Lighting") for a perfect finish.
This one feature can completely change the entire mood of an outdoor portrait or landscape in a matter of seconds. For a closer look at the tech behind these edits, you can learn more about AI image enhancement and how it all works. This final step is a perfect example of the incredible speed and creative power of using artificial intelligence in photography.
A Practical Guide to Generative AI
While AI enhancements are great for tweaking what’s already in your photo, generative AI is a different beast entirely—it lets you create what isn't there. This powerful side of artificial intelligence in photography isn't about replacing you. Think of it as the ultimate creative partner, ready to help you solve common photography problems or explore artistic ideas that used to be flat-out impossible.
We're going to skip the abstract theory and jump right into practical, step-by-step guides using tools you can get your hands on today. You'll see exactly how to use generative AI to erase distracting junk from a photo, expand your canvas for that perfect crop, and even create brand-new backdrops from scratch.
Tutorial 1: Seamlessly Remove Distracting Objects with Generative Fill
Every photographer knows the feeling. You've nailed the perfect portrait, but a random trash can or a loud sign in the background is killing the vibe. Cloning that stuff out by hand has always been a tedious, time-consuming job.
With generative fill, now baked into tools like Adobe Photoshop, it’s a fix that takes seconds. It works by looking at the pixels around your selection and then intelligently creating new content that blends right in.
Here’s a step-by-step guide to cleaning up your shots:
- Make Your Selection: Open your image in Photoshop and grab the Lasso Tool (press 'L'). Draw a loose circle around the object you want to remove, leaving a small buffer around it.
- Activate Generative Fill: With your selection active, a "Contextual Task Bar" will appear. Click the "Generative Fill" button on it.
- Leave the Prompt Blank and Generate: For removing objects, you don't need to type anything in the prompt box. Just leave it empty and click the "Generate" button.
- Review the Variations: Photoshop will create a new "Generative Layer" and give you three different options to choose from in the "Properties" panel. Click through the thumbnails to pick the one that looks the most natural.
This simple process can rescue a photo that you might have otherwise thrown away, turning a cluttered scene into a clean, professional shot.
Tutorial 2: Extend Your Canvas with Generative Expand
Ever get back from a shoot and realize your composition is just a bit too tight? Maybe you need to turn a vertical shot into a horizontal banner. Generative Expand was built for exactly this problem.
Instead of just stretching your image, this feature adds brand-new, context-aware pixels to the edges of your photo, making the new parts look like they were always there.
Here’s how to change an image's aspect ratio in Photoshop:
- Select the Crop Tool: Open your picture and press 'C' to activate the Crop Tool.
- Expand the Canvas: Drag the crop handles outward to the new size or aspect ratio you want. This will create empty space around your original photo.
- Generate the New Background: On the Contextual Task Bar, ensure the prompt box is empty and click the "Generate" button. The AI will fill in all that empty space, extending the scene seamlessly.
This technique is a complete game-changer. It gives you total compositional freedom long after you've packed up your gear, letting you adapt your work for any format, from Instagram posts to massive prints.
These tools are spreading like wildfire, and they're reshaping how visual media gets made. We're now seeing over 34 million AI-created images produced every single day. This isn't just for fun, either—AI-generated content now shows up in more than 68% of images used in marketing and social media campaigns. The market for AI image generation is exploding and is on track to blow past $900 million, growing at 17.4% annually.
Tutorial 3: Create Custom Backdrops for Studio Portraits
Generative AI also opens up a whole new world for studio photographers. Forget about buying and storing expensive physical backdrops. You can now generate literally any scene you can dream up, perfectly tailored to your subject's lighting and mood.
The key is understanding how different models "think." Some are brilliant at photorealism, while others are better for more stylized, artistic looks. For a closer look at how the big players stack up, check out our guide on Stable Diffusion vs Midjourney to see which one might be a better fit for you.
Here’s a quick workflow to create and pop in a custom backdrop:
- Isolate Your Subject: First, open your studio portrait in Photoshop. Use the "Select Subject" button in the top menu or the Quick Selection tool to get a clean cutout of the person. Create a layer mask from this selection.
- Generate the Backdrop: Create a new layer behind your subject layer. With this new layer selected, use Generative Fill. This time, type a descriptive prompt! Try something like, "Moody, dark library with soft window light, cinematic, photorealistic."
- Refine and Blend: The AI will generate a background for you. You may need to tweak its colors or lighting to match your subject. Use a "Color Balance" or "Curves" adjustment layer (clipped to the background layer) to make the whole composition look seamless.
This method gives you the power to put your subjects anywhere imaginable—from a futuristic city to a quiet forest—all without ever leaving your studio.
How to Automate Culling and Organization with AI
We’ve all been there. You get back from a great shoot, only to face a memory card loaded with thousands of images. The next few hours are a blur of clicking through every single shot, trying to weed out the duplicates, the blurry ones, and the inevitable photos where someone blinked.
This soul-crushing process, known as culling, is easily one of the biggest bottlenecks in any photographer's workflow. But this is exactly where AI swoops in to save the day.
AI-powered culling software is like having a lightning-fast assistant who looks over your shoulder, analyzing your entire shoot in minutes. It turns a multi-hour chore into a quick final review, letting you get back to the fun parts: editing and delivering beautiful photos to your clients.
A Step-by-Step Guide to AI-Powered Culling
Let's imagine you just finished shooting an event with 2,000+ photos. Here’s a practical look at how you can use an AI culling tool like Aftershoot or Imagen to conquer that mountain of images.
Import Your Entire Photo Set: Open your AI culling app. Instead of dragging everything into Lightroom right away, you'll create a new project and point the software to the folder of RAW files straight from your memory card.
Set Your Culling Preferences: This is where you tell the AI how to think like you. Before it starts, you can fine-tune the settings:
- Strictness Level: Choose how picky you want the AI to be. A "strict" setting will ruthlessly toss out anything with the slightest focus issue, while "loose" gives more shots the benefit of the doubt.
- Select Duplicates: Tell the AI to analyze groups of similar photos (like a burst of shots) and automatically pick the single best one based on focus and composition.
- Filter for Closed Eyes: Enable this feature to have the AI automatically flag or reject photos where people are blinking.
Let the AI Do Its Thing: With your preferences set, click "Start Culling." The software now rips through your images at incredible speed. For that set of 2,000 photos, the whole analysis might take just 5 to 10 minutes.
How the AI Makes Its Choices
So, what’s happening behind the scenes? The AI isn’t just guessing. It’s performing a deep visual analysis on every single photo, looking for technical and aesthetic quality.
It cleverly groups together all those near-identical burst shots you took, then highlights the one definitive winner from the bunch. It instantly flags the image where everyone in the group has their eyes open and their smiles look genuine. At the same time, it’s building a "reject" pile filled with the obvious duds—the out-of-focus shots, the bad exposures, and the clear duplicates.
The real magic here is that these tools learn. Many culling apps can analyze your past editing choices to get a feel for your unique style. Over time, their selections get more and more aligned with your own.
Reviewing and Finalizing the Cull
Once the AI is done, it presents a neatly organized gallery, often broken down into these categories:
- "Selected": These are the cream of the crop—the photos the AI is confident you’ll love.
- "Duplicates": This shows you the groups of similar images, with the AI's top pick already highlighted.
- "Rejected": This pile has all the images the AI flagged as unusable due to missed focus or closed eyes.
Your job now is to do a quick final review, which usually takes just 10-15 minutes. Once you give the final nod, you can export only the keepers directly into Lightroom. What used to be a four-hour headache is now wrapped up in under 20 minutes.
Your Camera Is Smarter Than You Think
The magic of artificial intelligence in photography isn't just happening on your computer anymore—it's built right into the camera you're holding. Today's cameras are loaded with intelligent features that make complex technical decisions in a split second, helping you nail the shot from the very beginning.
Think of it like having a seasoned pro photographer whispering in your ear. These on-device AI systems instantly analyze what you're pointing at and tweak the settings for the best possible outcome.
And this trend is absolutely exploding. The AI camera market, recently valued at USD 13.93 billion, is on track to hit a mind-boggling USD 47.02 billion by 2030. You can dig into the rapid expansion of the AI camera market to see just how big this shift is.
AI Autofocus That Just Won't Miss
One of the biggest game-changers inside your camera is the autofocus system. Not too long ago, autofocus would often struggle. Modern AI-driven systems are in a different league entirely.
Your camera's AI has been trained on millions of images, learning to recognize specific things instantly. It knows what a human eye looks like, can spot your dog's face, or even track a specific bird as it flies across the sky.
Putting this powerhouse to work is easy:
- Dive into Your Autofocus Menu: Find the AF settings in your camera's menu (this might be a physical button or a menu item).
- Turn On Subject Detection: Look for options like "Subject Detection" or "AF Subject Detection." Go into that sub-menu and choose the specific subject you're shooting, like "People," "Animals/Birds," or "Vehicles."
- Shoot with Total Confidence: As you frame your shot, you’ll see a small box appear right on your subject’s eye (or the cockpit of a plane). Now, the camera will stick to it like glue, guaranteeing your focus is perfect even if your subject is moving.
This intelligent tracking is a godsend for portrait, wildlife, and sports photographers. It dramatically increases your "keeper" rate—the number of tack-sharp, usable photos you get from any shoot.
Intelligent Scene Recognition
Ever wonder how your phone's camera just knows you're taking a picture of a sunset versus a plate of food? That’s AI-powered scene recognition doing its thing. The camera analyzes what it sees in real-time and identifies the type of scene you're capturing.
Once it knows you're shooting a landscape, it might give the blues and greens a little boost. For a portrait, it will prioritize natural skin tones and gently blur the background.
This all happens automatically, which is fantastic for getting great-looking shots without any manual effort. If you shoot in JPEG, these tweaks are baked directly into the image file. If you want maximum editing control later, shooting in RAW is still the way to go. But for stunning photos straight out of the camera, this feature is a lifesaver.
And when you do want to take those images to the next level, you can lean on AI in post-production, too. To see what's possible, check out our guide on AI tools for photo editing. By mastering both the AI in your camera and the tools on your computer, you create a seriously efficient workflow.
Common Questions About AI in Photography
Whenever a big new technology shows up, it’s natural to have questions. The rise of artificial intelligence in photography is no different, and it’s kicking up some totally legitimate concerns about the craft, business, and the very definition of a photograph. Let's cut through the noise and get straight to what photographers are actually asking.
My goal here is to give you practical, straightforward answers. We'll tackle the big topics—from job security to ethics—so you can figure out where these powerful new tools fit into your own creative world.
Will AI Replace Photographers?
Short answer: no. AI is a tool, not an artist. Where it really shines is in handling the technical, repetitive, and frankly, boring tasks. Culling thousands of images, making complex masks, or applying basic enhancements? AI is a beast at that stuff. And all that automation frees you up to do the work only a human can do.
Think of AI as the most efficient assistant you've ever hired. It takes care of the grunt work, so you can pour your energy into what really matters:
- Your Creative Vision: AI can't replicate your unique style or artistic voice. That's all you.
- Storytelling: The ability to capture a real emotion or an entire narrative in one frame is a human skill.
- Human Connection: You're the one building rapport with a client or directing a model to get that perfect, genuine expression.
- Light and Composition: Those deliberate, artistic choices you make on location are the soul of the image. AI just works with what you give it.
The photographers who learn to use AI tools won't be replaced; they'll just become more creative and efficient. See it as a collaborator that lets you spend less time clicking and more time creating.
What Are The Best AI Photo Editing Tools?
This is a classic "it depends" situation. The "best" tool is the one that fits your specific workflow and solves your biggest headaches. Most pros I know actually use a mix of different programs to get the job done right.
Here’s a quick rundown of the heavy hitters and what they're good for:
- All-in-One Editing Suite: Adobe Photoshop and Lightroom are still the kings of the castle. Their built-in "Sensei" AI is incredibly powerful, handling things like Generative Fill for zapping unwanted objects, creating near-perfect subject masks, and intelligent noise reduction, all inside the ecosystem you already know.
- Specialized Enhancement: When you need best-in-class results for a specific problem, look at Topaz Labs. Their tools are legendary. Sharpen AI can rescue a slightly soft shot, DeNoise AI is magic for high-ISO images, and Gigapixel AI does an unbelievable job of upscaling photos.
- Automated Culling: To slash your post-shoot time, culling software like Imagen or Aftershoot is a game-changer. These tools use AI to rip through thousands of photos, flagging the duds and highlighting the keepers in minutes, not hours.
- User-Friendly Power: Luminar Neo strikes a great balance. It has incredibly powerful AI features (its sky replacement is famous for a reason) but with an interface that doesn't require a PhD to operate. It’s perfect if you want fast, impressive results without a steep learning curve.
What Are The Ethical Concerns With AI Photography?
This is a big one. The ethical side of artificial intelligence in photography is a minefield, and it really boils down to three major areas: authenticity, copyright, and bias.
The single most important principle for photographers navigating all this is transparency. Just be honest about how and when you're using AI. That's how you maintain trust with your clients and your audience.
Authenticity and Truth: In photojournalism or documentary work, using generative AI to add or remove anything is a massive ethical breach. Period. It destroys the truth of the image. For portraiture, the line is blurrier. There’s a heated debate about where subtle, tasteful retouching ends and creating completely unrealistic beauty standards begins.
Copyright and Ownership: The legal side of AI imagery is the Wild West right now. Who owns the copyright to an AI-generated image? Is it the person who wrote the prompt? The company that built the AI? The millions of people whose photos were used to train the model? The law hasn't caught up yet, and the answers are murky at best.
Inherent Bias: AI models are trained on gigantic datasets of existing photos from the internet. If that data reflects society's biases—around race, gender, or culture—the AI will learn, repeat, and sometimes even amplify those stereotypes in the pictures it creates.
Even when AI is used for something fun, these principles still matter. For instance, you could imagine using AI to automate photo processing or add creative backdrops for some top wedding photo booth ideas. Even then, being upfront that AI was part of the magic is always the best policy.
Ready to unlock your creative potential? AI Photo HQ gives you the power to generate stunning, high-quality images, restore old photos, and create unique art styles in seconds. Stop spending hours on tedious edits and start bringing your boldest ideas to life. Explore our powerful AI tools today.

