
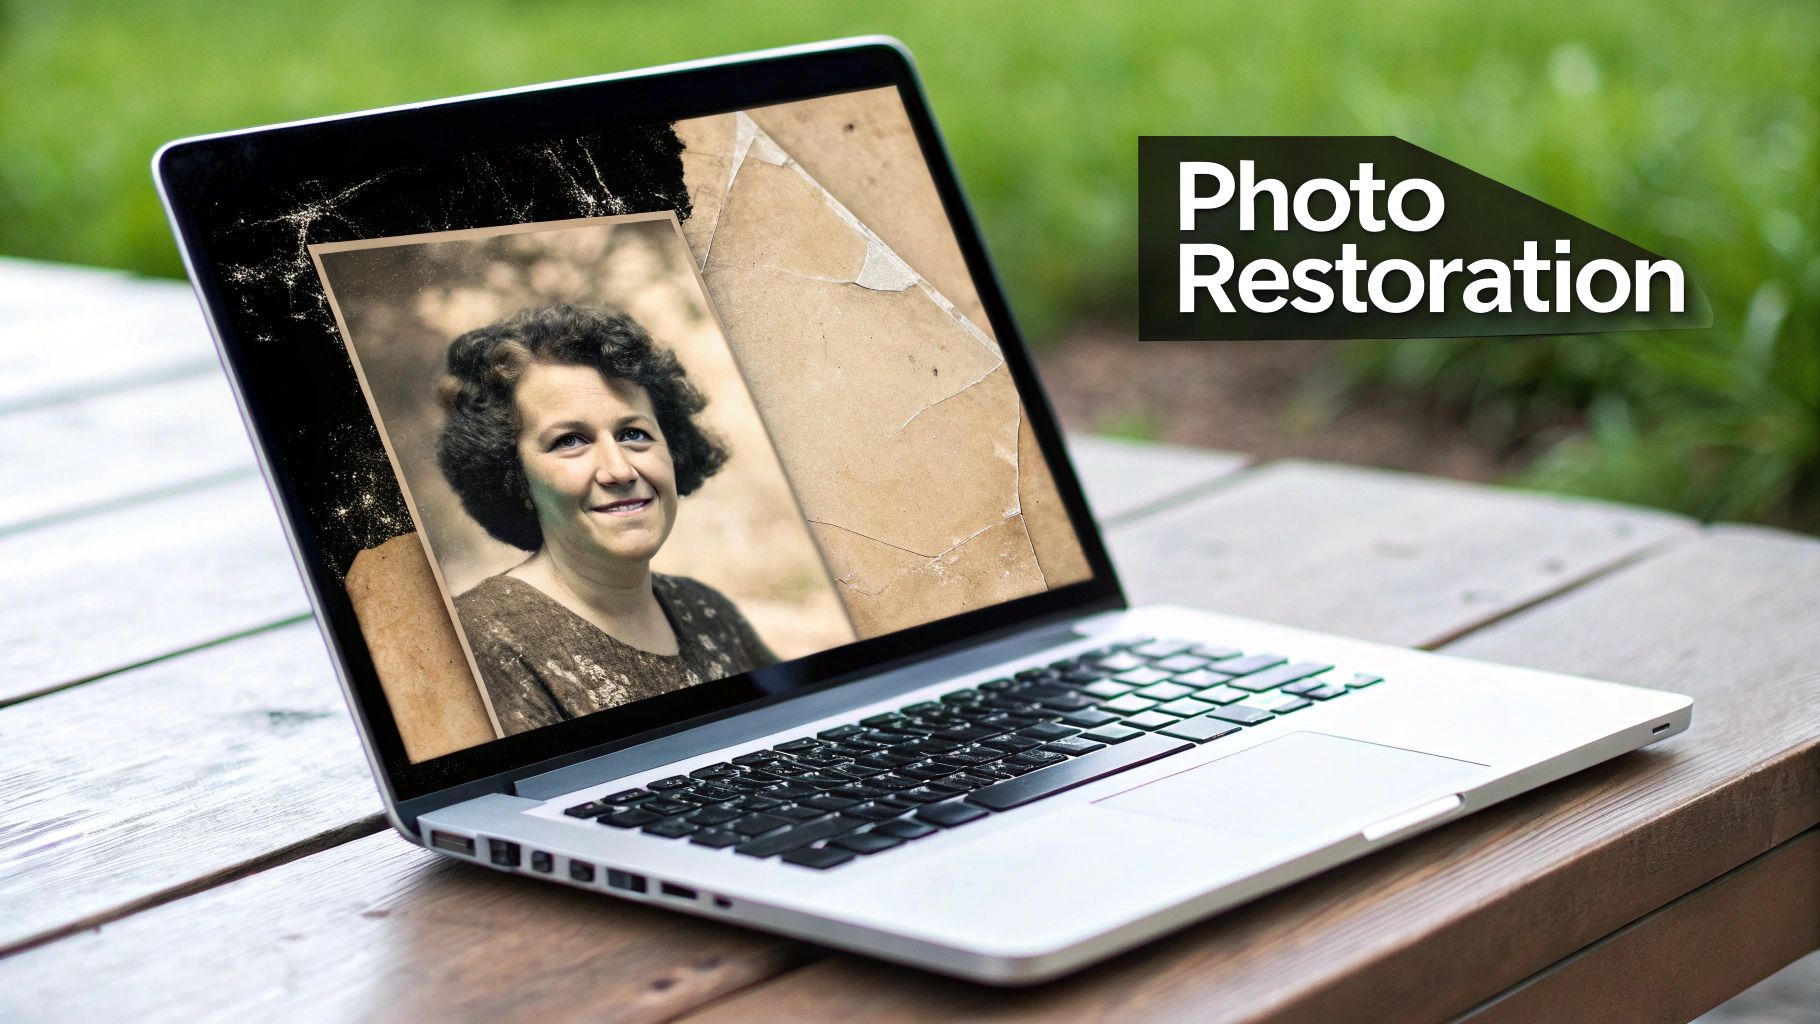
Every old photo is a window into a priceless memory, but time isn't always kind. Fading, scratches, and discoloration creep in, leaving their mark. Think of AI photo restoration software as your personal digital time machine—it uses incredibly smart algorithms to automatically fix that damage, bring back sharp details, and can even colorize old black and white pictures. It gives anyone the power to breathe new life into cherished family heirlooms with just a few clicks.
Giving Your Old Photos a New Life with AI
Imagine you’ve just found a dusty box of old family photos in the attic. The moments they captured are precious, but the prints themselves are faded and worn. This is where modern AI comes in, not as some simple filter, but as a digital artist that’s been trained on millions of images. It can intelligently analyze what’s wrong with a photo and reconstruct the missing pieces with unbelievable accuracy.
This kind of tech used to be locked away in professional studios, but now it's in accessible tools for everyone. And people are catching on. The market for AI photo restoration software is expected to hit around $500 million by 2025, growing by nearly 20% every year. This boom is all thanks to smarter AI that makes saving old photos faster and more effective than ever.
A Practical Example: Fixing a Damaged Photo Step-by-Step
Let's walk through how to restore a typical old, damaged photograph using AI software.
- Step 1: Scan Your Photo. Before anything else, create a high-quality digital copy. Lay your physical photo flat on a scanner and set the resolution to at least 600 DPI (dots per inch). This ensures the AI has maximum detail to work with. Save the file as a PNG or TIFF.
- Step 2: Upload to the AI Tool. Open your chosen AI photo restoration software and upload the scanned image. Most tools have a simple drag-and-drop interface.
- Step 3: Apply One-Click Repair. Look for a button labeled "Restore," "Repair," or "Enhance." Click it. The software will now automatically identify and fix common issues like cracks, dust spots, and tears.
- Step 4: Enhance Facial Details. Many tools have a specific feature for faces. Find an option like "Face Enhancement" or "Portrait Mode" and activate it. This will intelligently sharpen the eyes, nose, and mouth, bringing stunning clarity to the most important part of the portrait.
- Step 5: Correct Colors. If the photo is faded, use the color correction sliders. Gently increase the contrast and saturation to restore the original vibrancy.
The result can transform a beaten-up old print into a pristine digital file. You can see the process in action in the example below, where a badly damaged photo gets meticulously repaired.
The "after" shot really shows how well the software can rebuild the original photograph, effectively wiping away decades of wear and tear. If you want to dive deeper, you can learn more about various methods for photo restoration online in our detailed article.
How AI Intelligently Repairs Your Images
Ever wonder what's actually happening when you click "restore"? Think of an AI photo restoration tool as a hybrid of a meticulous art historian and a master painter. It isn't just slapping a simple filter over your image. Instead, it dives deep, analyzing every damaged pixel and cross-referencing it with a massive internal library built from millions of other photos.
This is how it makes an educated guess about what should be there. Where we see a chaotic mess of pixels in a scratch or tear, the AI sees broken patterns. It has a fundamental understanding of what a human face, a brick wall, or the texture of an old wool coat is supposed to look like. This contextual awareness is its secret weapon—it fills in the blanks logically, not just randomly.
A Tutorial: Using AI Core Restoration Processes
Let's break down how to use the core features of AI photo restoration software to achieve a specific result. Imagine you have a photo with a noticeable scratch across someone's face and faded colors.
- Run the Scratch Removal Tool. After uploading your image, select the "Scratch and Blemish Removal" function. The AI will automatically detect the unnatural line of the scratch and "in-paint" the area, using information from the surrounding pixels to blend the repair seamlessly. You usually don't need to do anything else.
- Activate Face Enhancement. Next, find and toggle the "Face Enhancement" or "Portrait AI" feature. This tells the algorithm to pay special attention to the facial structure. It will sharpen the details that were softened by the scratch repair, ensuring the eyes and smile are crisp and clear without looking artificial.
- Apply Automatic Colorization (for B&W). If it's a black and white photo, click the "Colorize" button. The AI will analyze the objects and apply historically appropriate colors. For example, it will recognize a 1950s car and color it a shade common for that era, turning a flat image into a vibrant scene.
The goal of AI restoration isn’t to create a flawless, modern picture. It’s to bring the original photograph back to its former glory, preserving its soul while wiping away the damage of time.
Why Context Is Everything
An AI's ability to pull off a great restoration hinges on the information it has to work with. It's brilliant at filling in small gaps by looking at the pixels right next to the damage. For example, if a scratch cuts through a patterned shirt, the AI can seamlessly continue that pattern across the broken area.
But if a huge chunk of the photo is just gone—a completely missing face, for instance—the AI has to start inventing details from scratch. This is where you might see some less-than-accurate results.
The appetite for this technology is absolutely massive. Just look at Remini, one of the leading apps in this space. They reportedly have over 100 million monthly active users and process billions of photos and videos. That’s a staggering number of people turning to AI to rescue their precious memories. You can find more incredible stats on Remini's growth over at Alphaklick.
By getting a grip on these core ideas, you'll be in a much better position to use these tools effectively and get the amazing results you're after.
Tutorial: How to Restore a Faded Photo
Ready to bring a faded photo back to life? This quick guide will walk you through your first restoration project using AI photo restoration software. We'll take a washed-out old picture and turn it into something you’d be proud to share.
Don't worry, you don't need to be a Photoshop pro. The whole process is surprisingly simple, and following these steps will get you some fantastic results right out of the gate. Let's dive in.
Step 1: Prepare Your Digital File
First things first, the AI needs a good-quality digital version of your physical photo to work with. Think of it this way: the better the scan, the more raw material the software has to analyze and restore.
When you scan your photograph, aim for a high resolution. A setting of at least 600 DPI (dots per inch) is a great starting point for most prints. This captures all those tiny, faded details that the AI can use to piece the image back together.
Step 2: Upload and Auto-Enhance
Got your digital file? Awesome. Now for the fun part. Open up your chosen restoration tool and upload the image. Most have a big, obvious "upload" button or let you just drag the file right in.
As soon as the photo loads, you'll probably see a "one-click" or "auto-enhance" option. Go ahead and click it. This is where the magic happens. The AI's core algorithms kick in, instantly correcting the fading, sharpening details, and boosting the overall clarity. The initial change is often pretty dramatic.
The auto-enhance feature is a huge time-saver. It's designed to do about 80% of the heavy lifting for you, giving you an excellent starting point that you can then tweak to perfection.
Step 3: Fine-Tune the Details
The automatic fix is usually a massive improvement, but a little human touch can take it to the next level. This is where you get to play with the settings and dial everything in perfectly. Most AI photo restoration software gives you a few simple sliders to work with.
- Sharpness and Clarity: Nudge this slider up a bit to make details in clothing, faces, and backgrounds pop. Just be careful not to push it too far, or the image can start to look a little unnatural.
- Color Correction: This is where you can fix that old, yellowish tint. Play with the saturation, contrast, and brightness sliders to bring the colors back to their original vibrancy.
- Face Enhancement: Look for a feature called "face recovery" or "portrait enhance." Toggling this on tells the AI to focus specifically on faces, often bringing incredible clarity back to eyes and smiles.
This infographic gives you a peek under the hood at how the AI sees a photo and decides what to fix.
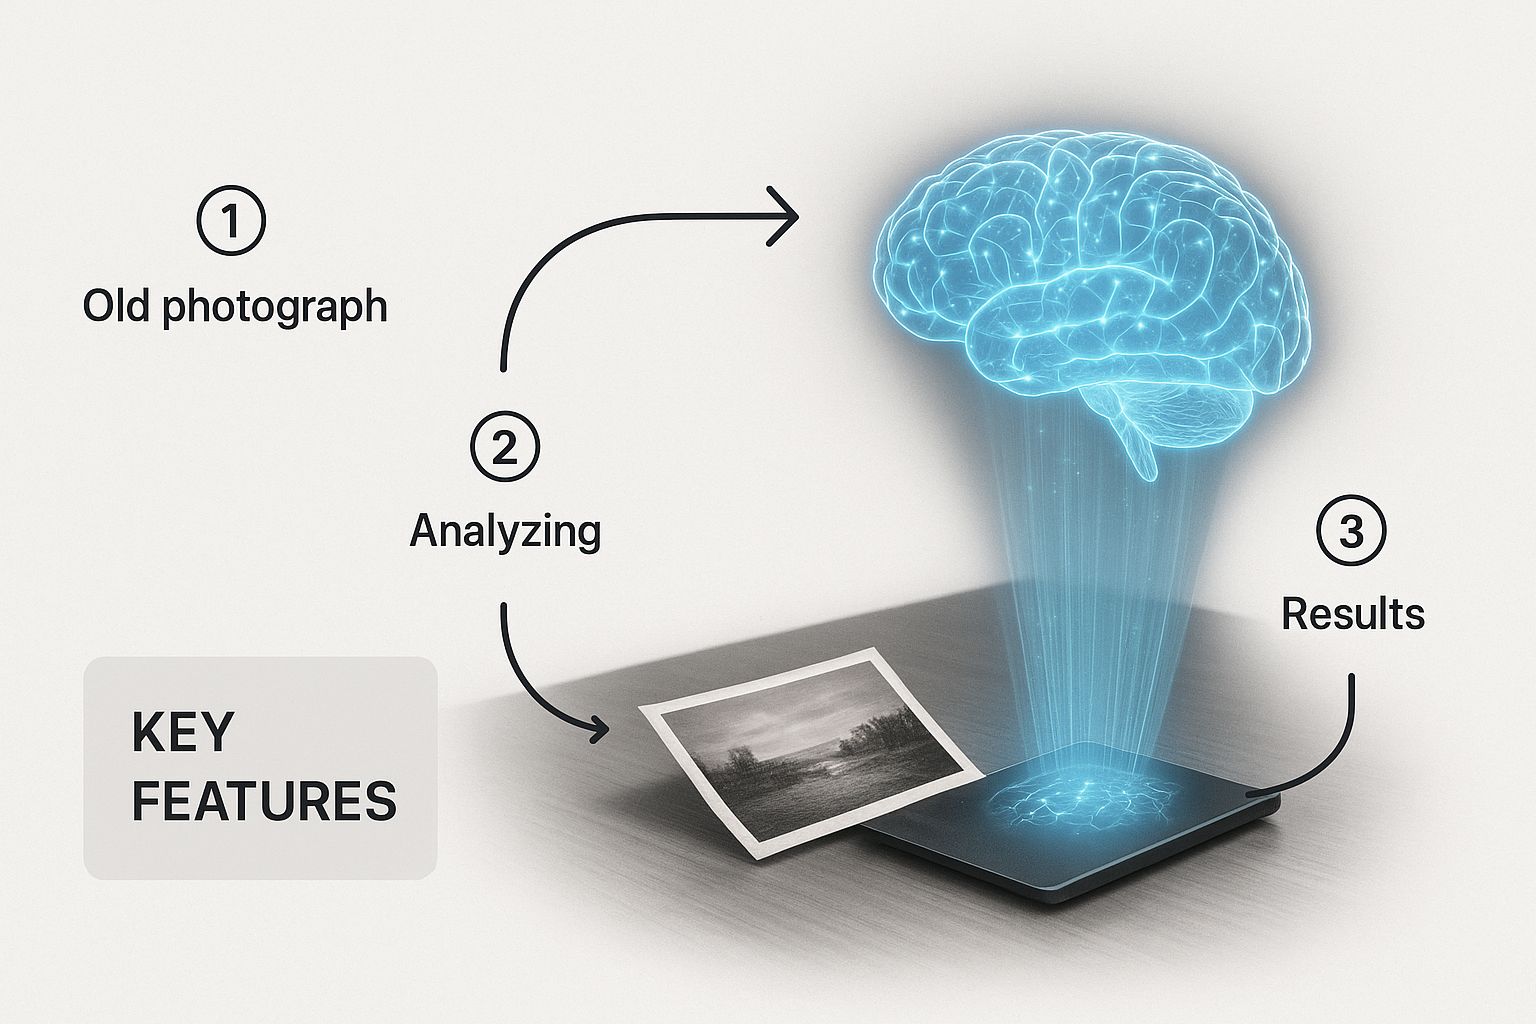
It breaks down the different layers of analysis, from recognizing faces to rebuilding lost textures. It’s a cool visualization of the complex work happening behind that simple one-click button. The results can be truly stunning, turning a barely-there image into a sharp, clear portrait.
For a deeper dive into these techniques, check out our full guide on how to restore faded photos.
Step 4: Save Your Restored Image
Once you’re happy with all your adjustments, the final step is to save your masterpiece. Make sure you export it in a high-quality format like PNG or TIFF. This will preserve all the amazing detail the AI recovered.
And just like that, you've rescued a piece of history. Your cherished memory is now preserved and ready to be shared with family and friends for years to come.
Tutorial: Adding Realistic Color to a Black and White Photo
Breathing life back into a black and white photograph is easily one of the coolest things you can do with modern AI photo restoration software. This process, called colorization, isn't just about splashing some color onto a grayscale image. It’s about making smart, historically-aware choices that make the final picture feel authentic and alive.
This step-by-step guide will walk you through how to use an AI colorization tool to get a result that's not just colorful, but believable.
Step 1: Start with a Quality Image
The foundation of any great colorization is the original photo. For the best results, you'll want to pick a black and white picture that has a good dynamic range. That just means it has a nice balance of deep shadows, bright highlights, and a whole lot of gray tones in between. A high-contrast image helps the AI clearly distinguish objects from one another.
Step 2: Run the Automatic Colorization
Once you've uploaded your high-quality scan into the software, find the "Colorize" or "Add Color" button and click it. The AI will immediately analyze the entire image, identifying elements like skies, trees, buildings, clothing, and skin. It cross-references these objects with its vast database to apply the most probable colors, giving you an impressive result in seconds.
AI colorization is a team effort. The software makes the first, broad-stroke guesses based on data, but your own knowledge and artistic eye are what add that final layer of accuracy and feeling.
Step 3: Review and Refine the AI's Work
Now, critically examine the result. The AI is smart, but not perfect. Look for specific areas to improve:
- Are the skin tones natural? Sometimes AI can make skin look too orange or washed out.
- Are the colors historically accurate? A bright, modern blue on a 1940s car might look out of place.
- Are there any "color bleeds"? Check if the color from one object has spilled over onto an adjacent one.
Your goal is to identify where the AI's automated choices can be improved with a human touch.
Step 4: Manually Adjust Key Colors
Most advanced AI photo restoration software includes tools for manual color correction. This is where you can truly perfect the image. For example, if you know your grandfather's eyes were blue, but the AI made them brown, you can use a selection tool to isolate the eyes and adjust the hue until it's correct. Fixing small but important details—like the color of a dress or the specific shade of a flower—is what elevates the restoration from good to great.
Step 5: Experiment with Different Styles
Don't be afraid to experiment. Some colorization tools offer different AI models or "filters." One might produce a subtle, vintage-toned palette, while another creates bold, vibrant colors. Try processing your photo with a few different styles to see which one best captures the mood and era of the original memory. Once satisfied, save the final image in a high-resolution format.
Choosing the Right AI Photo Restoration Software
With so many tools popping up, picking the right AI photo restoration software can feel a bit like navigating a maze. The secret isn't finding the "best" one overall, but the best one for you. Are you just trying to quickly fix a few old family photos, or are you a pro who needs total control over every pixel?
Your answer to that question really narrows down the options. Some tools are built for pure simplicity—you upload a photo, click a button, and get a great result. They're perfect for casual use. Others are packed with sliders, manual adjustments, and advanced features, giving you the power to fine-tune everything from color accuracy to the subtlest facial details.
Key Factors to Compare
Before you pull out your credit card, it's smart to weigh a few key things. This will help you find a tool that not only produces amazing results but also fits right into your workflow and budget.
- Ease of Use: How quickly can you get started? A beginner-friendly tool should feel intuitive right out of the box. Professional-grade software, on the other hand, might have a steeper learning curve but unlocks a lot more power.
- Feature Set: Look beyond the basics. Does the software just handle scratches and colorization, or does it offer more advanced tricks like background enhancement, noise reduction, or even manual color editing?
- Output Quality: This is the big one. Always check out before-and-after examples. Do the restored photos look natural and sharp, or do they have that weird, over-processed, "plastic" look? The best tools bring a photo back to life without erasing its original soul.
Understanding Pricing Models
Money matters, and you'll find a few different ways these tools are priced.
- Free Tools: These are fantastic for a test drive. Just be prepared for some trade-offs, like watermarks on your images, lower resolution downloads, or a cap on how many photos you can process.
- Subscription Services: This is the most common model. You pay a monthly or annual fee for a certain number of restorations or even unlimited access. It’s a great fit if you have a steady stream of photos to work on.
- One-Time Purchase: Some desktop applications let you buy a lifetime license with a single payment. If you're a heavy user, this can be the most economical route in the long run.
The market for these tools is absolutely booming. In fact, the larger AI image editor market was valued at around $2.37 billion in 2025 and is expected to soar to $3.29 billion by 2032. You can dig into the numbers and get a feel for this growth from the market insights on AI image editors from GlobeNewswire.
When you're comparing your options, just remember that the "best" software is totally subjective. What a professional photo archivist needs is going to be worlds apart from what a hobbyist wants for their personal family album.
To make this a whole lot easier, we've put together a detailed comparison table and a full guide to help you sort through the top players.
Feature Comparison of Popular AI Restoration Tools
Here's a quick look at how some of the leading AI photo restoration tools stack up against each other. This table gives you a bird's-eye view of their features, who they're best for, and how they handle pricing, helping you zero in on the right choice for your specific project.
| Software | Key Features | Best For | Pricing Model |
|---|---|---|---|
| VanceAI | One-click enhancement, batch processing, scratch removal | Beginners and casual users needing quick fixes | Subscription / Pay-as-you-go |
| MyHeritage | Deep Nostalgia™ animation, colorization, excellent face enhancement | Genealogists and family historians | Subscription |
| Topaz Photo AI | Denoise, sharpen, upscale, advanced AI models | Photographers and professionals demanding high quality | One-Time Purchase |
| Hotpot.ai | Simple interface, colorization, scratch repair, art generation | Hobbyists and users with simple restoration needs | Free (with limits) / Credits |
This table is just a starting point. For a much deeper dive, check out our comprehensive guide on the best photo restoration software. We break down the strengths and weaknesses of each tool to give you everything you need to make the right call.
Have Questions About AI Photo Restoration? We Have Answers.
Diving into the world of AI photo restoration is exciting, but it’s totally normal to have a few questions. This technology is powerful, but knowing its real-world limits is the secret to getting results you’ll love.
We’ve rounded up the most common questions we hear to give you clear, no-fluff answers. Think of this as your cheat sheet for using these tools like a pro, whether you're just sprucing up a faded snapshot or tackling a seriously damaged family treasure.
Can AI Really Fix a Photo That's Badly Damaged?
Honestly, it depends. AI does an incredible job with moderate damage—things like scratches, light fading, and small tears. But what about a photo where a big chunk of a face is just... gone?
In those cases, the AI has to make a very educated guess to fill in the missing pieces. It draws on its training from millions of other images to generate brand-new details from scratch.
Sometimes the results are shockingly good, but it's important to remember they are a reconstruction, not a perfect recovery. The AI is like a brilliant artist's assistant; it does its best work when there's enough original information to build on. For most old photos, though, the improvements are nothing short of amazing.
Is It Safe to Upload My Old Family Photos Online?
This is a big one, and it's a completely valid concern. Reputable online services always have clear privacy policies that spell out exactly how your photos are handled. In most cases, your images are processed on secure servers and are never shared or used for anything else.
As a rule of thumb, always take a quick look at the terms of service before uploading anything deeply personal. If you’re working with extremely private or sensitive images, you might feel more comfortable using desktop software that works completely offline. That way, you have total control.
Is AI Restoration Actually Better Than a Human Expert?
This really comes down to what you value most: speed, cost, or a human's artistic touch.
- AI Restoration: It’s ridiculously fast, easy on the wallet, and can produce fantastic results in just one click. If you have a box of dozens of family photos to fix, AI is your best friend.
- Human Professional: An expert brings something different to the table—artistic interpretation, historical research for accuracy (like getting uniform colors just right), and a meticulous attention to detail that AI can't quite match yet.
For a priceless family heirloom or a photo with complex, sentimental damage, investing in a professional restorer might be the right call. But for the vast majority of old photos waiting in shoeboxes and albums, AI photo restoration software hits that perfect sweet spot of quality, convenience, and cost. It’s the ideal choice for most of us.
Ready to see what AI can do for your own photos? With AI Photo HQ, you can restore old pictures, colorize black and white images, and bring your most cherished memories roaring back to life in seconds. Try AI Photo HQ today and give your photos the modern revival they deserve.

