Old photos are more than just paper; they're windows to our past. But time isn't always kind. Fading, tears, and stains can obscure the memories they hold. The good news is that we can fight back, creating a high-quality digital copy and using software to repair the damage. You can do this yourself with tools like Photoshop, or get instant results with powerful AI restorers.
Bringing Your Old Photos Back to Life
Every faded, creased, or torn photograph holds a story just waiting to be told again. These are tangible pieces of your family's history, capturing moments far too precious to lose. Learning to restore old photos isn't just a technical skill—it's an act of preservation. It’s about breathing new life into memories that have been silenced by time and reconnecting with your heritage.
And you no longer need to be a professional retoucher to get incredible results. From hands-on digital repair techniques to one-click AI solutions, the tools available today make photo restoration more accessible than ever. This guide will walk you through the entire process, empowering you to transform those damaged heirlooms back into the vibrant images they once were.
Why Photo Restoration Matters Now
There's a reason so many of us are suddenly digging through old albums. The global Photograph Restoration Service Market, valued at approximately USD 1,476.1 million, is expected to climb to USD 1,595.7 million in the next few years. That growth is fueled by a deep-seated need to preserve family legacies, combined with technology that finally makes it easy and effective.
This boom in interest means you have more resources and tools at your fingertips than ever before. Whether you're fixing a single cherished print or curating an entire family archive, the fundamental steps are the same. But before you even think about scanning, it’s crucial to handle the physical prints with care. Brushing up on the essential tips for preserving old photos can stop further damage in its tracks.
A well-restored photograph does more than just fix imperfections—it bridges the gap between generations. When you clear away the damage, you're not just looking at an old picture; you're seeing a moment as it was truly meant to be seen.
What You Will Learn in This Guide
I’ve designed this guide to be your complete walkthrough, covering everything you need to know from start to finish. We'll dive into:
- Creating a high-quality digital copy: This is the most critical first step. We’ll cover the best practices for scanning to get a perfect digital foundation.
- Manual and AI repair techniques: You'll learn how to use both traditional software and modern AI tools to fix any kind of damage, from small scratches to major tears.
- Color and exposure correction: Discover how to bring back faded colors and restore lost contrast, making your photos pop again.
By the time you're done here, you’ll have the skills to see your old photos in a brilliant new light.
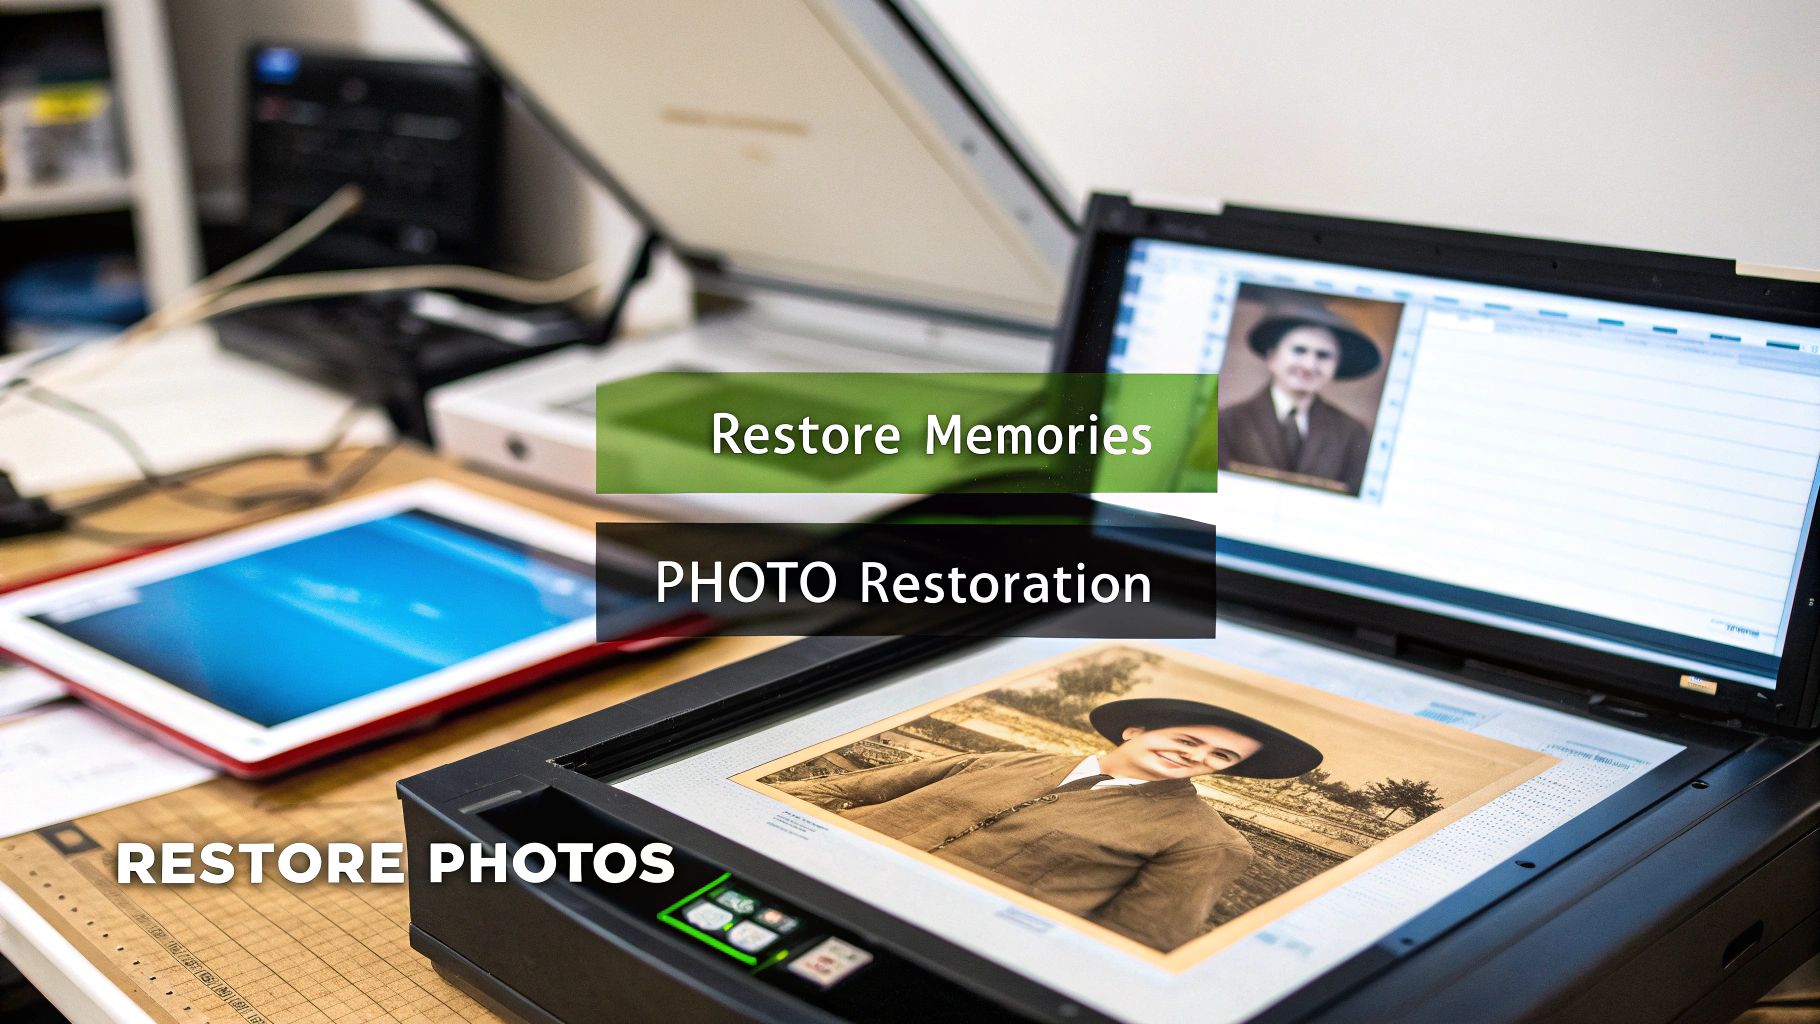
Creating a High-Quality Digital Copy
Your restoration journey doesn't actually kick off in Photoshop—it starts the moment you decide to digitize that old print. A blurry, low-quality scan is like building a house on a weak foundation; no matter how skilled you are with editing tools, you can’t recover details that were never captured in the first place.
The goal here is to create a digital copy that’s a perfect replica of the original. We want to capture every subtle tone, every bit of texture, and even the grain of the paper. This is your raw material, and the better it is, the more amazing your final restoration will be.
That means your smartphone camera isn't going to cut it. It’s a recipe for glare, weird angles, and uneven light. For a project this important, a good flatbed scanner is your best friend.
Getting Your Gear and Photo Ready
Before you hit that scan button, a little prep work will save you hours of headaches later. Every tiny speck of dust or fingerprint on the scanner glass is going to show up as a major blemish in a high-resolution scan, giving you one more thing to fix.
Here’s a quick step-by-step prep:
- Clean the Scanner Glass: Grab a clean microfiber cloth. Gently wipe the entire glass bed to remove dust. For stubborn smudges, apply a small amount of isopropyl alcohol to the cloth (not directly on the glass) and wipe clean.
- Clean the Photograph: Using a soft, clean brush (like a camera lens brush or a soft makeup brush), gently sweep any loose dust or debris off the surface of the photo. Do not use liquids or press hard.
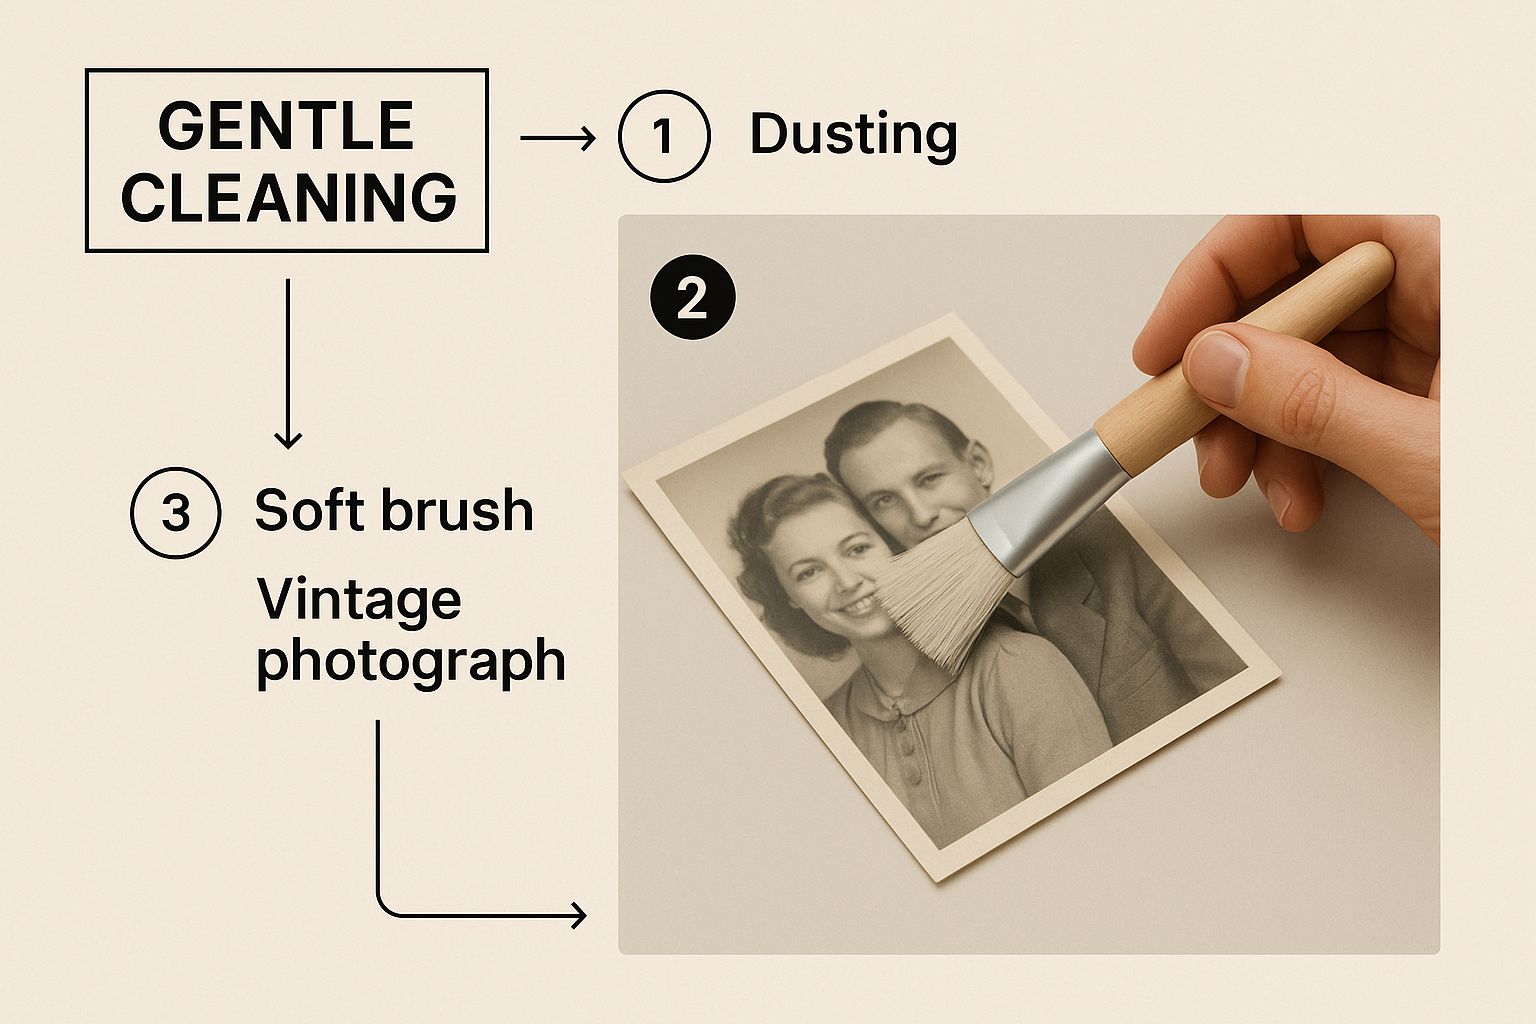
This quick two-step process ensures you're digitizing the memory, not the dust it collected over the years.
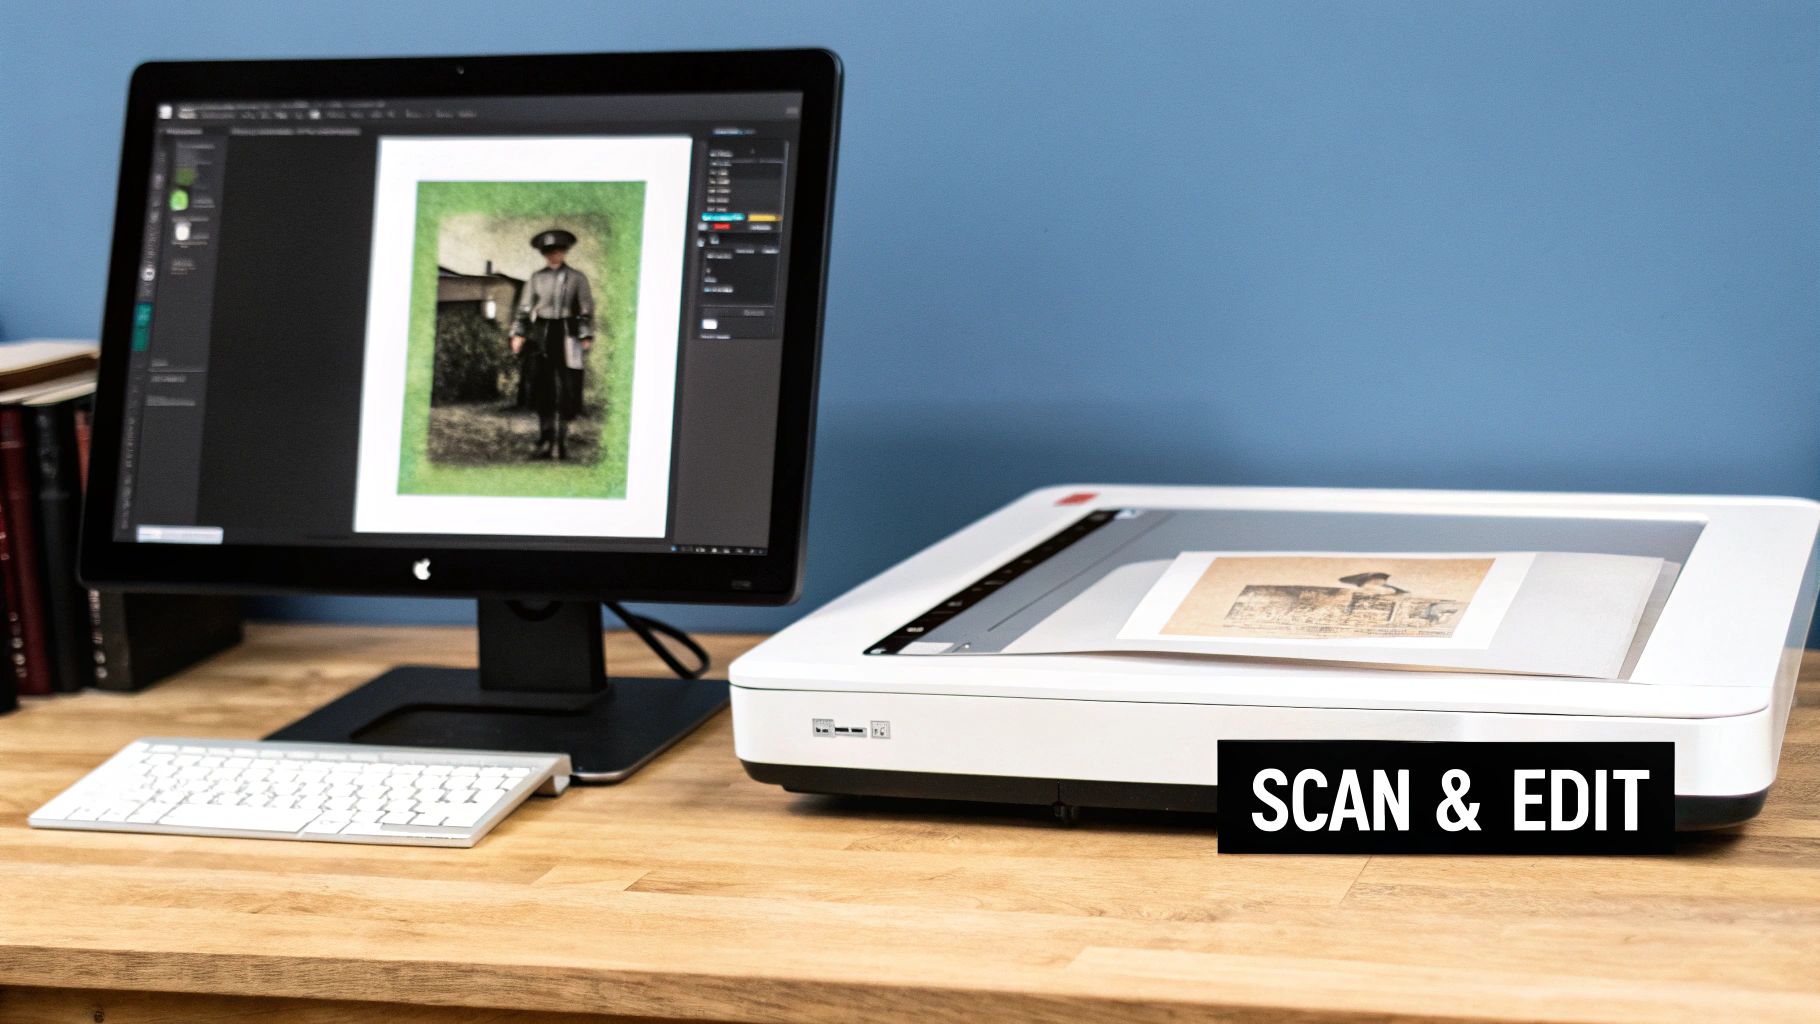
Dialing In the Perfect Scanner Settings
Okay, everything is clean and ready. Now it's time to dive into the scanner software. It can look a bit overwhelming, but you only need to nail three key settings: resolution, file format, and color depth.
- Resolution (DPI): This is all about detail. DPI stands for "dots per inch." For almost any restoration project, 600 DPI is the magic number. It gives you plenty of data to work with for repairs and even lets you enlarge the photo a bit without it looking pixelated.
- File Format: Always choose TIFF (Tagged Image File Format). TIFF files are "lossless," which means 100% of the original image data is preserved. JPEGs, on the other hand, are "lossy"—they compress the image by throwing away some data, which can create ugly digital artifacts that get in the way of a clean restoration.
- Color Depth: Look for a setting that says "48-bit color" or "16-bits per channel." This captures a massively wider spectrum of colors and tones compared to the standard 24-bit option. That extra information gives you way more flexibility when it’s time to correct faded colors and adjust contrast.
Here's the one rule to remember: You can always make a high-quality scan smaller, but you can never, ever add detail to a low-quality scan. When in doubt, go for the higher setting.
Recommended Scanner Settings for Photo Restoration
Use this guide to select the optimal scanner settings for different types of original photographs, ensuring you have the best possible digital file for restoration.
| Photo Type | Minimum Resolution (DPI) | Recommended File Format | Key Consideration |
|---|---|---|---|
| Standard Print (4x6 or 5x7) | 600 DPI | TIFF | This is the sweet spot for detail and file size. |
| Small Photo (e.g., 1x1 locket) | 1200 - 2400 DPI | TIFF | Scan at a much higher resolution to allow for significant enlargement. |
| Damaged/Torn Photo | 600 DPI | TIFF | Scan inside a clear sleeve to hold pieces together. |
| Black & White Photo | 600 DPI | TIFF (Grayscale) | Scan in grayscale mode, but ensure it's at least 16-bit for tonal range. |
Choosing the right settings from the start is non-negotiable. It sets the stage for a successful restoration by giving you the richest, most detailed digital negative possible.
What About Small or Curled Photos?
Life isn't always standard 4x6 prints. You'll inevitably run into tiny wallet-sized photos or old pictures that have curled up over time. These need a slightly different approach.
If you’re working with a very small photo that you want to blow up, you need to crank up the resolution. For a tiny 1x1 inch portrait, scanning at 1200 DPI or even 2400 DPI is a good idea. This captures enough raw detail so that the final enlarged print looks sharp and clear, not a blocky mess.
For curled photos, the cardinal rule is: don't force them flat. You’ll just crack the emulsion. Instead, place the photo on the scanner and gently lay a heavy, flat book on top of the scanner lid. The weight will help press it against the glass during the scan.
And for those truly fragile, torn heirlooms? Placing them inside a clear plastic sleeve before scanning can be a lifesaver. It holds all the pieces together and protects the photo from any further damage.
With your perfect digital copy saved as a high-quality TIFF file, you’re officially ready for the fun part—bringing that memory back to life.
Mastering Manual Repair Techniques
Once you've got that perfect, high-resolution scan, it's time to roll up your sleeves and step into the role of a digital surgeon. This is where the real artistry of photo restoration begins, using powerhouse tools in software like Adobe Photoshop, GIMP, or Affinity Photo.
Don't let the complex interfaces scare you off. The core of manual repair boils down to a handful of essential tools. Once you get the hang of them, you can tackle everything from tiny dust specks to major tears with an artist’s touch. It's a level of control that even the smartest automated tools can't quite replicate.
Before digital tools became widespread around 1990, restoring a photo was a painstaking physical craft that could take anywhere from four to six weeks. Today, we can achieve better results in a fraction of that time.
Conquering Small Flaws with the Healing Brush and Clone Stamp
Your first line of defense against dust, scratches, and blemishes will be the Spot Healing Brush and the Clone Stamp Tool. Both work by borrowing pixels from a clean part of the image and using them to paint over the damaged area.
Step-by-Step: Removing a Dust Spot
- Create a New Layer: In your software, add a new, blank layer on top of your photo. This is called non-destructive editing.
- Select the Spot Healing Brush: Find this tool in your toolbar (it often looks like a band-aid).
- Set Tool to Sample All Layers: In the tool's options bar at the top, check the box for "Sample All Layers."
- Click and Heal: Zoom in on a dust spot. Adjust your brush size so it's just slightly larger than the spot. Click once. The tool automatically blends the spot away using the surrounding texture.
For longer scratches, the Clone Stamp Tool offers more control. You manually set a source point (by holding Alt/Option and clicking on a clean area) and then paint over the damage. This precision is crucial for maintaining textures, like the pattern on a shirt.
Repairing a Deep Crease Across a Face
A deep crease on a face is a common and tricky problem. The key is to borrow texture and tone from undamaged areas while respecting the facial contours.
Tutorial: Fixing a Crease on a Cheek
- Create a New Layer: As before, start by adding a new layer to work on.
- Select the Clone Stamp Tool: Choose the Clone Stamp and set it to "Sample All Layers."
- Choose a Soft Brush: Set your brush hardness to around 0-20%. This ensures soft, blended edges.
- Sample Strategically: Zoom in. Hold Alt/Option and click on an undamaged part of the cheek right next to the crease. This is your source point.
- Paint in Short Strokes: Move your cursor over the crease and click or dab to paint. The tool will copy from your source point.
- Re-Sample Constantly: Move a little further down the crease. Choose a new source point by Alt/Option-clicking again. Paint another small section. Repeat this process—paint a little, re-sample, paint a little more.
The real secret to a seamless repair is to constantly re-sample your source point. Don't just drag the brush in one long stroke. Use a series of short, dabbing motions, choosing a new source point every few clicks. This prevents those repetitive, artificial-looking patterns that scream "Photoshop!"
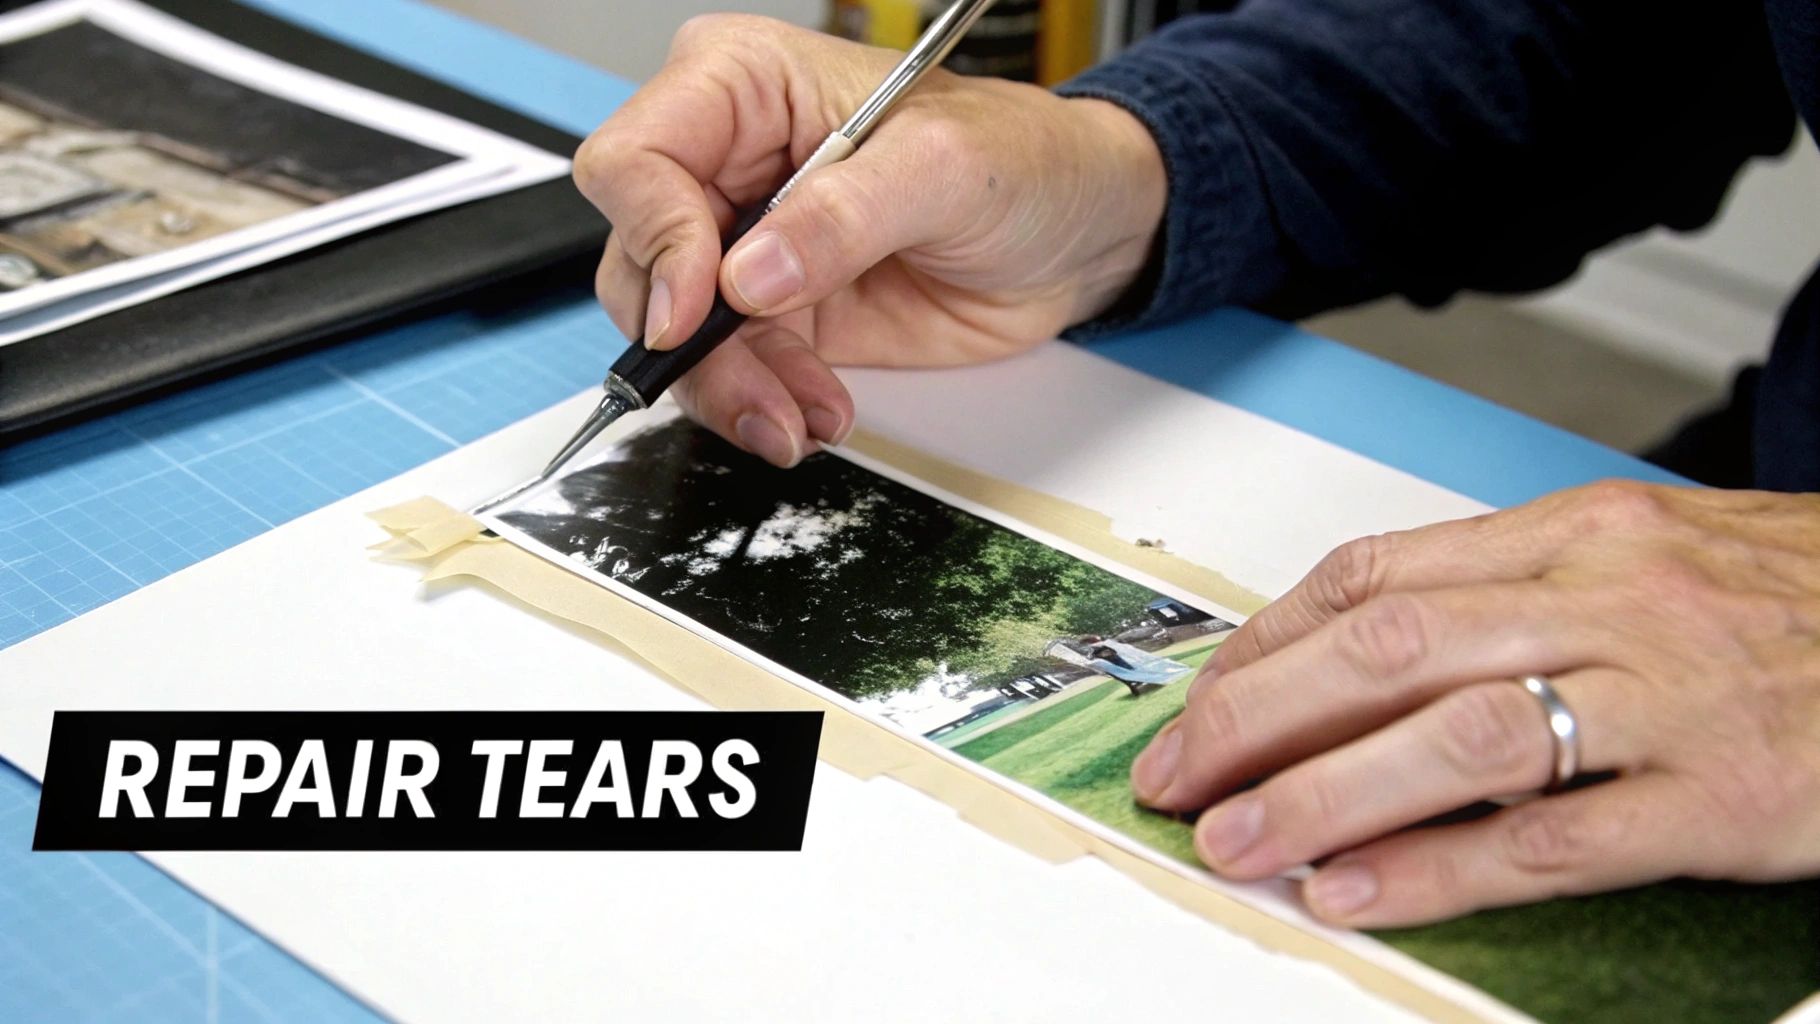
Tackling Large Damaged Areas with the Patch Tool
For bigger problems, like a water stain or a torn corner, the Patch Tool is your best friend. It lets you select a large damaged area and replace it with a clean section.
Example: Fixing a Water Stain on a Grassy Background
- Select the Patch Tool: In the toolbar, find the Patch Tool (it often shares a spot with the Healing Brush). Set its mode to "Source" in the options bar.
- Draw a Selection: Draw a selection lasso around the entire water stain.
- Drag to a Clean Area: Click inside your selection and drag it over to an undamaged part of the lawn with similar lighting and texture.
- Release and Blend: When you let go, the software intelligently blends the new texture into the damaged area, matching the tone and color automatically.
The Patch Tool is unbelievably powerful for fixing backgrounds and other non-detailed areas. Mastering these manual techniques gives you the power to restore old photos with an artistry that makes memories feel like they were captured yesterday.
Bringing Faded Colors and Exposure Back to Life
Time is a thief. It doesn't just leave scratches and tears; it steals the very color from our memories. The chemical dyes in old photographic prints break down, turning vibrant scenes into dull, washed-out images.
We're going to reclaim that lost vibrancy using non-destructive adjustment layers. Instead of permanently changing your image, you're just adding layers of instructions on top of it. This means you can experiment and tweak settings without ever damaging your original scan.
Your Secret Weapon: Reading the Histogram
Before you touch a single slider, you need to diagnose the photo's problems. The histogram is your most important diagnostic tool. It's a simple graph showing the tonal range, from pure black on the left to pure white on the right.
A quick glance tells you everything:
- Pushed left: The graph is bunched up on the left with a gap on the right. Your photo is underexposed (too dark).
- Pushed right: The graph is crowded on the right with empty space on the left. It's overexposed (too bright).
- A narrow spike in the middle: This is the classic sign of a low-contrast, faded photograph.
Your mission is to gently stretch this graph so it spans the full range from black to white.
Levels and Curves: Your Go-To Tools for Contrast
The Levels and Curves adjustment layers are your workhorses for fixing exposure and contrast. Levels is straightforward and fantastic for quick adjustments.
Step-by-Step: Using Levels to Fix a Faded Photo
- Add a Levels Layer: In your software's Layers panel, add a "Levels" adjustment layer.
- Set the Black Point: You'll see the histogram with three sliders below it. Grab the black slider on the far left and drag it to the right, stopping just where the data on the graph begins. You'll instantly see the shadows deepen.
- Set the White Point: Now, do the opposite. Drag the white slider on the right to the left until it meets the start of the data. This brings life back to the highlights.
Just those two simple moves can work wonders. The Curves tool achieves the same goal but gives you more finesse. Instead of sliders, you get a diagonal line. By clicking and dragging this line into a gentle "S-curve"—pulling it up in the highlights and down in the shadows—you can add beautiful, nuanced contrast.
Real-World Fix: Nailing That 1970s Yellow Cast
Photos from the 1960s and '70s are famous for turning yellow. Fixing this color cast is incredibly satisfying.
Tutorial: Removing a Yellow Color Cast
- Add a Color Balance Layer: Find and add a "Color Balance" adjustment layer. You'll see three sliders: Cyan-Red, Magenta-Green, and Yellow-Blue.
- Neutralize the Yellow: Our problem is too much yellow. Gently move the bottom slider away from Yellow and toward Blue. Watch the image as you do it—you'll see the colors start to neutralize. Stop when the yellow cast is gone.
- Fine-Tune Other Colors: After adjusting the yellow, the image might look a bit too green or magenta. Use the other sliders to balance things out until the skin tones and neutral areas (like a white shirt) look correct.
The real trick is to make small, gradual adjustments and trust your eyes. I always look for something in the photo that should be a neutral tone—like a white t-shirt or a gray sidewalk. Focus on getting that to look right. Once your neutrals are correct, the rest of the colors almost always fall perfectly into place.
These same principles work for black and white photos, too. Use Levels and Curves to ensure you have deep, rich blacks and clean, bright whites.
Using AI for Automated Photo Restoration
While manual repair techniques give you incredible control, the process can be time-consuming. This is where artificial intelligence comes in as a powerful partner. AI-powered tools have completely changed the game, making it possible to get stunning results in just a few seconds.
These platforms have been trained on millions of images, learning what scratches, fades, and blurs look like—and more importantly, how to fix them. If you’re looking to restore old photographs without a steep learning curve, AI is the perfect place to start.
The Power of One-Click Restoration
The single biggest advantage of using AI is speed. Complex tasks that might take an hour in Photoshop, like cleaning up hundreds of tiny scratches or sharpening a blurry face, can often be done with a single click. Tools like AI Photo HQ, Remini, and MyHeritage have all built their platforms around this simplicity.
You just upload your scanned photo, and their algorithms analyze it for:
- Scratch and Blemish Removal: AI is exceptionally good at finding and removing cracks, dust, and creases.
- Facial Enhancement: Specific models recognize faces, intelligently boosting sharpness and detail.
- Colorization: AI can look at a black and white photo and apply realistic, context-aware color.
This automated approach is fueling a massive interest in preserving personal history. The demand for photograph restoration services was valued at around USD 420 million in 2023 and is projected to nearly triple to USD 1.2 billion by 2032, largely thanks to the accessibility of AI.
A Quick AI Restoration Workflow
Let's walk through a typical workflow using a platform like AI Photo HQ. The whole process is designed to be intuitive and lightning-fast.
- Upload Your Scan: Start by uploading your high-quality TIFF file to the platform.
- Select Enhancements: The software will analyze the photo and present you with options like "Remove Scratches," "Enhance Faces," or "Colorize." Simply toggle on the fixes you need.
- Preview the Result: The interface usually gives you a clear before-and-after preview, often with a slider, so you can instantly see the impact of the AI's corrections.
- Download Your Restored Photo: Once you're happy with the preview, you can process and download the final high-resolution image.
The key is to evaluate the result with a critical eye. Does the skin texture look natural? Are the colors believable? AI does the heavy lifting, but your eye is always the final judge of quality.
Comparing Popular AI Photo Restoration Tools
Not all AI tools are created equal. Different platforms use different algorithms, and that means you'll get different results.
| Tool | Key Strength | Best For | Potential Weakness |
|---|---|---|---|
| AI Photo HQ | All-in-one feature set | Users who need colorization, scratch removal, and sharpening in one place. | Can be overkill for extremely simple fixes. |
| Remini | Facial enhancement | Sharpening blurry or low-resolution portraits with remarkable clarity. | Sometimes creates an overly smooth, "digital" skin texture. |
| MyHeritage | Colorization & Genealogy | Bringing black and white family portraits to life with natural-looking color. | Repair tools are less advanced than specialized platforms. |
Choosing the right tool often comes down to experimentation. Since many offer free trials, it's worth uploading the same photo to a couple of different services to see which one gives you the best result. To dive deeper into your options, our comparison of the best AI photo restoration software can help guide your decision.
Knowing When to Use AI
So, when is AI the perfect choice, and when should you stick to manual methods? I've found that AI is the ideal solution for widespread, common issues like fading, general blurriness, and a high density of small scratches.
However, AI can sometimes struggle with unique or severe damage, like reconstructing a missing piece of a face or fixing unusual chemical stains. This is where a hybrid approach often works best: start with an AI tool to fix 80% of the problems in seconds, then open the image in Adobe Photoshop or GIMP to manually refine that last 20%.
Common Photo Restoration Questions
As you start learning how to bring old photos back to life, it’s natural to have questions. This whole process is a fantastic blend of artistry and technology. Let's dig into some of the most common questions.
What Is the Best Software for Photo Restoration
The "best" software really comes down to what you're trying to achieve and how much time you want to spend learning.
For anyone who wants total creative control and professional-grade results, Adobe Photoshop is still the king. Its toolkit is incredibly deep, with features like the Clone Stamp, Healing Brush, and non-destructive adjustment layers that let you make incredibly precise edits.
If you're looking for something powerful that won't cost you a dime, GIMP is an amazing free alternative. It has a feature set that’s very similar to Photoshop, which has made it a long-time favorite in the open-source community.
But for anyone who needs speed and simplicity without giving up on quality, AI-powered tools are the clear winner. Platforms like AI Photo HQ or Remini are built to handle scratches, sharpen faces, and even colorize photos with just a click. They're perfect for beginners or anyone facing a big box of family photos that need impressive fixes, fast.
Can I Restore a Photo That Is Torn in Half
Absolutely! A photo torn in two is a classic restoration challenge, but it's completely fixable.
Here’s a simplified workflow:
- Scan Both Halves: Scan each piece separately at a high resolution (at least 600 DPI).
- Combine in Layers: Open one scan in your editing software. Drag the second scan into the same project, which will place it on a new layer.
- Align the Pieces: Lower the opacity of the top layer to about 50%. This makes it transparent so you can see both layers at once. Use the Move and Rotate tools to line up the two halves perfectly. Once aligned, return the opacity to 100%.
- Blend the Seam: Merge the layers. Now, use the Clone Stamp or Healing Brush tools along the seam to paint over the tear, borrowing textures from the surrounding areas to make it disappear.
How Much Does Professional Photo Restoration Cost
The cost for a pro to restore a photo can vary wildly, and it almost always comes down to how much damage they need to fix.
- Minor Restoration: For simple stuff like removing a few dust spots, light scratches, or fixing minor color fade, you’re probably looking at around $25 to $50.
- Moderate Restoration: Photos with bigger tears, noticeable stains, or small missing areas will typically run between $50 and $150.
- Severe Restoration: When you get into images with really extensive damage—like a face that needs to be partially reconstructed—the cost can easily go north of $200.
This is where online AI services can be a much more budget-friendly option. They often use a credit-based or subscription model that's incredibly cost-effective, especially if you have a whole stack of photos to work on.
Should I Use AI or Manual Tools
This is the big question, right? The best answer is often "a little of both." AI and manual tools are good at different things, and a lot of pros now use a hybrid approach.
AI is unbeatable for speed and efficiency, especially with common problems. It’s your best bet for:
- Fixing widespread scratches or cracks
- Reducing digital noise and grain
- Automatically enhancing faces
On the other hand, manual tools like Photoshop give you the fine-tuned control you need for unique or really complex repairs. A skilled artist can tackle issues an AI might get confused by, like reconstructing a missing hand. A great workflow is to let an AI tool do the initial heavy lifting and then jump into a manual editor to polish the final details.
Ready to see what AI can do for your photos? AI Photo HQ makes restoring cherished memories as simple as one click. Bring faded colors back to life, erase decades of damage, and sharpen faces with professional-grade results in seconds. Try AI Photo HQ today and rediscover your family's history.

