
At its core, machine learning in image processing simply means using algorithms that let computers learn from pixel data on their own. Instead of being explicitly programmed for every single task, these systems can recognize patterns, pick out objects, and make sense of entire scenes. It’s a complete departure from older methods, giving machines something that looks a lot like human intuition for visual information.
How AI Is Revolutionizing Image Processing
Traditional image processing has always been about rules. Think of an old photo editor: you apply a filter, you adjust the brightness, you sharpen the edges. These are all hard-coded instructions that manipulate pixels in a predictable way. And for simple jobs, that works just fine.
But the real world is messy and unpredictable. You can't write a simple rule to identify a cat. Why? Because a cat can be in a million different poses, under infinite lighting conditions, and seen from any angle. The rule-based approach just breaks down.
This is where machine learning completely changes the game. Instead of just following a rigid set of instructions, ML models learn by looking at massive datasets of images. They're not just mindlessly processing pixels anymore; they're actually building an internal understanding of what those pixels represent.
It's the difference between a simple photo filter and a digital artist. A filter just slaps a uniform effect on everything. An artist looks at the image, understands the context, and makes intelligent enhancements.
This ability to learn and adapt is why ML has become so essential in image processing. It’s the magic behind your smartphone’s portrait mode and the engine driving sophisticated medical imaging tools.
A New Era of Visual Interpretation
The impact here is huge, unlocking capabilities that felt like pure science fiction not too long ago. Developers and data scientists now have an incredible toolkit for solving complex visual problems across dozens of industries. We’re seeing major leaps forward in a few key areas:
- Automated Object Recognition: Training models to pinpoint specific objects in an image. This is the tech that allows self-driving cars to see pedestrians and lets retailers analyze foot traffic.
- Intelligent Image Enhancement: Moving far beyond basic filters to selectively improve parts of a photo. Think of restoring old, cracked family pictures with stunning clarity or automatically removing unwanted objects from a shot.
- Semantic Understanding: This is the next level—letting systems not just see objects, but also understand the relationships between them. This is what paves the way for advanced scene interpretation, like an AI understanding a "birthday party" from the arrangement of people, a cake, and decorations.
The infographic below really captures how AI is flipping the script on imaging, moving us from basic pixel-pushing to genuine visual understanding.
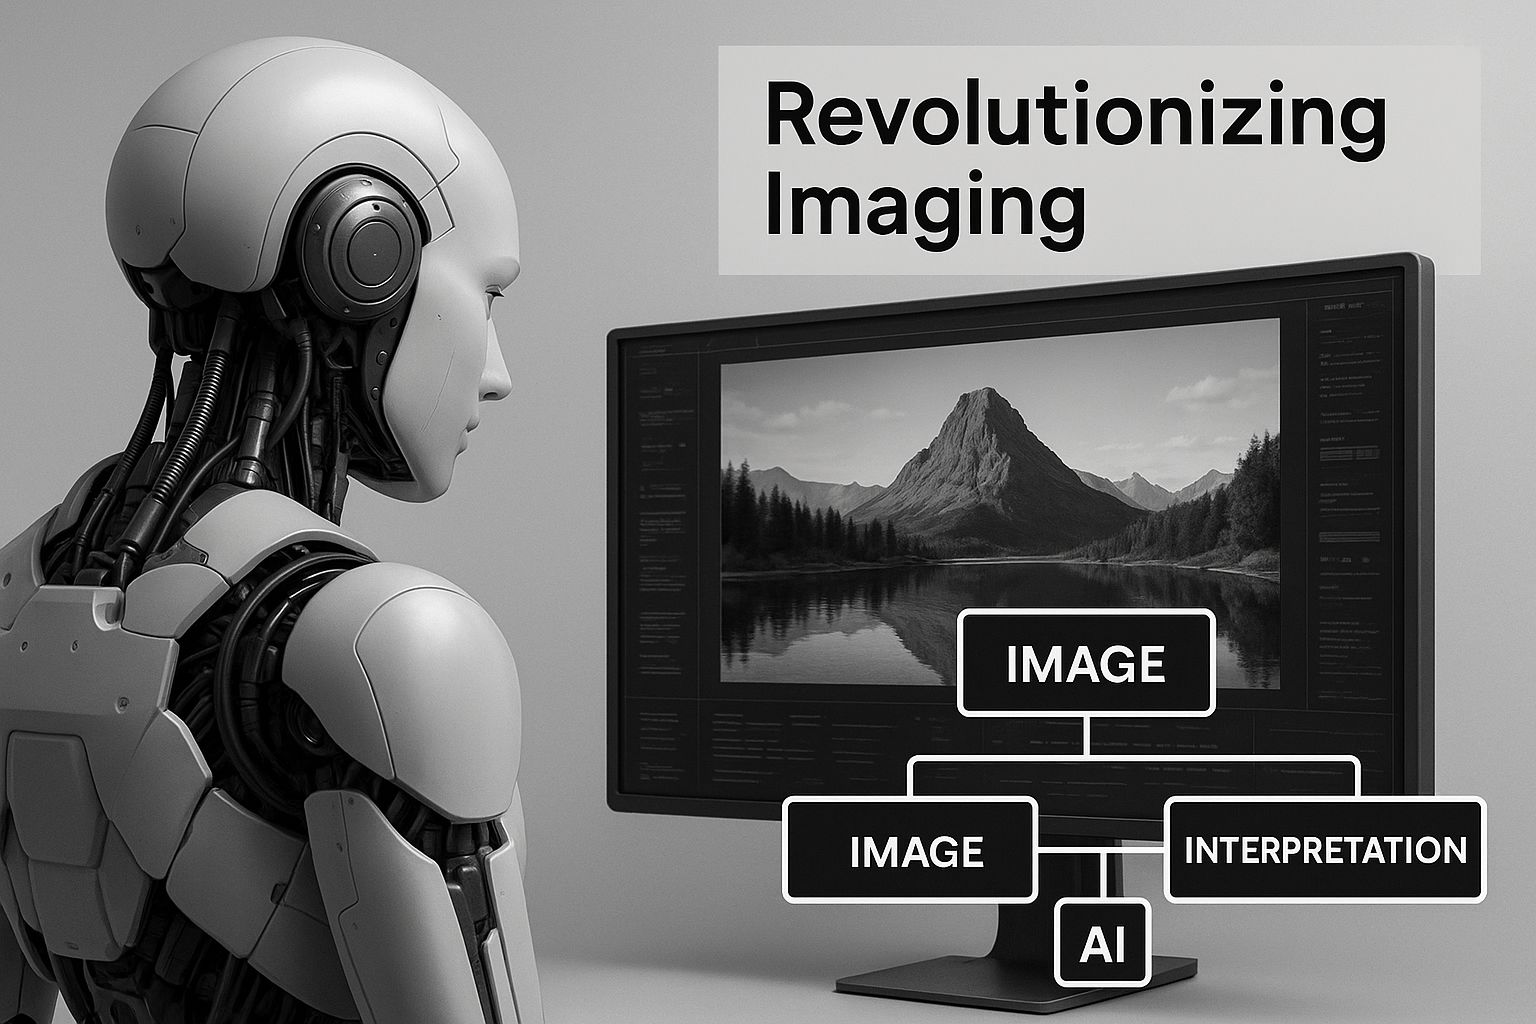
This visual shows just how big the jump is from manual manipulation to automated, context-aware processing. In this guide, we’ll walk through the practical steps to start using these tools, building your skills from the ground up.
If you’re curious about how this applies to creative fields, you should check out our deep dive into artificial intelligence in photography.
How Do Machines Actually Learn to See?
To really get what's happening with machine learning in image processing, you have to look under the hood. How does a computer take a picture—something we instantly recognize—and make any sense of it?
For us, a picture is about shapes, colors, and the story it tells. For a machine, it's just a giant grid of numbers. Every single image is a massive matrix of pixels, and each pixel is assigned a numerical value that represents its color and brightness.
This grid of numbers is the only language a digital image speaks. For an algorithm to "see," it needs to find meaningful patterns in this ocean of data. A photo of a cat isn't a "cat" to the computer at first. It's just a very specific arrangement of pixel values that's different from the numerical pattern of a dog, a car, or anything else. The whole game is about training a model to spot these subtle mathematical signatures.
This is where specialized neural networks come in. They’re the engines that do the heavy lifting, learning to interpret these pixel matrices.
The Old Guard: Convolutional Neural Networks
Imagine you're an art detective with a toolkit of special magnifying glasses. One glass is designed to find only sharp, straight lines. Another is built to spot gentle curves. A third is tuned to detect specific textures, like fur or metal. By layering the views from all these different glasses, you can build a complete picture of the artwork, from its basic structure to its finest details.
That's a pretty good way to think about Convolutional Neural Networks (CNNs). A CNN essentially slides a series of filters (called "kernels") over an image. Each filter is like one of those specialized magnifying glasses, trained to hunt for one specific, low-level feature—an edge, a corner, a patch of a certain color, or a particular texture.
As the image data moves through the network's layers, these simple features get combined into more and more complex ideas.
- Layer 1: Spots basic edges and color gradients.
- Layer 2: Puts those edges together to form simple shapes, like circles and squares.
- Layer 3: Assembles shapes to recognize parts of an object, like an eye or a wheel.
- Final Layers: Combine all those parts to identify the whole object—a complete face or an entire vehicle.
This hierarchical process is incredibly powerful and is why CNNs have been a cornerstone of image analysis for years. This step-by-step building of an image is conceptually a lot like how different Stable Diffusion sampling methods work, starting from pure noise and gradually adding detail until a coherent picture emerges.
The New Contender: Vision Transformers
While CNNs build up their understanding from local features, a newer architecture called a Vision Transformer (ViT) takes a totally different route. A ViT slices an image into a grid of smaller, fixed-size patches—think of it like cutting a photograph into a bunch of little squares.
Then, it analyzes these patches not just by themselves, but by looking at how every single patch relates to all the other patches in the grid, all at once.
It's like putting a puzzle together. Instead of just looking at two pieces that might fit, a ViT looks at all the pieces on the table simultaneously. It understands how a piece from the top-left corner might connect to a piece from the bottom-right, giving it a global understanding of the image's context right from the start.
This ability to weigh the importance of different image regions helps ViTs capture long-range relationships that CNNs might miss. While CNNs are still foundational for their ability to learn features automatically, ViTs have become a big deal for their knack at understanding broader context. Getting a feel for both architectures is key to tackling the real-world projects we’ll explore later.
Real-World Machine Learning Applications in Action

Now that we’ve got the core concepts down, let's dive into the really exciting stuff: seeing how machine learning in image processing is making a huge impact across different industries. These aren't just pie-in-the-sky ideas; they're real, practical tools changing how businesses get things done and how we engage with tech every single day.
From saving lives in hospitals to making online shopping easier, ML is the powerhouse behind a new wave of visual intelligence.
The growth here is pretty staggering. The global market for image processing and analysis is expected to climb at a compound annual growth rate (CAGR) of about 15% through 2033. That means the market could swell from roughly $15 billion in 2025 to a massive $50 billion by 2033. This explosion is largely driven by the sheer volume of visual data coming from things like IoT devices and advanced medical imaging.
Transforming Healthcare Diagnostics
In the medical world, machine learning models have become a second pair of expert eyes for radiologists and clinicians. These algorithms can analyze medical scans—X-rays, MRIs, CT scans—with a speed and level of detail that wonderfully complements human expertise.
A key application here is image segmentation, where an algorithm carefully outlines specific organs, tissues, or potential problems. Here's a practical step-by-step of how it works:
- Data Input: An MRI scan image is fed into a trained CNN model.
- Feature Extraction: The model's initial layers detect low-level features like edges, textures, and intensity variations specific to medical imaging.
- Pixel-Level Classification: Each pixel in the scan is classified as either 'tumor' or 'healthy tissue' based on the learned patterns.
- Segmentation Mask: The model outputs a "mask"—a new image where the suspected tumor area is highlighted, providing a precise boundary for doctors.
This allows doctors to get precise measurements and location data to work with, leading to earlier detection and more effective treatment plans.
Powering Autonomous Vehicles and Smart Cars
The auto industry is leaning heavily on machine learning to build the perception systems inside self-driving cars and advanced driver-assistance systems (ADAS). For these vehicles to navigate our world safely, they need to make sense of a constant flood of visual information from their cameras.
The star player here is real-time object detection. The process looks like this:
- Capture Frame: A camera mounted on the vehicle captures a live video frame of the road.
- Pre-process Image: The image is resized and normalized to match the input requirements of the detection model (e.g., YOLO or SSD).
- Run Inference: The model processes the frame in milliseconds, outputting a list of detected objects.
- Draw Bounding Boxes: For each object found, the system calculates coordinates for a "bounding box" and assigns a class label (e.g., 'car,' 'pedestrian') and a confidence score.
- Track Objects: The system tracks these boxes from frame to frame to predict movement and trajectory.
This all happens in a continuous loop, allowing the car to make split-second decisions. If you're curious about refining visual data, our guide on how AI image enhancement works offers some great insights into improving image quality.
Revolutionizing Retail and E-commerce
Ever see a product you absolutely loved but had no idea how to search for it online? The big names in e-commerce have cracked this problem with visual search, another killer application of machine learning.
This tech uses models that can analyze a picture you upload and then scour a gigantic product catalog for visually similar items. Here’s the step-by-step:
- User Upload: A user uploads a photo of a product they like.
- Feature Extraction: A deep learning model (often a CNN) processes the image, converting it into a numerical vector that represents its key visual features (color, pattern, shape).
- Vector Search: This new vector is compared against a pre-computed database of vectors from millions of product images.
- Similarity Ranking: The system uses an algorithm (like Cosine Similarity) to find the vectors in the database that are mathematically closest to the user's query vector.
- Display Results: The top matching products are returned and displayed to the user.
This makes for a much more intuitive and fun shopping experience. And it’s not just about images; ML is also transforming other creative fields with tools like AI-powered content generation tools that are changing how marketing materials are created.
Machine Learning Image Processing Applications by Industry
To give you a clearer picture, here’s a quick breakdown of how different sectors are putting these technologies to work.
| Industry | Application Example | Core ML Technique | Key Benefit |
|---|---|---|---|
| Healthcare | Detecting tumors in MRI scans | Image Segmentation, Classification | Early disease detection, improved diagnostic accuracy |
| Automotive | Identifying pedestrians and vehicles | Real-time Object Detection | Enhanced road safety, autonomous navigation |
| Retail | Visual search for e-commerce | Feature Extraction, Similarity Matching | Improved user experience, increased sales conversion |
| Agriculture | Monitoring crop health from drone imagery | Image Classification, Anomaly Detection | Higher crop yields, reduced resource waste |
| Security | Facial recognition for access control | Face Detection, Image Recognition | Automated and secure identity verification |
| Manufacturing | Quality control defect detection | Anomaly Detection, Classification | Reduced manual inspection, higher product quality |
As you can see, the applications are incredibly diverse, but they all share a common goal: using visual data to solve tangible problems and create value.
How to Build an Image Classifier with Python

Talking about theory is great, but the best way to really get machine learning in image processing is to roll up your sleeves and build something. In this quick guide, we're going to create a simple but fully working image classifier using Python. We'll walk through everything from setting up your environment to training a model that can tell the difference between a cat and a dog.
Think of this as your hands-on tour. We'll break down the entire process with clear code snippets and plain-English explanations. By the time we're done, you'll have a functional model and a solid playbook for starting your own image classification projects.
Step 1: Setting Up Your Development Environment
Before a single line of code is written, we need to get our workspace ready. A clean setup is your best friend in any machine learning project. We'll be using some of the most popular and powerful tools in the Python world.
First, you'll need Python installed. From there, we'll use pip (Python's package manager) to grab the libraries we need. Just open up your terminal or command prompt and get these installed:
- TensorFlow: This is the brains of our operation. It's a powerhouse open-source library from Google for building and training machine learning models.
- NumPy: An absolute essential for any numerical work in Python. It's fantastic at handling the huge arrays of numbers that make up our images.
- Matplotlib: This is our visual tool. It lets us see our images and plot things like how our model's accuracy improves over time.
You can install all of them in one go with this simple command:
pip install tensorflow numpy matplotlib
And that's it! With these tools in your pocket, you're ready to start building. This setup has everything you need to load data, build a neural network, train it, and see how well it works.
Step 2: Loading and Preparing the Dataset
Every machine learning model is hungry for data—it's how they learn. For this project, we'll be using the CIFAR-10 dataset, a classic go-to for anyone starting with image classification. It contains 60,000 tiny 32x32 pixel color images spread across ten different categories.
These categories include everyday objects like airplanes, cars, birds, cats, and dogs. The dataset is already split for us, with 50,000 images for training the model and 10,000 for testing it later.
The best part? TensorFlow makes loading this dataset almost effortless. Here's the Python code to pull it in and get it ready:
import tensorflow as tf
from tensorflow.keras import datasets, layers, models
import matplotlib.pyplot as plt

# Load the CIFAR-10 dataset
(train_images, train_labels), (test_images, test_labels) = datasets.cifar10.load_data()

# Normalize pixel values to be between 0 and 1
train_images, test_images = train_images / 255.0, test_images / 255.0

# Define the class names for later visualization
class_names = ['airplane', 'automobile', 'bird', 'cat', 'deer',
               'dog', 'frog', 'horse', 'ship', 'truck']
Notice that one line where we divide the images by 255.0? That's a crucial pre-processing step called normalization. Image pixels have values from 0 (black) to 255 (white). By scaling them down to a range between 0 and 1, we help our model train much faster and more reliably.
Step 3: Building the Convolutional Neural Network
Alright, now for the fun part—designing the model itself. We're going to build a simple Convolutional Neural Network (CNN), which is the industry standard for image recognition. As we covered earlier, a CNN uses special layers to learn patterns from images, starting simple and getting more complex.
Our CNN will be made of a few key parts:
- Convolutional Layers (
Conv2D): These are like detectives. They scan the image with "filters" to find basic features like edges, corners, and textures. - Pooling Layers (
MaxPooling2D): These layers shrink the image down, which helps the model focus on the most important information and run more efficiently. - Dense Layers (
Dense): These are the traditional neural network layers at the end. They take all the features the previous layers found and make the final decision about what's in the image.
Here's the code to stack these layers together using TensorFlow's Keras API:
model = models.Sequential()
model.add(layers.Conv2D(32, (3, 3), activation='relu', input_shape=(32, 32, 3)))
model.add(layers.MaxPooling2D((2, 2)))
model.add(layers.Conv2D(64, (3, 3), activation='relu'))
model.add(layers.MaxPooling2D((2, 2)))
model.add(layers.Conv2D(64, (3, 3), activation='relu'))

# Add Dense layers on top for classification
model.add(layers.Flatten())
model.add(layers.Dense(64, activation='relu'))
model.add(layers.Dense(10)) # 10 output neurons for 10 classes
This design starts by finding simple patterns, then combines them into more complex ones. The Flatten layer is just a bit of plumbing that takes the 2D feature maps and unrolls them into a long 1D list, ready for the final classification layers.
Step 4: Compiling and Training the Model
We've designed our network's blueprint; now it's time to get it ready for training. This is called compiling the model, and it involves telling it three things: what optimizer to use, how to measure error, and what success metric to track.
- Optimizer: We'll use
Adam, a popular and reliable choice that works well for most problems. - Loss Function: We're using
SparseCategoricalCrossentropy. It's a fancy name for a function that calculates how wrong the model's predictions are compared to the actual labels. - Metrics: We'll simply track
accuracyto see what percentage of images the model gets right.
Here's the code to compile the model and kick off the training process:
model.compile(optimizer='adam',
              loss=tf.keras.losses.SparseCategoricalCrossentropy(from_logits=True),
              metrics=['accuracy'])

# Train the model
history = model.fit(train_images, train_labels, epochs=10,
                    validation_data=(test_images, test_labels))
The model.fit() line is where the learning actually happens. We're telling it to go through our training data 10 times (or 10 epochs). In each epoch, the model looks at the images, makes a guess, checks how wrong it was, and adjusts its internal connections to do better next time.
Training is an iterative process. With each epoch, the model should get progressively better at classifying the images, refining its understanding of the visual features that define each class.
Step 5: Evaluating Model Performance
Once the training is done, we need to see how smart our model really is. The true test is to show it images it has never seen before—that's what our test dataset is for. This gives us an honest look at how it will perform out in the real world.
We can check its final score with a single line of code:
test_loss, test_acc = model.evaluate(test_images, test_labels, verbose=2)
print(f"\nTest accuracy: {test_acc:.2f}")
This will print out the final accuracy on our 10,000 test images. For a straightforward model like this one, you should see an accuracy somewhere around 70%. That might not sound world-class, but it's an incredible result for a model we built from scratch in just a few minutes.
This hands-on experience is the perfect first step toward building more powerful and complex systems with machine learning.
Challenges and Future Trends in AI Image Processing
While the potential of machine learning in image processing is massive, the road from a cool idea to a working model isn't always smooth. It’s packed with practical hurdles. Getting a grip on these challenges is just as crucial as understanding the algorithms themselves. Once we do, we can really appreciate the incredible developments shaping the future of visual AI.
One of the first walls you'll hit is the sheer volume of data you need. High-quality AI models are incredibly data-hungry. We're talking hundreds of thousands, sometimes millions, of labeled images just to get them trained up properly. Finding and carefully annotating all that data is a monumental task that can burn through a ton of time and money.
Then there’s the computational muscle required. Training deep neural networks, especially when you're working with high-resolution images, demands some serious hardware like powerful GPUs. The cost of that hardware, not to mention the electricity bill, can be a major barrier, especially for smaller teams or solo developers.
Common Hurdles in Development
Beyond the big-ticket items of data and cost, developers often run into a few other frustrating problems that can slow down projects and make a model unreliable.
- Model Interpretability: This is a big one. Many of the most powerful models, particularly deep neural networks, are basically "black boxes." It can be almost impossible to figure out why a model made a specific call. This makes debugging a nightmare and creates trust issues, especially in high-stakes fields like medical diagnostics.
- Overfitting: This happens when your model gets a little too good at its homework. It memorizes the training data, including all its noise and weird quirks, but then falls flat on its face when it sees a new, real-world image. It learned to memorize, not to generalize.
- Real-Time Processing: For things like self-driving cars or live video feeds, models need to think in milliseconds. Getting a complex, heavy model to run that fast without tanking its accuracy is a huge engineering puzzle.
The whole journey is a constant balancing act. You're juggling massive datasets and heavy compute demands, all while trying to build a model that's not just accurate, but also transparent and fast enough to actually be useful.
The Exciting Future Ahead
Even with these hurdles, the future of AI image processing looks incredibly bright. Several key trends are blowing the doors off what we thought was possible.
This space is growing fast. A huge part of this growth is machine learning making its way into everything from automated medical image analysis to smarter surveillance systems. In fact, around 83% of companies now say AI integration is a strategic priority, and imaging tech is a major beneficiary. The AI market in the United States alone hit nearly $74 billion in 2025 and is projected to grow at a compound annual rate of almost 27% through 2031. For a deeper dive, you can explore more AI statistics and their impact.
One of the most eye-popping trends is generative AI. Models like DALL-E and Stable Diffusion can now create breathtaking, photorealistic images from just a few words of text. This is completely changing the game for creative fields, from marketing and advertising to concept art for movies and games.
Another fascinating frontier is 3D image analysis. As augmented reality (AR) and virtual reality (VR) become more mainstream, we need AI that can understand and build 3D spaces from simple 2D images. This is the magic that will power truly immersive digital worlds and give robots the ability to navigate our own.
Finally, there's Edge AI, which is all about bringing the processing power directly to devices like your smartphone or a security camera. This means creating super-efficient, lightweight models that can run locally, without having to send data to the cloud. It's a huge win for privacy, it cuts down on lag, and it makes powerful image processing available to everyone, everywhere.
As you get your hands dirty with machine learning in image processing, you're bound to run into some questions. It’s just part of the process—figuring out the core ideas, which tools to use, and how to get past common roadblocks.
This section is your go-to guide for those frequent "what's the difference" or "how much do I need" questions. We’ll cut through the noise with clear, practical answers to get you on the right track.
Image Processing vs. Computer Vision: What's the Real Difference?
This one trips up a lot of people, and for good reason—the two fields are practically joined at the hip. The key difference, though, is their ultimate goal.
Image processing is all about taking an image and performing some kind of operation on it. The goal is usually to enhance it or change it in some way. Think of it like a darkroom, but digital. Sharpening a photo, bumping up the contrast, or just converting it to black and white? That's all image processing. You start with an image, you end with another (hopefully better) image.
Computer vision, on the other hand, wants to teach a computer to understand what's in an image, just like we do. It uses image processing as a stepping stone to reach a much bigger goal. When your phone recognizes a face in a photo or a self-driving car spots a stop sign, that’s computer vision at work. The input is an image, but the output is information—a label, a decision, a piece of data.
In a nutshell: Image processing refines an image for a better view (for people or other algorithms). Computer vision extracts actual meaning from it. You can't really do good computer vision without solid image processing first.
What’s the Best Programming Language for This Field?
If you ask ten experts, nine of them will give you the same answer: Python. It's not the only language out there—you'll still see C++ and Java in some corners—but Python is the undisputed king for a few very good reasons.
The syntax is clean and easy to read, which is a lifesaver when you’re trying to wrap your head around a complex new algorithm. But the real magic is in its incredible ecosystem of libraries that do all the heavy lifting for you.
- OpenCV: This is the swiss-army knife for pretty much any image processing task you can imagine.
- TensorFlow & PyTorch: These two are the giants of deep learning. They give you everything you need to build, train, and deploy powerful models.
- NumPy & Matplotlib: These are the bedrock tools for working with the numbers that make up an image and for plotting out your results to see what's going on.
On top of all that, the community is massive. If you get stuck, chances are someone has already been there, solved it, and posted the answer online.
Seriously, How Much Data Do I Need to Train a Model?
This is the classic "it depends" question, but we can break it down into something more useful. The amount of data you need is tied directly to how complex your task is.
Let's say you're building a simple model to tell cats from dogs. You could probably get decent results with a few thousand images. But if you're trying to build a model that can identify 100 different breeds of dogs with high accuracy? You're going to need tens of thousands, maybe even hundreds of thousands, of images.
The good news is you don't always have to start from scratch. There are a couple of powerful techniques that help you get amazing results with less data:
- Transfer Learning: This is a total game-changer. You take a massive, pre-trained model (like one trained on the huge ImageNet dataset) and then just "fine-tune" it on your smaller, specific set of images. It saves an incredible amount of data and training time.
- Data Augmentation: This is a clever trick where you create "new" training images by slightly altering your existing ones. Think rotating, flipping, zooming, or tweaking the brightness. It's a fantastic way to make your dataset feel much bigger than it actually is.
Can I Actually Train a Model Without an Expensive GPU?
Yes, you can! Especially when you're just starting out. You can absolutely learn the ropes and run smaller experiments on your computer's standard CPU.
But let's be real: for any serious deep learning, training on a CPU is painfully slow. We're talking days instead of hours.
GPUs are built for the kind of parallel math that neural networks depend on, making them exponentially faster for training. But you don't have to shell out thousands for a high-end card.
The most practical route is the cloud. Google Colab is an amazing place to start, offering free access to GPUs right inside a web browser. When your projects get bigger, services like AWS, Google Cloud Platform, or Azure let you rent all the GPU power you need by the hour. You get access to professional-grade hardware without the massive upfront cost.
Ready to see what the latest AI can create for you? AI Photo HQ puts professional-grade image generation and restoration at your fingertips. From creating stunning visuals for your social media to restoring cherished family photos, our platform makes it easy. Explore our tools and start creating today.

